DIY plasterboard shelves often have an unusual appearance and can accommodate a large number of different items. Thus, even equipment can be installed on a rack with additional metal reinforcement. In order to make a structure with your own hands, you first have to decide on its shape, then purchase all the materials.
Of course, such work requires certain skills, so it is better for beginners to choose the simplest shelf option or turn to specialists. Below we will tell you how to do this work yourself.
DIY plasterboard shelves
How to make shelves in a niche with your own hands: choosing material and technology
Hi all! Quite often in apartments and houses you can find niches in different rooms. They are found in the bathroom, often along with sewer pipes, in the kitchen and hallway, less often in the living room and bedroom. And if you make shelves in a niche, this will maximize its practicality.
Agree that simply covering an existing niche, or leaving it without shelves, storing all things only on the lower edge, is an extremely irrational way to use this interior element.
Yes, a niche is a kind of recess in the wall. Therefore, the shelves will be built-in and not protrude beyond the walls of the toilet, bathroom, living room or other room.
The only question is how to make a shelf and what material to choose from.
Manufacturing and decoration
Depending on the design and materials, there are different ways to manufacture the simplest element of cabinet furniture. If you make a shelf on the wall with your own hands from glass, then you do not need to have certain skills.
The simplest method of fastening is two dowels on the wall, to which a rope or twine is attached in the form of a loop. A plane of glass or plastic is inserted into these loops. You can drill holes in the wooden base for string - an excellent hanging option.
Wooden products require skill (experience) and a suitable tool. Wood must be processed in any way:
- Sanding (can be left without additional impregnation if the wood has a beautiful texture).
- Painting (it is better to choose the color to match the overall scheme of the interior or choose a tone to match a specific item in the room).
- Coating with colorless varnish (to match the shade to furniture, doors or laminate, use stain, then cover with colorless varnish).
If it is a floor-standing structure or a mobile module, it is recommended to equip it with wheels or rollers, which are available in furniture stores.
Expert tips for woodworking:
Before starting work, it is recommended to prepare all the tools in advance. It is advisable not to do “hand-made” work in the apartment, with the exception of the loggia. Old wood that is too dry must be drilled with extreme caution to avoid splits and cracks. Use ready-made holes smaller in diameter for screws (and other fasteners). It is better not to use large nails, with the exception of large floor modules for shoes made of rough boards. The method of fastening does not always need to be hidden; it is a completely independent decorative element.
The color of the products can be matched to textiles or a single item, for example, a mirror frame, which does not match other things.
This way it’s easy to balance the overall design.
Before making a shelf with your own hands, it is important to think through everything down to the smallest detail so that the manufacturing process and the storage device itself will please you for as long as possible.
Materials used
First, let's talk about what kind of shelves there are.
There are actually several options:
Mainly used are plasterboard shelves, as well as wooden and glass structures.
You can make them yourself, buy them from the manufacturer, or take them to order if you need something very original and individual. For example, you want to install a dozen shelves in a narrow niche.
Plasterboard construction for TV
Drywall is a versatile and easy-to-install material for creating all kinds of decorative structures. It’s easy to make a niche for a TV from plasterboard yourself. In this case, the process will not require significant costs, expensive tools and special skills. Advantages of placing a TV in a niche:
- A TV recessed into a niche will fit harmoniously into the interior.
- Lighting in the niche for the TV will create a decorative effect and the room will look brighter. And the backlight can be used as a night lamp.
- On the niche shelves you can place books or decor in the form of figurines and vases.
- The decorative recess guarantees the safety of the TV - it cannot be touched or damaged.
- All cords and cables will be securely hidden behind the false wall.
- A beautifully designed niche can become the central element of the interior.
- Soundproofing effect - a niche will help minimize sounds from the neighboring apartment. If the wall is side, then the plasterboard wall can serve as a kind of insulation.
This design has one drawback - it will reduce the area of the room slightly.
A niche may look like a shelving unit
Niche types
A plasterboard niche can be installed on a wall made of any material - brick, concrete or wood. The design can be rectangular, oval or combined. The first type is divided into rectangular-horizontal or rectangular-vertical. The most common is the rectangular-horizontal option due to the ease of its implementation. Such a niche will look natural even in a small apartment.
The most common niche option is rectangular
An oval niche is more difficult to make, but it looks more interesting. An oval niche is not suitable for small rooms, as it visually reduces the space.
The oval looks very catchy
Also, niches may differ in general design. For example, a niche can look like a decorative frame with a recess the size of a TV, or like a wall with shelves or stained glass windows.
Niche arrangement
Before starting work on a plasterboard structure, you should carefully consider its design and the location of all communications (sockets, lighting switches, etc.). There are many options for designing a niche for a TV. It is advisable to illuminate the niche with spotlights or LED strip - then it will look impressive. Moreover, the lamps can be mounted both in the upper and lower parts of the structure. The rays of light coming from below look interesting. The back of the niche can be decorated with various decorative materials - wallpaper, photo wallpaper, stone. You can also paint it a different color - lighter or darker than the entire wall. A niche can consist of several sections in which shelves, speakers or decor will be located. You can even place an aquarium or an electric fireplace in the section. In special cases, a plasterboard structure for a TV can even zone a room
If you make it rotating, then you can watch TV from different angles. The stylistic arrangement of elements is also important. The symmetrical design is inherent in the classic style and will look good in the bedroom
The asymmetrical composition is suitable for high-tech, modern and minimalist styles. It is most often used in cases where it is impossible to allocate an entire wall for TV or if there is a door nearby. Asymmetry is good for zoned or combined rooms - kitchen-living room, child’s room.
Mounting methods
Having decided what the shelf will be made of and paying attention to the material of the niche itself, you can begin installation.
The question now is this. How to secure the shelf better? There are several options here. Each of them is quite easy to implement with your own hands.
The mounting itself in a niche is usually done using:
Now I will try to briefly talk about how to install shelves in a niche in one way or another.
Glue or liquid nails
Perhaps the easiest option to implement is installing shelves in niches.
Here you will need to do the following:
This method is suitable for the lightest shelves made of thin plywood, plasterboard and even glass. You just can’t put anything heavy on them.
Load the shelf below at least 5-7 hours after installation.
This is necessary so that the glue has time to fully set.
Dowel-nails
This installation method is suitable for shelves made of thin wood, chipboard and MDF.
Again, they withstand a small load, but demonstrate greater endurance than glue.
Here you will need to do the following:
The shelf can have hidden hooks for invisible installation, or regular ears. It depends on which option you chose when purchasing.
Expansion dowel
Perfect for massive shelves made of wood and MDF. Withstands increased load.
This method will require purchasing several drop-down butterfly fasteners.
Here the technology is not complicated:
Depending on what type of fastening the shelf itself is used, you may need to first tighten the screw and hang the shelf on its head. Either a shelf is first applied, and a fastening element is screwed through its hole for fixation.
Shelf supports and brackets
Exquisite metal brackets are suitable for massive wooden shelves for wine or books, for example.
And if we talk about pelican shelf holders, then this is the best choice for glass shelves.
The principle of working with them is almost the same. First, the holders themselves are mounted in the niche in the form of a bracket or shelf holder. Dowels with self-tapping screws are used here. The shelf is then attached to the holders themselves.
Pelican gently presses the glass on both sides in special holes where gaskets are provided so that the glass does not crack. It's even easier with brackets.
The only question is whether it makes any sense to use beautiful metal brackets or shelf holders when it comes to installation in a niche. Here it is just better to make the fastening invisible.
Just a few more words about installation in the groove. In theory, this option is also possible. To do this, a recess is made along the perimeter of the niche using a grinder, and a shelf is inserted inside it. But implementing such an idea is difficult. It must be provided for at the stage of redevelopment or the start of repairs. So many people naturally reject this idea.
What ideas can you offer? What did you think of necessary for the niche?
Write your stories and suggestions in the comments.
Source
Curtains for the living room in a modern style
Modern window decoration in the living room does not mean eliminating drapes and curtains. However, it is worth remembering that these are not the only options. Lastly, you also have different types of blinds and more. It all depends on what effect you want to achieve.
Fashion for window decoration does not change from season to season, but there are many trends that persist for a long time. First of all, drapes and curtains in the living room are still the dominant solution, however, in a modern edition they should be discreet, preferably monochromatic and reaching the floor. Curtains made from blackout fabrics are especially recommended as they are heavier and meatier, making them look extremely impressive. It's also worth looking for patterned fabrics. However, they should fit into the style of the entire interior and not dominate it. It is desirable that the curtains in the living room be smooth and delicate. Models made of lace and jacquard mesh are clearly outdated and are only suitable for classically stylized rooms.
Blinds for a modern living room
Blinds are primarily designed to protect a room from excessive sun. However, nothing prevents them from performing a decorative function. After all, their designs have changed significantly over the years. In the case of roller blinds, you can choose the most classic ones, which differ mainly in the material of manufacture. They can be successfully combined with traditional curtains. Roman linens with dramatic folds give a more decorative look. The choice of fabrics is much wider, and they look better on their own. Blinds are designed to replace curtains. In turn, they look best on wood, providing effective window treatments.
Window placement in the living room: other solutions
In addition to the well-known solutions listed above, we also have a number of others. For example, shutters, that is, internal curtains, which are gaining popularity. They allow you to completely darken the living room and give a very interesting visual effect. They look best when they have a wall color or a natural dark wood color. Suitable for both modern and classic living rooms.
Another idea is stickers and window films. The advantage of this solution is that it is inexpensive and easy to replace. So if the window template gets boring, you can always replace it with another one.
Of course, there are still many possibilities for decorating your living room windows. You can combine different solutions, and the final effect depends, among other things, on the materials and colors used. Whatever you decide, remember that window treatments should be functional and harmonize with the interior design. Below are many inspiring photos.
Modern style is a concept that covers a wide range of interiors. What are the main features of this trend and what is in fashion now? Consider ready-made arrangements in photo examples.
Plasterboard niche with shelves
The longer people live in a house, the more small things accumulate. Figurines, photo frames, things. Then the redevelopment of the house begins, because children appear and relatives come. There is a need for additional shelves and cabinets. Drywall replaced metal and wood. It is very practical, long-lasting, and harmless to health.
Design and decoration of a plasterboard niche with shelves The question arises: “how to make a niche with plasterboard shelves”? It's simple, although looking at the photo it seems impossible. A niche with shelves will help:
Colors
The color scheme of this design is selected to match the overall design of the room, for example, the classic solution is products in black, white or black and white, which form a rich picture and endow the decor with impeccable style. Brown TV stands or models in wenge shade look quite impressive, which has a pronounced structure, a slightly rough texture and clear veins, emphasizing the natural appearance and nobleness of the product.
The photo shows a floor-mounted TV stand in a dark wenge shade.
Colored or two-color furniture is intended to create an individual, stylish design and add new colors and bright accents to the room. Expressive models in red tones will help give the room warmth, comfort, a certain liveliness and a certain mood; green designs will be an equally luxurious and surprisingly attractive solution.
The photo shows an interior with a small floor-mounted TV stand, made in white.
Types of niches with plasterboard shelves
A niche with shelves can be different:
If the niche is illuminated, it uses spotlights and LED strips. Sometimes both are illuminated, creating an extraordinary range of light. When decorating a niche with shelves, various materials are used for decoration. Wallpaper or painting, wood or plastic, metal or glass.
Design options for a niche with plasterboard shelves
Attaching drywall sheets to the frame
When the frame is ready and securely attached to the wall, you can begin covering it. This is done very simply and does not cause such difficulties as in the case of creating a frame. First, a sheet of drywall needs to be cut to the existing dimensions. It is necessary to calculate everything in advance so that the minimum number of sheets for covering is used. Shelves made of plasterboard will be perfectly flat if the cutting is done carefully so that the edges do not crumble.
To prevent the screws from falling into the plaster during fastening due to the high force on the screwdriver, you can use a special bit. We are talking about a bit with a limiter, which will rest against a sheet of drywall just so that the head of the screw goes to the required depth, flush.
To attach gypsum boards to the profile, 3.5 mm self-tapping screws are used. In this case, the fastening step can be the standard 15-20 cm. As for the length of the fastening, the point is ambiguous. It is generally accepted that the length of the self-tapping screw in this case should not exceed 25 mm. However, for those who are working with gypsum board for the first time, it is better to take longer screws (35 mm), although they are more expensive. The fact is that self-tapping screws can bend the profile and move the plasterboard sheet away from it. This often happens to inexperienced workers who have not yet gotten the hang of working with drywall. Because of this, the minimum fastener length may not be sufficient.
By cutting the profile correctly, you can use it alone to create a frame for a shelf
Sheath the frame from the top, bottom, and then from the sides
The finished shelf can easily support a lot of weight
By the way, for those same beginners, it is better to screw in the screws one after another, and not in different places, in order to attach the sheet faster. If you drill them sequentially, then there is less chance that the profile will be pressed through, because next door there is already a fastener that holds it.
Features in drawings and accurate calculations
When you come up with the idea of creating a niche with shelves, you need to decide what it will be like? Where will it stand? Why is it needed? When all the answers to these questions have been received, you need to start designing, drawing and drawing. In order to design a drawing on which the entire installation will be based, it is initially better to draw a drawing with the number of shelves, the color of the light, and the installation location. To install shelves, you must take into account the interior of the room.
So, for the drawing you will need: a ruler, a pencil, a square, an eraser, a meter. Accuracy in calculations is required, because they will be transferred to the walls. All the numbers must be put on the sketch: depth, width of the shelf, height, location of the shelves in the niche. If you plan to install lighting, you should draw the wiring and the places where the lighting device is planned, as well as the location of the switch.
Diagram showing the dimensions of a niche with plasterboard shelves. In some cases, it is necessary to mark on the drawing the location of the socket in the plasterboard or the cable connectors. After completing the sketch, you should carefully check everything again, down to the smallest detail.
Decorative elements
The decorative element is a kind of cherry on the cake, the final component of the interior. His choice is a responsible matter and much more difficult than it might seem at first glance.
You can create an accent without resorting to repairs - just decorate the wall with decorative elements
The decorative element must be combined with the furniture, wall color, lighting, etc.
When decorating an accent wall we use:
- tapestries;
- paintings;
- aquarium or terrarium;
- family genealogical tree;
- panels made of ceramics, metal or wood;
- objects made by craftsmen or artists;
- painting on the wall;
- Children's drawings;
- collages from photographs.
The decorations will largely depend on the style of the interior. Each home owner chooses his own style, in which he will feel as cozy and comfortable as possible. A tapestry, mirrors in a large frame and paintings are ideal for classics; for a modern style, a large photograph, an aquarium of an unusual shape, the use of glass and mirrors will fit well.
Accent mirror on the wall of the living room in the style of modern classics
Rustic or loft styles love wood and clinker bricks in all its forms. The place near the fireplace can be decorated with wooden sculptures, animal horns, and ceramic panels. For the Mediterranean style, clay and metal sculptures made in ethnic style are suitable. Japanese style assumes minimalism and laconicism of shapes and colors; the emphasis can be placed on small shelves and niches on which you can put the most important and iconic items.
In a rustic interior, a wooden shelf will successfully serve as an accent.
Bohemian style combines an abundance of bright colors and unusual objects. Mirror wall decoration and unusual compositions will be most appropriate here. For the Nordic style, a bright painting or tapestry is best.
Wooden or wicker dishes are suitable for the accent wall of a boho room
Modern eclecticism (a mixture of different styles) in the interior is the norm rather than an exception to the general rule. Previously, cultures hardly mixed; now we have no shortage of communications and information. If you can take the best from different styles, then the boundaries between them are erased. The main thing is the attitude of a particular person to materials, forms and their combination
Creating an accent with modular paintings
Decorating an accent wall with wood cuts
Creating shelves with stiffeners
After installing the base, you should begin installing the shelves. To do this, according to the width of the shelves, additional profiles are vertically attached to the wall for the strength of the structure. The profile must have stiffening ribs. These are mainly galvanized profiles, which have a thickness of 0.55-0.8 mm. Between the vertical posts, horizontal sections of the profile are inserted, connecting the verticals.
The base of the shelf is 10 cm. In order for the horizontal profiles to be reliable, corners are attached at the bottom. The recess of the shelf will be as shown in the diagram. This will be the thickness of the entire structure. Jumpers should be installed as often as possible to ensure the reliability of the structure. Let's say every 30 cm.
Scheme for creating plasterboard shelves with stiffeners. Basically, around a niche, a wall or corner needs to be sheathed with plasterboard for an impressive appearance.
Main types
Frame. It consists of racks with shelves. It is a simple design that is light in weight.
Shelving wall. The shelves are mounted on racks in several tiers. A rear wall is added to the design; sections can be open or closed. Most models have a shelf in the center for mounting a TV.
White shelving is especially popular and has a number of undeniable advantages:
- The structures are easy to assemble and easy to use.
- Minimum space required for installation.
- On the open shelves you can see all the things. Finding the right item will not take much time.
- Used to divide a room into zones.
- The cost is lower than that of a wardrobe or modular wall.
- Decorative models deserve to become a unique highlight of any interior.
There are different types of racks, each of them is used in different ways. Ergonomic products vary in size.
Height 1 m 80 cm is the most popular value. Width 90 cm - for book shelves; for a wall-shaped structure, the figure can increase to 2-3 m. The following are considered the optimal depth indicators - 45 cm for things and from 25 cm to 30 cm for books. Shelves are installed at a height of 35 or 40 cm in any model.
Next, we will talk about the use of the piece of furniture. You can find useful tips to help you place it correctly in the space.
Technology of covering a niche with plasterboard
Before you start covering the niche with shelves, you need to prepare the gypsum board. To do this, plasterboard sections are cut to size. You can cut gypsum board sheets either with a hacksaw or a construction knife.
The edges of the cut part should be processed (sanded), after which, using self-tapping screws, each part should be attached according to the planned plan in its place.
If you plan to backlight, you should make holes in the places of the lamps, but so that the diameter of the lamp matches the diameter of the hole.
Finishing a plasterboard niche
First, finishing should begin to mask the fastening points. They are carefully plastered using putty.
Final plastering of the plasterboard niche After which you need to begin finishing the plasterboard joints and corners. For this, reinforced mesh is used. It is secured with glue or a thin layer of plaster. After each step taken with putty material, you should wait until it dries completely. As a result, you need to putty the entire surface of the drywall and, after drying, go over it with grout. This can be a special mesh or sandpaper - zero. It removes all the errors left during putty (small pebbles, stripes).
An example of finishing a niche made of plasterboard with stone. If you plan to decorate a niche with stone or facing tiles, then special adhesives are used. Before applying the adhesive, in some cases it is necessary to use a primer. This is also used when covering drywall with wallpaper. If painting is intended, then after the putty has dried, the paint of the desired tone is diluted.
Advantages of gypsum plasterboard
Drywall is a unique material that can be used not only to create room partitions and install a suspended plasterboard ceiling with a magnificent design. You can use it to make a variety of niches, built-in cabinets or shelves. They will become a practical and convenient place for you in which you can store any things, kitchen utensils, books and even household appliances.
Note! If after repairs you have leftovers and scraps of gypsum boards, do not rush to throw them away immediately. Even if it seems to you that there is not enough space in the room, a small shelf will always fit in it.
“Don’t clutter your space with unnecessary furniture,” this is one of the rules of Feng Shui. But no matter how hard you try, sometimes it’s very difficult to give up cabinets and shelves.
By installing shelves and niches made of plasterboard indoors, you will solve several problems at once:
- get rid of old things;
- improve the room design;
- You will make unusual stands for various collections, decorative dishes and souvenirs.
DIY plasterboard shelves
DIY plasterboard shelves often have an unusual appearance and can accommodate a large number of different items. Thus, even equipment can be installed on a rack with additional metal reinforcement. In order to make a structure with your own hands, you first have to decide on its shape, then purchase all the materials. Of course, such work requires certain skills, so it is better for beginners to choose the simplest shelf option or turn to specialists. Below we will tell you how to do this work yourself.
DIY plasterboard shelves
Installation of the structure
Frame for shelves.
Shelves made of gypsum plasterboard can be made at the stage of installation of a plasterboard partition (wall) or can be a separate structure.
Frame assembly
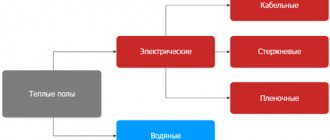
Which is better: heated floors or radiators?
Warm floorBatteries
- Before making a partition with shelves, a common frame is created in such a way as to create a niche. It is covered with plaster sheets, like the entire surface of the wall.
- If the shelf is hinged, a separate frame is prepared for it. Typically, a profile with a cross-section of 50×25 mm is used for it.
- First mark the wall using a level.
- Where fastenings were provided, drill holes with a hammer drill.
What you need to consider before making hanging shelves from plasterboard.
If the structure will experience heavy loads, you will need:
- use thick plasterboard (from 1.8 cm) and butterfly screws;
- fasten profiles in frequent increments;
- use frames and traverses that will strengthen the structure.
Fix the guide strips lengthwise and crosswise to the fixed wall profiles. They will create the volume of the sheathing.
Shelf trim
If the structure will have lighting, do not forget about the wiring.
Once the sheathing is ready, begin covering it. To strengthen them, horizontal planes of shelves can be made not only from gypsum plasterboard, but also from MDF, chipboard, thick plywood, impact-resistant glass, and mirrors.
Note! If the structure will have lighting, you need to take care of the electrical wiring in advance. Following fire safety precautions, lay the cable in a protective corrugation.
Before you make a shelf in the corner, you will need to do some cutting work.
- Take measurements of the future design. Transfer them to the gypsum board.
- Now you need to cut out the blanks. For this purpose, cut one side of the sheet, then break it along the indentation made.
- Bend the material at a right angle and cut the cardboard from the other side with a painting knife.
- Level the cut ends with sandpaper.
- Fasten the sheets to the sheathing with self-tapping screws.
How to process joints and seams
The photo shows a corner profile.
We continue to talk about what is needed in order to properly make plasterboard shelves. Their ends and main surface must be absolutely flat.
Therefore, the structure will need to be further processed.
- Sand the ends of the sheets.
- Apply a thin layer of gypsum putty to all joints.
- Seal them with serpyanka (plastic reinforcing mesh).
- Apply a second coat of putty.
- It should be noted that when using serpyanka it is necessary to putty the entire surface of the gypsum board.
- When the composition has dried, apply a layer of finishing putty for drywall.
To make the corners even and look aesthetically pleasing, stick on corner profiles. Such strips can be steel, galvanized, plastic or aluminum.
Note! The most durable corners are steel. However, the metal can begin to corrode over time. Rust stains will appear through the facing material.
Advantages and disadvantages of drywall
Drywall is classified as a universal material that has various purposes - ceilings, niches, and all kinds of shaped structures are made from it. This popularity is due to the following advantages:
Plasterboard construction can also be durable
Despite the large number of advantages of this material, some of its disadvantages should be highlighted:
Types of plasterboard shelves
There are several main parameters by which such designs differ. Before choosing one option or another, you should familiarize yourself with them.
Table No. 1. Types of gypsum plasterboard shelves
| View | Description |
| Open | Such shelves mainly have a decorative appearance; they are placed to display various souvenirs, cups, photographs and other decorations. |
| Closed | These are already more functional shelves, so they are often made deep to accommodate many items. |
Table No. 2. Types of shelves by type of placement
| Accommodation | Description |
| In the center of the room, a large structure consisting of many shelves is most often installed. This option will best fit into the interior of the living room. | |
| Such plasterboard structures will fit perfectly into the interior of a small room. Moreover, they are not only decoration, but also perform a functional task. Quite often, a bookcase is placed in the corner. |
Position of shelves in the corner
In this case, any plasterboard structures can be designed as follows:
LED lamps are often used for lighting
Shelves made of gypsum plasterboard are:
An unusual version of plasterboard shelves
Video - Shelves made of gypsum plasterboard: original ideas
Successful solutions for the kitchen
Plasterboard structures mounted next to the dining area are decorated with a stock of vintage wines or fine china.
Practical shelves in the kitchen
Lighting solutions enliven the interior of the kitchen and rooms, making it modern, interesting and original.
Arch in the corner of the kitchen
Making shelves from plasterboard
In the process of creating shelves you will need the following materials:
In addition, we will need the following tools:
If you have all the tools, you can get the job done faster
Prices for popular hammer drill models
It is worth noting that not all devices and materials may be useful, because if we plan to make a structure for heavy objects, then we will need a metal profile to create the frame. For decorative shelves, a simple rack profile with guides will be sufficient.
Important! In order to make the final finish, you will need putty, paint, a set of brushes, and rollers.
Create a project
First we need to develop a design for the finished shelf. It is recommended to do this in the following ways:
Approximate design diagram showing all shelf sizes
Important point! It is advisable to design a universal design that will be not only decoration, but also a functional element of the interior. That is why it is recommended to strengthen it.
Typically the following parameters are displayed on the drawing:
Important point! When drawing up a drawing, it is necessary to take into account the thickness of the materials used (gypsum board sheets and metal frame).
Sheets can be of different thicknesses
Regardless of the choice of one option or another, creating a diagram is an important step, thanks to which it will be possible to make a structure of an ideal shape. This way you get the opportunity to evaluate the correct placement of the shelves and avoid various problems during the installation process.
Surface preparation
Before starting installation work on the manufacture of plasterboard shelves, you will need to prepare the walls. Here, any irregularities can become an obstacle to the normal fastening of the frame, causing the structure to turn out crooked.
It is necessary to assess the condition of the surfaces. If there are all kinds of cracks, sagging, and depressions, they should be eliminated. In addition, it is better to treat the walls with several layers of primer so that they do not crumble in the future.
It is necessary to plaster the uneven areas
Important point! In some cases, preliminary floor preparation is required.
Step-by-step instruction
Frame installation
Step 1. Mark the wall. In order for the base for our shelves to be reliable, it is necessary to take the markings with special responsibility. At this stage we will use a building level, mark the location of all heights, and fasten the dowels. To mark the surface, you must use a marker or a simple pencil.
Leaving marks on the wall
Step 2. Calculate the load. Calculating the load on the shelves is not difficult - it is important to know what these shelves are supposed to be used for. For example, if a TV is installed in a niche, it is important to make it durable. For such purposes, it is better to strengthen the frame with metal jumpers.
If you plan to make a small shelf for shoes or other not very heavy objects, then a standard sheathing for drywall will be sufficient. The shelf for various postcards and souvenirs does not have to be strengthened at all.
Calculating the load is of great importance, because the durability of the plasterboard structure will depend on it
Step 3. Assembling the frame. The basis of the frame is made up of metal profiles that serve as guides. Thanks to the use of such beams, you can make a structure of any shape - for this you will need to make notches on the metal. It turns out that the more different bends there are, the more such notches will need to be left. It is recommended to use metal scissors when working. All parts of the frame are secured to each other with self-tapping screws. It is necessary to carefully tighten the fasteners to ensure a strong base.
You should check the correct location of all parts using a building level
Prices for building levels
Step 4. Attach the profiles to the wall. It’s not difficult to fix the shelf on the wall, because it already has markings that we set in advance. In any case, even at this stage you can still slightly change the location of the structure.
The frame of the shelves is fixed to vertical posts, which are first fixed to the wall
In the case of assembling built-in structures, it is necessary to secure the racks along the facade. To do this, lay a jumper according to the markings and then attach a jumper. Supports are fixed at its ends:
It is worth noting that the more you plan to load the shelf, the more dowels and screws you will need to use to secure the frame. Typically the pitch between fasteners is about 200-250 millimeters.
Installing drywall sheets
Step 1. Mark the gypsum plaster boards. Some craftsmen prefer to calculate the required amount of material at the stage of creating the project. The standard length of sheets ranges from 200 to 450 centimeters, and the width is 120-130 centimeters. Since additional changes are often made during the frame assembly process in order to mark the sheets, it is necessary to measure the frame. In this case, you will need to leave a few centimeters for gaps, because the entire base must be covered with plasterboard panels.
In order to avoid inaccuracies, it is recommended to use a cardboard template for this purpose (boxes from large household appliances will do). These parts can then be attached to the frame and some changes can be made if desired.
These patterns should be transferred to gypsum board sheets - for this we need a marker or a simple pencil
Step 3. Installation of lighting. It is at the stage of creating the frame that it is necessary to carry out wiring for the lamps. Of course, this step is not mandatory; it is only necessary if lamps are included in the project.
Holes of the appropriate diameter should be made in the plasterboard panels for spot light devices
Important point! There is an easier way to install lighting - using LED strip.
Step 4. Install the parts on the frame. It is important to be especially careful at this stage. The sheets are used either immediately after cutting, or they are additionally given different shapes. If you choose the second option, it will be necessary to carefully process the sheet with a wet roller on all sides, as a result of which it will become very plastic.
This is an example of installing gypsum board panels on a frame
After preparing all materials, it is necessary to begin installation:
We fix the sides of the structure
Shelves inside the frame
Prices for the range of drills
Here, too, it is necessary to calculate the optimal distance between the screws depending on the purpose of the shelves - it is important to remember that they should be no further than 100 millimeters from each other. However, it is recommended to take a minimal step between them.
Finishing
Prices for popular types of putty
When the entire structure is securely fastened, you can begin the finishing stage.
Step 1. Prime the surface. In order for the putty to adhere reliably to the plasterboard sheets, they should be pre-treated with a primer (a total of 2 layers will be required). It is better to apply the primer using a roller, this way you can quickly distribute it even over a large structure.
Choose a universal primer
Step 2. Apply putty. Now we have to apply the first layer of putty to the structure. It should be quite thick to hide all fasteners, joints, and irregularities. It is better to use a spatula to apply putty. The result should be a smooth surface.
It is better to take a medium-sized spatula
Step 3. Sand the surface with sandpaper. When the first layer of putty has dried thoroughly, it will need to be sanded using sandpaper - this will allow you to achieve an ideal surface.
For this work, it is recommended to purchase a special sandpaper holder
Next, you will need to putty this structure again. If desired, you can apply decorative plaster because the next step will be painting. The design of the shelves can be different, here everyone can show their imagination.
Video - Making shelves for a children's room
Creating a frame from a metal profile
Using a profile and guides when creating a frame is the main step in the process of creating shelves. Everything literally depends on this process. First, shelves are created from a profile for plasterboard, and then they are sheathed with the sheets themselves. But let's discuss everything in more detail.
There are two main ways to create a frame for shelves.
- The shelves are included in the project even before the walls are covered with plasterboard. In this case, the frame is formed immediately taking into account future shelves. And then niches are simply made in the wall, which are sheathed along with the wall. However, this is not exactly what we need, because niches have a slightly different purpose than shelves.
- The base for the shelf is made. It will protrude, so it will not be possible to sew it flush with the entire wall.
It will not be superfluous to know what strength characteristics plasterboard structures can have. This information can be found in the table below. The data in it is more suitable for those who were planning to install plasterboard shelves after the entire wall was sheathed, rather than thinking about them initially.
| Strength characteristics of plasterboard structures | ||
| Index | GKL 12.5 mm | GKL 15 mm |
| Required force to pull out a plastic butterfly anchor 8 mm | 50kg | 65kg |
| Maximum load per 1 anchor | 25 kg | 35 kg |
| Maximum weight of a shelf supported by two anchors | 50 kg | 70 kg |
When creating a frame from profiles, you need to mark the wall. By marking out the places where the profile will pass and be attached, you can ensure that the plasterboard shelves come out perfectly level. Fastening the profile to the wall in the marked places is done using dowels. They can be either metal or nylon (can be used if the shelf is made as a decorative element).
With an electronic level, the design will definitely come out level
The greatest load will be placed on the profile that is attached to the wall along its entire length (so do not skimp on dowels). A rack profile is used for this. However, if the shelf is not made narrow and not for decoration, then jumpers should be used to increase the strength of the frame. To create jumpers and other parts of the frame, a guide profile is used.