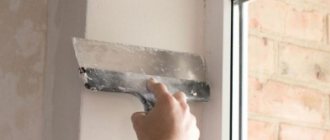
Private houses are equipped with a subfloor or basement for storing crops and preserving them. The entrance to the storage facility is equipped with a door or door. If the cellar is under the floor, make a hidden hatch into the basement with your own hands.
Work on equipping Lyada includes several stages: drawing development, material procurement, construction
Hatch designs and what to consider when making them
To ensure that the work on installing the hatch is successful and the result does not spoil the interior of the house, all the details are thought through. Lyada should fit harmoniously into the space of the room. Hatch includes:
- box;
- door;
- awnings;
- handle;
- lock.
The box is placed on the interfloor ceiling in the floor. A wooden hatch is made from a board 15 cm wide and 5 cm thick. A metal box is constructed from a 5*6 cm corner.
A door in a wooden structure is made from a board 2-3 cm thick. If you plan to step on the hatch and it is located in a passageway, the thickness is increased to 4-5 cm. The metal door is made from a steel sheet 3 mm thick. The hatch around the perimeter is reinforced with corners 4 cm wide.
Canopies are chosen from durable material so that they can withstand the weight of the hatch. Handles are made both protruding and hidden, depending on the design and preferences of the owner. Protruding handles from windows and entrance doors are suitable. Rings are used as secret ones. The lock is made from bolts or mortise models.
Requirements for cellar hatches
The basement is used as a utility room. It can store not only vegetables, fruits and canned goods, but also seasonal yard items: a hose, a pool, chairs. The storage facility installed in the house allows the floor on the ground floor to remain warm. When designing, the following requirements are taken into account:
- the location must be on a free site;
- the dimensions of the hatch are chosen taking into account the dimensions of the cellar, at least 75 * 75 cm;
- the door is equipped with a simple handle and lock so that there are no problems when opening;
- if the hatch weighs more than 10 kg, install an electric drive;
- the joints are made airtight so that cold air from the underground does not enter the rooms;
- the box is equipped with reliable supports;
- the hatch under the laminate is made of boards;
- To prevent the door from closing while the owner goes down to the cellar, it is equipped with a gas shock absorber.
The location for the hatch is chosen to be impenetrable so that when opening the door it does not touch the furniture. Types of hatches for cellars and basements
Modern manufacturers offer a wide selection of hatch models by type and size. There are different designs:
- swing doors - consist of one or two doors, each is attached to 2-4 hinges, a handle is installed on one side, and a latch on the other;
A hinged hatch is installed in a large cellar with a comfortable wide staircase - removable - the door is a separate element with a handle, it is installed on the opening in the frame;
If a hidden structure is intended, a ring is attached instead of a door handle - sliding – the door along guides in the frame opens a passage to the underground;
The box for the sliding hatch is made of reinforced metal corner - concrete - for such a design a frame is built from a metal profile, made for street or garage cellars;
To install a concrete door, the frame is reinforced with reinforcement, after which the frame is filled with cement mortar
Attention! To prevent the structure from collapsing into the underground floor under the weight of the door, the frame is made of a steel profile. Massive metal loops are used as fastenings.
Types of hinges and handles for cellars
Hinges for a self-made cellar lid are selected based on the weight of the door structure. The heavier the entrance, the more reliable the fasteners should be. For hidden models, secret loops are selected. Fasteners are divided into groups:
- overhead, similar to door hinges, but have the disadvantage of visible gaps;
- hidden, installed from inside the hatch, such fasteners open the structure by 900;
- hinge-brackets are attached to secret lids, the model looks like a question mark;
- The pantograph resembles a scissor hinge; the door first rises up and then swings back.
The requirements for a hatch handle are not the same as for entrance doors. The lyada handle can be nondescript. Its purpose is to be invisible, not to protrude high, so that the residents of the house do not get injured by it. More often, secret models are installed for the cellar hatch or rings and hinges.
If small children live in the house, install a removable handle
Drawings with cellar hatch dimensions
Any construction work is carried out according to sketches and dimensions. When designing, take into account:
- floor horizon;
- landing size;
- frame perimeter;
- hinge fastening is added to the width of the opening so that the hatch can open;
- height includes the thickness of the material and the insulating layer;
- convenient opening;
- fastening gas shock absorbers;
- angle and clearances required to open the door.
The dimensions of the ice are determined based on the area of the cellar. Do-it-yourself cellar lid drawings are shown in the photo below:
Before drawing the drawing, determine the location for the hatch
The open lid should not touch interior items. The minimum dimensions for a hatch are 75*75 cm. The method of arranging the box depends on the choice of material. There are lightweight and reinforced designs. When arranging tightness and thermal insulation, additional dimensions are taken into account and applied to the drawing.
The sketch should reflect the method of opening the hatch
To prevent the lid from falling and hitting the owner on the head during descent and ascent, a soft closing system and a latch are installed. A lock or removable handle is installed in homes with children and animals.
The electric drive is capable of turning the cellar into a reliable, inaccessible storage facility and tightly closing the doors if necessary.
The drawing shows the method of attaching the box to the interceiling. If necessary, it is reinforced with metal corners 5*6 cm, which are mounted in the floor rafter system.
If the door is made of steel sheet, the frame is made of a metal profile reinforced with corners
Points that should be taken into account
The work begins with the manufacture of a cellar hatch, and only then a cover is installed according to its dimensions.
Important nuances
- The entrance to the interior is located in the most convenient place for users. Its dimensions are based on the build of the owners. The average figure is considered to be 0.75 × 0.75 m. It is not recommended to do less, otherwise it will be difficult for you to squeeze through, especially with a load in your hands.
- The roof for the cellar must rest on four supports; they are made in advance.
- The weight of the door is of no small importance. Not all household members will be able to easily raise and lower it; it is especially worth considering women’s and children’s strength.
- Durability is also worth taking into account. Otherwise, you will have to repair or replace the cover soon.
Materials for production
- Often the roof of the cellar is made of plywood, 10 mm thick. The lightweight material gains strength thanks to glued veneer sheets, where the layers are arranged alternately along and across the wood fibers. Be sure to saturate the cut piece with drying oil and cover it with varnish or paint.
- An excellent option would be a frame made of timber, covered with plywood on both sides. If desired, the cellar lid can be insulated. The space between the top and bottom coverings is filled with a gasket. Use leftover mineral wool mats, foam rubber, and polystyrene foam. Even old blankets, coats, or a piece of old carpet will do.
- Galvanized iron will last a long time. As in the previous paragraph, it is used to cover a wooden frame on one or both sides, with or without insulation.
Note! If there is no emergency, the frame can be sheathed only on one side, the upper side. But this is acceptable if in your case there is no need to thoroughly protect yourself from the cold or break-ins.
What you will need for work
Before making a cellar roof, stock up on the necessary materials and tools:
- Boards, beams or slats.
- Plywood.
- Hacksaw.
- Hammer, screwdriver.
- Screws or nails.
- Door hinges.
- Hatch handle.
- Drying oil.
- Wide brush.
- Ruler or tape measure, pencil.
As you can see, there are no expensive or scarce components here, the price of materials is minimal, especially if you use everything that is gathering dust in your utility room.
What tools and materials will be needed
The choice of material depends on what the house and floor are built from. In wooden log houses, boards are used. In concrete floors, combined structures are used: a metal frame, a wooden door. The finished hatch is easy to install; making it yourself according to the drawings is not difficult.
The cellar located in the house is most often equipped with a wooden hatch. There are no requirements for this design. If the arrangement of the entrance to the basement is possible only in a passage area, it is made of metal.
To implement the project you will need the following tools:
- Bulgarian;
- drill;
- screwdriver;
- welding machine;
- roulette;
- level;
- handle;
- loops;
- gas shock absorber;
- latch;
- selected material.
For wooden boxes, timber 5 cm thick and 15 cm wide is used. For doors, boards 2-3 cm thick and 10-15 cm wide are used.
For metal structures, a profile of 3*4 cm and a corner of 5*6 cm are used for the frame. The box is welded from a steel corner.
Determining the size of the hatch
There are no standard sizes for a basement opening. Designs are divided into two categories: with straight and oblique stairs.
The passage from the hatch to the basement floor is 1.5-4 m, so the cellar is equipped with a ladder
For vertical structures, the entrance is built small, the width of the stairs. The largest family member with a full bag should fit into the opening. For inclined structures, the entrance is made larger. The length of the hatch can reach 2 m. If the ladder is installed at an angle of 450, it makes no sense to increase the length, since the head does not reach the ceiling.
Creating an additional frame
Manhole covers that bend when stepped on require additional structural reinforcement. To do this, it is necessary to make an additional frame, which is attached to the main cover. Typically, wooden covers are susceptible to this problem, so let’s look at an example of creating an additional frame for wooden hatches:
- Boards of the required sizes are prepared.
- Each board is treated with an antiseptic substance. This will create additional protection against fungus and other pests.
- You need to give the board time to dry.
- The treated boards are connected to each other into a single structure. To do this, you can use several wooden beams.
- If the boards are uneven and it is impossible to process them, make a spacer of tarred fabric between them.
How to make a wooden cellar hatch cover at home with your own hands
To make a cellar hatch out of wood with your own hands, prepare the material. Beam 5*15 cm for the box and board 3*10 cm for the door.
Stages of work:
- Parts are cut from the timber according to the drawings. A milling cutter is used to remove the rebate to hold the door with a depth corresponding to the dimensions of the project. The size of the opening is 1 cm larger than the box. For mortise hinges, a recess is made to the thickness of the parts.
- Using a square, draw a perpendicular line at the ends. The boards are cut along the marked lines. Trimming is performed with a circular saw.
- The box is assembled with 10-12 cm nails. Using the square, the base is inserted into the opening.
- The length of the door boards is made 2 mm shorter so that it can move freely.
- The door is assembled on the guides. Screw the hinges and install them in the opening.
- Check the functionality of all elements.
If the hatch and door do not correspond to the opening, check each part with a square, because during assembly the structure was skewed.
Attention! Before carrying out work, all wooden elements are coated with drying oil or a moisture-resistant agent so that the hatch does not rot from the dampness of the basement.
Installation nuances
In addition to knowing how to make a lid for a cellar in the house, an important step is choosing a handle for the manhole. You can’t just take and install a regular door handle on the hatch. It may be convenient to use, but it will cause constant falls. A folding handle would be an excellent solution. It is a small base that must be recessed into the hatch. It has a loop that can be used to lift it. You can independently make a small recess with a groove in the hatch and then you won’t have to buy additional fittings.
The hatch hinges also deserve special attention. In most cases there will be no problem in using regular hinges, which are often seen on barn doors. But they have some weight restrictions. Therefore, for example, for a hatch with a metal base, you can purchase cylindrical hinges that are mounted on gates or metal doors. You will have to tinker a little with their installation, but the effort is worth it. If the hatch is really heavy, then you can make it easier to open with the help of pneumatic supports, which are used in car trunks. Thanks to them, you do not have to fix the hatch in the open position with a hook.
Due to the temperature difference in the cellar and the room, drafts from the hatch may occur. To prevent this phenomenon, care must be taken to seal the cracks of the hatch cover. Gluing a special door tape around the perimeter of the hatch will help in this process. It must be selected with a sufficient diameter so that the hatch cover fits and closes with little effort. To better understand the whole process of installing a hatch, you can watch the video.
How to make a metal hatch into a cellar yourself
To make a lyada from metal, prepare a metal profile 4*5 cm, a corner 5*6 cm to strengthen the structure, and a sheet of steel 3 mm thick.
Step-by-step instructions for creating a basement hatch with your own hands:
- Parts from the profile are cut according to the dimensions indicated in the drawings. It must be at an angle of 450, it’s more convenient to cook and mount. Using a square, the parts are aligned and connected by welding.
- The workpiece is placed in the opening. If the sizes do not match, they are adjusted.
- A rectangle is cut out of a sheet of steel to fit the size of the door. Its parameters are 5 mm smaller than the inside of the box.
- Check the size of the door and apply the workpiece to the box. Parts are cut out from the corner and welded to a sheet of steel. The structure is reinforced not only around the perimeter, but also inside it. This creates an internal sheathing.
Weld the hinges to the door and frame, check the operation of the hatch - To attach the hatch to the opening, holes are drilled in the box and secured into the ceiling with anchor bolts.
The outside of the lid is painted or lined with decorative material, and the handle is screwed on
A sealed hatch into the cellar with your own hands allows you to rid the room of the cold and cuts off the penetration of hot air into the cellar. Reliable insulation keeps unpleasant odors out of the basement. Felt tape or door seals are used to seal joints.
Conclusion
If you have already built your own cellar, you can definitely handle making a comfortable and durable door to it. Do not delay the process for too long, because the favorable climate inside the storage facility will depend on this (see also the article “Racks for the cellar: we do it ourselves”).
The video in this article will complement the above; it contains information on today’s topic.
The basement not only serves to store food, but also acts as a utility room in which certain things are stored. The vast majority of modern basements are planned in such a way that the entrance to it is either invisible or decoratively decorated in accordance with the stylistic design of the door.
How to make a manhole cover with gas shock absorbers for a cellar with your own hands
A gas shock absorber is attached to a previously made wooden, metal or combined hatch to make it convenient to descend and descend into the cellar. The smooth movement of the door and its fixation make the operation of the hatch convenient. Shock absorbers are selected based on the resulting weight of the door. Installation method:
- Open the lid.
- Mark the attachment points on the door and frame.
- Make holes according to the markings.
- If necessary, in the places of fastening to wooden parts, recesses are made according to the size of the fasteners.
- Gas shock absorbers are attached using self-tapping screws.
A hidden handle with a latch will prevent accidents from children falling into the cellar
Determining the entry point
When choosing this area, you should take into account that the open door does not block the passage in the house. The space near the manhole should always be free, so this must be taken into account when planning.
The free area around the hole should measure about two meters.
It is not recommended to place furniture items near the entrance to the cellar, since the resulting moisture will appear on the wooden surface and lead to damage to the furniture.
Also, the chosen place should be well lit so as not to create dangers for household members.
The best option would be when the entrance to the basement storage is located next to the wall.
In this case, the open door will not interfere with the passage, and the ladder may be fixed to the wall. This arrangement of the entrance will be practical and convenient.
How to make a power sunroof
To protect households and control the opening of the hatch, a lifting mechanism for the lid into the basement is made. Prepare an electric cable, a drill, an electric drive. Installation is carried out on the hatch cover:
- The lyada door is set to less than 900.
- Weld the fastening loops. Mark the attachment points. Make holes.
- Screw the electric drive mechanism with self-tapping screws.
The entire electronic system is placed under the floor and does not interfere with the opening and closing of the cellar hatch door
Features of the construction of a semi-buried cellar
Building a semi-buried cellar yourself, with your own hands, includes a number of nuances that you should pay special attention to:
- To erect the structure, a large depression is not required; it is enough to dig a pit about a meter deep.
- You can use brick or concrete screed as the base of the storage facility.
- It is required to perform high-quality and reliable waterproofing of the cellar floor and walls.
- It is necessary to make a high-quality and moisture-proof ceiling that will protect the structure from precipitation and floods.
- Additionally, when installing the ceiling of a building, reliable indoor air ventilation is necessary.
- An entrance must be installed at ground level, without any recess.
- When choosing the direction of entry, the direction of the wind and the location of the extension on the site must be taken into account.
If we take into account all these features, as well as the design of the semi-buried cellar being manufactured, the interested party will not have any difficulties in the design and subsequent construction of the structure.
In this video you will learn how to make such a cellar:
How to properly make a basement hatch cover under tiles with your own hands
The cover for the basement under the tiles is made with your own hands according to a pre-drawn sketch. All work is carried out in three stages: floor screed, hatch installation, tiling.
Operating instructions:
- Determine the thickness of the tiles and the level of coverage. The opening for the cellar is beaded around the perimeter. In the room they make a screed under the tiles.
Leave 5-10 cm as support under the hatch cover - Tiles are laid on the floor in the room. At this stage, one row around the perimeter is left without tiles.
- Install the hatch frame, leveling it. The gaps between the screed and the frame are sealed with concrete. Lay out the last row of tiles, cutting them to size.
The opening is lined with plaster - Reinforcement is attached to a steel frame and filled with concrete. After drying, glue the tiles on top, matching them to the pattern on the floor. The seams must match.
The final touch is grouting the seams and attaching the handles
Installation Rules
The manufacturer will give specific recommendations for installation and they should be the priority when it comes, for example, to the layer of soil that should be on top of the roof. It is also worth listening to the recommendations for backfilling the pit. We will present a general installation scenario, and in relation to the most difficult case: a high level of groundwater coupled with heaving soil.
This is not a very high quality case paired with incorrect installation
The procedure for installing a plastic cellar is as follows:
- Dig a pit, the depth of which is at least 40 cm greater than the height of the container to the edge of the neck. Level the bottom, compact it (preferably with a tamping machine, if not, you can simply mechanically - with a deck with attached handles and a plate on the bottom.
- Lay a layer of geotextile with a density of 200 g/m2. The canvas should be 50 cm larger than the dimensions of the pit on each side.
- Place 20 cm of gravel on the geotextile and level it.
- Lay or cast the slab. To make the slab more stable, we use longer reinforcement when knitting the frame. We do it with outlets - it can reach the walls of the pit. When casting the slab, do not forget to monolith the studs or other fasteners to secure the caisson. These pins/hooks should be stainless steel.
- A plastic cellar for a summer house or home is placed on the finished slab and secured to the slab using stainless steel ropes or plastic slings.
- Thermal insulation of walls. To maintain a positive temperature inside the cellar in cold weather, the walls must be lined with thermal insulation. It is better to lay extruded polystyrene foam in the ground. Thickness - 50 mm. To what depth? 10-20 cm below the freezing depth.
- Backfilling the pit. Before backfilling, roll up the geotextile and place the gate on the slab. You can secure it with something so it doesn't roll back. Here are some further options:
- Some manufacturers require pouring concrete, and even reinforcing the walls in two rows. It will, of course, be reliable and nothing will float out, the walls will not bend. But what is the plastic caisson for then? Only for waterproofing? So, you can coat concrete walls with pool mastic and achieve the same result, and the cost of waterproofing will be 10-20 times less, even if you take very expensive compounds and apply them in several layers.
- Backfilling with sand or crushed stone. In this option, the backfill will act as a damper of frost heaving forces. But looser aggregate will allow water to collect here. Since plastic does not react with water and is not afraid of it, this option is possible.
- Backfilling with “native” soil. These recommendations are given by manufacturers who are confident in their product. There is nothing stopping you from filling it with sand or crushed stone.
Backfilling with sand concrete mixture may be required. Construction sand and concrete are mixed in certain proportions (specified by the manufacturer). This mixture is used to fill the space between the cellar wall and the pit. When filling, the mixture is well compacted. When it rains, this mixture will gradually turn into concrete. So this is one of the subtypes of concreting.
As you can see, the installation is quite complicated, but this is for a “difficult” case - high groundwater and clay or loam. Although, such conditions are a reality for most regions of our country.
How to make a hidden hatch cover in the basement under laminate or linoleum with your own hands
A do-it-yourself floor hatch for a basement under laminate, linoleum or carpet is a practical arrangement option. Lyada is made from boards and timber.
Installation steps:
- Make a hole in the ceiling in the selected area. Install the frame. Carpet, laminate or linoleum are laid close to the wooden frame
- Hinges are attached to the door and the part is screwed to the frame.
The outer surface of the door is covered with a selected decorative material, for example, laminate - Seal the cracks, install a gas shock absorber, a clamp and attach the handle.
The inside of the wooden surface is coated with moisture-resistant varnish or paint
Advanced options
The photo shows a factory cover for basements and cellars.
Today we looked at how to make a simple design with your own hands. In most cases, owners do not pay special attention to what some may consider an insignificant detail.
But interior features or homeowner preferences often force a more complex, mechanized system.
- When the floor in the room is covered with high-quality parquet or expensive tiles, in order to fit the subfloor door into the interior and make it invisible, you have to do a lot of work. It is necessary to finish the hatch with the same material and using the same technique as everything else. Not everyone can handle this on their own, so it’s better to invite a qualified professional.
- Specialty stores offer a large assortment of mechanical shutter devices, almost always equipped with a control panel. They are silent, safe, operate on an electric drive or a gas shock absorber. After spending a certain amount, you will receive a safety hatch. It will open and close without your physical effort, no matter how much it weighs.
How to make a lid for a cellar on the street with your own hands
A do-it-yourself hatch for an outdoor cellar is made from a reinforced metal corner 5 mm thick, 5 cm wide and a steel sheet 3-5 mm thick.
Stages of work:
- A box from a metal corner is mounted on the prepared area.
- A rectangle is cut out of a sheet of steel according to the dimensions in the drawing.
- A corner is welded along the perimeter of the sheet to strengthen the frame, and sheathing is made inside.
- Attach the door to the frame.
- Concrete is applied to the surface of the steel sheet, and tiles or other facing material are laid on it.
- If necessary, attach a handle.
- On the inside, sheets of polystyrene foam, expanded polystyrene or other insulation are glued between the sheathing.
Mineral wool 5-10 cm thick and moisture-resistant gypsum fiber will reliably protect the basement from frost.
Attention! Concrete doors are very heavy. It will be difficult for one person to open them. To facilitate this process, an electric lifting system is installed.
.
Blueprints
When designing a hatch, you need to take into account many parameters: the dimensions of the structure, the functioning of the mechanical component, and the like. Each design has its own distinctive features.
Let's consider the process of designing a basement hatch based on its component elements.
- Parameters taken into account: perimeter size – general;
- landing size - dimensions of the hole in the floor;
- clearance size;
- cover size.
- Material and design: wood or metal, thickness of elements;
- structure of the cover frame and support frame;
- hinges or similar mechanism for opening the hatch;
- hatch locking mechanism, handle for opening;
- insulation – mineral or glass wool, polystyrene foam, polypropylene and the like;
- the use of shock-absorbing compensators and an electric motor necessary to facilitate opening/closing of the hatch;
- gap seal ensures sealing of the hatch, maintaining the temperature regime, in addition, makes its opening/closing less noisy;
- hatch trim.
Basement lid hinges, shock absorber
One of the main design elements, especially if you choose the option of covering the surface of the hatch with finishing material to match the interior of the room. In this case, the mass of the cover increases significantly and requires a different solution than in the absence of cladding. In general, several options can be distinguished.
With a massive structure, you can make a mechanism that compensates for the load. It will require the following details:
- coil spring;
- jamb fastening;
- steel rod;
- hinge with bracket and screws.
You will get a homemade shock absorber.
The most convenient option is to lift the lid using an electric motor; you will also need a toggle switch and a power source to connect it. In this case, the hinges can be used if the cover will be lifted, for example, by a cable, or not used if the cover will be attached directly to the shaft.