The plumbing market is filled with bathtubs of different shapes and sizes. Unusual interiors require non-standard solutions. Then you need to create a bathtub according to an individual project. This is due to the size of the room, the arrangement of furniture in it or the original design idea. Plumbing fixtures made of metal, plastic or acrylic can be ordered from the manufacturer. Another option is to make your own bathtub.
Brick bath
A structure made of brick or foam concrete blocks can replace a standard bathing bowl. The masonry technology is based in such a way that you can create a bowl of any shape and size. The use of a shrink mold is not required.
Most often, a homemade brick container is placed in the corner between two walls. The design allows you to make a comfortable font that takes up little space.
The individual masonry process consists of 4 stages:
- supply of plumbing communications;
- masonry of the structure itself;
- waterproofing;
- external cladding.
Advantages of materials
The advantages of brick baths are as follows:
- high strength and wear resistance;
- soundproofing properties;
- low level of moisture absorption;
- naturalness and environmental friendliness;
- material density;
- comparative ease.
Which brick is suitable
Bathtubs are made of ceramic, sand-lime brick or foam concrete blocks. If you follow all technical standards, you can make a strong and reliable font from any brick. The design can last for many decades. Construction industry experts recommend giving preference to standard ceramics. It is a little more expensive than its opponents, but its consumer properties cover the difference in price.
Preparatory work
Before starting construction work, it is necessary to prepare all tools and materials.
The list includes:
- level;
- putty knife;
- square;
- jointing;
- trowel;
- mopping;
- brick;
- cement;
- plaster;
- waterproofing mixture;
- tile;
- grouting of joints for swimming pools.
You also need to dismantle the old bathtub and floor down to the floor slabs in advance. Communications are double-checked and installed before construction work begins, since it will be almost impossible to correct this in the future.
Step-by-step construction instructions
In order for the design to comply with technical standards and regulations, you must follow the step-by-step instructions:
- Install a drain for shower cabins. This will increase the convenience of subsequent plumbing maintenance.
- Lay out the bottom and walls of the container using standard masonry mortar. When building walls, they use the “half-brick” technique, or use blocks with a minimum thickness.
- Apply plaster, which will help smooth out all the unevenness, and round the corners if necessary.
- The next layer is waterproofing. For these purposes, polymer and combined ready-made compositions are chosen. They are laid in a thin layer, but at the same time have a high degree of water resistance. Also, the walls and bottom can be plastered with cement mortar, which includes liquid glass.
It is not recommended to apply roll or bitumen waterproofing, as it prevents the durable installation of the facing material.
Final finishing and cladding
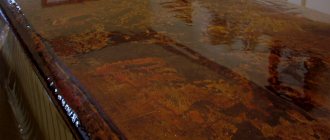
The final stage of construction is the external and internal finishing of the structure. Whole tiles, mosaics made of ceramics or porcelain stoneware are used as cladding. The material is attached with waterproof glue. After the installation has dried, begin grouting the joints with epoxy.
Judging by the photos of the finished products, the mosaic cladding looks much more impressive. In addition, due to its small size, the material can be easily placed under any inclination or bend of the container.
Preparation for finishing
When the waterproofing work is completed, fill the bowl with expanded clay or crushed stone in a thin layer, place a three-dimensional metal mesh on the bottom and walls, in which you first make a hole for the sewer pipe, and pour concrete. Do not forget that a slight slope should be made towards the drain to allow more active flow of water and prevent it from stagnating in the font.
After drying the concrete screed, plaster the bottom and walls inside and out and leave the bath for final drying before laying the tiles.
Concrete bath
Concrete construction is considered better than brick, but the manufacturing process is also more complicated. The absence of joining seams makes the font strong and durable.
The advantages of a monolithic bath are as follows:
- the bathtub can withstand a lot of weight;
- Over time, only decorative cladding can deform;
- long service life;
- the ability to implement any idea and design idea.
This is interesting: Bathroom design ideas with a shower
Design disadvantages include:
- Lack of access to communication systems. All plumbing fixtures are covered with concrete, so in case of emergency it is quite difficult to get to them.
- Difficulties in making formwork. When a bowl is created according to an individual project, the design often contains curves and transitions. This causes additional difficulties when pouring concrete.
- The structure turns out to be quite heavy, so placing concrete baths on the upper floors is not recommended.
Selection of cement and preparation of mortar
The choice of materials depends on the further lining of the container. If you plan to leave the surface concrete, then you need to choose a cement mixture with additional plasticizers. This composition will help make the bottom and walls smooth and durable.
In the case where acrylic or tiles will be applied to a concrete base, you can use a cement-sand mixture without additives.
The main rule is that the solution must be water-repellent. Builders recommend the following proportions: 1 part M350 cement or higher to 3 parts sand. Before mixing, the sand must be sifted to remove debris and foreign bodies.
Planning and wiring of communications
To make a concrete bathtub, a plastic mold is used, which helps to choose the size of the future bathtub and correctly carry out the wiring of communications.
It is recommended to approach the location of plumbing fixtures with extreme care. In the future, they will be covered with a layer of concrete, and it will be problematic to redo anything.
Formwork and frame
The construction of the base of the tank consists of 2 stages. At the first stage, a frame is created from reinforcement, the diameter of which should be no thicker than 8 mm. First, vertical rods are installed in the corresponding holes in the ceiling, and then horizontal rods are attached with wire. It is impossible to use the floor as the bottom of a bathtub, so it is necessary to design fittings for these purposes.
At the second stage, the formwork is erected. Most often, smooth wooden slabs are used as a basis, which are easily detached from the concrete and do not leave marks.
Pouring concrete
Before pouring, you need to make sure that there are no cracks, the frame is installed firmly, and all drain holes are closed with plugs. For the first stage, a more liquid version of the solution is used, which corresponds to the consistency of sour cream. It will spread better over the formwork and fill all the cavities of the future container.
When the bottom is completely filled, you can begin to create the sides. To do this, take a mixture of standard thickness. It is important to complete the entire fill in one go. Otherwise, layers and leaky areas may form.
Now, using vibration, the structure must be rid of air accumulations. If there is no vibrating machine, you can use a simple hammer. Lightly tapping the walls of the bowl will prevent the formation of voids.
Once finished, the bath should be left to harden for 4-5 days. During this time, the structure will become sufficiently strong and you can move on to the next step.
Removal of support structures and sanding
At the current stage, the wooden structures are removed and grouting of the container begins. The tool used is sandpaper or a grinder. If further decorative design is not required, after sanding and polishing, the bowl is coated with a special impregnating solution for stone, which acts as a waterproofing agent.
Decorative cladding
Ceramic tiles, acrylic or mosaic are used as a decorative covering for a homemade bathtub.
The first option is considered the fastest and simplest. The tiles are laid with waterproof adhesive, and the seams are grouted with a special grout for bathtubs and swimming pools. This design can only be used for square and rectangular structures. If the font has roundness, it is better to resort to another cladding option. The tile has good resistance to moisture, cosmetics and can withstand heavy loads. Moreover, it does not require special care.
This is interesting: Do-it-yourself shower cabin - step-by-step instructions for carrying out the work
Self-leveling acrylic protects the concrete structure from moisture and gives the surface an elegant glossy shine. When using this type of filling, the bowl is additionally sanded with plastic and moisture-resistant putty.
The layer is applied using a reinforcing mesh, which will increase the strength of the layer. Acrylic is combined with a hardener according to the instructions and applied to the sides and bottom of the bath. Similar cladding can be used for swimming pools and Jacuzzis. The material can last 20-25 years.
The most popular method of cladding non-standard plumbing structures is tiled mosaic. It is highly moisture resistant and, due to its small size, easily fits into rounded, curved products. Mosaics, like simple tiles, are glued to a waterproof mortar, and the seams are treated with epoxy grout. The only drawback is the laboriousness of the process.
Features of innovative material
Artificial stone refers to new types of modern polymer-acrylic ceramics that imitate natural stones:
- Malachite;
- Marble;
- Onyx;
- Slantsev;
- Granita.
In its production, natural granite chips or quartz sand are used as the main fillers. To impart strength and quality characteristics, special pigments, catalysts, polyester resins, and acrylic plasticizers are added to the working mixtures.
In the production of composite polymer-acrylic ceramics, modern innovative technologies, various compositions of casting mixtures and molding methods are used. The basic production scheme follows this principle. The initially prepared mixture has a liquid consistency that is easily molded, and after a day it finally hardens. Then the products are kept for a certain time to acquire the inherent hardness and strength for further processing.
The production of such a composite material, which uses environmentally friendly components, is absolutely harmless to humans and the environment.
Using polystyrene foam as a base
Another material that allows you to make a bath with your own hands is polystyrene foam. It is used to create a frame. Due to the lightness and comparative softness of polystyrene foam, you can create a container of any shape.
The manufacturing instructions are similar to those used for brickwork.
However, there are some nuances of the process:
- The expanded polystyrene sheet is cut into pieces of the desired shape and size.
- Using mounting adhesive, the pieces are connected to each other and form a bowl shape.
- A reinforced mesh and several layers of waterproof glue are applied to the finished frame. This will help strengthen the product and protect it from leaks.
- The next step is to prime the surface and treat it with a waterproofing solution.
- Ceramic mosaic tiles are attached with adhesive, and the seams are rubbed with pool cleaner.
In the finished room, you can make a plasterboard ceiling. It will give the bathroom a finished look. But such an idea is not required to be implemented.
Dependence of the complexity of a structure on its shape
It is clear that the more complex the shape of the bowl in plan, the more work an independent craftsman will have to do.
According to the degree of complexity, the arrangement methods can be divided into the following options:
- Regular rectangle. Its construction will not cause difficulties, especially if the frame is installed in a niche or in a corner formed by two adjacent walls.
- Triangle with a curly outer side . Similar designs are suitable for corner baths. The sides converging at right angles are usually located in the corner of the room, the frame is constructed along the outside, and includes several interconnected frames.
- Oval . It is arranged along the contour by installing a large number of frames or broken strapping. Although there is a simpler method.
To ease the effort when installing oval and fancy-shaped bathtubs, a rectangular structure with gypsum fiber lining is constructed.
A hole is cut out in the horizontally laid top sheathing panel for the bowl so that its sides rest completely on the frame.
Image gallery
Photo from
Arrangement of an oval bath
Specifics of frame construction
Forming a hole for the bowl
Template for marking the hole on the panel
Most homemade products do not require repeated assembly/disassembly. They are arranged in a non-disassembled form, although sometimes the possibility of dismantling and subsequent construction in a new place would be very useful for those who like to move frequently.
The frames supplied with acrylic bathtubs can be easily disassembled and reassembled many times. They include, as standard, a welded frame and adjustable supports in the form of steel threaded rods with plastic attachments. They come with fasteners and instructions with a detailed step-by-step description of the actions.
Design and advantages
A brick bathtub is an excellent option for a washing container that you can build yourself if the standard models do not suit the homeowner in size, shape or appearance. It is made of sand-lime brick and moisture-resistant concrete, and then lined with finishing material.
Brick bath
Most often, a brick font is placed between two opposite walls of the bathroom to save free space. A finished bathtub, made to individual sizes with your own hands, becomes part of the room, a kind of swimming pool. This technology has the following advantages:
- Individual approach. A brick bathtub can be made of any size, so it fits perfectly into the interior of the bathroom, allowing you to make the most of the available space.
- Affordable price. If you make a font with your own hands, then the cost of the finished product consists only of the costs of materials: brick, concrete, waterproofing, cladding. This option for making a bathtub is cheaper than ordering a model of non-standard sizes from the manufacturer.
- Low thermal conductivity. The brick font, due to the low thermal conductivity of this material, retains heat for a long time during hygiene procedures.
- Interesting design. Unlike washing containers made from standard materials, brick bathtubs look more solid and aesthetically pleasing; they fit organically into antique, rustic and minimalist interiors.
Note! If you decide to make a brick bathtub with your own hands, choose rectangular models that do not have rounded sections, as they require less masonry skill.
Artificial stone for interior decoration: design options, installation tips
Currently, a huge selection of materials is produced, with the help of which the most ambitious design plans can be realized.
Among such abundance, it is worth highlighting artificial stone. You need to figure out exactly how it is used in the bathroom interior.
The cost of a bathtub made of artificial stone is quite high, so its selection and purchase must be approached with all responsibility. Artificial stone, taking into account all its characteristics and especially its appearance, is only slightly inferior to natural stone. This bathtub will be a special source of pride for your interior, which will give the bathroom a touch of aristocracy.
Brick laying
The first step in making a bathtub with your own hands is laying the bricks. For work, use ordinary sand-lime brick or red ceramic. The laying is done in one row using moisture-resistant concrete grades mixed with water in a ratio of 1:4.
Brick laying
Since there is high humidity in the bathtub, experienced professionals recommend using a solution with antiseptic additives that prevent the formation of fungus or mold. To make the walls of a brick font, you will need a trowel, a construction mixer, mixing containers, a mop and a level. This operation is performed in the following order:
- The bathroom floor is cleared of debris, the old decorative covering is removed down to the concrete base and leveled.
- The siphon is connected to the sewer system, the pipes are replaced, since after completion of the work it will be impossible to get to them.
- Lay out the sides of the font of the desired size and height. The correctness of the masonry is constantly checked using a building level.
Checking the bath level - The seams between bricks should be 0.8-1.2 mm. Excess mortar that extends beyond the seam is removed before it hardens.
Important! Before laying out the walls of the bathroom, you need to wet the brick with water. This operation prevents water from being drawn out of the cement mortar and loss of structural strength. It is recommended to soak for 24 hours.
Equipment Features
Reference: An artificial stone bathtub is a structure made of composite materials, which includes dyes, polyester resins, and fillers.
Material imitating natural marble can be produced using the following materials:
- granite chips;
- special catalysts;
- cast marble;
- polyester resins;
- malachite;
- shale materials;
- artificial and natural quartz chips;
- onyx.
Manufacturers use special catalysts to ensure rapid hardening of the composition, because initially the mixture of all components forms a liquid stone. Thanks to this feature, the material can be given a wide variety of shapes. And only within 24 hours after the molding is completed, the marble will begin to harden.
Facing
To give a brick bath an aesthetic appearance, it must be lined with decorative material. The cladding, on which the service life, appearance and convenience of the hot tub depends, must have 3 qualities: moisture resistance, impact resistance, and durability. For finishing you can use:
- Mosaic. Ceramic mosaic is an excellent material for cladding a brick font. It does not absorb water and is small in size, allowing it to cover bathtubs of complex shapes. However, when working with your own hands, it is better to abandon this idea, since finishing will take a lot of time.
Bathtub tiling with mosaic - Ceramic tiles. Ceramic tiles are also suitable for lining a brick font, but working with them is easier and faster. The disadvantage of this material is that it will not be able to finish bathtubs with curved, complex shapes.
Tiling - Liquid acrylic. To give an aesthetic appearance, the inner surface of the font is coated with a compound based on liquid acrylic. It gives the surface smoothness, glossy shine and a beautiful, rich color. Liquid acrylic dries in 3-5 days.
Some craftsmen use a combined method of lining a brick washing container, which can be used when working with your own hands. It consists of finishing the outer surface with ceramic tiles or mosaics and then filling the inner surface of the bowl with liquid acrylic.
What buyers say
Expensive but reliable product
We decided to buy a country house. When construction was completed, interior elements began to be acquired. I wanted to choose quality items with an unusual appearance. Including in the bathroom. We immediately entered into an agreement with a professional designer. A Roxburgh cast marble bath was what he recommended to us from the very beginning.
A separate order is placed for the legs; here they are made in the form of lion paws. This particularly struck me. The shape of the font fits perfectly into the appearance of our interior. The length of the structure is 171 cm. The width is 81 and a half.
Of course, cast iron is much cheaper than stone. But we have been using the bathtub for 3 years now, and not even the smallest traces of rust have appeared on it. You don’t have to add hot water for a long time, just immerse yourself and enjoy. Weight is only 80 kilograms, which is not so much by modern standards.
There's no better option
We made a choice in favor of artificial stone a year ago. “Color and Style” is the company we turned to to resolve this issue. I like the fact that the bathtub does not require complicated maintenance. Everything is simple and clear. Instead of bothering with self-installation, they invited a specialist.
During operation, small defects appeared, but this problem is easy to get rid of - just purchase a repair kit. When the bathtub fills with water, you can't hear anything at all. Of course, this bathtub weighs a lot, it is really heavy.
But the original design completely compensates for this shortcoming; the appearance simply cannot be described in words. Massiveness and strength are not everything, a reliable product. The thermal conductivity of stone baths made of artificial material is very low. This means that the water will take a very long time to cool. Excellent balance between quality and cost, we were satisfied. An original and unusual purchase that is worth the money.
How to install a corner acrylic bathtub
The corner installation differs from the usual one only in the dimensions of the bathtub and frame.
The installation itself is not much different from installing a regular bathtub and does not take more time. A corner bath will be more rigid, as they always come with a screen. The only difficulty will be to pre-align the angle in which it will be installed. If the angle is slightly more or less than 90 degrees, then the bathtub will not fit tightly to the wall, which means that the mounting strips will soon become unusable and the walls of the acrylic bathtub will be damaged.
So, installing an acrylic bathtub with your own hands is not so difficult. Light weight and detailed instructions will allow you to assemble it without a technician in just an hour.
Product selection criteria
With a huge range of products, it is sometimes difficult to choose just one model. By following the recommendations, you can purchase a product of fairly high quality for the appropriate design and size of the bathroom:
It is necessary to check the strength of the frame under the bathtub. It is usually welded or bolted, has a rectangular shape, is installed under the bottom of the bowl and must withstand the weight of water and a person. A frame of a more complex design of a non-standard shape has additional elements that give strength to the walls around the entire perimeter. The skeleton for an acrylic bathtub matches the shape of the product, but it should not be too complicated, as this indicates poor rigidity of the container.
Additional points
Is it possible to install a shower in the bathroom? Of course, it’s enough to install a special common mixer and hang a curtain. The latter will come in handy if the bathroom is shared. In addition, the curtain protects the floor from liquids.
I would like to create a large, beautiful plunge pool, where you can then spend hours relaxing in the hot foamy water. The task is quite doable even in a city apartment. The main thing is to imagine in advance what the room will look like and measure the location of the future bathtub. And select materials.
Screen options
The screen is a protective wall that helps cover the legs and bottom of the bathtub. Sewer pipes, supports and other communication systems are “hidden” behind it. You can also make the screen yourself. Before choosing a material, you need to measure the space and estimate the shape of the screen.
It is better to determine in advance whether the screen will be monolithic (stationary) or sliding. The second option is more convenient if you plan to create a place to store various things under the bathroom.
You can choose any material, the main thing is that the finished screen fits harmoniously into the overall design of the room and is:
- moisture resistant;
- resistant to possible temperature changes;
- washable;
- easily replaced.
Recommended reading: Bathroom after renovation
Most often, sliding plastic screens are installed, designed to match the color of the walls or floor.
A wooden screen looks gorgeous, but the wood will need to be protected by treating it with a special moisture-resistant compound. It looks beautiful if there are other wooden parts in the room. For example, cabinets, shelves or racks.
Drywall also looks beautiful, but here you need to install profile bases, then cladding the finished structure. The advantages of the material are the ability to create any shaped element.
The most convenient screen option is a removable sliding screen made of lightweight, washable material. This one is easy to clean and replace if it breaks or loses color.
Recommendations
Due to the special responsibility of the chosen work, clear principles should be followed when carrying out it.
- The presence of additional functions that require electricity provides grounds for installing a grounded outlet.
- The structure should be equipped with a corrugated hose.
- Mineral wool can be used as a material for sound and heat insulation of the bathtub body.
Taking into account all the recommendations, you can purchase a bathroom of the desired size and safely begin installation work.