From the author: Hello, dear readers! Shower cabins are increasingly becoming a part of our lives, and for good reason. After all, they give us the opportunity not only to maintain hygiene, but also to relax after a hard day. Many of them are equipped with equipment for aromatherapy, hydromassage and other pleasant treatments. As a result, you have your own personal SPA salon, which gives great pleasure.
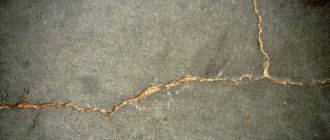
But it may be somewhat overshadowed if some problems arise. For example, puddles on the floor begin to appear after a shower, and this is fraught not only with the need for cleaning, but also with the risk of flooding the neighbors below. The reason for this phenomenon is that when installing equipment, some people skip such an important step as sealing the shower stall.
Why is this procedure needed? Firstly, of course, to protect the bathroom from water pouring from the joints of the cubicle elements. Secondly, increased humidity levels at the same joints can cause mold and mildew to form. This is not only unpleasant, but also dangerous, since fungal spores cause many serious diseases in people.
And the external aspect of the issue leaves much to be desired, because few people like to see moldy corners. At the same time, keep in mind that fighting a fungus that has already appeared is not an easy and long task. Therefore, it is much easier to initially take measures to prevent this phenomenon.
In general, no matter how you look at it, sealant is necessary. But not every type of product is suitable for these purposes. Today we will talk about which composition is suitable for use in a shower stall, as well as the process of sealing a shower stall with your own hands.
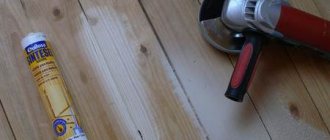
What you will need
To work you need:
- sealant;
- soft, clean rag or paper;
- rubber spatulas with a working edge size of 6-10 mm.
When assembling the shower, sanitary silicone sealant is used. It is designed for rooms with high humidity levels and changing temperatures. It includes:
- silicone rubber - provides strength and elasticity;
- hydrophobic pigment (filler);
- plasticizer - increases plasticity;
- fungicide - counteracts the appearance of mold, mildew and bacteria;
- thixotroping agent (Aerosil) - eliminates the fluidity of the paste, thanks to it you can process seams at any angle;
- catalyst - activates polymerization.
The highest quality pastes contain at least 50% silicone rubber. This ensures reliable sealing when the pallet moves under the weight of a person and water. The approximate amount of other components is 40% filler, plasticizer and fungicide 4% each, aerosil and catalyst 1%.
Cheap silicone sealants are not recommended. They are made according to a different recipe, often with a higher filler content. With this quality of composition, the pigment particles do not repel moisture, but absorb it, expand and squeeze out the plasticizer with fungicides. The seal shrinks, loses elasticity, turns yellow or black.
Other characteristics to consider when choosing a sealant:
- Color. If the back wall of the shower stall is white, a white paste will do. For colored panels, a transparent mixture is better.
- Neutrality. A paste without aggressive secretions interacts well with various materials.
Silicone sealants are sold in tubes, extruded by hand or with a gun. It is worth paying attention to the following mixtures: Ciki Fix, Sika Sikasil-C, Dow Corning, Tytan, Moment, Kiilto Saniteettisilikoni, Ceresit,
How?
Any waterproof sealed mixture can be used. For example, antibacterial or aquarium. The composition of most mixtures is quite homogeneous:
- Silicone-silicon (synthetic) rubber.
- Hydrophobic filler (water repellent).
- Plasticizer.
- Fungicide (against mold and bacteria).
- Catalysts.
- Thixotroping agent.
Pan sealing
May include:
- Organic solvents.
- Fillers.
- Extenders.
Thixotropy shows the ability to take pore seams at different angles. This is achieved by achieving the desired consistency and thickness. So that the glue adheres equally well to a plane at any angle in space. The fungicide kills mold well. It is better to choose a neutral silicone adhesive with a maximum content of synthetic rubber. Organic solvents have a strong, unpleasant odor. They are sold in tubes, extruded by hand or with a pistol, leveled with a spatula and cost from 150 to 200 rubles per unit.
Butyl, acrylic and polysulfide sealants are widely available on sale. The optimal temperature range for coating is from 5 to 40 degrees Celsius. The glue tube should also be kept at room temperature for some time. The seam is leveled using a spatula soaked in water. The drying time of the joints depends on the thickness of the application. The speed ranges from 2 to 4 millimeters daily and depends on the manufacturer and composition.
Acrylic sealant is widely used to seal cracks in wood. Here are some properties of this class of materials:
- high degree of adhesion to wood, concrete, polymers (PVC, acrylic);
- high resistance to solar radiation;
- is an insulator not only of moisture, but also of heat;
- high thixotropy;
- good plasticity even after drying;
- of all other compositions it is characterized by maximum plasticity.
The shrinkage of acrylic (to ensure competitiveness) is reduced by a special filler. Ideal for wooden structures whose dimensions change according to weather conditions, especially ambient temperature. Since acrylic dissolves well in water, it serves as the basis for the glue.
Step-by-step instruction
All surfaces that will be treated are degreased with alcohol.
A shower stall that does not have rear walls is treated as follows:
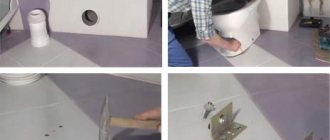
- First, install the pan and seal it with sealant along the rim when installing the siphon into the sewer pipe.
- Before attaching the guides to the wall, silicone is applied to the back of each.
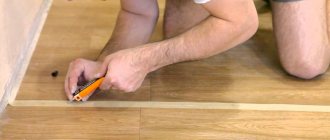
- To seal the seams between the sides and the frame, place it on the sides and draw a pencil around the location line from the inside and outside of the shower. Then the frame with glass needs to be lifted a little and coated with silicone between two strips of pencil. The frame is lowered and excess silicone is wiped off.
- After the cabin is completely assembled, the joint of the pallet is processed. Silicone is applied in excess, in a continuous continuous layer. Then the seam and spatula are sprayed with a soap solution from a spray bottle so that the silicone does not stick to the tool and does not stretch. The spatula is held in the hand with the beveled side facing the palm. Excess sealant begins to be removed from the corner. When moving with your hand, you do not need to press hard on the silicone layer. The spatula is wiped with a rag.
- Finally, they go over the joints between the wall and the guides again, as well as along the seam connecting the tray to the frame (on the inside of the shower).
The most difficult to process are 3-point corners. This can be done in 2 times - first apply the sealant to horizontal surfaces, and after it dries - to vertical ones. Sealants harden and gain strength in up to 2 days.
If the structure includes rear walls, the order of work is as follows:
- When assembling the back wall, sealant is applied between the joints between its parts and the central panel.
- After the structure is installed on the pallet, the seam is treated with honey and back panels.
- When installing the cabin roof, all areas of its connections with the vertical part are coated.
- If there are special grooves on the top of the sides for water drainage, there is no need to seal the seam between them and the front frame from the front.
After the seams have dried, the cabin is checked for leaks and if a leak is detected, the shower must be thoroughly dried and the defective areas must be re-treated with sealant. If the gaps are too wide during assembly, it is recommended to use a sealing cord.
Pallet installation
Nowadays, when plumbing equipment is made of strong and durable material, installing a shower tray is a relatively simple job.
And yet, mistakes made during its installation can lead to a leak in the shower stall.
When installing a pallet, you should adhere to the following rules:
- All doors and walls of the shower cabin must be fixed strictly perpendicular to the tray.
- The pallet should fit snugly against the walls .
- The drain pan must coincide with the sewer outlet.
- When installing the pan, you must first connect the drain to the sewer drain, adjust the legs, and align it horizontally using a special level.
How rework is carried out
First you need to identify areas of leakage. To do this, the joints are watered. To eliminate the leak, the sealant of the shower stall needs to be replaced. For this:
- Loosen the fasteners and clean off the remains of the old paste without harming the parts. Mechanical or chemical means are used (for example, titanium based on phosphoric acid). First you need to make sure that the drug will not corrode the surface.
- The area is degreased with laundry soap (72%) or alcohol, thoroughly dried and a fresh composition is applied. After this you need to tighten the screws.
Silicone protective elements are purchased for hydroboxes and shower cabins:
- seals - “eyelashes” - are mounted on the door and, when closed, form a reliable barrier to water flows;
- drippers - prevent leakage near the floor with special “petals” that set the direction of water droplets.
Initial stage: primary waterproofing
- in the transition zone from the ground (floor) to the floor;
- and as a base for laying the finishing coating.
Since subfloor joists in wooden houses are usually not removed, primary waterproofing in this case is best done using reinforced polyethylene film.
The film is laid overlapping and then sealing the joints with special tape.
Primary waterproofing
The finished base should look something like the picture on the left.
In cases where the logs are installed on subfloor boards, you can use a coating version of waterproofing based on bitumen mastics.
No special tools are needed to complete this stage: cutting the film can be done with a regular construction knife or scissors, and a wide brush is enough to apply bitumen mastic.
Please note that the edges of the insulation cover should extend onto the wall, forming a protective tray
Possible problems
A leak can form due to various defects in the cabin:
- sides too low;
- crack in the pan;
- crack in glass or plastic;
- roller corrosion.
It is necessary to check the condition of all elements and it is better to replace damaged ones.
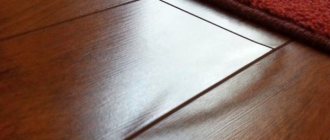
Sealing the shower cabin
Sealing the shower stall is one of the most important stages of its installation. Only by performing this procedure correctly, you can be completely sure that water will not get outside, flooding your neighbors or simply spoiling the finish of the bathroom. And let us immediately note that the work can be easily done with your own hands. The main thing is to carefully study the step-by-step instructions and its features.
Peculiarities
After installing the cabin in a small bathroom, there is still space for some furniture, a washing machine, and so on. And sealing the shower stall is the most important element of protecting the room from moisture and its excess and, as a result, dampness in the room. The severity of the problem in this case is due to the fact that the booth is a prefabricated structure. Namely, through the cracks between its parts, moisture and steam enter the outside and increase the humidity.
Moreover, this causes the formation and extremely rapid spread of fungi, mold, and other harmful microorganisms in the bathroom, and then in the apartment. Their spores, which are released into the air, cause allergies, diseases of the respiratory tract, lungs, and so on. In addition, dampness can attract various creatures: cockroaches, rats, insects, woodlice and the like, which are carriers of dangerous infectious diseases. That is why it is strongly recommended to seal and waterproof the shower cabin after installation.
If we talk about the most common places for leaks, then most often these are connecting seams. This is the weakest point in any shower stall. Another reason could be the cabin design itself. A large number of models have thresholds that are small in height, through which water simply spills. Another reason for a water spill may be poor quality of the drain mechanism or the connection of its elements. In this case, water simply accumulates under the shower stall. As a rule, it is enough to either tighten the fasteners or replace the system itself. Another fairly common reason for a leaking shower stall is a crack in the shower tray.
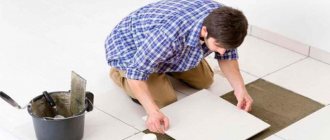
Sealing the floor - the first stage
The area of the floor where the shower cabin is planned to be assembled must be perfectly level. This will allow the installation to be carried out correctly, avoiding distortions of the structure that could lead to a violation of its tightness. If there are any unevenness on the floor, they can be eliminated by creating a sand-cement screed. Next, polystyrene foam boards should be glued onto it to avoid the formation of condensation under the cabin pan. The seams between the plates must be treated with a waterproof compound.
Sealing shower stalls is a prerequisite when installing plumbing fixtures
The next stage is preparing the base for installing the pallet. A special mounting mesh must be laid on the waterproofing layer. Pour a screed on top of it to mount the product. When the surface is dry, all seams and joints must be treated with waterproofing material. It is better to use polymer-based products. Liquid rubber is perfect for such purposes. After the processing of the seams is completed, you can begin installing the shower stall itself, after which all that remains is to treat the joints with sealant.
Types of sealants
Proper sealing of shower stall seams requires the use of a quality sealant. It is quite difficult to choose one, since there is a huge variety of similar compositions on sale. First, you need to study the instructions, understand the manufacturer’s instructions, consult with the seller, and only then buy the product.
The further sanitary condition of the room and the serviceability of the plumbing fixtures depend on the quality of the sealant and the method of its application. Effective protection of high-risk areas is provided by compositions made on the basis of:
- silicone;
- acrylic polymers;
- polyurethanes.
The above preparations are paste-like masses, which, after application, completely fill the crevice space and reliably glue the contacting surfaces.
There are several types of construction sealants, each of them is designed for use in specific conditions Source i.ytimg.com
Silicone
Silicone sealing mixtures come in two types:
- acidic – upon contact with metal they oxidize;
- neutral - highly inert.
To equip metal booths, it is advisable to use inert compounds that have the following advantages:
- excellent elasticity;
- moisture resistance;
- strength;
- resistance to high temperatures;
- resistance to ultraviolet radiation and aggressive substances.
Minuses:
- require careful preparation of the base;
- poorly connect polycarbonate, polyethylene, polyvinyl chloride elements.
To prevent mold from appearing on the silicone seam, it is recommended to use products with antibacterial additives or thoroughly treat the surfaces with an antiseptic.
Silicone sealant does not have a strong chemical odor and is not at all difficult to apply. Source hammer.bel
Choosing a sealant for processing seams
When sealing a shower cabin is done with your own hands, the first difficulties may arise already at the stage of choosing a sealant. Among the wide range of products, you need to determine one thing - one that will provide high-quality sealing of joints, will be easy to apply, durable and resistant to water.
Let us immediately note that for this work you will need silicone sealant. But it can also have different quality. It's better not to save money on this. When choosing a product, pay attention to its composition. There should be at least 45% silicone rubber. The same share falls on the hydrophobic filler. The rest is a plasticizer and fungicides. Additionally, the composition contains catalysate and thixotroping agents. It would be right to give preference to products from well-known manufacturers. It has managed to prove itself properly and has become widespread, so it will not be difficult to find reviews about such compositions. In addition, the manufacturers themselves are interested in maintaining a good reputation and will not offer consumers a product of poor quality.
Resurfacing
If, during testing of the level of tightness of the shower stall, leaks or insufficiently treated areas are found, then a re-application of a layer of waterproof sealant will be required.
You must first thoroughly dry the surface in all problem areas. It should be remembered that the outer film coating of any sealing composition is characterized by rapid drying, so all work must be carried out as carefully and quickly as possible. The standard sealing layer hardens at a humidity level of no more than 48-50% and a temperature of 20-22°C at a rate of 0.2-0.4 mm/day.
When choosing a sealant, pay attention not only to its composition, but also color, level of water resistance, the presence of antibacterial and antifungal properties, as well as the presence of additives that positively affect the durability of the treatment. The sealants “Tytan”, “Moment”, “Ciki Fix”, “Ceresit” and “Dow Corning” have proven themselves very well.
Sealing joints - how it is done
When assembling the shower, you can apply sealant to each of the joints during the assembly process, or you can process the seams already on the finished structure. Particular attention should be paid to areas that are sealed with rubber gaskets or cords. When processing joints, you need to pay attention to the fact that all fastenings with screws and bolts are located outside in relation to the sealant layer.
The shower must be assembled in strict accordance with the instructions provided by its manufacturer. At each stage, seams and joints need to be processed. To get a more complete understanding of the matter, watch the video of sealing a shower stall. A clear example shows which joints must be sealed.
After sealing the seams, it is necessary to check the quality of the work performed
After sealing the seams, you need to check them for leaks. This is done after drying. To do this, just close the drain and fill the pan with water, then flush it down the drain. If you find that the shower stall is leaking, it will have to be eliminated by re-sealing.
Sequence of work
Before starting sealing measures you need to:
- all old coatings, dirty spots and dust are removed;
- all elements to be treated with a sealing compound are degreased;
- softened with a special solvent and all layers of the old product are removed;
- metal, plastic and glass surfaces are treated with any approved alcohol-containing composition and wiped with a dry cloth.
The use of polysulfide, silicone and acrylic or butyl sealants requires not only cleaning the surfaces with water and detergents, but also drying them completely.
The main stages of sealing a shower stall:
- processing of seams by means of joining parts and screw connections;
- removing excess product;
- installation of a sealing cord from the outside of the structure and application.
At the final stage, the quality of the work performed is checked. After the waterproofing composition has completely hardened, it is necessary to ensure the level of tightness of all connections by directing a sufficiently strong stream of water at them. To get the maximum effect from carrying out independent work on sealing a shower stall and waterproofing a plumbing unit, it is very important not only to carry out all the activities as a whole, but also to follow their sequence.
How to fix a leak
If you see water coming out of the shower stall, do the following:
- check all joints, seams and threaded connections to accurately determine the location of the leak. You can check the joints on the walls with a directed stream of water;
- if the seam is leaking, remove the old sealant, clean the surface well, treat it with a degreasing compound, and dry it well;
- treat the joint with sealant and let it dry;
- Check the quality of sealing of the seams in the shower stall again.
There is no need to reseal the joints if you follow all the rules and tips when assembling the cabin. The main thing is to apply the sealant to a dry surface, then it will not peel off from it, forming a leak site.
Be sure to watch the video of how to seal a shower stall with your own hands. Pay attention to even the smallest details and all moments. Remember well which joints and which connections must be treated with a sealing compound.
How to fix a shower stall leak?
A shower leak is a rather unpleasant problem that may not be immediately noticed. Moisture can accumulate in any area in the bathroom for a long time, and thus cause harm to both the finishing material and human health.
To avoid such a problem, it is important to take care of the reliable sealing of the shower stall, and the bathroom must also have good ventilation, etc.
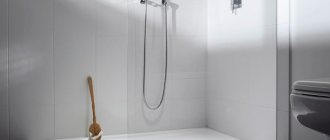
Why is it needed?
The shower stall is usually a plastic or glass “corner” attached to the wall, with a drain pan.
The wall, in turn, is usually covered with ceramic tiles. And if separately ceramics and glass easily resist moisture, then cracks often form at the joints through which water seeps.
In addition to constant puddles outside, this can lead to a decrease in the life of the cabin and the appearance of mold due to constant humidity.
To prevent this from happening, all cracks must be treated with sealant. This is a building material whose consistency resembles thick sour cream. When applied, it forms an elastic film that does not allow moisture to pass through and additionally holds the parts together. Used for application on glass, metal, ceramics and aluminum.
In case of high humidity (in the kitchen and bathroom), a waterproof sealant is used. It perfectly resists drops and does not change under the influence of ultraviolet radiation. For additional protection against mold and fungi, an antifungal option is produced.
This is interesting: Features, areas of application and popular brands of butyl sealants: lay out point by point
How to seal a shower stall
One of the reasons for a shower leak may be depressurization of the cabin. This happens if the seams were sealed with a poor-quality sealant, which dried out and began to let water through. Therefore, it is important to pay special attention to sealing the shower stall.
Work process:
- - assemble structural elements
- - treat with sealant
- - remove excess sealant
- - dry
Before assembling the shower cabin, treat all connections of the structural elements with high-quality sealant. It is necessary to apply the sealant so that the holes for the bolts and screws are located on the outside, and the sealant strip is located on the inside.
Now that the shower elements treated with sealant are connected, take a good look at all the elements from the front side and check all the seams.
If there is excess sealant, remove it carefully with a cloth. Apply sealant to the joints with sealing gaskets, check everything well, and let the seams dry.
All seams should ultimately be completely dry, then you can check the strength of the sealing of the shower stall. If a water leak is detected, then dry the cabin thoroughly again and then only seal the leakage points with sealant.
Which areas need to be sealed?
The practical part of the question is where exactly to apply the composition, how much to use to achieve an excellent result, and whether you need to save money.
Pallet perimeter
First of all, completely treat the joints of the bowl into which the water flows. If possible, it is recommended to fill all the seams between the pallet and the floor, as well as those places where it is docked to the wall. This way you won't have to worry about dampness.
Before you begin sealing the pan itself, make sure that the plumbing is in good working order. For example, if the corrugation is bent at a strong angle, it may crack over time. Water leaking out will not dry out under the pan, and dampness will create a favorable environment for fungus and insects. Make sure that the drain is in order and is not leaking, then proceed to seal the pan.
Shower corner
After you have installed the side walls, connected and adjusted the plumbing, and checked the functionality of the communications, you can begin sealing the joints between the corner and the wall. It is recommended to apply a small amount of the product to the fastening units and connections themselves, and at the assembly stage. In this case, you will create a water-repellent layer, which will help keep moisture inside the perimeter of the cabin.
If the seams are too large, you can use sealing cord. It is pressed into the cracks to the limit, after which the top is closed with liquid. When applying the composition, make sure that there is no dust or drops of water on the surface, as this will reduce adhesion.
Between the pallet and the corner
At the final stage, it is worth processing all the joints between the elements of the shower stall. This will make it completely sealed.
If funds allow, it is recommended to process the joining seams not only from the inside, but also from the outside. This way you can enhance the effect and extend the life of the shower cabin.
How to silicone a shower stall
Correctly siliconizing the joints of a shower stall will not be difficult if you follow a certain technology.
We prepare materials for work:
- - gloves
- - sealant
- - staple
- - adhesive masking tape
Silicone, in addition to performing an insulating function, is also a means of strengthening the frame on the pallet. It is worth remembering that before applying silicone it is still necessary to temporarily secure the frame.
To do this, use adhesive masking tape, which is glued at the top and bottom of the joint of the supporting profiles, as well as at the bottom of the supporting profiles.
Now that everything has been strengthened, you can apply silicone, distribute it directly from the tube to the joint. We treat the entire surface of the pallet and profiles well with silicone, when everything is filled, carefully level the silicone.
This can be done using a small staple, which is sold in all construction stores.
We also remove all excess silicone and, as a final process, trim and smooth out all fresh silicone seams with our fingers.
To do this, you need to wet your fingers in a detergent solution, then the silicone will not stick and will easily smooth out over the surface. Remove the masking tape when the silicone is completely dry.
Kinds
Manufacturers provide a wide selection of various shapes and sizes from various materials. Each type of profile has its own advantages and disadvantages.
Silicone
Silicone products are quite strong, heat-resistant, elastic and durable. Such types withstand mechanical damage, do not cause metal destruction, and do not become cracked.
They fit tightly to the cabin elements, reliably protecting against moisture penetration. A significant disadvantage of silicone is its high price.
Magnetic
It is a silicone strip with magnetic elements. Such fittings are installed on the cabin door so that it closes more tightly. Magnetic options are selected depending on the opening angle of the cabin door.
Reference! If you haven’t found a suitable profile, choose fittings with a latch. Its angle can be adjusted independently.
Sealing rubber bands
A budget option would be a rubber seal.
The rubber material provides a seal, withstands exposure to plumbing cleaners and has good heat resistance.
This option wears out quite quickly and can be toxic.
PVC profiles
Fittings made of polyvinyl chloride provide a closer connection between the moving elements of the cabin. Such seals are heat-resistant, do not change color with prolonged use, and are safe for health.
Thermoplastic elastomer profile
Under normal conditions, its properties are similar to those of rubber. As the temperature rises, the material softens and resembles thermoplastic.
After deformation, such material returns to its original form. This property increases the service life of the profile.
Thermoplastic elastomer does not crack, is resistant to mechanical damage and is practical to use. A significant disadvantage will be the rather high price.
Reference! Sealing profiles are soft and hard. Soft products adhere more tightly to the joints of the shower stall, ensuring complete tightness.
How to seal a shower tray
Most often, the pan leaks due to the appearance of cracks in it, which form for various reasons.
Eliminating cracks is not an easy process and first you need to find out the cause of their occurrence. Cracks can be repaired using the following materials:
- — desmokolom
- — gelcoat
- - epoxy glue
We will look at how to seal the tray with glue, and before work, prepare the shower:
- — empty the pallet so that it is available for further processing
- - prepare the tray, namely clean and dry, degrease
- - prepare a special support that could hold the pallet and prevent it from sagging
When applying glue, wear a respirator to avoid breathing harmful glue and gloves, then dry the area to be treated. Carefully place a piece of fiberglass on the cracks and apply glue with a staple.
Now let it dry for about a day, then glue the cracks on the other side and let it dry again for about a day.
Before installing an already glued pallet, treat the reverse side with polyurethane foam. This process will help the pallet become more rigid and prevent cracking in the future.
How to silicone a shower cabin
Silicone is used in the installation of ready-made shower cabins and cabins made according to an individual project. A silicone seam is applied at the junction of the fixed glass to the walls, floor or pallet.
Even with a wide range of sealing profiles, it is not always possible to achieve maximum tightness of the shower using profiles. To solve this problem, the seam is sealed using silicone sealant, silicone glue or glue sealant.
So-called sanitary silicone should be used in shower cabins. Sanitary silicone contains special fungicidal additives that prevent the formation of mold. Sanitary silicones come in a variety of colors, but when sealing a glass-to-wall joint, we recommend using clear sanitary silicone.
If after applying a layer of silicone there is a possibility that the sealant will be visible, it is better to use colored silicone, the color of which most closely matches the color of the walls or the color of the shower glass.
The sealing material should be selected taking into account the tasks at hand. If you need to seal the glass-wall joint, you should choose a silicone sealant. If there is a need not only to seal the seam, but also to glue the glass to the surface, you need to choose an adhesive sealant or silicone adhesive. Such adhesives not only have sealing properties, but also provide a reliable, inextricable connection.
If there is a window in the bathroom, choose sealants that are resistant to UV radiation.
Silicones or adhesive-sealants have different service life - it can be 3-5, 10 or 20-25 years. As a rule, this information is located on the official websites of manufacturers. Of course, we recommend using long-life sealants.
When purchasing, pay attention to the expiration date of the sealant. When purchasing silicones on the market, especially in winter, there is no certainty that the seller has withstood all the storage conditions for silicones or adhesives. If the sealant was stored at temperatures below those recommended by the manufacturer, it loses its properties and characteristics. Application temperature, storage temperature, and operating temperature of sealants and adhesives are different concepts. And only compliance with the manufacturer’s recommendations guarantees long-term and safe operation of the product.
general information
First you need to find out what a sealant is, what types it comes in and how it should be used. Sealant is a paste-like material that is widely used to seal joints of various types and sizes.
It began to be used to strengthen joints in building materials, gaps around window and door openings, pipes, and during the installation of ceramic tiles. The sealant consists of a polymer, a filler and several additional elements. Their main difference is the type of polymer compound.
Sealants
The most popular in the modern construction world is the use of silicone sealant. This is a material that can be suitable for both the kitchen and the bathroom. Silicone is a composition that is resistant to ultraviolet radiation.
How to apply a silicone seam when installing a new shower stall
The silicone seam is applied when installing glass panels. The shower cabin must be assembled, the position of the glass must be set and adjusted in fasteners and hinges. If possible, the gap between the edge of the glass and the floor or wall should be as small as possible. With properly manufactured glass and the use of Pauli fittings, the thickness of the silicone seam cannot exceed 3 mm; as a rule, it is 1.5-2 mm.
Due to the weak fluidity of the glue, a gap of less than 1.5-2 mm is very difficult to fill with sealant completely and accurately.
Such technological gaps between glass and tiles or other materials are needed in order to compensate for possible deformations of the walls that occur during shrinkage of the building.
The walls must be clean and dry. Remove construction dust from walls and floors before installing glass and after drilling mounting holes in tiles.
To protect against possible leakage of silicone onto glass and walls, apply masking tape to the glass and wall. This will help make the silicone seam as neat as possible.
Using a gun, apply a layer of silicone to the seam. Try to do this in a continuous strip of equal thickness.
If you need to adjust the silicone deeper into the gap, use a rubber spatula. Moisten the spatula with soapy water - the silicone will not “stick” to the spatula.
The protective masking tape must be removed no later than 10 minutes after completing the silicone application process. Otherwise, when removing the masking tape, there may be “hooks” in the silicone that will need to be cut off with a sharp knife, which will impair the accuracy of the silicone seam.
The drying time for silicone is indicated on the tube. The drying time of silicone is affected by the temperature in the room where the work is carried out. We recommend using the shower cabin no earlier than 24 hours after sealing the shower cabin with silicone or adhesive sealant.
Material selection
Today, waterproofing for showers can be of various types, since the choice of building materials is very large. To best determine the appropriate material, it is necessary to carefully study the conditions of its use. It is necessary to determine what lies at the base of the wall, for example, the tile can withstand moisture well, but if installed incorrectly, water leaks into its cracks.
Important! In simple cases, only one waterproofing material is used, but more often it is necessary to combine different types depending on the location of use.
Insulation types:
- coating - these are wet materials that harden and prevent moisture from entering;
- elastic - soft coating with easy application;
- penetrating - liquid insulation that penetrates into the surface and prevents moisture absorption;
- polymer-cement waterproofing is used as a base for forming a pallet or other covering;
- roll is the oldest and most reliable method of insulation.
The roll method involves the use of materials in rolls, which are unrolled and laid on top of a rigid base. Fiberglass or bitumen with polymerization is predominantly used. Materials can be guided, when special glue is used for fixation, and self-adhesive, which require the use of a gas torch for application. The advantage of the technique is its low price, the disadvantage is its short period of use.
Today there is a more practical method - coating insulation, when mastic is used as waterproofing, mainly from bitumen with the addition of polymer or rubber. High elasticity rates, high-quality adhesion and long service life are the advantages of the technique. At the same time, simple installation also contributes to the popularity of the technique.
Polymer-cement compositions are a mixture that must be diluted with water; it is used to cover plastered walls. Often used when installing heated floors and to create a layer in “wet areas”. Waterproofing without a tray under tiles often uses this method, since its elasticity and volume allow for quick installation.
Penetrating materials saturate the substrate and push water away from the material, creating a surface protective layer. When the mastic dries, the layer becomes more durable and waterproof. In practice, they have proven themselves well: Ceresit CL 51, Grida HydroMEB Acrylic and Knauf Flachendicht.
How to replace the silicone layer
When replacing a silicone seam, it is better to dismantle the structure. It's troublesome, but effective. Residues of “old” silicone must be completely removed, and walls, floors, and glass must be degreased. It is very difficult to remove residues and degrease the structure without dismantling it.
When purchasing sanitary silicone, do not forget to purchase a special gun for the tube - this will make the process of applying the sealant easier.
As a rule, silicone from walls and glass is first cut off with a knife. Silicone residues can be removed either with a special solvent or with ordinary vinegar.
Before applying a new layer of silicone, the area where the silicone will be applied must be dry and clean. The technology for applying a silicone seam is the same as for new designs.
Please do not forget to work with the door open, as silicones have a rather pungent acidic odor. After completing the work, you need to ventilate the room.
Adviсe
- If you don't want to buy a caulking gun, buy sealant in tubes.
- Do not try to fill large (more than 6 mm) cracks with sealant. For this, use a dense insert (wood, plastic, etc.) or a special waxed braid. Fill the gap with sealant over the insert.
- Plan to apply the sealant in one go. If you take breaks and come back to apply the sealant again, it will adhere unevenly, thereby creating points of moisture penetration and mold growth.
Laying roll insulation
To install material from a roll, you should do the following:
- The surface on the field is leveled with cement; the difference should not exceed 5 mm. At the junctions of the floor and wall, rounding is performed using a DSP.
- Cutting the canvases requires taking into account an overlap of 15-20 cm on each wall. After receiving the pieces, it is necessary to moisten the material with solar oil, which gives the material greater elasticity and high adhesion, and also helps eliminate excess quartz sand.
- Before laying, the canvas is laid on a flat surface for curing and leveling, the duration is 1 day.
- The surface is cleaned of all debris.
- Now they cover everything with a layer of bitumen, and sheet material is applied on top, and the sheet is rolled on top.
- After pasting (if it is self-adhesive) or melting the material with a gas lamp, the surface is left for a day.
- When the material hardens, a second layer is applied in the transverse direction from the previous material.
- The entire surface is treated with heated mastic.
Popular companies
The world name of the Dow Corning brand is known to many; products from this manufacturer have all the necessary qualities for working in rooms with high humidity.
Separately, it should be noted the high-quality adhesion with most popular shower cabin materials, the long service life of the layer, as well as the availability of different bottle volumes.
An equally effective tool will be Moment; for several decades the company has not yielded to the first position in the rating in this market segment; silicone models meet all quality standards.
The products of the Belgian brand Soudal stand out due to their extensive line of brands, among which you can also find mixtures for the bathroom.
Somafix is exported from Turkey, construction chemicals are in demand among professional installers, the solution is worth taking for self-application into joints.
The German brand Ceresit is suitable for household needs, but it is not recommended to use it for connecting aquarium parts if you plan to store food in the container.