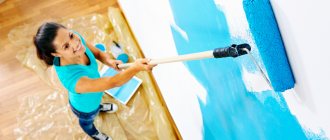
One of the important stages of any renovation is painting the internal surfaces of the walls. This work is not too difficult, but it requires special attention and accurate execution of all operations. If everything is done correctly, then you can paint the walls yourself without the involvement of experienced specialists.
What is the best tool to use to carry out painting work efficiently and accurately? A regular roller will evenly distribute the paint over the entire surface of the wall.
What to paint with?
There are various rollers, which are divided by size and depending on the material from which they are made. Foam rollers are suitable for water-based paints. They are not very durable, but they are cheap. In the case where you intend to apply enamel or an oil composition, it is better to use velor or fur rollers.
Polyamide thread ones are also popular. The length of the pile in them is selected depending on the desired relief. The deeper the relief is needed, the longer the pile should be. Such rollers are able to create the necessary surface texture, they are easy to wash, durable and will last for many years.
But it should be noted that it is important to handle them carefully, since any careless movement can lead to paint threads splashing. There is another type of these tools - textured rollers. They help create the necessary pattern and shape.
They help create the necessary pattern and shape.
They help create the necessary pattern and shape.
What to look for when choosing
The material for making the fur coat is selected based on the type of paint used, but the roller also has other characteristics that need to be taken into account:
- The length of the pile depends on the condition of the surface. The smoother the wall, the shorter the pile is needed to prevent smudges from forming; Long pile paints well on rough and uneven surfaces.
- Fur coat width. It can be small (up to 180 mm), medium (up to 250 mm) and large (250–300 mm) - for foreign manufacturers these are the mini, midi and maxi classes (facade rollers), respectively. Wide rollers are used for painting large areas, but you should not choose a 30-centimeter tool in any case - it is very heavy, and labor productivity is unlikely to increase.
- Purpose of the roller. Like paints, they are divided into tools for interior and exterior use. The latter are denser and tougher.
The tools also differ in design - the method of attaching the reel to the clasp. Based on this feature, rollers are divided into models with a hairpin, a replaceable coat, and frame shock-absorbing ones. If you are not a professional painter and do not plan to paint hundreds of square meters of surface, there is no point in thinking about which roller is better in terms of design - you can choose any one.
Knowing the labeling will help a lot when choosing. Each model has a number and letter designation indicating:
- bobbin diameter - measured in mm, accompanied by the Ø symbol;
- the material used to make a fur coat is a combination of letters, for example, BB (velor), PE (polyesters), PC (polyacrylates);
- tool width - numbers after letters, measured in mm.
Thus, from the marking Ø50 VMP-180 it will be clear that this is a roller with a diameter of 50 mm and a length of 180 mm, made of polyamide faux fur.
The main thing you need to pay attention to when choosing a roller is the quality of workmanship. Threads should not stick out from the fur coat, the stitching should be even, there should be retaining rings
The presence of the manufacturer's marking is also important. If you are interested in painting with a textured roller, read a special article about it
If you are interested in painting with a textured roller, read a special article about it.
Features of painting wet rooms
Water-based compositions are easily dissolved by water, so during repair work the question arises: how to properly paint walls in wet rooms? The main condition for painting with this material is the presence of high-quality forced ventilation. If we are talking about the kitchen, then you can paint only those walls that are located away from the countertop for cooking, gas stove and sink. It is better to tiled this area. After the material has dried, it is recommended to varnish the walls.
For wet rooms, washable water-dispersion compositions based on latex or acrylate are used.
As for the bathroom, it is better to use water-based emulsion only if a shower stall is installed. The fact is that even with good ventilation, a large amount of steam will form in the bathroom, which negatively affects the coating.
Painting walls with water-based paint yourself is a fairly simple procedure. For the result to meet your expectations, it is enough to follow the above recommendations and carefully read the label on the package. We also recommend watching the video.
Completion of work
Upon completion of painting, all tools used in the work are thoroughly cleaned. The soft roller is squeezed out strongly and placed under running water. Liquid waste is washed down the drain. This cleaning method is only suitable for water-based paints.
Brushes and grooved tray can be easily cleaned in warm water.
Advice. Before painting, it is better to put the brushes you used last time in warm water for a couple of hours. If you do not want to wash the tray, then before filling it should be placed in a plastic bag.
How to properly apply paint to walls
You can learn how to properly paint walls with a roller without leaving marks by following the recommendations. To do this, it is also worth watching a photo or video to better understand the application techniques. There are several ways to paint walls with a roller: using bottom-up or top-down movements and horizontal movements.
The first option allows you to avoid stripes, the second allows you to cover the entire coverage area. Sometimes these techniques are combined to achieve better results. It is correct to paint walls with a roller in the following order:
- pour the required amount of paint into the tray;
- soak the roller in paint and roll it over the corrugated surface of the pallet;
- start painting from the window.
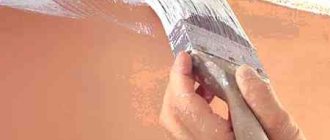
To avoid scratches, stripes, and overlapping layers, do not press the roller too hard against the wall. All movements are performed smoothly, without fuss, then the walls are painted evenly, without the formation of gaps. It is worth remembering that the second coat of paint is applied only after the first has completely dried.
Surface marking and paint application
For uniform painting, the wall area can be divided into squares. The value of the width of the roller must be multiplied by 5, then you will find out the length of the side of the square. For example, the width of the cylinder on the tool is 20 cm, which means the square will have sides of 100 cm.
Now we divide the square into 5 vertical stripes and paint the second, fifth strip, skipping the first, third and fourth. After painting 5 stripes, we return to the fourth, then to the first and third. In theory, the information looks a little confusing, but in practice it is very easy to perform such manipulations.
When the first coat of paint remains dry, you can begin applying the second. This should be done in the following sequence: stripes No. 3, 1, 4, 5, 2. If the first time you painted the wall with movements from top to bottom, then next time you should make movements in the opposite direction.
After the first square, you can move on to the second and continue doing this until the entire wall is covered. This technology allows a thin layer of paint to be distributed over the surface, thus avoiding unnecessary consumption of material and streaks.
Tips for painting walls correctly:
- if it is difficult to visually represent the squares and conditionally divide them into strips, you can use masking tape;
- Do not apply a thick layer of paint, otherwise stains cannot be avoided. The dye is distributed in several stages in a thin layer;
- Before finishing one wall, do not move on to another to avoid color changes;
- if it is necessary to tint the paint, do it before starting work with the entire volume of the mixture, otherwise there is a possibility of obtaining a non-uniform shade;
- For the first layer, use a long-nap roller, as it will be able to paint over the desired areas faster. The second time you need to paint the walls with a roller with a 6-7 mm pile to avoid drips and overuse of paint;
- If paint gets on a wooden surface, it can be removed using a metal spatula or a stationery knife. To do this, carefully scrape off the drops, then walk over the surface with industrial alcohol.
Preparing walls for painting
In order to achieve the required result, that is, paint with water-based paint without streaks, you should prepare the walls for painting by first performing such types of work as plastering, putty and primer. Keep in mind that before painting the walls must be solid, smooth, dry and clean.
How to properly paint walls with water-based paint design photo ideas
First of all, you need to inspect the walls, if there are minor cracks, you can cover them with alabaster; for stains of grease or mold, use an acid or alkaline solution. If the wall surface was previously painted, whitewashed or wallpapered, you will need to remove it. Please note that water-based paint is not applied to oil-based, varnished surfaces, alkyd paints or synthetic materials.
If the walls have differences of 2 cm or more, they should be plastered; if less, then it is enough to putty it using a spatula, and then sand it, thus making the surface of the walls smooth. During the sanding process, dust generated should then be vacuumed or wiped with a damp sponge. Please note that if you plastered the wall, then let it dry for at least 4 weeks, otherwise failure to comply with this rule risks destroying the structural composition and pigment of the water-based paint.
Afterwards, you will need to carry out priming work, which significantly reduces paint consumption, improves adhesion and uniformity of paint distribution. Do not forget to follow the drying times described in the instructions.
How to paint a wall with water-based paint video
If the room has already been finished, then instead of a primer, you can use the first layer of water-based paint, adding a little water.
Roller technology
To get a perfectly smooth and neatly painted surface, you need the correct technique for working with a roller. It has characteristic features:
- Painting boundaries are marked with masking tape. It must be at the same level, which is checked with a spirit or laser level. When gluing the tape, it is advisable to press it for a tight fit to avoid water-based paint getting under it. The height, shape, size and location of the tape can be any - vertical, horizontal, high or low. It depends on the intended interior and the taste of the owner. The tape is removed when the coating is completely dry.
- The roller should not be completely immersed in the paint; the axis of the tool must remain dry. Several twisting movements are made on the ribbed wall of the pallet to evenly distribute the paint throughout the masking tape, which can be removed, washed and stored upon completion of the repair.
- The movements of the roller should resemble the letter W, that is, up and down, if horizontally, then from left to right, with a brush in some narrow places crosswise. Vertical movements in one direction leave marks. Knowing how to paint walls with a roller without streaks, you can get the perfect result.
- The sequence of work is to paint the ceiling first, then the walls. Usually start from a corner or doorway. A small roller is used here
- You shouldn’t apply a lot of paint in one stroke; smudges and drops should be rolled out. Often one layer of water-based paint is not enough. They are applied at least two, and each subsequent one when the previous one is completely dry.
- If the strokes are uneven, the roller is renewed.
- If it is not possible to remove the furniture, it is moved to the middle of the room, covered with covers or film, which is secured with masking tape. The same is done with doors and windows. Water-based paint drips from such surfaces are difficult to remove.
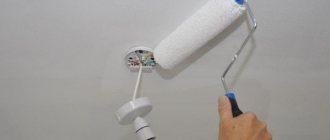
- For high-quality painting near electrical wiring, the power must be turned off, and the sockets must be protected with the same tape.
- After completing the painting of the walls, all switches and sockets that were dismantled at the beginning of the work are installed in their places, the floor is cleaned, and covers are removed from the furniture.
Before you start painting, you should put on clothes that you won’t mind throwing away afterwards. This knowledge can be useful when using paints with oil, enamel and other compositions, because the basic principles of working with a roller are the same.
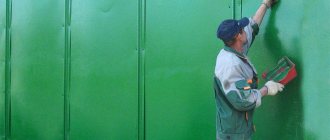
Textured paint for exterior finishing
For exterior decoration of buildings, you should choose textured paint, which includes special additives that increase the resistance of the coating to temperature changes, ultraviolet radiation and high humidity. Acrylic compositions fade in the sun, so it is better to avoid them, but vinyl mixtures are just suitable for painting facades. In addition, silicone and silicate textures can be used.
Related article:
Do-it-yourself textured wall painting: tools and application technology
To apply textured paint with your own hands, brushes, sponges, and various rollers are most often used. During the work process, you should adhere to the same application technology throughout the entire room, otherwise the effect will not be so beautiful.
Roller application technique
Making relief with a sponge
Versatile brush application
Preparatory work before applying textured paint
Before applying textured paint with your own hands, you need to prepare the surfaces. The operating procedure is as follows.
Lay the film on the floor and secure it to the ceiling with tape to prevent splashes during operation. Putty the walls, paying attention to deep cracks and irregularities. Coat the surface with an acrylic primer to improve adhesion of the paint to the base. For work it is better to use a roller; the composition should be applied evenly. First, the surface is completely cleaned
The surface is completely cleaned beforehand.
DIY methods for applying textured paint
Before painting walls with textured paint, you must prepare tools that will be used to create a relief to the surface:
- containers for water and paint;
- construction brushes with bristles of different hardness;
- sponge;
- spatulas, trowels, construction floats;
- brush;
- rollers to create a rough base;
- trowel;
- overalls, glasses, gloves, cap.
Rollers with a textured base to give surface relief
Technique for applying textured paint with a roller and sponge
Let's look at the step-by-step process of applying textured paint for walls with a roller and sponge. First, the composition must be mixed well until it becomes a homogeneous mass.
| Illustration | Description of action |
| Apply white paint evenly onto the wall surface using a medium-nap roller. Drying time – 6-8 hours. | |
| Soak a natural sponge in cold water and squeeze well. | |
| Blot the sponge into the composition and apply it with tamponing movements to an area of 1-2 square meters. m. The work should take no more than 15 minutes, during which time the coating will dry out a little. | |
| Moisten the surface with water using a spray bottle. | |
| Smooth the sharp edges with a spatula using light movements. | |
| Then you can begin finishing the next section. You need to start from the upper left corner, gradually moving down and to the right. After 6-8 hours the surface will dry, excess protrusions can be removed using sandpaper. | |
| Wax is used for tinting. To facilitate its application, the surface is moistened with water from a spray bottle. The coating should be applied to an area of 0.5 m² using a brush. Remove excess wax with a spatula. | |
| The drying time of the decorative coating is 4-6 hours. |
Step-by-step application of textured paint with a brush
Let's consider another way to apply a texture with a chameleon effect with a brush. To work, we need a composition in three shades.
| Illustration | Description of action |
| After mixing, the thick paint is applied to the wall using short multidirectional movements using a wide brush. | |
| The next day the wall is ready for further decoration. | |
| The remaining two tones must be mixed directly on the wall. To do this, use a brush to apply first one tone, then another, and blend with multidirectional movements on the surface. | |
| Upon visual inspection from different angles, all shades of the coating appear. |
You can watch the master class in more detail in the video:
Watch this video on YouTube
Why is additional processing needed?
After complete drying, you can apply interior varnish or wax to the surface - they will give the relief a more expressive structure. In addition, the additional coating has protective functions against mechanical damage.
Wax gives expressiveness to the relief
What fur coat material to choose
When selecting the type of roller, the chemical composition, features of the paint structure and requirements for the quality of the paint coating are taken into account.
If the selection is made incorrectly, stains or fragments of pile remain on the surface, which can only be removed mechanically.
The compatibility of the coat material and solvents should be taken into account. Some rollers can only be used with water-based paints.
Artificial fur
A fur roller allows you to obtain a uniform paint coating; the use of materials based on synthetic solvents is allowed. The disadvantages include rapid wear of the product; the resulting small fluff remains on the paint layer.
Fur roller.
Polyamide threads
The polyamide-based roller is universal, suitable for painting concrete walls or ceilings, as well as wallpaper. Due to the fine pile, the quality of the coating is improved, and water-based materials can be applied.
Polyamide fiber absorbs and releases paint well. Before starting use, it is recommended to moisten the surface of the tool with water.
Polyamide coat.
Foam coat
Foam rubber is designed for painting walls and ceilings with water-based dispersion paints. Due to the soft structure, you should not apply force during operation: increased pressure causes drips or streaks to appear.
To obtain a textured surface, foam rollers with a stencil are used, leaving imprints on the coating. The material absorbs a large amount of liquid, which increases paint consumption and promotes the formation of bubbles.
Foam roller.
Flock
Products with a flock surface and shortened pile are designed for processing flat surfaces. If there are potholes, the quality of the paint layer decreases.
The tool is designed for applying water-based materials and is characterized by increased durability. When moving on the surface, air bubbles do not form, which improves the quality of the coating.
For paints using synthetic solvents, products made from polyester plush are used, which allows working with thick paints and varnishes.
Flock roller.
Velor base
These rollers are designed for painting large areas and allow the application of water-based or synthetic-based materials. Care should be taken when working, as the fabric absorbs a lot of liquid and creates a stream of splashes.
You should take into account the increased paint consumption and the risk of contamination of interior items or floor coverings that are not covered with protective screens. If the master chooses which roller to paint the wallpaper for painting, then it is recommended to choose a product with a velor surface.
Velor base of the roller.
Applying primer
Priming is necessary for better adhesion of paint to the surface and increase the life of the paint. The required primer is usually indicated on the paint label. To prime a dark ceiling, you can use the base paint, diluting it with water. Hard-to-reach places are treated with a brush, the rest of the surface with a roller.
A separate set of tools is used to apply the primer. Treatment begins from the outer window to the wall opposite it in strips of 1 meter with overlap. The dark areas remaining after drying are primed again, but it is better to apply a second layer over the entire surface.
Learn more about decorating rollers
On the surface of the roller intended for decoration, recesses or protrusions are applied, allowing you to create an imitation of natural stone, wood structure or brickwork.
In addition to rubber, there are products with a leather working surface, which allows for the application of an ornament similar to Venetian plaster.
Only an experienced craftsman can apply neat decor using a roller. If the trajectory of movement is violated, the pattern turns out to be crooked and asymmetrical.
Varieties of rollers for decoration.
Quality checking
Before you paint walls with water-based paint, you should check its quality. This can be done at home. The composition is applied to a small sample. After drying, the color is clearly visible
It is important to consider that often even improved paint after drying does not have such a bright shade as it was at first
But the verification does not end there. After the coating has dried, the sample can be placed under running water. Has the layer started to bubble or has it completely washed away? This means that these products are of poor quality or are simply not recommended for use in rooms with high humidity. It is better to find out this before starting work.
https://youtube.com/watch?v=og_CgejXuUY
Using acrylic or any other high-quality water-based enamel in the interior has a number of advantages:
- everything can be done with your own hands;
- upon completion of the work, you can stay in the room, as there is no strong unpleasant odor;
- Modern improved technology allows you to achieve amazing results.
Creating an apartment design with your own hands leads to the emergence of unique styles and images. The advent of water-based paints significantly expanded creative horizons. Simplified and improved technology allows you to carry out repairs and creativity even with your child, since most of these paint and varnish coatings are not only harmless, but also hypoallergenic.
Operation and care of painting tools
After completing work with water-based paints, you must rinse the tool with warm running water and hang it to dry. It is prohibited to squeeze out the liquid, since the pile becomes wrinkled and does not restore its original configuration. To wash a fur coat from synthetic or oil-based enamels, use a solvent (for example, white spirit).
You should calculate the rationale for cleaning in advance, since the cost of solvent may exceed the price of a new cover or roller.
To extend the service life, the pile is washed from water-based paints with a solution containing a softener and a cleaning agent. After removing the pigment, the product is thoroughly rinsed with water and placed on newspapers or paper towels.
If it is necessary to take a technological break during the painting process, the tool can be placed in the refrigerator. Before further use, defrosting of the pile will be required (in case of using water-based materials).
After finishing the painting work, all tools must be cleaned of paint residues.
Let's start painting
Any work begins with surface preparation. The quality of the future coating will entirely depend on this. There are several types of ceiling surfaces: concrete, gypsum and plasterboard, although all of them are covered primarily with a layer of gypsum putty.
Surface preparation
All work can be done with your own hands and without the help of specialists.
Stages:
Initially, it is necessary to assess the condition of the surface. If there are layers of old paint on it, it would be better to wash them off or remove them mechanically.
- With water-based paint, the situation is much easier, since this type of paint is based on water. It is simply washed off from the ceiling surface with plain water and detergent.
- After complete removal of the old finish, the ceiling is well primed to improve adhesion. Bundles of dust residues and strengthens the surface.
- If there are traces of mold on the ceiling, then choose soil with antiseptic additives.
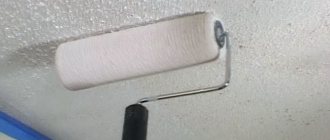
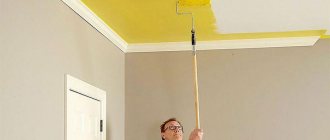
The process of painting a ceiling with a roller
How to properly roller paint ceilings? Many people have this question during renovation work. There is nothing complicated in this process, but there are some rules that are recommended to be followed.
You will need:
- Dye;
- 2 rollers (large and small);
- Painting tray;
- A small bucket, for example for sour cream, for convenient work with a brush;
- 2 brushes (large and small);
- Foam rubber or rags.
Stages of work:
Open a can of paint and, if necessary, dilute it with thinner to the desired consistency. Paint solvents are different, so be sure to read the instructions on the label before taking any action.
Pour paint into the tray and into the bucket;
- Initially, it is worth deciding whether there will be various decorative elements under the ceiling (ceiling plinths, rosettes or friezes), since the painting process begins with them. They are painted with a brush.
- To do this, the brush itself must be of the appropriate size so that it is convenient to apply layers of paint. Since friezes often have complex designs, painting them will also be difficult.
- Since the roller will not be able to reach and paint hard-to-reach places, you need to use brushes to paint them. Do this before the main work so as not to stain the painted decor and walls.
- Dip the roller into the paint and roll it thoroughly over the tray, thereby removing excess paint and distributing it evenly over the roller.
- How to paint a ceiling with a roller? Start from any corner and gradually cover the entire surface, immediately carefully rolling out paint splatters
- All movements must be smooth so that the paint does not splash around.
- Each “roll” on the ceiling surface should overlap the previous one.
After the first pass, let the paint absorb well and apply a layer perpendicular to the previous one. There is one subtlety here - due to the quality of the paint, a different number of layers may be required to evenly paint the ceiling, but in any case there will be at least two. Calculate the direction of the layers so that the latter lies parallel to the light falling from the window, so that it does not emphasize surface defects.
So that in the future there will be no questions about how to properly paint the ceiling with a roller, the video will show the entire work process from beginning to completion.
How to paint different types of wallpaper?
New wallpaper must be thoroughly dried before painting. It usually takes 24-48 hours after sticking them on the walls. If the repair was carried out more than 2-3 days ago, then painting can be started at any time.
The biggest concern is the paper covering. But if you work carefully with a roller, even this fragile material will not be damaged. When painting paper wallpaper, you can also use a non-contact method: using a paint sprayer.
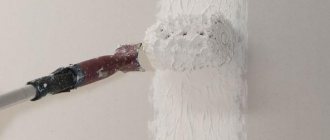
The first stage is painting the corners of the room, where the walls meet the ceiling or baseboard. If it is possible to remove the baseboards, sockets, and decorative door trims, then it is better to do this before painting the walls. But in old buildings you will have to cover the edges of these interior parts with masking tape. This measure will protect the surfaces of parts from water-based paint, which is more difficult to wash off after drying.
You need to paint difficult areas with a soft paint brush, without trying to press it too hard. Walls near doorways, corners, rosettes and other protrusions should be painted by hand to a width of about 5 cm. Without waiting for the paint to dry, proceed to the next step:
- Pour a little coloring composition into the cuvette and roll it with a roller along the ribbed surface to thoroughly saturate the pile.
- Start painting from the middle of a small area in the upper corner of the wall. Move from the center to the edges, capturing part of the pre-painted stripes.
- When the paint on the roller has dried up, roll it several times over the water-based emulsion poured into the ditch. Continue working in the specified sequence.
You need to paint 1 wall in 1 step, not allowing the paint to dry on the edges of adjacent areas. When applying the emulsion to a new area, use a roller to cover 1-2 cm of the already painted surface. This way the paint will lay down in an even, continuous layer.
Next, dry the surface and apply another layer of dye. When working, observe the same conditions as when treating the surface for the first time.
Choosing a paint roller
Choosing the right roller helps prevent streaks. The design includes a clasp that holds the handle and a cylindrical nozzle. The length of the part may vary. Sometimes the clasp is supplied without a core. This roller is used to apply paint from a short distance. The user can select the handle of the required length.
When choosing a means of distributing finishing material, the following parameters are taken into account:
- Pile adhesion force. If, when you try to pull the threads, they are pulled out, you should not buy such a tool. When using the attachment, lint remains in the paint.
- Diameter. A large cylinder can capture a large amount of coloring composition. At the same time, the weight increases, which makes repair work difficult.
- Presence of joints. Nozzles made of artificial materials have evenly spaced pile. Products with large distances between threads cannot be selected. When using them, dark streaks remain.
Roller classification
Tools for applying water-based material are made from different materials, including:
A long-pile synthetic roller is the best choice in terms of price/quality ratio.
- Foam rubber. Nozzles are used to distribute thick finishing materials. When using liquid compounds, they get wet, which causes smudges to appear.
- Synthetic with long pile. The cylinder absorbs a small amount of paint, evenly distributing the composition over the surface. When using this material, spots or streaks do not form. The finishing agent is applied in a thick, even layer.
- Natural fiber. The nozzles have a long service life. They do not leave lint or smudges. A sheepskin cylinder has a higher cost.
Painting walls with a roller: selection of tools and process features
A roller is used to apply paint and varnish composition faster, while obtaining an even distribution of the layer without unnecessary streaks that remain when using a brush.
The device allows you to adjust the thickness of the paint, change uneven areas if they appear, before the painted surface has dried.
The advantages of using a roller are:
- Easy to apply paint on the base;
- Paintwork materials do not accumulate in one place;
- You can use textured fur coats or in the form of stencils;
- Hair loss is unlikely compared to brushes.
The roller is used to apply the paint and varnish composition faster, while obtaining an even distribution of the layer without unnecessary streaks.
Preparing the ceiling for painting
Before starting work, all small pieces of furniture are removed from the room. Dimensional elements are covered with plastic film. The floor is protected with newspapers.
When preparing a suspended ceiling, special attention is paid to puttying the joints. After this, you can proceed to perform the following actions:
After this, you can proceed to perform the following actions:
- Surface cleaning. If there are many defects, the old coating is completely removed. To do this, wipe the surface with a sponge moistened with warm water. After soaking, the plaster is cleaned with a spatula or brush. To remove the water-based emulsion, use a grinding machine. After completion of the work, the ceiling is cleaned of dust.
- Puttying. Cement mortar or leveling plaster helps eliminate protrusions and depressions. The mixture is diluted with water according to the instructions, after which it is evenly distributed using a metal spatula. The coating is left until completely dry, then treated with a grout mesh.
- Grinding. Use fine-grained sandpaper to remove defects left in the previous step.
- Padding. It is recommended to use penetrating compounds that fill pores and reduce the consumption of the coloring composition. The average drying time for the primer is 6 hours.
- Painting skirting boards. These parts are treated with a narrow brush. Before starting work, seal the edge of the wall with masking tape.
How to apply?
Painting a ceiling using old paint is not difficult; anyone, even an inexperienced person, can do it with their own hands. After all stages of preparation, you need to start painting.
The best paint coating is considered to be three layers; in this case, you can be sure that there will be no streaks or streaks left on the surface. Before applying each layer, the roller must be carefully rolled out in a tray to get rid of excess paint; thanks to such manipulations, the possibility of smudges is eliminated. The first and last layers should be applied correctly perpendicular to the windows; this applies to all types of paint, including acrylic.
The next layer should be applied only to a dry surface, and there is no need to speed up the process in any way; the paint should dry naturally.
After applying the second layer of paint, it is advisable to exclude the possibility of exposure to direct ultraviolet rays, as well as the occurrence of drafts, which will help to avoid peeling of the coloring material from the base.
You can paint the ceiling with several types of tools. The most common are a paint brush and a foam roller; you can also apply paint using a spray gun, which is a regular spray gun. This device helps to carry out the painting process much faster, the main thing is that the paint consistency is appropriate.
When repainting the ceiling, it is better to use the same color or a similar shade, otherwise you will have to apply a large number of layers to completely paint over the previous coating and achieve the desired result.
Painting technique: existing options
When using a roller, you should pay attention to the quality of painting: a lack of paint on the tool can lead to the formation of unpainted areas that are difficult to notice during the work process. Such “bald spots” will have to be duplicated with an additional layer of paint, since dotted strokes will stand out from the overall uniformity of the coating
A common method of working with a roller is the “W” technique: vertical stripes slightly overlap each other at the junction, allowing you to quickly paint a large area. The speed of painting using this method does not allow the paint to dry before the end of the work, which makes the resulting layer even and visually consistent.
Painting with a “W” requires plenty of room to manipulate, so it’s best to do it in an empty room. The long handle of the roller makes it especially convenient.
Another way to avoid gaps and stripes is the “squares” technique. It consists of conditionally dividing the wall into squares at the corners, which are painted alternately, and then connected into a single covering with horizontal stripes. This method depends on the illumination of the room and takes into account the direction of light from the window.
Painting in “squares” requires speed to avoid premature drying, so it is more often used by professionals. Hobbyists need to monitor the degree of drying of the paint in order to prevent the coating from being applied to an area that has already dried.
Types of water-based paint
Water-based paint is a water-based emulsion that contains polymer particles undissolved in water. The composition also includes pigments and various additives that change the characteristics of the final product. After applying the paint, active evaporation of water occurs and a thin polymer film remains on the surface.
Painting the ceiling with water-based paint begins with choosing the composition. They use four types of polymers:
- Acrylic. An aqueous emulsion based on acrylic resins allows you to obtain a smooth surface, has good hiding power, and hides small surface defects, even cracks up to 1 mm wide. Its disadvantage is its high price, but it is easier to work with. In their pure form, acrylic compositions are hygroscopic and can only be used in dry rooms, but they do not interfere with the passage of steam. To create a waterproof film, latex is added to the acrylic water-based emulsion. The same additive increases the elasticity of the dried film. Such compositions can be used in damp areas.
Acrylic-based water emulsion - a smart choice
- Silicates. This type of water-based paint is based on liquid glass. The coating is resistant to precipitation and does not interfere with the release of vapors, has a long service life (10 years or more), and can be used for outdoor work.
Silicate paints are vapor-tight
- Minerals - lime or cement. Mineral water-based emulsions have good adhesion to any surface, but are quickly washed off. As a result, they are gradually losing popularity.
Water-based paints based on minerals (lime) are the cheapest
- Silicone. Silicone-based water emulsions are the latest achievement in the industry. These compositions are good because they “tighten” cracks up to 2 mm thick. As a result, the surface painted with them, even without excellent preparation, turns out to be even and smooth. The film turns out dense, but vapor-permeable. Silicone water-based emulsion can be used to paint ceilings in bathrooms and other wet areas. The disadvantage of this type of paint is its high price.
Silicone water-based paints can even paint over cracks
Latex can be added to any of the compositions. Latex water-based paint is water-repellent. It is not afraid of moisture and can be used in damp rooms.
Based on the main characteristics of these compositions, you can choose the best type of water-based paint for yourself. Each case requires its own properties and the “best water emulsion” is different each time.
Paints Snezhka characteristics
The leading manufacturer of paints and varnishes produces a wide range of products for all surfaces.
This paint can be applied to concrete, plaster, drywall, wood.
All products of the plant are manufactured in accordance with European environmental safety standards and international standards.
The main characteristics of the “Snowball” paint are:
- strength and wear resistance;
- long service life;
- good adhesion and quick drying;
- free penetration of air and steam;
- environmental cleanliness and absolute safety;
- acceptable pricing policy.
Any surface painted with Snezka looks perfect and unsurpassed.
Painting compositions for ceilings are available on a water or acrylic basis.
There are several series of paints that differ slightly in their composition and purpose.
Thus, the Disney series, intended for decorating children's rooms, is absolutely environmentally friendly, does not cause allergic reactions, looks great and does not require special care.
The stable and breathable Snezhka Eco series is especially in demand.
The base color of ceiling paints is white.
If the design of the room requires the use of other shades, you can purchase ready-made colored paint or tint white paint by adding a special organic dye.
In this case, you should take into account the required amount of paint for all stages of finishing.
If there is not enough color dye composition, it is not always possible to guess the proportion of the dye and get a completely identical tone.
When adding dye, the paint should be thoroughly mixed until smooth.
It is advisable to use a construction mixer or drill with a special attachment.
General recommendations
To obtain a high-quality result, you must follow the following recommendations:
- Do not press too hard on the tool.
- Apply the paint evenly, without visual gaps.
- All movements are smooth, so there will be less splashing.
- The minimum number of layers is two. The first is applied in a horizontal direction, the other in a vertical direction (or vice versa). Drying time is required between coats.
- The only way to paint corners properly is with a brush.
- You cannot completely immerse the instrument in the tray; to ensure uniform absorption, it must be rolled in the tray.
- When the fur coat becomes uneven, replace it with a new one.
A paint roller is an indispensable tool when painting walls. Thanks to the variety of its types, any composition can be applied efficiently and evenly. To obtain a good result, the correct technique for working with this tool is important.
Features of the compositions
When choosing paint and varnish materials for renovation of premises, you should know that they may differ in their characteristics, have different compositions, and from different manufacturers. Some types of materials can only be used indoors, others are used both indoors and for painting walls outside.
The basis of water-based paint is water, to which mineral components are added. After the water dries, a durable film is formed, which protects the surface from external negative influences and makes the walls and ceiling attractive.
The final result depends on what paint you use. We can distinguish the following types of paints and varnishes, which differ in their components:
- Mineral paint. It is made by adding lime or cement to the composition. It is inexpensive, easy to apply, but quickly begins to fade under sunlight and is easily damaged.
- Silicate - it is produced using liquid glass. This paint can be used to paint a room inside and outside, as the material is resistant to sunlight and has increased water resistance. By painting the walls with this paint, you can forget about repairs for 10 years, the material will retain its color.
- Acrylic paints. They are recommended to be used in a dry room; for greater moisture resistance, latex is added to the material. After using this material, a flat, smooth surface is obtained; in the process, minor cracks on the walls are healed.
- Using silicone paint, you can combat cracks on larger walls, up to 2 mm. The material is quite expensive, but has many advantages: the paint lies smoothly on the surface, allows water vapor to pass through, and retains its quality for a long time.
- For repair work, you can use polyvinyl acetate paints, which have many advantages. They are used for finishing porous materials such as wood, cardboard, and plaster. The material dries quickly, has no ingredients harmful to health, adheres well to the surface, and after drying an excellent result is obtained.
What do you need to know about water emulsion?
Attention: Water emulsion contains water, tinting pigments, and various additives - mineral particles or polymers. During painting, the water component dries out, leaving behind a thin film.
This composition does not have an unpleasant chemical odor, which is a huge “plus”: people with allergies to such building material can use it without fear of having another attack. And it will be more comfortable for healthy people to paint walls in a room where it is impossible to open the windows.
When purchasing, evaluate:
- Composition (depending on the amount of antiseptic, thickener, fillers, it may or may not be suitable for interior work, for dry or wet rooms).
- What walls are needed for: concrete, enamel, wood or something else.
- Viscosity level (what, how it needs to be diluted).
- Consumption (average consumption per square meter - 200-400 ml).
- Temperature during application and drying.
- Permissible humidity level during operation, during operation.
- Specific gravity (a high-quality water emulsion in a 10-liter jar will weigh approximately 15 kg).
The jar should be stored in a dry place where sunlight does not penetrate.
How to properly paint walls with textured paint?
Surface preparation
We start by preparing the surface of the walls, as mentioned above, chips, cracks and unevenness of up to 2-3 mm are allowed. The most important thing is to level the walls in a plane; usually a construction laser level is used for this. Moreover, the very texture and relief of the future paint will visually hide most of the defects.
We treat the prepared surface with a primer. You should wait for the primer to dry completely, which is approximately 4-6 hours to a day. The drying speed of the primer is affected by the humidity and temperature of the room. There are times when two coats of primer are required.
Preparing the Paint
The next stage is preparing the paint itself. We bring the paint into the room for several hours so that it accepts the ambient temperature. Some paints have application restrictions based on temperature and humidity criteria, so read the instructions carefully before use.
If you want a smooth coating surface on the wall, then you should add ordinary water, no more than 1% of the paint volume. If relief is required, then add fillers. To give the desired color, add color to the paint. Regardless of the added components, the entire volume should be thoroughly mixed to obtain a homogeneous mass.
Mixing should be done only with a construction mixer, and not by hand.
Application
Before you start applying a coat of paint, we recommend that you watch photos and videos on the topic: “How to properly apply textured paint to walls.” Next, apply well-mixed paint to the wall.
The layer should be thick, but no more than 1.5 cm. Sometimes paint is applied in two layers. The second layer is applied only after the first has completely dried.
Complete drying of the layer occurs after 24 hours. Apply paint in small areas of approximately 1.5-2 sq.m.
And don’t forget that the paint on the walls begins to set within 15 minutes after application. During these 15 minutes, a decorative design should be applied.
Drawing tools
To apply a decorative design, you can use the following tools:
- Hard brush or brush. Using these tools we draw lines in different directions. To distribute the pattern more evenly, it is recommended to first brush in a horizontal direction and then in a vertical direction. If you have the skills of an artist, you can create your own unusual ornament or design.
- Comb. Apply in the same way as a brush and brush. Only the drawing turns out to be more pronounced.
- Putty knife. One of the most complex methods of applying decorative patterns. With this tool, a pattern of natural stone is obtained. Coarse spatulas are used when there is a coarse filler in the paint. For other paints, you can use a soft spatula.
- Roller. Please note that to quickly decorate a wall you will need several rollers of different widths. If we use a roller with foam rubber or a fur coat, we will get a uniform, rough surface. And if you wrap a rope around a roller, then when the roller moves over fresh paint, traces in the form of stems will remain on the wall. Professionals recommend using rollers with a pattern already applied.
- Cloth, sponge, compressed paper. All these tools are used according to the principle of applying and pressing. You can also apply the design with your own hands, just wear rubber gloves.
- Stencil. There are prepared stencils of drawings; all you have to do is apply them to fresh paint and treat the exposed areas with a moistened sponge. It is also possible to use different colors, that is, the base is one color, then we apply a stencil and use a sponge to go over it with a different color or shade.
Varnish coating
After applying the design and the paint layer has completely dried, the surface should be coated with varnish or wax. This is done so that the color and texture lasts a long time.
Using masking tape
The vertical surface of the beam had to be painted the color of the walls, and the horizontal surface the color of the stretch ceiling, white. When painting with a roller, the paint got onto the adjacent surface.
It is difficult to obtain a high-quality surface of the beam corners using a brush. So I had to use masking tape.
Adjacent surfaces that should not be touched by paint are sealed with strips of adhesive tape. Masking tape differs from the usual transparent tape in that it can be easily peeled off if necessary and does not leave marks on the surface to which it was glued.
You need to remove the masking tape an hour after finishing painting, until the paint has completely hardened, otherwise equal edges may remain. As you can see, the resulting corners have an even line between paints of different colors.
Rules for painting the ceiling
There are some tricks to doing this kind of work. First, more than two layers of dye are applied to the surface. The final layer should be applied away from the window to better hide small blemishes. The following rule: the ceiling should be painted in one go, so that when drying there are no differences in color in different places. You can check the uniformity of coloring by taking a step to the side. Unpainted areas at an angle of 90 degrees will not be visible very well, but under an oblique angle it will be more clear how the paint was applied. If there are stains on the fresh layer, they should be removed with a dry washcloth, and then painted again. Between staining there must be a time period until complete drying.
The process itself is performed as follows.
- We move the roller in one direction.
- Then we move it perpendicular to the previous direction.
- The next layer is perpendicular to the previous direction.
How to paint a ceiling using a roller
There are those who like the ceiling to have a greenish or bluish tint. For this additional dye, buy the dye of the desired color and add it to the paint jar. Then you need to leave the smear on white cardboard and wait until it dries to evaluate the color.
Paint the ceiling using movements similar to the letter “W”. The next stroke falls on the previous one, covering it by 2-3 centimeters. The layers must be extremely thin. If each layer is applied with different rollers, the dye will apply more evenly.
Cleaning Tools
You can clean the roller by washing it with water and a special fabric softener, or simply with dishwashing detergent. First, the roller is rolled well over the ditch to remove as much paint as possible. Afterwards it is soaked in water with a softener and the paint is washed off under clean water until the fur coat is clean.
You must first dry the fur coat with a towel so that excess water comes out, and only then hang it on the dryer.
You can clean the roller by washing it with water and a special fabric softener, or simply with dishwashing detergent.
Other criteria for choosing a roller
When purchasing rollers, additional criteria are taken into account:
- structure of the surface to be painted;
- width of the working element and length of the handle;
- purpose of the roller (for painting or forming decor).
When choosing, you must take into account the height of the walls to be painted and the presence of a stepladder. In standard apartments, you can use a tool with a telescopic handle, which allows you to reach the top edge of the partitions (room height 2.5-2.7 m)
To paint the lower part of the walls, a roller of typical sizes is sufficient. There are products with replaceable handles (they differ in length and ergonomics).
According to the texture of the ceiling
When processing smooth surfaces, paint consumption is reduced, so a coat with increased absorbent characteristics is not required. Rollers with medium or short pile are suitable for the job.
Additionally, it is necessary to take into account the paint base (for example, medium pile is suitable for water-based materials). For textured surfaces, you will need a coat with a pile at least 20 mm long, which penetrates into uneven areas when you press the tool.
There are special rollers with a lining that ensures uniform contact between the pile and the depressions on the wall surface. The cover does not absorb paint, which reduces the weight of the tool and the amount of splashes during work.
The painter needs to apply even force and roll the roller along the wall in accordance with the chosen painting scheme.
Roller for water-based paint.
By tool size
Depending on the width of the drum, rollers are divided into categories:
- mini, providing painting of a strip 150 mm wide, designed for painting hard-to-reach places;
- medium or midi, which has a drum up to 250 mm wide and up to 90 mm in diameter, is used for processing surfaces with slight relief;
- large or maxi, featuring a larger drum and designed for professional use.
The width determines the speed of work and the ability to quickly access narrow niches. The intensity of paint splashing depends on the diameter of the drum.
As the size increases, the angular velocity decreases, which reduces the lateral spread of enamel. For household use, rollers of the mini and midi series are used. The maxi option is suitable for painting the external walls of residential or office buildings.
Advantages and disadvantages
Pros of painting walls with a roller:
- Speed of work . You can quickly paint large areas of surfaces (how to paint walls quickly and professionally?).
- Ease of use . The tool does not require preparation or maintenance, and there is no need to follow complex rules when painting.
- The handle can be extended . By attaching an extension handle, you can reach high areas of the wall.
Minuses:
- It is impossible to paint corners and other complex reliefs and surfaces.
- The need to select a tool depending on the type of paint used.
Tip
You can use a roller to paint walls in any room: kitchen, living room, bedroom, bathroom or toilet.