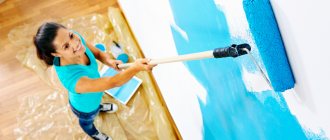
Nowadays, most people use a roller to paint. The choice is made in its favor due to the simplicity of the process. In most cases, this is justified, but, for example, if you need to paint a small area or small details, a brush comes first.
Painting with a brush yourself doesn't seem like a difficult task. But in fact, remaining stains and drips are a common problem. To prevent them, you just need to follow a few simple rules.
How to paint with acrylic paints correctly?
Before applying paint, it should be evenly distributed over the entire surface of the instrument, “rolled” on a special tray in a shallow puddle of paint until the sponge or fur wrap is completely saturated. Then press down lightly and roll along the plane, squeezing out the excess. Ideally, the layer should lie smoothly, without drips.
Interesting materials:
Who monitors compliance by cadastral engineers with the requirements under the compulsory civil liability insurance agreement for a cadastral engineer? Who provides compensation for moral damage to the insured? Who discovered the strait separating Asia from America? Who discovered North America? What was Yesenin's education? Who was Oblomov by origin? How are the husbands of two sisters related to each other? How are cousins' wives related to each other? Who was Peter III related to Elizabeth Petrovna? How is my brother's wife related to my husband?
How to choose a brush?
The first important task is choosing a brush. High-quality equipment should have moderately elastic and even bristles. They must also be durable. Particular attention should be paid to the loss of bristles. It shouldn't exist at all. Lost hairs will create small lumps on the paint, thereby making its placement on the wall less uniform.
If you don’t have a quality brush at hand, you can simply soak the bristles in water before painting. This will prevent them from falling out.
Brushes are divided into two main types: natural hair and synthetic hair. Different types of brushes are suitable for different types of paint. When working with alkyd and oil-based bristles, you need to use natural bristles. They will not be affected by the solvents contained in the dye.
But with latex, acrylic paints, as well as varnishes, it is better to use artificial hairs. They hold their shape better and will not allow elasticity to change during the painting process.
Painting Tips
Skilled workers use this trick: after dipping the brush into the can, they tap on its edge to remove excess paint. This allows you to save it, because it does not stick to the edges of the jar and does not dry out there.
To increase the uniformity of paint application and reduce precipitation, the jar should be shaken every 15-20 minutes. This will prevent lumps from forming and will increase its uniformity.
Mistake #6: applying paint “in different directions”
If you apply paint vertically, then horizontally, and then all at once, in the hope that the wall will look decent when dry, you are making a serious mistake. All strokes can show up, especially if you use a brush.
What to do:
choose one painting option - vertical or horizontal - the paint will apply evenly, and the painting will not look awkward due to chaotic strokes. When painting in several layers, you can alternate methods, for example, paint the first layer vertically, the second horizontally.
Mistake #2: Ignoring Primer
Don't use primer before painting walls? Don't be surprised if you end up with an unevenly painted wall or overused paint. The fact is that the primer provides a lower hygroscopicity of the surface, which allows you to save paint. The base also gives the surface “adhesion” to the paint, which improves the painting of walls.
What to do:
choose the appropriate primer for the walls. Apply it with a brush vertically in small stripes, and then horizontally - perpendicular to the first layer. After the base has dried, you can cover the surface with the first layer of paint.
Cleaning the roller and tool
Once the work is completed, wash the roller under running water. Don't worry about drainage, because water-based paint is safe. When using other types of paint, gasoline or acetone will do. Other special solutions are also sold in stores. Now dry the roller.
If you plan to work in a few hours (up to three), put the tool in a bag and thereby prevent the paint from drying out. The use of cling film is allowed.
Wash and wipe the brush and tray well. If you don’t want to wash the paint container, put it in a bag or wrap it in cling film (or foil).
How to prepare and paint a ceiling: tools, materials, painting methods
How to paint a ceiling without streaks and smudges? What paint materials can be used? How to prepare a surface for painting? Having found the answers to these questions, you can safely begin repairing your home with your own hands.
The choice of tools for painting the ceiling and methods of coating depend not only on the qualifications of the painter, but also on the type of paint and varnish material. By choosing the right material and method of application, you can get a high-quality and durable coating.
If you have finally decided not to resort to the services of professionals, then this article is just for you.
How to remove paint coating (paint) from an old fence
To prepare the fence for painting, you will first need to get rid of the old layer of paint.
This procedure can be carried out in three ways:
- Mechanical. Involves cleaning the surface manually or with a power tool. The last method is much faster. You need to wear protective glasses and a mask when working. A grinder, a drill with a grinding wheel or brush, or a sandblaster are suitable. Doing this manually is difficult. To do this, use sandpaper, a metal brush, or a scraper, but for cleaning small parts and hard-to-reach areas this is the only available method.
Photo: preparing metal poles for painting using an angle grinder
Rust can be easily removed with Rust Filler, Fosol, Epoxy. The product is applied to a piece of rag and rubbed into the affected areas.
It is important to remove all traces of corrosion and peeling coating, which will be an obstacle to uniform painting of the metal structure.
Mistake #1: Painting unprepared walls
Minor defects, dust, grains of sand, and brush fluff from a previous painting may appear under the paint and negatively affect the result. All the imperfections will be visible under the layer of paint - all you have to do is either accept it or clean the wall and paint it again. And possible greasy stains will appear, no matter how many layers you cover the surface. Defects will be especially noticeable if you use glossy paint.
What to do:
To avoid double work and unpleasant surprises, prepare the wall in advance. Take sandpaper or a special plaster sanding tool and go over the uneven areas and defects. Afterwards, brush off the dust with a brush or broom. Stains can be removed by wiping the wall with a damp cloth and soap.
Mistake #8: Painting over wet paint
Of course, I want to finish painting faster and enjoy the result. That’s why we often don’t think about the consequences of painting on a “raw” wall. As a result, the undried layer begins to come off and stick to the brush or roller. Oil paint, in turn, may bubble and you will have to start all over again. True, after waiting for the paint to dry, and sanding the areas with defects.
What to do:
be patient. While the paint dries, do anything else. Pay attention to the instructions on the can, which indicate how long the paint needs to dry completely. If it's a single-base emulsion, it won't take long before you can get to work again.
Suitable types of primers
The main purpose is to protect metal from corrosion and environmental influences. Helps strengthen the structure, increases the degree of adhesion. Apply before painting.
Depending on the composition and technical characteristics, it happens:
- Insulating. This includes primers marked EP-0010, GF-021. The first is epoxy putty used to level the metal surface. It is characterized by high strength, adhesion, resistance to moisture and chemical solutions. The second is used as a pre-treatment of metal before painting with enamel. Contains anti-corrosion ingredients.
- Phosphating. VL-02 belongs to this category. Suitable for all types of metal. The product is greenish-yellow in color. Apply after cleaning the surface from dirt, dust, and degreasing.
- Passivating. These include GF-0119. The base is alkyd varnish with the addition of anti-corrosion and stabilizing substances. Tolerates temperature changes well. Has high adhesion. Color – red-brown. Apply before painting with enamel.
- Tread. This is the primer EP-0284. Forms a durable film on the surface, which makes the structure resistant to mechanical damage, moisture and rust development.
- Inhibitory. Variety – EP-0180. Suitable for processing ferrous metals and rusty surfaces. Stops the development of corrosion. Reliably protects the product from moisture and environmental influences. Color – red with a brownish tint.
Photo: preliminary priming of pillars before applying paint
Separately, it is worth highlighting the anti-corrosion primer marked EP-0199, brown in color. Suitable for processing any metal elements, both new and with traces of rust. Reliably protects the material, increasing service life and resistance to the external environment.
Mistake #3: Incorrectly thinned paint
The paint can be too thick in consistency or becomes so during the work process. Then it needs to be diluted - this is an intuitive action. But what to dilute with is a question that can ruin both the material and the whole work. For example, if water-dispersion paint is diluted with white spirit, it will cause the polymers to stick together. If you paint a wall with this composition, the result will be of poor quality - disappointment is inevitable: the paint will lie unevenly, maybe even in lumps. If, on the contrary, you dilute oil paint with water, it simply will not mix with the main mass.
What to do:
read the composition on the paint can and select the product you will use to dilute the product accordingly. Do not add too much water or solvent - it is better to add a little at a time, thoroughly mixing the paint.
Why does the soil fall on Shagreen?
There are many reasons for the appearance of incorrect shagreen: - Incorrectly diluted material. The paint is too thin or thick. — The spray gun is faulty.
Interesting materials:
When is the best time to go to Spain? When is the best time to go to Korea? When is the best time to eat fruit? When is the best time to swim at Epiphany? When is the best time to fly to Cyprus with children? When is the best time to replant thuja? When is the best time to buy airline tickets? When is the best time to take casein? When is the best time to harvest nettles? When is information best received?
Mistake #7: Applying paint in one layer
When applying paint in one layer, the coloring may turn out to be uneven, and if you want to change the color of the surface radically, you will definitely not be able to finish the job quickly. Even if you change a light shade to a darker one, the first color will show through.
What to do:
To obtain an intense shade, apply two, or preferably three, layers. The first will allow you to distribute the paint over the surface; the second and third - it is better to shade it, even out the color and fill in small irregularities.
How to paint a ceiling without streaks: choice of paint, techniques, execution
Many people don’t know how to paint a ceiling without streaks and all sorts of irregularities; they rely on their own experience and knowledge. However, this is often not enough, and the final appearance of the ceiling does not correspond to wishes and preferences.
From this article you can learn everything about how to properly paint a ceiling, and do it at a professional level and as simply as possible.
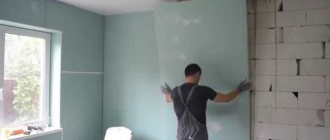
Preparing the walls and bolster
Before painting surfaces, carefully inspect them for damage and defects. To achieve the desired effect, the wall must be perfectly flat, because any errors can be seen with the naked eye.
Take the following steps:
- When treating a wall after wallpaper, remove the top layer and use sandpaper to level the surface.
- Cover cavities and other defects with putty/gypsum compound using a spatula. Once dry, sand the area with sandpaper.
- Cover the walls with a primer for better adhesion with the paint composition. To reduce consumption and obtain a more saturated shade, use a primer that matches the color of the paint.
- Treat wooden elements (if any) with a special compound that protects them from rotting and damage.
After completing the preparatory work, prepare the roller itself. To do this, make a soap solution and place the tool in it. Leave it there for 2-3 hours, then take it out, wash and dry. This preparation allows you to avoid the appearance of lint on the wall.
How to paint a surface: step-by-step instructions
There are many tutorials and instructions available online on how to apply paint to walls. They describe different techniques. The most popular are top-down, bottom-up or horizontal. Each option has its own characteristics. For example, in the first and second cases, you can avoid stripes, and in the third, you can capture a larger area. To achieve the best effect, the considered methods are best used in combination.
General algorithm of actions:
- pour the required amount of paint into the pallet;
- wet the roller and roll it along the ribbed part;
- Apply the composition starting from the window, moving in any direction.
To obtain the perfect layer, do not press too hard on the tool. Proceed smoothly and try not to miss areas on the surface. After the first layer has dried, apply the second. Sometimes a third one may be required, but in rare cases.
Mistake #9: Not enough paint
This can be a serious problem. Firstly, because during a trip to the store the already applied layer may dry out (after drying, the joint between the fresh and already applied paint will be noticeable). Secondly, it is difficult to choose the right shade if you added the color to the paint yourself.
What to do:
the easiest option is to take more. As a last resort, you can return the unopened can to the store or leave it “just in case” - touch up the places where the paint will peel off over time. On paint cans they always write what area the volume is designed for - pay attention to the numbers. Keep in mind that if you paint the surface in two layers, the area will double.
Preparing the room for painting
When all the tools are ready, you can start preparing the room for painting. To do this, you need to remove the curtains, move all the furniture to the middle of the room and cover it with plastic wrap or special covers.
To protect against paint getting on windows, floors, doors, you need to use the same film, but secure it securely with masking tape. This way the film will not slip or slide. After securing the tape, go along its edge with a spatula to better secure it. Skirting boards and gutters should be sealed with masking tape.
It is better to turn off the power supply to avoid injury. Covers from sockets and switches can be removed, and areas without boxes can be covered with masking tape. This way you can achieve better staining results.
Correctly paint the walls in the room after removing the heating radiators. This way you can thoroughly process the entire surface without missing even small areas. To do this you need:
- close the heating valve;
- unscrew the union nuts
- drain the water
- remove the radiator.
Provide a tray to prevent water from the radiator from spilling onto the floor. If you are not confident in your abilities, it is better to invite a specialist who will do this. Before you start painting the entire room, try applying the paint to a small area of the wall. This way you can make sure the color is correct and understand how long the paint takes to dry.
Useful tips
To achieve the best results, use the following tips when coloring:
- if paint gets on the wood, remove it with a sharp knife, and then treat the area with alcohol;
- use masking tape to divide the room into squares;
- tint all the paint to get the same shade;
- to avoid streaks, use as thin a layer as possible;
- when applying for the first time, use a roller with a longer pile, and then use a roller with 6-7 mm of “wool”;
- move to the next wall only after finishing work on the first.
Following the recommendations discussed above allows you to get an even shade, avoid drips and get the job done faster.
Tool preparation
Before painting the walls, do the preparatory work and assemble the tools. Choose a roller for the job, which comes in several types:
- fur - absorbs paint well and completely transfers it to the wall, but leaves lint;
- velor - guarantees an even layer, but is characterized by high consumption of the coloring composition;
- polyamide - stands out for its durability and quality of coloring, subject to proper technique.
In addition to the roller, prepare an emery block, which will be useful for sanding the surface before painting. Also take a few rolls of masking tape to protect unpainted areas from paint. To work, you will need a brush for painting hard-to-reach places and a tray.
Furniture in the room must be protected from paint. PVC film is useful for this. Take it in excess to completely cover the floor surface and avoid paint getting on it.