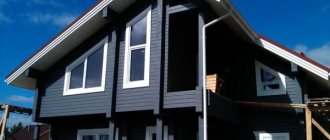
The simplest and most affordable option for insulating the facade of a building is the use of polystyrene foam. The material is not only very resistant to external damage, but also perfectly withstands exposure to a humid environment and ultraviolet radiation.
Unfortunately, when installing polystyrene foam, even with high-quality work, gaps form between the sheets of foam plastic, and this leads to a decrease in the effectiveness of the protective layer, and the appearance leaves much to be desired. To cope with the problem, you should not resort to complex design solutions and spend money on purchasing special finishing materials.
Regular facade plaster on the facade will help with this. The material is affordable and allows you to finish the walls of a building in an extremely short time . Let us consider all the issues related to the design of the building in more detail.
Facade plaster - advantages and disadvantages
Plastering walls finished with foam plastic cannot be done using conventional plaster . This risks the fact that after drying, the mixture may simply fall off and plastering will have to be done again.
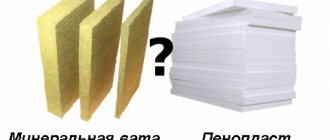
In this regard, it is extremely important to choose the right plaster that will fit well on the foam and can last for a long period of time. Let's consider which plasters are suitable for this purpose and will turn out to be the most suitable.
Before making a choice of plaster, let's study the foam itself . The following two important indicators can be distinguished:
- this material has a smooth and even surface, so there may be problems with the adhesion of the mixture;
- not every composition has a sufficient level of viscosity and can cling to a smooth surface. That is why it is important to choose facade plaster designed to work with polystyrene foam.
Experienced craftsmen recommend using the well-known and popular brands of finishing compounds Ekomix and Ceresit, however, it is worth noting that absolutely any plaster that has high adhesive properties to polystyrene materials can be used . The most important thing is to use a mixture from one manufacturer on the entire working surface to be plastered and not mix compositions of different brands.
The next thing you need to pay attention to is that some manufacturers recommend using foam gluing compounds followed by applying a protective layer. Others make universal mixtures suitable for all types of finishing work. The second option is suitable for those who want to save money, however, you should not count on the high quality of the finished finish.
IMPORTANT!
The selected mixture must have certain characteristics, such as moisture and frost resistance. Read about wall insulation with foam plastic here.
This issue is especially relevant if we are talking about painting the facade, and not about additional finishing with decorative putty.
The following plasters are best suited for finishing facades:
- cement;
- cement-polymer;
- polymer.
If we talk about cost, then the most expensive compositions are polymer ones, however, they are the most durable and do not crack during application, as well as after drying. Each type of plaster has virtually no disadvantages, and buyers should choose the composition based on cost, features of the necessary work and ease of use. The easier it is to apply the composition, the faster the work will be completed.
Why is it necessary to plaster polystyrene foam?
Plaster will protect the material from destruction
Plaster is an important element of protective treatment. The technology for carrying out the work in this case differs in a number of nuances from conventional plaster. Polystyrene foam is characterized by a porous structure. This material is produced by filling styrene granules with gas under high pressure and heating with water vapor. Exposure to high pressure and temperature leads to swelling and sticking of granules together.
Afterwards, the mass of the resulting substance is pressed, giving it the shape of slabs. The thermal insulation properties of the resulting material are high, but it impairs natural ventilation in the house. Low cost relative to other insulation materials and low weight allow you to put up with its low strength.
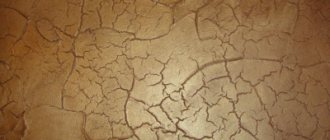
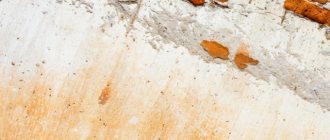
As a result of atmospheric influences (ultraviolet radiation, humidity, temperature fluctuations), the bonds between individual granules weaken over time. The slab begins to crumble and may fall apart into pieces.
Due to these phenomena, it is necessary to apply a plaster coating to polystyrene foam. It plays a role protecting against negative influences.
Along with conventional polystyrene foam, the use of fire-resistant and extruded types of polystyrene foam is common in practice. The latter is the most advanced version of the material in the form of a single substance (rather than individual granules) with a strong connection of molecules. The absence of micropores prevents steam and water from penetrating into the structure. The negative effects of the atmosphere can be traced only on the surface, but also in places of cuts, so the use of extruded polystyrene foam is more preferable in the long term.
Types of plaster mixture that can be used for application to foam plastic
Let's take a closer look at what types of plasters there are that are suitable for application to polystyrene foam.
Since we are talking about exterior finishing, the plaster must withstand low and high temperatures , as well as various atmospheric conditions.
In this regard, gypsum compositions should be immediately excluded from the list of suitable mixtures.
So, we have already noted that the best option would be cement or polymer compositions, but not those prepared by mixing cement, sand and water at home, but those sold in hardware stores.
The thing is that additional components are added to special compositions, which provide the plaster with strength and durability. Let's consider which compositions are most preferable for application to polystyrene foam.
The following types of compositions exist:
- Mineral. Sand, water and cement are used to create them. They are not durable, but have a low cost.
- Acrylic. The mixtures are based on acrylic resins. The material perfectly allows air to pass through and allows the material inside to “breathe”. It has high vapor permeability.
- Silicate. This plaster is sold in buckets, and it has an alkaline reaction. You need to work with it very carefully.
- Silicone. They have increased elasticity and, when applied, form a uniform, beautiful layer.
In addition to the varieties, there are a few more important points. It is better to use thin-layer materials that are easy to apply and spread . Cement-sand compositions are characterized by low plasticity and cracks may form during application. All of these compositions are characterized by increased resistance to mold, fungi and algae.
Consumables
Insulating walls outside with polystyrene is not a complicated process. However, like any other activity, it requires certain knowledge in installation.
The structure under consideration is endowed with its primary positive qualities:
- Affordable price;
- Reduced level of thermal conductivity;
- Good resistance to moisture;
- Increased vapor permeability;
- Long service life;
- No risk of rotting:
- Ease of operation and so on.
Of course, insulating external walls with polystyrene cannot contain exclusively good features. Each activity and material has individual disadvantages:
- Poor fire resistance;
- Formation of acrid smoke, that is, toxicity;
- Possible exposure to damage from small rodents.
Consumption of façade plaster on polystyrene foam
For plastering the facade of a building finished with foam plastic, two types of mixtures are used. The first is necessary for gluing the reinforcing mesh, and the second is used to level the surface. In addition, there are universal mixtures that are suitable for both types of work.
If you decide to buy two types of materials at once, then it is extremely important to correctly determine the amount of the required mixture. In this case:
- glue consumption will be 4 kg per square meter, and plaster should be calculated based on 6 kg per square meter;
- if we are talking about a universal mixture, then the consumption will be 10 kg per square meter;
- to calculate polymer plaster, it is worth using an indicator such as 9-10 kg per square meter, provided that 3.5-4 kg will be spent on gluing the reinforcing mesh, and the rest will be required to create a leveling layer.
Primer
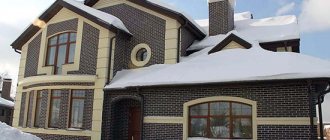
The facades of two-story houses and other buildings, after they have dried and rubbed, must be primed. This will improve the adhesion of the final layer along with the base.
Deep penetration primers are used - they contain quartz grains, in particular, Ceresit CT-16.
When you plan to only paint the resulting coating, you can use a simple primer.
To apply the primer, use a short-haired roller. It needs to be wetted so much that the composition that is applied does not flow down the wall.
Preparing the surface for application
Before you begin plastering walls finished with foam plastic, it is very important to properly prepare the work surface. For this purpose, you will need:
- seal the joints between the sheets using polyurethane foam and wait for it to dry;
- if excess is formed, it must be cut off with a sharp knife;
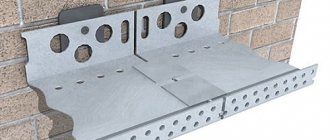
- most often, foam plastic is attached using “umbrellas”, so it is important to make sure that the caps are sufficiently recessed and do not protrude , as this will create additional difficulties when applying plaster;
- After this, you will need to sweep the surface of the wall from dust and prime it. This will increase the adhesive properties of the wall and even simplify the work;
- the next steps will be to reinforce and level the walls . If dry plaster is purchased for this purpose, then the mixture should be prepared before reinforcement begins, otherwise it will quickly lose its qualities.
NOTE!
It is very important to remember that plastering can only be carried out on insulation that is firmly fixed.
If the foam is not securely fixed, it is necessary to correct this point, since after applying the plaster, unsightly cracks may form on it.
Insulation process
Following a certain order will help you understand exactly how to insulate external walls with polystyrene foam. That is why the first stage should be the installation of panels on an already cleaned and carefully prepared, primed wall.
The correctness of fastening can be checked using a special level. And only after this can the structure be hammered with dowels.
A special adhesive developed for slabs will help guide you on the question of how to glue polystyrene foam to the wall. It is applied with a notched trowel evenly over the entire working area. Do not forget that the insulation thickness is selected depending on the purpose:
- Indicators from 30 to 50 millimeters for residential premises;
- Indicators of 60 millimeters for walls of other industrial structures.
Disc-shaped dowels will be an excellent assistant in all work, since it is necessary to attach polystyrene to the wall as securely as possible.
Plastering walls made of polystyrene foam helps to level and decorate the formed surface.
By following all technologies when carrying out insulation work, you can achieve the highest quality result, as well as avoid possible heat loss. Do not expose the surface to sunlight or high temperatures.
Reinforcement and priming
Reinforcement or application of a special mesh to the walls can be done in two ways:
- In the first case, the mesh is placed on the prepared area and coated with a plaster solution on top . The composition penetrates into the cells and the material quickly sticks. It is not easy to do such work alone, since you will need to hold the mesh with one hand and apply the mixture with the other, so it is better to first fix the mesh and then apply the solution.
- The second way is to first apply plaster to a section of the wall, and then attach a mesh to it . Gradually pressing the cells into the composition with a spatula, the master glues the mesh to the surface.
Regardless of which reinforcement method is chosen, you first need to glue the corners of the building, doorways and slopes , and only then start applying the material to the total area.
To reinforce window and door openings, the mesh is cut into strips of 30-40 cm and, after bending, glued to the destination. After the plaster has dried, which may take from several hours to a day, you should rub it with sandpaper or a special grater to eliminate various irregularities.
After this, the surface of the walls is primed with a special composition that enhances the protective functions and qualities of the plaster itself . It is better to choose a liquid, homogeneous primer, which will give the coating roughness and provide better adhesion of the material.
Preparatory work
To carry out correct work, you must know how to properly insulate walls with polystyrene foam. That is why it is worth adhering to some fundamental steps:
- Assessment of the overall scope of work, calculation of the required material, determination of insulation volumes, preparation of consumables and elements (accessories, tools, etc.);
- Careful preparation of wall surfaces:
- Cleaning from dirt;
- Leveling out unevenness;
- Plastering cracks and obvious potholes;
- Attaching polystyrene to the wall requires a preliminary primer to improve the adhesion of the surface to the glue.
Technology of façade finishing with polystyrene foam plaster
The last finishing stage is the application of a leveling layer.
Here the contractor should be as responsible and attentive as possible, since the leveling layer must hide all defects in the reinforcing coating and prepare the basis for the final finishing of the walls - painting or covering with decorative putty.
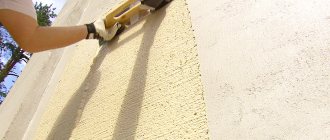
In fact, this work is not particularly different from plastering walls made of concrete or brick.
It is worth using a standard spatula and applying the plaster in a thin layer.
IMPORTANT!
An important point that must be taken into account when finishing is that the joints of the sections should be mixed relative to the joints of the mesh. In other words, the seams should not overlap each other.
The finishing must be especially careful and careful when it comes to subsequent painting, since all the unevenness in the future will only be emphasized by the paint and the walls will not take on a very aesthetic appearance.
To ensure that the surface is perfectly smooth, after the coating has dried, it is recommended to sand it using sandpaper or a special mesh. It is important to grout in the first 3-4 days, otherwise in the future the composition will harden greatly and it will be extremely difficult to sand it.
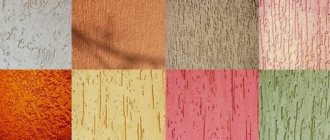
The exception in this case is textured finishing plaster, however, here everything depends on the grain size.
Features of insulation
You can save a little on heating costs by insulating your home with polystyrene foam. How exactly? Let's take foam plastic for this.
Polystyrene foam has many uses these days:
- It is used to make packaging for transporting fragile and easily breakable items;
- life jackets are made from it;
- in refrigerators it is used as a heat insulator.
Recently, polystyrene foam has been widely used to insulate the walls of buildings, since it is a good heat and sound insulator, very easy to install and relatively inexpensive. It is attached to the insulated surface using a special adhesive mixture or plastic fasteners, popularly called “umbrellas”. They can be seen in the photo.
After the foam is attached to the walls of the house, it will need to be plastered.
DIY plastering
Now let’s take a closer look at how to properly plaster polystyrene foam. The algorithm is as follows:
- preparation of the base;
- fastening the reinforcing mesh is the first adhesive layer;
- applying a base leveling layer;
- finishing mixture.
Tools you will need:
- mixer;
- container for mixing;
- reinforcing mesh;
- sandpaper for rubbing;
- putty knife;
- building level;
- adhesive solution and mixture for plastering (rough and decorative);
- primer.
Preparation of the working area
As soon as the work on covering the facade walls is completed, carefully inspect the entire area, identify and eliminate small defects. Empty areas in the seams are filled with foam for installation work, excess adhesive solution is cut off with a sharp blade, and the joints are cleaned with sandpaper.
The result should be a smooth surface, free of protrusions and depressions, free of dirt and dust.
If polystyrene foam boards are excessively smooth, experts advise treating them with a little sandpaper or rolling them with a roller with a special needle nozzle.
Such measures will increase the percentage of adhesion of the plaster layer to the insulating surface, after which the hardened solution will be firmly fixed.
Is reinforcing mesh necessary?
Even if the foam is prepared for applying the solution using a primer, the plaster mixture is still not applied directly to it. In order to obtain a more reliable coating, a fiberglass reinforcing mesh is used.
It is optimal to choose a mesh with a density of 130/160 g/m2. Foam plaster will work well on such a reinforcing fabric, but it is difficult to work with when finishing corners.