Despite the fact that polymer clay is produced in a large number of colors, clay products still need painting.
And the question of how to paint polymer clay worries most sculpting masters. After all, the appearance of the craft will depend on which coloring method is chosen.
And this is very important, because often during work small flaws arise that can be skillfully hidden with the help of paints.
And in order for the product to successfully fit into the chosen interior or correspond to a creative idea, it is also necessary to select the desired color palette.
But, however, you can always find the best options for how to paint polymer clay. And for this you need to know: what types of paints can be used for polymer products.
But paints are not everything. It is also necessary to learn how to mix their shades, since a successful color combination enhances the positive impression of a skillfully created product.
Types of materials for painting plastic and working rules
Polymer clay, both purchased and homemade, lends itself well to coloring, both at the stage of formation and at the final stage of manufacturing the product. However, the dyes may be different.
But the following materials are most suitable for painting plastic:
- Acrylic paint;
- Oil paint;
- Aerosol;
- Dry soft pastel;
- Powder;
- Special ink.
Each dye has its own characteristics. But what they have in common is that depending on what color the master wants to get, the amount of material used varies.
So, to get delicate pastel colors, you need to take a minimum amount of added substance. And if, on the contrary, it is necessary to obtain bright and saturated shades, then the amount of the dyed substance should be increased.
In addition, when working on clay coloring, craftsmen must adhere to the following rules:
- It is not advisable to mix dyes of different compositions;
- You cannot use materials from different manufacturers when working with one product. Violation leads to uneven color and violation of the density of the product, which leads to surface distortion and cracks;
- When mixing polymer clay colors, you need to pay attention to special shade mixing tables, both from manufacturers and from artists.
By following these simple rules and practicing, you can learn how to beautifully design polymer products.
Painting with acrylic paint
One of the most common and popular ways to paint polymer clay is to use acrylic paint. Why is she so good?
What’s good about it is that it fits perfectly on the surface of the finished product and has a wide color palette. The only “but” is that it is not recommended to add it to the clay before baking, since it can cause defects (unevenness and bubbles).
Also, when working with acrylic paint, you need to pay attention to its important qualities: quick drying and darkening after drying.
Due to these characteristic features, when using this dye, you must adhere to the following steps:
- Mixing different shades is done either on a palette or in small plastic jars;
- When the paint dries, add a small amount of drying retardant;
- You should apply paint to the finished product not with ordinary brushes, but with special ones with a spongy surface at the end;
- When applying to a product, take into account that the paint darkens, so see in advance what the final color will be after drying on the palette;
- Store the dye only in a closed container after use.
Otherwise, there are no difficulties in working with acrylic paint. All that remains is to learn how to mix colors.
Acrylic paint mixing table
To start working with acrylic paint, it is enough to have several basic colors in your arsenal: white, yellow, red, blue and black.
Why these particular colors? Yes, because experienced colorists who have been working with this dye for a long time have compiled a special artistic chart for obtaining additional shades.
Mixing acrylic paints, table:
It's quite easy to work with. On the one hand, it indicates the desired color to obtain, and on the other, the colors that need to be mixed.
For example, you need orange color. To get it you need to take yellow and red. If we want to get green, then we need to mix yellow and blue.
To obtain other shades, you can continue to mix the colors from this table. For example, to get a peach color you need to mix yellow with red and brown, and also add white.
In the same way you can get burgundy, mustard, olive, light green, purple and many other mixed shades. The main thing is to constantly practice creating the necessary palette.
Painting with oil paints
The second most popular dye for polymer clay, which is used by sculpting masters, is oil paint.
First of all, it is great for adding color to self-hardening clay at the stage of preparing parts. After the product has dried and hardened, you should not be afraid that any flaws will appear due to its use.
But as for baked plastic, here it is necessary to pay attention to such a property of paint as long drying.
Due to this property, after covering a craft with this dye, it is necessary to wait some time for the paint to completely dry on the surface. And only then apply the fixing varnish.
Therefore, when choosing oil paints, you should be guided by the following rules:
- Choose an oil-based dye rather than petroleum-based, since the latter takes up to six months to dry;
- Compare several manufacturers. To do this, carry out testing on prepared samples. And opt for the paint that dries faster;
- To fix some types of oil paints, you need to re-bake the product.
But despite this, oil paints are well suited for painting plastic using various techniques.
With their help, you can achieve the effect of antiquity, create an imitation of natural stone, work in the Mokume Gane technique, and paint the surface in various tones. At the same time, color mixing tables for oil paints can help in tinting products.
Oil Paint Mixing Charts
To give natural shades to their products, many sculptors have to act as artists.
But every master of oil painting constantly experiments with different shades in order to achieve the intended color nuances.
At the same time, there are over 1000 shades of oil paints. But despite this, even working with seven basic colors, each master is able to create a different color scheme.
However, not all polymer clay beginners want to put effort into creating a color palette. And they prefer to buy paints with a wide selection of shades.
So in sets you can find 60, 70 and even 120 colors. Here you just need to choose a specific paint number and paint the polymer clay with it.
But if you need to get the desired shade, you will have to study for a long time. Mix, add paint, mix again, and through trial and error achieve the desired shade.
However, tables for mixing oil paints, which many artists have been compiling for a long time, can help avoid lengthy experiments.
Thanks to these tables, mixing colors becomes a matter of minutes and makes the life of any polymer clay master much easier.
Examples of three such useful oil paint mixing charts are given below. And they are quite easy to use.
Aerosol paints for plastics
Some types of plastic crafts require uniform coloring. This is especially true for making dolls from polymer clay.
Spray paints, also called aerosols, provide such coloring and a smooth color transition.
These dyes have distinctive features from other materials. And they are as follows:
- Before applying spray paint, the surface of the plastic craft must be sanded and primed;
- The aerosol can be applied either outdoors or in a special well-ventilated room;
- The temperature outside or indoors should not be below +10 and above + 20 degrees Celsius. If the regime is violated, the paint will not adhere well and will stick;
- You can work with paint only with gloves and a respirator;
- Before using the aerosol, it must be shaken well;
- You need to spray the composition at a distance of 25-30 cm from the craft with even up and down movements;
- Apply no more than three coats of paint, leaving at least an hour of drying time between each coat.
In addition, when using aerosols for ceramics, it is worth remembering that they all come in different compositions. The label will always say what they are used for.
So, for example, if the composition contains acrylic or nitrocellulose, then these sprays are well suited for plastic. But car enamels will ruin the product, since their composition is not compatible with polymer clay.
Therefore, overall it is a complex dye. And it is not recommended for beginners to use it, despite the wide palette of colors.
Some subtleties
You can often hear that even good varnishes begin to stick, peel off or chip. What could be the reason?
• The product was not baked for enough time, the plastic was not completely polymerized and the plasticizer reacted with the varnish. To eliminate this reason, you need to finish baking the product, without even removing the varnish layer.
• There was too much plasticizer in the plastic and a thin oily film formed on the surface of the product after baking, which prevents strong contact of the plastic surface with the varnish. St. Petersburg plastic has this property to the highest degree. What to do? – wipe the surface of the product with alcohol before applying varnish and/or wash with dishwashing detergent. By the way, a fatty film can also appear from frequent contact of the baked product with your hands, especially if you have previously worked with raw plastic.
• The first coat of varnish was not sufficiently dry before applying the next one. Some polishes appear dry within 10-15 minutes of application; in fact, many polishes take several hours to dry completely.
• If you apply varnish immediately after sanding without removing any remaining dust, the varnish will fall not on the surface of the plastic, but on the “cushions” of dust. Over time, during the use of the product, this can cause pieces of varnish to chip off in these very places. Therefore, after sanding, if polishing is not intended, it is advisable to wipe the surface of the plastic with a damp cloth and dry before applying varnish.
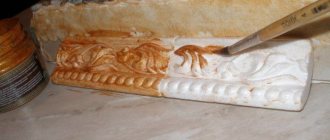
Pastel for polymer clay
Pastel is an easy medium to paint. It is a chalk pencil block that, when abraded, leaves a kind of colored dust.
It is with the help of this chalk dust that you can paint clay blanks or tint the finished product.
However, since pastels have a dry base, mixing colors is a little more difficult than with regular paint. And before mixing, the coloring material must be thoroughly crushed to a finely dispersed state.
Of course, you can buy many shades of pastels on sale, both in sets and individually. But what if the required color was not at hand? Then at home you will have to mix several shades to get the right one.
But the main thing to remember is that, unlike other materials, pastel can be mixed in two ways:
- Mechanical - by mixing two or more types together in a separate container;
- Optical - by applying several layers of different shades to the product and shading them.
However, regardless of the method, it is worth knowing that you can get lighter tones by adding white, and darker ones by adding black. But as for color shades, you will have to experiment.
For example, many people want to know: how to get the purple color from pastels? What colors should I mix for this? To do this you will need red and blue in equal parts.
At the same time, blue, pink or black tones will also help to diversify the depth of purple. If you add them, you can achieve light lilac and bright purple shades.
And if you need to get raspberry? Then you will also need to mix red and blue, but in different proportions. There should be very little blue color.
In general, by practicing mixing different ranges of pastels, you can achieve the desired results. But it is worth noting that, unlike paints, it is not a color mixing table that can help with this, but a color wheel.
Using a color wheel when painting with pastels is much more convenient. And if you practice creating it, it will help in further work with polymer clay.
Modeling techniques
There are many different sculpting techniques, and here we will describe the most popular and most suitable for beginners.
Salt technology
Roll the clay into beads and roll them in salt (any salt will do), carefully pressing in the crystals. Bake or boil the beads. Then put them in water to dissolve the crystals. The result will be a beautiful, bubbly texture, reminiscent of a sponge or pumice. Watch the video for more details.
Millefiori
This technique is also called cane or sausage. This is a rather complex and painstaking technique, but your efforts will definitely be rewarded with excellent results. Cut layers of the desired colors, shapes, thickness. Place them on top of each other in a specific order. Wrap the resulting bar in a thin layer of clay, squeeze and cut into slices. You will see a drawing on the cut. More details shown in the video
Watercolor technique
Take three pieces of clay: a base color, a base light and a base dark (for example, black and white, different shades of the same color). Place them on top of each other in the following sequence: colored, light, dark and roll them into one whole until smooth watercolor transitions are formed. How to do it right is shown here
Filigree
If you decide to create an imitation of this legendary jewelry technique, run the clay through an extruder to create thin strips, no more than 1 mm thick. From these “strings” and their pieces, lay out a pattern on any basis. Filigree is shown step by step in this video:
Mokumeganeg
This technique is a bit like watercolor. Take from 2 to 6 layers of clay and place them on top of each other. Stamp them, pressing well so that the layers blend together. Make a cut: it will reveal an unusual, unique pattern. How to do everything right is shown here
We have listed only the basic techniques, thanks to which you can create your first jewelry and figurines, getting a lot of pleasure from the creative process.
Powder for polymer clay
Powder is a shiny, crumbly material that can be used to achieve a colorful texture and interesting effects in a product. What are they?
The most exciting colors that can be achieved using powder are:
- Imitation mother of pearl: white, pink and yellow;
- Creating shimmering patterns;
- Creating interesting transitions between the main colors;
- Imitation of a metal surface, for example, gold, silver and bronze.
At the same time, working with this painting and tinting material is quite simple. The powder, consisting of fine particles, is easy to mix with plastic and apply to different surfaces.
But still, what are the main methods used by craftsmen when working with this material? And they are as follows:
- Tinting - applied to the product before baking;
- Rolling powder into beads in special pearl oysters before baking;
- Apply using a soft brush to the desired areas of the product;
- Stir the powder into cold porcelain until hardened;
- Coating the finished product with varnish combined with powder.
Masters are experimenting with other methods. But the most important thing is not this, but the fact that the rainbow of colors in the powder allows you to create incredibly beautiful tint effects.
Special ink for plastics
Coloring polymer clay with ink is not a common practice. And not all liquid dyes are suitable for this.
Suitable inks include a special alcohol ink called Alcohol ink, used by artists and craftsmen. How do they look?
They are a concentrated alcohol-based dye. Their main property is that the ink becomes waterproof after drying, which, by the way, is perfect for polymer clay.
This bottle dye has a wide color range, including both bright intense colors and muted shades such as beige, brown, gray. Therefore, it can be used for various types of plastic.
But the great thing about this ink is that it is best suited for translucent polymers. When it is painted with any materials that contain pigment particles, the translucency is lost.
However, this does not happen when using alcohol dye, since it does not have pigments. And transparency is maintained even with strong ink intensity, with the exception of shades that are too dark.
Therefore, everything is fine with the use of alcohol inks, except for one thing that is worth knowing. If you overdo it with adding dye to the clay, the products may become sticky or areas with light spots will appear on them.
Characteristics of coloring compositions
Paint products are distinguished by their light resistance, which the paint labeling will help you understand. The lightfastness of paints is indicated by asterisks. The most suitable dyes are those with two or three stars.
For the base of the product, markings with a black square or a half-filled square are suitable - such colorful materials can get rid of the transparency of polymer clay. The white square indicates transparency, which will give the product the properties of cold porcelain. A crossed out white icon indicates that the colorant is translucent.
Master classes on painting polymer clay
Many craftsmen use various dye materials when working with polymer clay. This can be gouache, food coloring, watercolor, and stained glass paints. But, of course, acrylic and oil paints stand out among them.
However, these are masters, and as for beginners, they need to practice at home for a long time to learn how to paint plastic crafts well. And professional lessons can help them in mastering the secrets of mastery.
You can watch how to paint polymer clay at home in the following educational videos:
Is it possible to paint Keraplast?
Keraplast oil paints
(and self-hardening plastics in general)
to be painted
.
The oil is absorbed and the color pigment comes off like
snake skin. Traditionally, a boudoir doll's body is soft. It is sewn from fabric, cut and stuffed tightly with filler.
Interesting materials:
How to return from maternity leave correctly? How to froth milk as a barista? How to take academic leave correctly? How to take leave without pay? How to book a train ticket online? How to order a product on JOOM? How to properly freeze pink salmon? How to properly freeze shrimp? How to freeze egg whites correctly? How to freeze coffee correctly?
When the friendship of materials produces remarkable results
A reasonable question immediately arises: why paint polymer clay if it is sold in literally dozens of colors in the store.
- Well, firstly, for real artistic creativity even these two or three dozen are not enough.
Paint for polymer clay can radically change the principles of working with this material
- Secondly, paint provides many more possibilities for artistic design made from clay.
- Well, thirdly, when you throw yourself into the creative process, you can’t stop it; you want great impressions, searching for new things, experiments, and this is perhaps the most important thing. And I must say, this search more than pays for all the efforts expended.
Perhaps, at home, this question of how to paint polymer clay with your own hands will seem inappropriate, because the color palette of this material is not bad at all
But before you start working with polymer clay, you need to clearly understand what kind of material it is and what its capabilities are.
About polymer clay
The presented version of clay is nothing more than a type of plastic that is easily molded right in your hands like plasticine, but under the influence of elevated temperatures (usually in the oven) hardens. It is no coincidence that the material has another name - thermoplastic.
Among the advantages of thermoplastic:
- easy modeling of products of almost any size;
- large range of colors;
- the convenience of mixing samples of different colors and obtaining new shades, for example,
- red and yellow will result in orange;
- red already with green - brown;
- red with blue - purple;
- and gray can be obtained by the usual kneading of black and white.
- the ability to fix what is done for a long time after baking.
Polymer clay varies depending on how easy it is to work with your hands:
- soft and
- tough.
This material is represented on the market by no less than a dozen companies, but the two most reputable are:
- Eberhard Faber produces several types of clay under the Fimo brand:
- Soft - soft, which will not always suit the master of small parts, which turn out to be too fragile after baking;
- Classic - tougher.
- Polyform Products - with Sculpey brand products. This clay is more suitable for professionals; beginners may be put off by the too much flexibility of this clay when sculpting.
But, looking at existing achievements, you understand that the price of work increases significantly when acrylic paints for polymer clay come into play
About colors and ways to influence them
Thermoplastic itself is available in a large palette of colors, and this is the most important thing if you are going to actively work with color, and not stop at one large single-color piece (see also the article “Polymer and powder painting - the main features of the process”) .
At the same time, the following techniques are at your disposal:
- You can mix clay of different colors and create new colors.
- You can add acrylic paint, water-based paint of any color to a white clay sample, knead it thoroughly and get any suitable color.
And you don’t need any special effort to answer the question of how to paint polymer clay - a good brush and proven paint
- You can also use the above addition, but “play” with the sculpting without being too zealous, then the paint will not spread throughout the entire volume, creating absolutely amazing stains for new ideas.
Helpful advice! Working with any material for artistic creativity is always an experiment. Therefore, we strongly advise you to immediately set yourself up for a search.
Strictly speaking, there are no ready-made recipes for creating works that will be exhibited in the Hermitage literally the very next day. Some do not limit themselves to adding paints to the kneaded clay, they even add lipstick and are delighted with the results obtained.
- After all, you have acrylic paints at your disposal after creating and fixing the composition.
In the photo, the paint helped add a small nuance, which often contains the whole idea
Acrylic painting
Using acrylic paints is the most common way to paint polymer clay items.
What is necessary
As a matter of fact, you can create such paints yourself, you just need to mix:
- with gouache or watercolor acrylic varnish - and you get absolutely incredible delicate colors that you can control by changing the volume of mixed components;
- acrylic varnish already with PVA glue - as a result, the palette may not suit you too much, but you will get incredibly white paint of very high strength after hardening.
Here, on the contrary, there is a lot of paint, but the instructions for work are still the same - be careful and careful with the material
However, there is no great need to create your own paints. The market offers an incredibly wide selection of ready-made acrylic paints.
To work you will need:
- a finished clay product, not yet baked;
- acrylic paints - and this is the most suitable answer to the question of how to paint polymer clay;
- brushes, the bigger the better, of different sizes and of the highest quality possible, hair should not come off under any circumstances;
- palette - you can’t do without mixing colors and selecting them;
- a rough plan, a drawing in color of your future creation - this is already in the realm of creativity and ability; some people simply keep this plan that they dreamed of in their heads.
White clay is best suited for painting, as it allows for complete flight of imagination.
Immersion in work
Presenting the work itself is both simple and difficult.
Just because:
- we take the finished product in our hands, even before the oven, and begin to paint it, according to the idea, and constantly preparing the necessary paints;
- Let's not forget, after baking the colors will become a little darker;
- You can apply paint after the oven, but in this case it is best to pre-polish the surface;
- if you want to create a metal effect, you can mix acrylic solvent with pearl powder, apply the mixture to the product, let it dry and varnish;
- if clay is supposed to be painted, then it is chosen in a snow-white color, but we advise you to play with colors here too, because artists often do not paint it to create the main background, but simply use a primer of a certain color, on which the necessary strokes of paint are then applied;
- If the work takes place on a flat surface, then it is very convenient to first apply the design through a stencil.
You can’t do without a selection of colors
But it’s difficult, because the world of creativity:
- does not tolerate fuss and indifference;
- requires the ability to draw conclusions from one’s achievements and failures;
- requires being consistent and patient;
- and again, it requires learning and grasping new ideas on the fly.
Helpful advice! And again from the category of experiments. We advise you to try using watercolor paints for coloring, but in this case, be sure to apply it over a primer. Let's say - under no circumstances use oil paints, they will never dry completely.
But on the other hand, it still encourages you to experiment! Try using ink, they are also used. And to create a beautiful gradient, some experienced craftsmen use an aerosol.
Secrets of the masters
Over time, each master develops his own techniques for solving the problem of how to paint polymer clay.
Here are some of the most famous:
- If you want to make a doll or a product of similar complexity, then use Living Doll clay, which is the leader of preference among professional dollmakers. It is a little expensive compared to other options, but it is incredibly convenient to use and incredibly durable after firing. Specially produced only in light shades, counting on future painting.
In the end, this is the kind of work whose craftsmanship can only be envied
- If your goal is colored mosaic, then the best choice would be Premo brand clay. It does not crumble when working, it is often used for decorations. One very useful feature of Premo is that it is competitively friendly and can be easily mixed with other types of clays, increasing their strength.
What you need for sculpting
Many people are interested in how to sculpt from clay and what products even an inexperienced “master” can make.
The following video covers clay tools and where to start for beginners.
However, before starting work, you need to acquire available materials for modeling. These include the following items.
- 1. Metal string. It is convenient to separate small pieces from the overall array. The country should not be too thin, as it will easily injure your hand while working.
- 2. Special knife. It is easy for them to separate small pieces of clay. You can use an old kitchen knife, not very sharp and wide enough.
- 3. Flat wooden planks. You need to prepare in advance wooden boards of different calibers that will be used for rolling out pieces of clay.
- 4. Wooden rolling pin. It is convenient to roll out a prepared piece of material.
- 5. Set of stacks for modeling. They can be purchased at a specialty store.
A box with a variety of small items can also be useful. It needs to be filled with a variety of “junk” that is usually thrown away׃
- a piece of coarse fabric with a relief pattern;
- caps from pens or felt-tip pens;
- buttons;
- paper clips;
- toothpicks;
- empty old ballpoint pen refills;
- caps from baby cream or sparkling water, etc.
All these familiar and even no longer necessary things can, when pressed into the clay, leave exactly the imprint that will help give the finished look to a masterfully executed creation. The creative process involves not only manual dexterity and dexterity, but also creative thinking, coupled with imagination.
Firing clay products
The main condition for clay products to last for a long time is that they need to be fired. Clay will turn into ceramics only at a temperature of 850-900˚C. To prevent the product from exploding in the oven, it must be thoroughly dried so that it is not wet.
Home gas and electric ovens, as well as microwave ovens, are not suitable for roasting. However, do not despair - there is a way out. You can purchase special clay in the store that does not require firing, or you can arrange to have your products fired in a muffle furnace at any pottery workshop.
Artisanal firing
Those who love experiments can try firing their products in a fire. Since the temperature in it will only rise to 750˚C, the crafts will have to be kept in the fire for a long time, constantly maintaining the heat in it.
They dig a shallow hole in which the products are placed, and make a fire on top. However, there are not many people who want to resort to this method of firing, since the fire must be maintained for several hours. The quality of the fired product is checked by the sound made when tapped. If it is ringing, the firing was successful.