Acrylic paints are made from plastic and are suitable for painting not only on paper, but also on canvas, fabric, wood, glass or plastic. The technique of painting with acrylic can be mastered from scratch at any age. A master class for beginners in painting with acrylic paints is suitable for those who want to master basic techniques in one lesson and immediately create ready-made pictures.
Drawings with acrylic paints with honed skill are almost photographic in quality.
Getting started - preparing the palette, brushes and paints
To properly prepare your workplace and choose work clothes, you need to know the features of acrylic. When dry, it becomes water resistant. If the drops get on your shirt or on a wooden table, it will be impossible to clean them. Therefore, before starting work, you should put on an apron, wrap the table with cling film and cover the floor with thick paper. If acrylic does get on clothes or furniture during work, try to quickly wash the stain with water or fill it with solvent.
For work you will need the following materials:
- base: paper, cardboard, plywood or canvas;
- set of acrylic paints;
- thin and thick brushes;
- palette;
- glass of water.
For beginners, it is better to take thick paper with a rough texture or white cardboard as a basis: it is easier to draw on them. Having mastered the basics of acrylic technique, you can move on to canvas, wood and other materials.
If the painting surface is a little dark, prime it before starting work. Art and construction stores sell special white acrylic primer. Apply it evenly to the surface with a wide brush and let it dry completely before painting.
Acrylic paints are sold in individual tubes and in sets. For beginners, a set of 12 colors is suitable. It’s worth buying an additional jar or tube of white acrylic: this is the most popular color, it runs out earlier than others. For specific surfaces (fabric, wood, glass, plastic), it is worth choosing the appropriate set: the type of paint should be indicated on the box. Any paints are suitable for drawing on paper and white cardboard.
For those who are just learning to paint, it is recommended to choose brushes made from squirrel fur as a material, although brushes made from fox fur are more common on sale.
Palettes for acrylic paints are sold in art stores. Most often it is a white plastic board with a hole for your fingers. This palette is easily washed off from paint that has not had time to dry. Sometimes palettes are made of plexiglass: they are in no way inferior to plastic ones, but are heavier in weight. You can make your own palette from scrap materials (even from a disposable plastic plate).
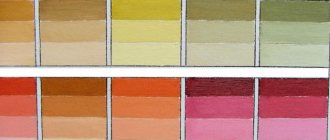
Before starting work, put a little paint from each jar on the palette. To make it convenient to mix colors, artists place white paint in the upper left corner, warm shades (yellow, orange, red, brown) along the upper border of the palette, cool colors (green, blue, purple) along the left border. It is better to lay out black paint after blue or purple.
Artistic brushes differ in size, shape (round or flat), composition (synthetic or natural), and hardness (bristles and synthetics are stiffer than ponies and squirrels). Since acrylic paints are dense and heavy, medium-hard synthetic brushes hold them better.
Beginner artists should stock up on 3-4 brushes of different sizes. A wide flat brush is convenient for painting the background. Use a wide round brush to make textured strokes. Medium brushes are useful for painting most objects, while thin brushes are useful for drawing details. High-quality round brushes, even large ones, have a thin, elegant tip. It allows the artist to change the thickness of the line and move from broad strokes to drawing small details without changing the tool.
Brushes should be rinsed in clean water. Pour water into 2 cups, so that in one you wash off most of the paint, and in the other you completely rinse your brushes. Renew the water regularly as it becomes dirty. Place a clean, dry cloth next to the cups to blot your brushes and remove excess moisture.
To ensure that the brushes last longer and the bristles do not deteriorate, you can purchase a brush washer in which each brush is secured in such a way that it is in the water but does not touch the bottom with the bristles.
Strawberries
You will need: pebbles, acrylic paints in red, black, white and green, a simple pencil, brushes, PVA glue, craft varnish.
Master Class
- Dilute PVA glue and water in a 1:1 ratio, this will be a primer.
- Cover the half stones with primer and wait until it hardens.
- Apply primer to the other half of each stone and wait until dry.
- Cover the halves of the stones with red paint, wait until dry and paint the rest.
- Draw leaves with a simple pencil and color them green.
- Apply small black stripes over the entire surface of the strawberry and wait until dry.
- Apply small white stripes next to the black ones and wait until dry.
- Cover the strawberries with varnish and wait until dry.
Strawberry pebbles are ready! I recommend watching this video!
How to draw on rocks. DIY
What can you paint with acrylic paints?
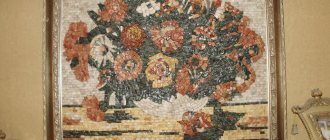
Acrylic is suitable for any idea. You can paint landscapes, still lifes or portraits from nature or copy from photographs. An art set with a palette of natural shades is suitable for conveying the beauty of nature and people as naturalistically as possible.
For fantastic scenes, it is better to additionally take a special set of decorative acrylic paints. They have specific properties (for example, a fluorescent glow or metallic luster) and are suitable for drawing details and bright accents.
With acrylic you can apply a decorative pattern to fabric or glass, paint wooden furniture or decorate plastic items. The dried drawing adheres to any surface quite reliably. An art store employee will tell you how to select materials for any design idea: from decorating leather shoes to decorating Christmas tree balls.
But from frequent contact with hands or other surfaces, the drawing will sooner or later be erased. Therefore, acrylic should not be used for painting silicone smartphone cases or cutlery: the paint will quickly crack or wear off.
Photographic quality drawing
High quality painting with acrylic paints
Drawing with acrylic paints
The art of realistic painting
Realistic drawing of animals with acrylic paints
Sketches with acrylic paints
Drawing as a method of self-expression
Interior paintings with acrylic paints
Basic principles of acrylic painting
Acrylic painting can be airy and transparent - like watercolor, dense and bright - like gouache, voluminous and rich - like oil. Beginners should first make a sketch in pencil, and then cover the drawing with paint. The easiest way is to take a wide brush or palette knife and fill the background with broad strokes, and then add small details.
To see the pencil sketch, you can add more water to the palette and create a light, translucent watercolor background, and then gradually paint over it. The more water you add, the lighter and more transparent your brushstrokes will be.
Brushes should be washed frequently and thoroughly. When acrylic dries, it becomes viscous, resulting in rough brush strokes. Do not leave dirty brushes: they will dry out unnoticed and become hopelessly damaged.
Use a spray bottle of water to keep your palette moist to keep your paints from drying out longer. But under no circumstances splash water on the paper: it will get wet and go in “waves.”
Leave the finished drawing on the table until completely dry. Carefully put the remaining clean paint that was not used during the painting process back into the jars. And if you need to take a short break during your painting session, simply cover your palette with cellophane or cling film.
Painting with foil
Description and examples
Another interesting unconventional drawing technique that has gained recognition among beginners and professional artists. And its meaning is simple. Take a small piece of foil from which a lump is formed. Then it is lowered. into paint and applied with dotted movements onto a sheet of paper or canvas.
There is another option when the paint is first applied in thick layers, and then it is shaded using crumpled foil.
Photo source - youtube.com
Typically, this technique uses acrylic paint or gouache. Landscapes are the best. A brush is used to work out small details.
The peculiarity of this technique is that the paint, under the influence of foil, acquires a heterogeneous texture and looks voluminous after drying.
Video tutorials on painting with foil
Here is a list of lessons that I found easy to review.
Moonlight night painted with foil
First, the author attaches a moon stencil (circle) to the paper to preserve a white background for it. Next, apply drops of paint around the moon. Using a wad of foil, shades the paint. The surface is textured. A lot of paint is applied and it takes the form of the curves of an improvised “brush”.
After the paint has dried, the artist begins to work with the texture of the moon, applying the paint in dotted movements.
Attention! To prevent layers of paint from mixing, you need to use different pieces of foil for different colors. For the background - one, for the moon - the second, and so on.
Smaller details, trees, a ballerina against the background of the moon are painted with a brush.
Spring bouquet painted with foil
And again my favorite lilac. In this lesson, the author mixes two painting techniques - sponge and foil. Using the first, the background is drawn, and using the second, the lilac. And this is justified. Flowers look voluminous against a shaded background. Their textures don't mix.
Winter night using foil painting technique
Romantic, atmospheric design, quite easy to reproduce.
Tips and tricks to help with acrylic painting
Acrylic dries quickly. Do not keep jars or tubes open while painting. It’s better to put the required amount of acrylic of all the shades that you plan to use in your work on the palette, close the containers tightly and open them next time only when the paint on the palette runs out.
To prevent the paint from drying out longer, use special acrylic solvents. Add a drop of thinner to the palette as you mix colors to achieve the desired shade. This will increase the drying time of the paint and make it more flexible.
When purchasing paints and solvents, ask how these types and brands fit together.
Acrylic has good covering properties (almost like gouache or oil). This means that you can paint with it in several layers to correct a bad part of the drawing. Unlike watercolor, acrylic allows you to paint with light shades over a dark background.
When drying, acrylic becomes noticeably darker. How much depends on the quality of the material and the manufacturer. Therefore, choose a shade that is a half-tone lighter than you need (add a drop of white when mixing shades). After drying, evaluate the result and, if necessary, darken the drawing.