Do I need to apply glue to non-woven wallpaper?
For example, it is generally not recommended to apply glue to heavy non-woven wallpaper, but only to the wall. Some wallpapers need to be spread with a thick layer and so that they are also saturated (lay there), the wall should also be coated, but for example, paper ones cannot be generously coated with glue and take time, you need to glue them right away, otherwise they will get wet.
Interesting materials:
How to obtain Russian citizenship through the registry office? How to obtain Russian citizenship if your husband is a Russian citizen? How to obtain Russian citizenship if you were born in Russia? How to obtain Russian citizenship if your wife is Russian? How can citizens of Belarus obtain Russian citizenship? How can a citizen of Kazakhstan obtain Russian citizenship? How can a Latvian citizen obtain Russian citizenship? How can a Moldovan citizen obtain Russian citizenship? How to obtain Russian citizenship for a citizen of Moldova 2020? How to obtain Russian citizenship for a citizen of Moldova?
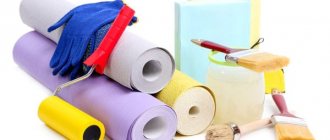
Tools for gluing non-woven wallpaper
Everyone who glues wallpaper themselves, with their own hands, has their own list of necessary tools. But if you are doing this for the first time, or are unhappy with past experience, you can use the following universal list.
Tools for gluing:
- Construction level (if there is a laser level - ideal);
- Roller with long pile;
- 5m tape measure;
- Plastic spatula for rolling wallpaper;
- A sharp knife for cutting wallpaper;
- Narrow spatula (metal);
- Pencil;
- Foam sponge;
- A bucket for glue and a bucket for water.
Basic tools for comfortable gluing of non-woven wallpaper
Perhaps some additional tools may be needed to prepare the walls. Wide wallpaper is glued using the same tools.
Where to apply wallpaper glue: on the wall or on the wallpaper
You can glue the wallpaper correctly and fully enjoy the beautiful appearance of the decorated walls, provided you follow certain gluing rules.
Those who are faced with the process of decorating walls with wallpaper for the first time often wonder: should glue be applied to the prepared wall or directly to the canvas?
The answer to the question is simple: the method of applying glue is determined by the type of wallpaper used.
Let's take a closer look at the main options.
Features of gluing non-woven wallpaper
Even if each instruction clearly states several times how to glue, with what glue, and in what order, people often decide to do it on their own.
However: always level and prime the wall. Always mark and cut the blades in advance. Always use special glue without experimenting with its composition.
Is it possible to glue paper wallpaper with non-woven glue?
If there is glue left over from a previous renovation, or for some reason you decided to glue paper wallpaper rather than non-woven wallpaper, then you can use non-woven glue.
Glue for non-woven wallpaper can also be used when gluing other types of wallpaper, but such glue must be diluted with a large amount of water
The only thing is that paper wallpaper is thinner in structure, so the glue for it should be lighter. In this case, when mixing non-woven glue, you need to pour more water so that it is not so heavy.
Is it possible to paste wallpaper on non-woven wallpaper?
It is not recommended to do this: there is extremely little chance of a good result.
You will need to remove old non-woven wallpaper, be it standard or wide meter. You can remove them if you go over the wallpaper with a needle roller and then moisten it.
Non-woven wallpaper can be easily removed using a steam generator, if you have one, this method will be the fastest
If you decide to use a steam generator, be sure to:
- Put on gloves (rubber);
- Tuck your sleeves into gloves;
- Protect the floor from water.
If the old wallpaper is not removed, the fresh glue will begin to be absorbed into the pores of the old wallpaper, softening the old layer of glue, which may cause bubbles to appear.
Why non-woven wallpaper peels off
There are several reasons that influence poor-quality wallpaper gluing.
Why do non-woven wallpaper still peel off:
- Poor wall preparation. Even if there are small holes in the wall, the wallpaper may peel off. All defects must be removed, the wall must be leveled and primed.
- Use of unsuitable materials. The wrong glue and the whole job might stop.
- Wrong sticker. Apply glue only to the wall, and only to that part of the wall that will need to be glued in the near future. Glue end to end.
Non-woven wallpaper can peel off if the surface on which it is pasted is poorly prepared
Also, do not resort to forced drying, otherwise the wallpaper will definitely come off. Sometimes this method is used if wide meter-long wallpaper is being glued. But such meter-long wallpaper is glued according to the same principle, and they are also afraid of forced drying.
Bubbles on non-woven wallpaper after gluing
How to glue non-woven wallpaper to prevent bubbles? They appear, as mentioned above, due to insufficient preparation of the wall.
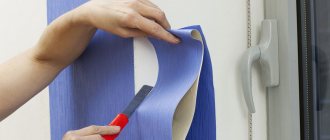
You can carefully correct the deformation after gluing non-woven wallpaper using glue and a utility knife.
To eliminate bubbles, you need:
- Make an incision on the bubble with a sharp stationery knife;
- After this, try to carefully straighten the wallpaper, fill the syringe with glue and squeeze it through the cut into the wallpaper;
- Straighten the piece of wallpaper well and press it against the wall with a clean cloth.
Wide meter-long wallpaper may also have bubbles after gluing; do not attempt to glue it alone, the risk of bubbles and peeling will be high.
What tools will you need?
You should prepare in advance. You will need equipment and tools. Before you start working with non-woven materials, you need to think about what kind of glue to use and what you will need for this. The process cannot complete successfully without:
- wide brushes or rollers for applying adhesive;
- wallpaper knives and a wide spatula for cutting the ends of the strips;
- special equipment (electronic levels, plumb lines or levels);
- containers for preparing glue;
- clean dry rags for smoothing the surface of the wallpaper;
- stationery scissors;
- narrow rubber rollers for rolling seams (joints);
- pencils or ballpoint pens for marking.
All of the above must be available. The list does not indicate the tools necessary for the preparatory work.
General rules for working with wallpaper glue
Regardless of whether the glue will be applied to the wall or to the canvas, it is important to adhere to certain recommendations:
By following certain rules for wallpapering, repair work will go quickly, and the result will please you with quality.
Is it possible to save money and use a paste made from flour and starch instead of wallpaper glue? Share your opinion in the comments.
Source
Finishing features
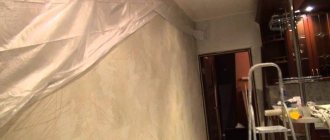
The wallpaper market is incredibly diverse. The types of trellises we are familiar with, for example, paper ones, need to be impregnated with an adhesive before installing them on the walls, after waiting a little for them to swell. Non-woven finishing materials are an exception to this rule. All that is necessary is to measure the length of the panel in advance and apply glue to the wall.
Important! Make sure that by the time you glue the canvas onto the wall surface, it does not have time to dry. To avoid this, coat the area in two layers or treat it with a liquid adhesive solution in advance.
How to glue vinyl wallpaper on non-woven backing video and photos
Vinyl wallpaper on a non-woven basis is becoming increasingly popular when renovating apartments and houses, and this is not surprising; they combine many positive qualities.
Vinyl wallpaper holds color well and does not fade over time, like paper wallpaper; the polyvinyl chloride layer is poorly saturated with water, which means they can be washed. Embossed vinyl wallpaper has a sound absorption effect, which adds comfort to the room.
Non-woven wallpaper does not need to be coated with glue during gluing. Non-woven fabric absorbs glue well, you can apply glue to the wall and apply wallpaper to it, this will be enough to get high-quality finished walls. This technology has several advantages: firstly, the walls are glued quickly and easily, and secondly, you can make overlaps on the ceiling and floor without fear of getting them dirty.
Due to the fact that there is no need to apply glue to the wallpaper, non-woven wallpaper is very easy to glue to the ceiling. It is enough to spread glue on the surface and carefully apply the wallpaper, gradually smoothing it with a spatula.
Vinyl wallpaper consists of two layers, the outer vinyl and the bottom - on a non-woven backing.
How to apply the composition correctly?
First, decide which composition to use for gluing. It is advisable to use the information printed on the wallpaper roll. The manufacturer indicates the type and brand of glue that is best suited for this type of wallpaper.
A prerequisite for obtaining a good result is impeccable cleanliness of the wall. The painted surface must be sanded and then washed off with a special product. After this, it is washed again with clean water and allowed to dry.
Important! The absorbent surface (for example, made of gypsum or drywall) must first be primed with a special compound.
Here are some tips to help you get everything done neatly:
- Prepare glue according to instructions.
- The beginning of gluing the canvases - at the request of the owner, is done from the window or doorway.
- Apply the adhesive mixture to the walls with a short-haired roller or wallpaper brush.
- The composition is not distributed exactly to the width of the roll, but with a small margin.
- Particular attention is paid to places near the baseboards and corners.
- To apply glue in these places, use a smaller brush.
Important! You can cover walls with non-woven fabrics in two ways: from a roll or by first cutting strips of the required length. The first method is more suitable for those who have experience in finishing work with this material.
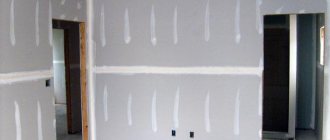
After installing the panel on the wall, you must carefully smooth it from the center to the edges. When smoothing, remove air bubbles. After this, cut off the excess part of the canvas located near the baseboard. This can only be done after the wallpaper has dried thoroughly.
Nonwoven paper-based
Among the many materials for interior decoration, it is worth highlighting non-woven wallpaper with a paper base. The canvases are suitable for any living space, except the bathroom and kitchen, because due to high humidity they are deformed. The material is attractive because it has increased wear resistance.
An interesting option, characterized by high strength, is non-woven fabric based on paper.
During the work, both the surface of the wall and each sheet of wallpaper are treated with glue. Non-woven wallpaper on a paper base is carefully applied joint to joint without creating cracks.
Tools and Process Steps
To work you will need the following tools:
- Brush. It is used to apply glue to narrow strips or along the edges.
- Foam roller. Rollers with artificial or natural fur can replace it, but this is the most comfortable one. The quality of the pasting largely depends on which roller is used for the job. Before first use, it must be well saturated with water.
- Bath. Necessary for rolling out the roller; it's easier to use than a whole bucket of glue.
- A rag or sponge made of foam rubber.
Glue preparation
The durability and quality of wall decoration with non-woven wallpaper directly depends on the type of adhesive chosen. He must:
- have good adhesion to trellises;
- diluted to a thick consistency, which allows it to be applied in a thin layer without smudges;
- do not leave marks when drying - do not turn yellow.
Only specialized glue satisfies such requirements - universal glue does not hold even light non-woven trellises well. Let us note here that there are two types of special glue: for light and heavy wallpaper.
Attention: heavy trellises are made of vinyl with a non-woven backing (vinyl trellises). Therefore, here we are talking only about glue for light (pure non-woven) types of wallpaper.
Which glue to choose
On the shelves of construction stores you can see a huge variety of brands of wallpaper glue for non-woven fabrics. But, due to the lack of reliable information about the quality characteristics of unfamiliar brands, it is better to buy popular brands.
"The Interlining Moment." The cheapest glue from recognizable brands, which is due to its Russian origin (pack of 250 g from 200 rubles, 500 g from 399 rubles). Suitable for all types of non-woven wallpaper, including heavy vinyl wallpaper.
Provides good sliding of the wallpaper sheet along the wall during joining. Contains additives against mold and mildew. Can be stored diluted for up to a week. At the same time, it also has disadvantages:
- Dilutes poorly - it is difficult to obtain a homogeneous mass;
- not suitable for trellises with a three-dimensional pattern - it requires dense rolling, which cannot be done with a rubber roller on embossed wallpaper (a wallpaper spatula cannot provide such force).
"Methylane Interlining ultra premium." Product of the famous German company Henkel. It is made from methylcellulose and natural resins, which provide reliable adhesion of all types of non-woven wallpaper to various types of walls (plasterboard, concrete, cork, brick, etc.). Easy to divorce.
Does not leave stains when applied to the front side. It has an important feature: it must be diluted to a thinner consistency than indicated on the package, as it dries quickly. It is in the middle price category - a pack of 250 g from 290 rubles. up to 350 rub., packaging weighing 500 g from 535 rub.
"Quelyd Special non-woven fabric". Produced in France. It has the highest price among all brands of glue for non-woven wallpaper (a 450 g package costs from 360 rubles). However, the price fully corresponds to the quality - professional finishers consider it an ideal means for gluing trellises:
- perfectly holds light and heavy wallpaper, with a smooth and voluminous pattern;
- easy to divorce;
- does not smell;
- does not flow down the wall during spreading;
- does not leave marks when it gets on the front side, etc.
The “PUFAS” line of adhesives for wallpaper with a non-woven base (5 types on sale) provides better adhesion between the trellises and the wall surface. It has a color indication, which helps with spreading - no omissions are allowed. When purchasing glue from this brand, you can choose a product for a specific wallpaper: smooth, corrugated, light, heavy.
In addition, we can recommend: “FliziLex”, “Exclusive Non-Woven”, “Kleo Non-Woven”.
How to calculate the number of glue packs
An important feature of glue for non-woven trellises is that the packaging indicates its consumption not per number of rolls of wallpaper, but per wall area in m2. Therefore, the calculation is done a little differently.
First, the area of the walls to be covered is determined. Then the result obtained is divided by the consumption in m2 indicated on the packaging. The result is rounded up.
How to divorce
To dilute the glue you will need:
- 10-12 liter capacity (plastic bucket, basin or bowl);
- warm (40-45°C) water (it will not dissolve in cold water; in hot water it will coagulate into insoluble lumps);
- an object that can be used to stir the glue (stick, whisk, mixer, electric drill, etc.);
- a tablespoon or measuring cup (an error of just 50 g of the powdery mass leads to complete rejection - the mixture is poured into the toilet).
The instructions are simple:
- warm water is poured into the basin (bucket) in the volume specified in the instructions - no more, no less;
- the required amount of powder mixture is measured;
- the water is stirred until a funnel forms with a stick or hand (power tools cannot form a funnel);
- the glue is slowly poured into the center of the swirling water;
- in this way the glue is stirred for another minute after all the dry mixture is in the water;
- It is advisable to carry out further stirring with a mixer or a drill with an attachment - they will break up all the small lumps, which is difficult to do by hand;
- After stirring is completed, the glue is allowed to brew and swell (14-16 minutes is enough), during which time it will take on a working consistency - it will look like jelly or thick sour cream.
Professional finishers recommend adding another 200 ml of water and mixing thoroughly (thick glue dries quickly). You need to add water within half an hour after starting stirring. If you violate this requirement, you will end up with water with floating jelly-like clots. That's it, the resulting glue is ready for use.