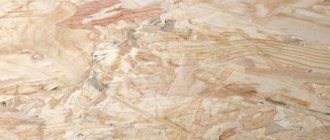
Drywall is one of the best-selling materials for finishing in apartments and houses. Its use requires additional cosmetic decoration, in the form of painting or wallpaper. Wallpapering without putty can have a negative impact in the future. Primer and putty are important processes during finishing work.
Features of drywall
GCR stands out for its health-safe properties and ease of use. It’s easy to get smooth walls with it, and the result is pleasing to the eye. At the same time, after work there is a minimal amount of garbage left, which is also a plus. You can also note the following advantages of drywall:
- Good sound insulation;
- Not highly flammable.
The material is lightweight, so it is easy to transport and work with.
GCR stands out for its health-safe properties and ease of use.
Why putty walls finished with gypsum plasterboard?
Puttying the surface is done mainly for the purpose of creating a solid base on which any type of wallpaper can be glued without problems. This stage also allows you to get:
- An additional layer that can be replaced with a new finishing coating if you want to change the finish, or if the old one is deformed;
- Leveling the wall;
- Protective layer;
- Not high cost;
- Safety.
The main task is to create a layer that can be replaced at any time; putty can also serve instead of a primer. An alternative to using putty is gluing glass wallpaper.
Puttying the surface is done mainly for the purpose of creating a solid base on which any type of wallpaper can be glued without problems.
Preparatory stage
The quality of further work directly depends on how the surface is prepared. The good news is that a plasterboard wall is already a perfectly flat surface. Therefore, the question of whether it is necessary to plaster drywall under wallpaper disappears. First, let's look at the option of preparing walls with old wallpaper already glued.
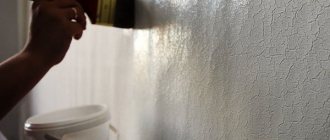
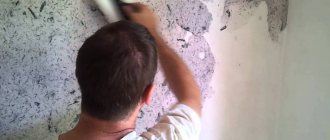
The main task is to remove the old coating from the surface. If the drywall was puttied before, then there should be no problems with this stage. How to remove old wallpaper from drywall? To do this, you can use a special removal composition.
Another option is cheaper. You need to moisten the entire surface with warm water. After some time, the finish is removed using a regular spatula. The end result should be a perfectly flat surface, without wallpaper, just putty walls. All that remains is to thoroughly clean the surface, prime it and start gluing new canvases (if the putty layer has not been damaged anywhere and does not lag behind the surface, otherwise that area needs to be repaired).
Can be glued without putty or not?
Sometimes it may be necessary to save time and, in the absence of proper experience, to skip the stage of puttying walls. Then you will have to mask the remaining defects on the surface by gluing high-density wallpaper, otherwise they will show through the material. In this case, you will also have to prime the surface twice, and it is recommended to add water-based paint to the primer composition for applying the second layer. Make sure that the joints of the gypsum boards do not intersect with the joints of the wallpaper.
You will have to mask the remaining defects on the surface by gluing high-density wallpaper, otherwise they will show through the material.
How to glue non-woven wallpaper
Liquid wallpaper must be prepared strictly according to the instructions. Before gluing, you must pay attention to priming in order to obtain better adhesion of the material. You need to stick non-woven wallpaper using the standard method, also using wall reinforcement and putty; the final step is to apply a primer layer.
You need to stick non-woven wallpaper using the standard method, also using wall reinforcement and putty.
How to glue vinyl wallpaper onto drywall
For vinyl wallpaper, it is better to choose the glue specified by the manufacturer, or regular glue of high quality. You can stick them on a pre-primed surface that has dried well. The places where the sheets of drywall and wallpaper are joined should not coincide.
For vinyl wallpaper, it is better to choose the glue specified by the manufacturer, or regular glue of high quality.
Wallpaper for painting
Wallpaper for painting is applied end-to-end, so the wall must be perfectly level. The surface is first coated with a deep penetration primer.
Wallpaper for painting is applied end-to-end, so the wall must be perfectly level.
Paper wallpaper
The joints must be sealed using serpyanka or paper tape. In addition, you should pay attention to the places where they are secured so that when smoothing the material you do not touch them. Priming is carried out in two or three layers; it is better to glue the wallpaper using standard glue. The material must be glued end-to-end or in an invoice.
The material must be glued end-to-end or in an invoice.
How to glue photo wallpaper
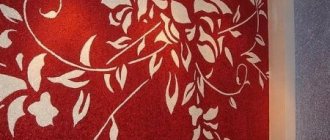
Photo wallpaper requires an ideal surface; unputtyed areas will stand out strongly in the picture. Therefore, it is undesirable to exclude this stage. Before gluing photo wallpaper onto plasterboard sheets, you need to mark the location of the pattern. The glue is selected specially for the type of wallpaper.
Photo wallpaper requires an ideal surface; unputtyed areas will stand out strongly in the picture.
Gluing without the use of strengthening mixtures
The walls must be dry, the primer must dry for at least 24 hours. Wet spots are darker areas against a light background. Under no circumstances should you glue wallpaper to wet walls ; these places will come off later or become moldy and blackened.
Also, when sticking wallpaper, you must follow simple rules:
The wall must be clean , without various spots and debris, you can carefully go over it with your palm or with a lamp. The tape should be the same color as the drywall, for which you can add a little light dye to the primer to give the surface one tone. For glue, you need to use clean dishes that have not been used for priming, free of dust and dirt; they need to be rinsed well before use. Dust and debris will become limp and subsequently the wallpaper will not hold up as well. as much as possible or remove all black pencil marks, name, drywall logo and the like. For thick wallpaper this is not a problem, but if there is thin, light wallpaper, then everything will show through. Before gluing wallpaper onto drywall without using putty, seal the cracks with reinforced self-adhesive tape , and over it with joining tape. This will help minimize the lack of putty in the walls . It is highly advisable to treat the walls with a primer before wallpapering. A special emphasis can be placed on the wall along which the light will slide. You don’t have to pay much attention to walls that don’t have direct sunlight; minor imperfections won’t be visible on them. But if a lamp hangs on the wall, then all the defects and even the debris that was in the adhesive mass will be clearly visible under it. If a 2-3 mm gap appeared between the wallpaper during the sticking process, which we noticed too late, it is better not to touch it, and not to try to forcefully pull the wallpaper and hide it. The next day the gap will appear again. correct and carefully inspect the wallpaper , before the glue has yet hardened .
Pasting without putty on primer
Priming sheets of drywall helps to avoid the surface of the material from being soaked with glue and will create a film against moisture getting on the gypsum board. Removing the old finish from a surface on which a primer has been applied will be easier, but it is possible that in some places the material itself will also be removed.
A primer coating can help prevent defects from appearing on the wallpaper.
Priming sheets of drywall helps to avoid the surface of the material from being soaked with glue and will create a film against moisture getting on the gypsum board.
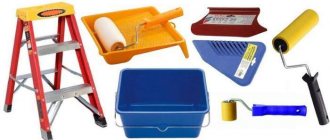
Tools and materials for work
To get started, you first need to take care of the necessary tools and materials. For this process you need to prepare:
- Painting knife or scissors;
- Tape measures and marker for marking;
- A spatula for sealing seams and a plastic spatula for smoothing wallpaper;
- Serpyankas of different sizes;
- Wallpaper and glue for them;
- Reinforcing mesh;
- Primer.
To get started, you first need to take care of the necessary tools and materials.
Where does gluing begin?
For a new premises you need to do the following:
- The wall is checked for flaws and they are eliminated.
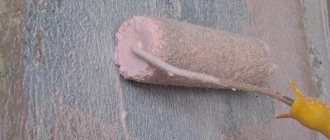
- The sheets are primed; it is better to work with a brush in the fastening and joining areas.
- The joints are reinforced and the mesh is secured using a special mixture.
- After the layer has dried, small defects are eliminated with sandpaper.
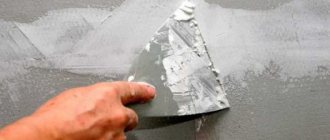
- The fastening points are covered with putty, and after drying they are cleaned.
- All fasteners and joints are covered with another layer of primer solution.
- All markings must be covered with putty.
After preparation, a vertical strip is drawn on the surface with a level, the length for cutting the wallpaper is measured, 5 cm is added to it. The adhesive solution is prepared in advance according to the instructions.
The glue is applied both to the surface and to the strips; it is possible to apply glue only to the surface, it depends on the type of wallpaper. Gluing is done from top to bottom, the strips are carefully smoothed out. They are glued end to end.
Gluing is done from top to bottom, the strips are carefully smoothed out.
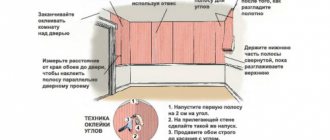
How to glue in corners
Carefully apply the adhesive solution in the corners using a brush, measure the distance from the sheet of wallpaper to the corner in order to cut the appropriate width. To the measurement you should add 5-15 centimeters to enter the adjacent wall when working with an internal corner, and 2-3 cm for an external one.
On the adjacent wall, after gluing the strip, its width is measured and a vertical line is made. It will become a guide for gluing another strip, overlapped.
Carefully apply the adhesive solution in the corners using a brush, measure the distance from the sheet of wallpaper to the corner in order to cut the appropriate width.
How to stick under the baseboard
Flexible and soft ceiling plinths are glued to the material using liquid nails. If the skirting boards are already installed, then the finishing material is glued onto it. Using a spatula, the baseboard is moved aside to slide the wallpaper under it. Excess parts are cut off. The baseboards on the floor are fixed on top of the finishing, leaving a couple of centimeters of material underneath them.
If the skirting boards are already installed, then the finishing material is glued onto it.
Conclusion
Wallpapering on drywall can be done either with careful preliminary preparation of the surface or without putty. The main requirement for a wall to be covered is its evenness, smoothness and cleanliness.
When working with any wallpaper, you should consider options for future renovation of the room . If you soon have a desire, for example, to decorate a wall with decorative tiles, it makes sense to think about the possibility of removing the wallpaper before hanging it.
A variety of finishing technologies and decorative solutions today make it possible to paste plasterboard walls without resorting to putty, which will significantly save effort, time and money.
Features and Recommendations
Important recommendations for this process that will help you complete the perfect repair:
- You should start gluing from the door or window opening;
- The material must be cut on a clean horizontal surface;
- It is necessary to completely remove air from under the wallpaper;
- Excess glue must be wiped off immediately;
- Trimming the excess part of the strip is done under the ruler with a knife.
The material must be cut on a clean, horizontal surface.
Wallpaper under drywall without putty can be glued, but this is not advisable, because unsightly defects may appear on the surface. And the appearance of the coating will be ruined. You should work slowly, paying special attention to preparation. Then the decoration of the walls in the country house or at home will delight the eyes of the owners.
Gluing non-woven wallpaper
Before proceeding to the procedure of gluing non-woven wallpaper, the walls must be prepared as follows:
- carefully reinforce all joints;
- cover the drywall with a generous layer of primer mixture;
- after priming, cover the walls with gypsum putty a couple of millimeters thick;
- Apply a second coat of primer.
If you do not follow these recommendations, there is a high probability that the drywall will show through the non-woven wall finishing.