Why do you need a primer for walls?
Practice shows that the final result of wall finishing depends 80% on the correctly selected primer material. If the mixture is chosen incorrectly, or the surface coating is applied to an unprimed wall, there is a high probability that the applied plaster will soon fall off or crack, the paint will peel off, the wood will begin to rot, and a layer of rust will appear on the metal. So, why do you need primer treatment?
- Improves adhesion . The key function of the primer is to create reliable adhesion between the main surface and the finishing material. Thanks to the primer, the paint or putty lasts for years.
- Strengthens the work surface. Some walls have a weak surface, which means they crack and collapse. The primer penetrates deep into the surface, holds it together and creates reliable support for the exterior finish.
- Antiseptic effect. Primer treatment protects walls, especially wooden or damp concrete ones, from the appearance of fungus and mold.
- Corrosion protection. Applying primer mixtures to a metal wall protects the metal from corrosion.
- Saves finishing materials. Applying paint, varnish or liquid glass to a primed surface allows you to save up to 40% of materials due to the fact that they are not absorbed.
- Moisture protection. The destruction of materials begins with the penetration of moisture, and the primer becomes a reliable protection against its penetration.
- Durability. The finishing material applied to the primed surface lasts for many years without peeling or falling off.
- Easy removal of the layer during the next repair. Having treated the wall with a primer, during subsequent repairs it will be much easier to remove the previous layer.
Primer or primer
Primer, or as it is also called primer, can strengthen the surface and make it possible to uniformly apply various materials. Apply to the surface before applying plaster, putty, paint, various adhesives for wallpaper and tiles. A good primer will ensure high-quality adhesion of the base to the materials that will be applied on top. The primer also allows you to significantly save on the consumption of paints and varnishes, and will prevent the appearance of pathogenic fungi and mold. By applying primer to the surface to be painted, you can achieve excellent quality of the final result.
The time has long passed when builders were forced to use only one type of primer for all types of work. You can choose a primer for a specific case; there are a large number of brands of manufacturers of these products on the market.
The choice of primer depends on what materials you want to use and what surface will be treated. It is also worth paying attention to the fact that the primer and paint are on the same base, this will avoid unpleasant surprises later. That is, water-dispersed and acrylic paints are best applied over silt-based water-soluble primers. It is best to treat concrete, putties, drywall, plaster, bricks, and so on with such primers. On a primed surface, the paint will adhere much better and last longer.
Acrylic primers are divided into two types - some penetrate into the structure of the surface, while others simply strengthen it, preventing it from collapsing. Penetrating primers penetrate the surface using small particles, while strengthening primers strengthen using large particles. Now primers with deeply penetrating properties have appeared on the market; such primers penetrate approximately 1.0 cm, thereby strengthening it strongly throughout its entire volume. This compares favorably with strengthening primer, which simply, roughly speaking, glues the coated surface together. But this does not mean that this primer needs to be used everywhere; each has its own area of application, where certain qualities come to the fore. Deep primer is used primarily on non-porous substrates such as brick or drywall. They are also widely used before applying tile adhesives or plaster. Strengthening primers are applied mainly before painting or wallpapering on puttied and plastered surfaces.
Composition of primer mixtures
All primer mixtures have a similar set of components, which may differ depending on the existing surface or the desired result.
Let's look at them.
- The basis. There can be three types: organic, mineral or polymer. Often, the base is cement, lime or gypsum. The main component is responsible for the adhesion of soil to surfaces.
- Liquid component. Typically, water is used as the liquid. It is already present in ready-made mixtures, and if you purchase a powder composition, it is enough to dilute it to the desired consistency. This will allow the soil to better penetrate deep into the material.
- Moisture-repellent substances. They prevent the penetration of moisture into the work surface, thereby increasing its durability.
- Adhesives. Designed to increase the adhesive properties of the material.
- Antibacterial additives. Prevents the appearance of mold and mildew on the walls.
In addition, depending on the purpose of the primer and the existing surface, various polymers, resins, bitumen and oils, insulators, drying accelerators and other specific components can be added to the composition.
Important! When finishing a new building, it is advisable to apply 3 layers of primer to the walls: before leveling, on top of the rough leveling layer and on top of the finishing layer.
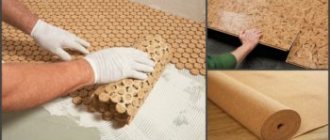
Deep penetration primer
The primer is made from various solvents, drying oil and resin. In addition, various fillers and pigments are added to the composition. It is impossible to find a universal primer that would suit all surfaces. Therefore, today on the building materials market you can find products designed for different purposes.
One of the widespread types is deep penetration, which has absorbent properties and strengthens the surface well.
This allows you to save on building materials, since less putty or paint is used. This primer is a multicomponent substance, the basis of which is water, as well as polymer elements that allow it to penetrate deep into the base. This material is often used for interior decoration. Sometimes the composition is used for facade work. It is used to treat concrete or brick surfaces and even drywall. This finishing material is applied using a brush or roller.
This primer mixture is resistant to low temperatures. However, when applying it, it is necessary to observe the temperature and humidity conditions in the room. The primer contains latex, silicone agents and antiseptic additives that help repel moisture and prevent the appearance of mold on the applied surface.
Types of primer mixtures
Primers for walls have many varieties, and therefore we will further talk about the features of each mixture, paying attention to their advantages and disadvantages.
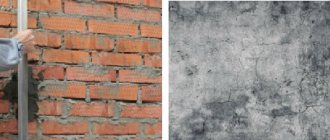
— Mineral primer. This is the most common among all primer mixtures. It is based on natural components, primarily cement, which makes this material universal and can be applied to literally any surface. Experience shows that for porous surfaces such as limestone or plaster, a mineral primer is an ideal option. In addition, it is distinguished by durability, UV resistance and the ability to withstand moisture.
— Acrylic primer. This primer mixture contains acrylic polymers. Thanks to this feature, the material is able to penetrate deeply into the working surface, be it wood, brick or concrete, and reliably bind the fibers. Having treated the wall with such a primer, you don’t have to worry about cracks appearing on it or the putty falling off. Acrylic primers are also available as water-based. This mixture is used to prepare walls for work with water-based paints and enamels.
— Alkyd primer. This material is based on polyurethane, polyvinyl chloride, polystyrene, various dyes and acetate components. Obviously, this composition cannot be called environmentally friendly. However, it impresses with other things, namely its anti-corrosion properties and the ability to be applied to any surface, including glass, steel and fiberglass. However, it should be taken into account that the drying time of such a primer is 12-16 hours.
Important! Any glypthal, polyurethane or enamel primers are varieties of alkyd.
— Epoxy primer
The basis of such a mixture is resins, and chemical components are used as additives. The resin is designed to protect the work surface from aggressive environmental influences, protect the wall from moisture and prevent the formation of mold. Obviously, it is optimal to purchase such a primer for exterior finishing work. As an option, given the pronounced moisture resistance, epoxy primer is used for finishing the kitchen and bathroom.
But the most important advantage of this mixture is its resistance to damage and high temperatures. This may be why epoxy primer is chosen to prepare metal structures for subsequent painting.
— Silicone primer
This composition implies obtaining the most durable of all primer coatings. It not only perfectly strengthens the working wall, but also reliably holds finishing materials, especially silicone-based paints. One has only to note that the chemical composition of this mixture does not allow working with it indoors. Silicone primer was created for external structures, because it can be used to protect the facade of a building from negative external influences, including rain, snow and fog.
Important! You should work with silicone primer carefully, and only with the use of protective equipment, because this material is toxic.
— Silicate primer
Silicate primer is produced on the basis of potassium liquid glass, and is used mainly for exterior finishing of buildings. In this case, the base can be concrete, brick or even plastered. Moreover, this material fits perfectly on damp walls of basements and underground tunnels, which is why it is widely used in the construction of underground communications.
— Quartz primer
The basis of this mixture is quartz sand, and this is a real advantage of this primer over other types of preparatory mixtures. The fact is that quartz provides the necessary surface roughness, which greatly increases the adhesion of the finishing coating to the main surface. We can say that the quartz mixture performs the main function of a primer coating “excellently”.
And quartz primer differs from others in its color. Thanks to the presence of grains of quartz sand, the primer applied to the wall creates harmony between the absorption and reflection of light, which means that by choosing the right color of the topcoat, you can get an amazing decorative effect.
— Phosphate primer
This is a specific coating, consisting of many different components and designed to prepare metal surfaces for finishing. Obviously, such a mixture is designed for use outside the building and boasts its anti-corrosion properties. By the way, aluminum primer can also be classified as a phosphate primer, which is sold in the form of an aerosol and, when applied, gives metal products a characteristic gloss.
Important! Before treating the metal, the phosphate primer is diluted with a special acid thinner, which is purchased as a kit.
— Shellac primer
This is another specific type of primer, which is produced on the basis of the milky juice of insects in combination with methyl alcohol. It was developed specifically for processing wood, and to be precise, for coating the cuts of branches on beams and boards. This treatment prevents the release of wood resins, which is extremely important when making steam rooms in baths or saunas. Most often, shellac primer is used to work with water-soluble stains.
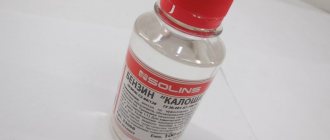
— Bitumen primer
This name hides a whole group of preparatory coatings designed to treat floor coverings. Practice shows that bitumen primer is ideal for concrete floors, floor screeds and even wooden floors.
Obviously, the compositions for different floor coverings can differ significantly and include mineral mixtures, polymers, rubber waste, all kinds of adhesives and even gasoline. Considering this composition, it becomes clear that it is highly toxic, which means that it can only be applied to the floor in special clothing, using gloves, a respirator and safety glasses.
Penetration rate
Based on the degree of penetration, primers are divided into two main types:
- Surface primers
This type of preparatory mixtures is designed to fill surface cracks and pores in the working surface, and therefore create a solid canvas on which the finishing material will be better fixed. This primer creates an even, rough layer on the surface, thanks to which the adhesive properties of the working surface are improved, and 50% less of the applied paint or varnish is wasted.
- Deep penetration
These sweeps are used in cases where it is necessary to finish a loose, crumbling surface consisting of sandstone or other material with a fine fraction. Such a working surface requires strengthening, and a deep penetration primer will come in handy here. When applied, the primer is absorbed into the main surface, penetrates up to 10 centimeters deep and bonds the particles of the material together, making it a single whole. Practice shows that this treatment is especially relevant when preparing drywall, brick, concrete and plaster, cement and cinder blocks.
Purpose
Primer mixtures differ according to their intended purpose. They are:
- Primer for wood
This material is simply necessary for those who are engaged in the construction of wooden buildings. Wood is a capricious material that is easily susceptible to rot and pests, and therefore it must be treated with special primer coatings. And given that wood has an extremely high degree of absorption of adhesives, varnishes and paints, primer treatment can significantly reduce the consumption of finishing materials. It is only important to take into account that wood also absorbs soil well, which means that before applying the main layer you will have to go through the primer 2-3 times.
The mixture chosen can be mineral, acrylic or oil based. It is only important that it is light and has antifungal properties.
- Primer for metal
These mixtures contain additives that can protect metal surfaces from corrosion and moisture penetration, which is the main cause of rust. One-component compositions such as shellac or phosphate are suitable for this purpose.
- Primer for plaster
It is no secret that plaster easily absorbs moisture and is damaged by mechanical stress, which means that such a surface should be thoroughly strengthened before finishing. The best solution for this is a special primer for plaster, which contains adhesive, antibacterial and water-repellent components.
- Universal primer
A universal primer suitable for most known surfaces can be applied to a non-specific material. Typically, the choice in favor of this mixture is made when processing chipboard and fiberboard, OSB boards, plasterboard and plywood.
- Betonkontakt
From the name of the material you can understand that it is used for processing concrete, in particular, floor coverings. Made on the basis of latex, silicate, liquid glass or bitumen, such soil lays on the subfloor with a dense film, protecting it from subsequent saturation with moisture. Moreover, thanks to such a primer, moisture will not escape from the screed, which will prevent it from drying out and cracking.
Place of application
Depending on the place of application, there are two types of primers:
- For interior decoration
This category includes environmentally friendly primer mixtures that do not emit toxic substances and are not harmful to health. You can read about these features on the packaging of the building material.
- For outdoor use
Solutions for external use are much more powerful in their characteristics, because they must protect the surface being treated from negative natural phenomena, including rain, fog, ultraviolet radiation, low and high temperatures, as well as mechanical influences.
Important! Exterior primers should not be used indoors for two reasons. Firstly, most of them contain harmful substances, and secondly, such a solution creates a dense film on the walls of the room, interfering with air exchange and provoking a “thermos” effect.
What kind of soil? How does he work?
Let's imagine what would happen if painters did not use a primer when painting. Paint would be applied to the bare metal, which had been previously treated, cleaned and degreased... And it would begin to peel off and bubble, like, for example, leather after a couple of days in Sochi. And the point is not that the paint is bad or the metal is wrong, but that these materials have rather weak adhesive properties among themselves - they cannot simply be bonded to each other. Plus, any contact with hard objects would soon lead to corrosion.
To avoid problems with corrosion and adhesion, engineers came up with such a thing as a primer. This is an intermediate layer between metal and paint, which helps the latter to better adhere to body parts and not fall off in the process. In general, a primer solves both problems: adhesive and anti-corrosion. If a chip occurs, the primer will prevent external irritants from getting on the metal and forming rust.
How to choose the right primer?
Now let's turn our attention to important aspects that will help you make the right choice when purchasing a primer mixture.
- When choosing a primer mixture, decide whether this is façade work or finishing work taking place indoors. Next, evaluate whether the surface being treated needs protection from moisture, sunlight, corrosion or mechanical stress. Having answered all the questions, it will be easier for you to make the right choice.
- Pay attention to the area. If it is large, it is better to choose a dense primer that does not have to be applied more than two layers. Even if the material is more expensive, in the end you will still save, both in finance and in time.
- When choosing a primer, try to match it as closely as possible to the material of the main working surface. If this is not possible, try to match the finishing material with the base primer. In this regard, it is better to combine a mineral-based emulsion with a wall made from minerals of natural origin, a synthetic primer with a synthetic base, and an alkyd primer with alkyd paint.
- When processing a fresh putty, brick, concrete or cement surface, you must opt for mineral soil. And for mineral plaster only mineral primer is suitable. It is this material that provides improved adhesion to the finishing material and provides the plaster with resistance to negative environmental conditions.
- If the exterior of the room is to be finished, the primer must have a water-repellent base. Indoors, on the contrary, you need a quick-drying primer that will not allow the plaster to get wet and move off.
- When preparing a previously painted surface, you should choose a primer based on copper sulfate. Such special mixtures etch hard-to-clean surfaces, after which they can be repainted.
- Weak, porous and crumbling surfaces, as well as materials that easily absorb moisture, must be treated with a deep penetration primer. It is better to choose from silicone or acrylic based primers. Or you can opt for a quartz mixture with dispersion additives. When it comes to applying enamels for decorative finishing, the wall should be strengthened with a deep-penetrating alkyd compound.
- Alkyd, phosphate or epoxy primers are suitable for working with metal surfaces and can provide anti-corrosion protection.
- The most problematic areas and areas with moisture accumulation (for example, doors and windows) should be treated with an adhesive matte primer. This material will provide excellent adhesion not only on wood, but also on plastic or glass.
- When you have to process a combination of wood and metal, it is wise to purchase an alkyd-based primer with the presence of stabilizers and solvents.
- Wooden surfaces are finished using compounds containing antiseptics. If there is a need to treat knots, an epoxy primer will be required. It is undesirable to mix such mixtures, which means you should evaluate which soil will be most suitable.
- To finish wood walls, you should choose a varnish-based primer.
What primer should I use?
When choosing a primer, it is important to consider:
- Type of base.
- Type of finishing material.
To achieve a high-quality result, you need to select a primer that will most effectively connect the base with the cladding or act as the necessary intermediate layer.
When deciding which primer to use, take into account the conditions of finishing work and operation. Of great importance are: temperature conditions, humidity levels, ventilation or airing efficiency, and the presence of contact with water.
Tips for working with primer
Primer is a fairly simple material that is easy to work with. However, some tips will be useful for those who are faced with repairs for the first time.
1. Without preparation, it will not be possible to carry out normal wall finishing. Paint, putty and other finishing materials will very soon warp, peel and simply fall away. Therefore, you need to start repairs by removing the old layer of material. For this, water and various devices are used - spatulas, brushes, scrapers.
2. It is important to remove dust and degrease the cleaned walls, because finishing materials will not adhere to a greasy surface. Dust can be removed with a broom or vacuum cleaner, but greasy stains need to be dealt with with special solutions or an emulsion of water and laundry soap.
3. Some primers are toxic, and if you decide to work with one, take safety precautions. Wear a protective suit, goggles, a respirator and rubber gloves. Avoid getting the mixture into your eyes.
4. When working with primer, prevent drops of the mixture from getting on furniture and finishing materials. Be sure to cover them from spills and splashes, because after drying, white indelible stains may remain on the floor and furniture.
5. An important stage of preparation is the choice of tool. One of the most popular tools in this regard is a regular synthetic brush. With its help, you can process both planes and hard-to-reach places. If you have to cover a large flat wall or floor with soil, it is better to choose a roller. Thanks to it, primer consumption will noticeably decrease. The ceiling is also processed with a roller, but with a long handle, and if necessary, use a stepladder.
6. When working with a roller, remember that the first layer is applied in one direction, without gaps. If it is necessary to apply a second layer, it is applied perpendicular to the first. But it is better to avoid spraying the soil with a spray bottle. Primer dust flies in different directions and can damage furniture, windows and other interior details. And spraying the mixture on the floor is completely prohibited. Floor primers have a viscous consistency and quickly clog the spray nozzle.
7. You can apply finishing material, be it paint, liquid wallpaper or whitewash, only after the primer has completely dried. Therefore, check the instructions described on the packaging; it is best to let the soil dry for 24 hours. If necessary, use a fan or heater to speed up drying. It is only important not to open the windows and not create a draft.
8. To check the readiness of the primed wall, simply fly masking tape to it. It simply won’t stick to a wet surface, but will hold tightly to a dry surface.
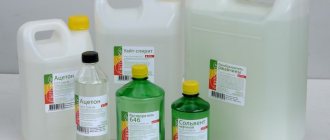
The best primer manufacturers
In order not to get lost in the selection when visiting a construction supermarket, we will give a description of the most attractive primer mixtures according to observers.
— Tikkurila Otex. A universal primer that is a recognized leader in the processing of metal coatings. In addition, this material is the best in terms of price and quality ratio. What also captivates buyers is its quick drying. True, the consumption of such a primer is 0.7 liters per sq.m. leaves much to be desired.
— Ceresit 17. One of the best primers for deep penetration and working with concrete. It is characterized by high frost resistance, and therefore behaves well during outdoor work. True, users note an unpleasant odor and a rather high cost, but experts call Ceresit 17 the best primer for wallpaper.
— Eskaro Aquastop Professional. A true leader among primer mixtures for exterior use. This is a moisture-proofing material that provides reliable waterproofing of literally any surface being treated. The advantages include a high drying speed. The only thing that stops buyers is the too high price.
— Belinka Base. The best primer for wooden coverings made in Slovenia. The material based on alkyd resins penetrates deeply into the wood and perfectly protects it from the growth of fungus and rot. These advantages do not prevent such a primer from having a low price, which is why buyers love it so much. It is only important to remember that Belinka Base emits a strong odor when working and takes at least 24 hours to dry.
How to properly dilute the primer
— One-component primer. If you have a one-component primer, before use it must be diluted with drying oil, solvent or water.
— Two-component primer. In a two-component material, first add a hardener and then a thinner according to the instructions.
— Dry water-soluble primer. If you have a dry water-soluble primer, simply add water to it in a 4:1 ratio.
— Alkyd primers. Thinners for alkyd primers are solvents of grade 649 or 650. Xylene or solvent in a 1:1 ratio is also suitable
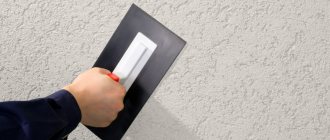
How to apply primer
- Prepare the work surface by removing dust and dirt. Wash off the whitewash from the wallpaper with water, wet the wallpaper with water and remove with a spatula.
- Pay attention to the air temperature, which should be within +5...+30°C.
- Prepare a brush, roller and tray for the primer mixture. If necessary, have a stepladder.
- Dilute the primer according to the instructions (if necessary), or simply mix it well (if it was sold ready-made).
- Pour the working mixture into the tray, soak the roller in it and start rolling it over the wall, spreading the primer in an even layer. Make sure that it does not splash or flow down the wall.
- Carefully coat the wall with primer, leaving no dry areas. For hard-to-reach places it is better to use a brush.
- Once the entire wall has been treated, allow the primer to dry for at least 3 hours (the exact time is indicated in the instructions), and apply a second coat. For high-quality surface preparation, it is necessary to apply at least 2 layers of primer.
- When the second layer is completely dry, you can begin applying paint, wallpapering and other finishing touches.
Primer is an important finishing material that should not be neglected. With the proper approach, it will ensure the durability of your renovation, and even years later it will delight you with a nice finish!
Basic rules for using primer
To ensure high efficiency of using the primer, you must follow certain rules and requirements for its use:
- You cannot purchase a primer with an expired or expiring shelf life, as the quality of the solution will be reduced.
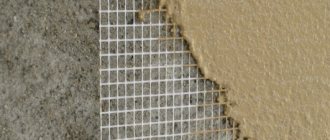
- Before applying the primer, you should prepare the surface to be treated, which includes cleaning it, eliminating blisters and peelings of old coatings and plaster, deepening and widening the cracks that have formed.
- When applying the primer with a roller, brush or spray gun, you must ensure uniform application without skipping the front and end sections.
- If the solution is quickly and strongly absorbed by the surface being treated, a second layer of primer must be applied after the first layer has dried.
- After applying the primer, you need to give it time to dry completely, the duration of which depends on the composition of the primer and external conditions, room humidity and temperature.
Inexperienced homeowners should remember that using a primer is always better than ignoring it. The principle “you can’t spoil porridge with oil” applies here, and the quality of the finish only improves with it.