- December 31, 2020
- Construction
- Nina Promyshlnikova
When an apartment owner begins to repair the floor, he thinks about which self-leveling floor leveler is best to use as a coating. To prepare the base, you need to stock up on mixtures that harden quickly. Such compositions are used as floor leveling for laying linoleum, ceramic tiles and other coatings that close cracks in concrete, filling the floor area.
Such mixtures are called self-leveling, or floor levelers. This modern material has replaced cement and sand screed. The advantage of a self-leveling floor leveler is that it is a ready-made solution that can be used by diluting it with water. The mixtures are different, each performs its own tasks.
In order not to make a mistake when buying a leveler, you need to know its varieties.
Types of levelers
Before purchasing a composition, you need to find out which self-leveling floor leveler is best in order to choose the one that is more suitable for the apartment owner. There are two types of leveler sold on the market:
- Plaster. Its basis is gypsum. The composition is inexpensive, plastic, with acceptable weight. But restrictions apply: it is not used in areas with high humidity.
- Cement. This composition is created on the basis of cement, it is universal, used indoors, regardless of the humidity in them. Dries quickly due to the fact that cement absorbs water. Resistant to wear. Withstands heavy loads due to the density of the coating. There are disadvantages to such a leveler: it is expensive, not so flexible, heavy, and has a fragile surface. Re-leveling is required, which leads to additional costs.
Which self-leveling floor leveler is best is determined by the quality of the surface and the amount of damage. For insulation in a dry room with a smooth and plastic base, use a gypsum-based leveler. In other cases, cement is used.
Mixtures consisting of two components
Two-component levelers deserve special attention. Typically, they consist of epoxy resins and methyl methacrylate. Such solutions are less popular on the market, as they are most often used in industrial buildings. If you purchase a two-component composition for treating the floor of an apartment or house, you should give preference to compounds based on polyurethane components. Thanks to this inclusion, the leveler acquired its advantages:
- The finishing layer hardens within 24 hours.
- Aesthetics of appearance.
- Decorative benefits.
- Wear resistance which ensures a longer service life.
- Possibility of adding various decorative elements to the self-leveling floor, such as drawings, prints, appliqués, and ornaments.
Some disadvantages are a significant obstacle to purchasing a two-component solution:
- Inability to properly hide imperfections on the surface.
- Large consumption of material. So, on an area of 5 square meters it is necessary to use at least 7.5 kg of plastic mass.
- High price on the market.
As a finishing coating, a two-component composition with polymer components and alcohol dispersion gives the floor quality, reliability, and resistance to mechanical damage.
Rough and finishing compounds
The use of a leveler becomes necessary when the old floor is removed to eliminate unevenness. Depending on how well the previous surface has been preserved, there are several methods for covering the surface.
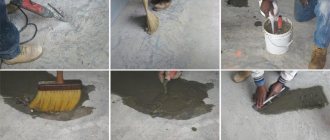
- Rough leveler is a mixture primarily consisting of cement. Use it for rough filling. A thick solution is prepared, then applied to the floor surface and fastens the base. After drying, it can withstand heavy loads, acquiring an even coating. Hides significant defects in the form of cracks and chips. If large chips occur, a gradual screed is used. First, those areas where unevenness has formed are processed. You should wait until it dries and only then cover the entire surface. Then the next layer is applied, which fits tightly to the surface.
- Corrective compounds are used on surfaces that have minor imperfections.
- The final coating has a fine porous surface. It contains polymers and minerals that give the floor an aesthetic appearance. The material is resistant to physical and external influences. Cement and gypsum are used in the leveling agent, which form a homogeneous composition when combined with water. The result is a thin, smooth coating.
To know which is the best finishing self-leveling leveler for the floor to choose, you need to proceed from the characteristics of the surface.
Device technology
Now it’s worth figuring out how to properly level floors with self-leveling mixtures. To do this you need to go through three main stages:
- Preparing the base. Before pouring the solution, the base must be prepared;
- Dilution of the solution. A very important stage, if you do not comply with all the necessary proportions, the coating may very soon become unusable;
- Pouring the mixture. Direct application of the mixture to the floor surface.
Preparation
Before leveling floors with a self-leveling mixture, you should perform the following steps:
- Removing old coating. The base must be completely cleaned of obsolete flooring;
- Then the floor is cleared of debris and a primer is applied. The primer improves the adhesion of the concrete base and mortar;
- If after drying you see that the surface remains loose, prime it again. You can’t be lazy in this matter, otherwise the repair will go down the drain.
Dilution of the solution
- The manufacturer of the mixtures must indicate on the packaging how much water needs to be added to obtain the composition of the desired consistency. Follow all the data very carefully, otherwise your self-leveling floor for outdoor use will have insufficient ductility and ductility. As a result, the coating will be of poor quality;
- Pour the required amount of water into a prepared container;
- Then gradually add it to the dry mixture, stirring the contents. In such a situation, you will get a homogeneous composition;
- The packaging should indicate the hardening time of the emulsion. You must use the solution within the allotted time, since you cannot re-add water to the leveler.
The video shows the correct technology for diluting such compounds.
Laying the mixture
The solution must be laid within 3 to 24 hours after the base has been primed.
- Find the highest point on the base of the floor and install a beacon there;
- After this, install beacons around the entire perimeter of the room. This will make it easier for you to control the thickness of the mixture;
- Pour the solution in small portions, no more than 1 sq.m;
- Using a self-leveling floor roller, spread the compound over the entire surface. The layer thickness should not be less than 5 cm;
- To prevent bubbles from forming in the solution, go over the surface with a needle roller;
- If it is necessary to apply an additional layer, complete the work within 10 minutes, otherwise the composition will begin to thicken;
- Depending on the temperature and humidity level in the room, the surface will harden in 3-14 days.
This is how self-leveling floor mixtures are applied; the video demonstrates the application process in detail. It will be nice if you take someone as an assistant to carry out the work. If you have never encountered anything like this before, it will be difficult for you to do the filling alone.
The strength of a self-leveling floor covering exceeds the strength of even cement screeds. Therefore, this type of solution has become so popular in private construction. Depending on the conditions in the room (temperature, humidity, load on the coating), the consumer can purchase compositions with different technical characteristics.
Some levelers have a high level of strength, others are not afraid of temperature changes, and others dry quickly. If you want the coating to last you a long time, be sure to follow the instructions on the package. After all, only a solution with the correct proportions will ensure the quality and reliability of the coating.
Advantages of self-leveling mixtures
Apartment owners prefer to use such compositions. It's easy to see why:
- Cement-sand screed takes longer to dry, unlike self-leveling screed. The levelers harden within 8 hours, and the concrete will set only after one and a half to two months.
- This mixture creates a very durable surface. When it is flooded with water, there is no danger. The base dries quickly. Water will not have time to seep through the coating.
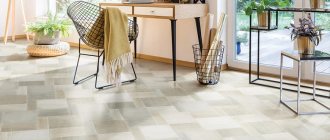
- Due to the smooth structure of the material, most coverings are made without cushions and underlays, so that there is no risk of uneven wear.
- Levelers do not form cracks over time.
- Such floors are not afraid of frost, so they are used even in rooms that are not heated.
- Plastic even when frozen due to the self-leveling base.
- They are used in a thick layer due to their low weight, which avoids creating excess load on the slab.
Thanks to these advantages, it becomes clear why self-leveling floors are so popular in the modern world.
Types of self-leveling floor systems
Before installing a self-leveling floor, it is recommended to decide on a heating system that is suitable for it. The quality and reliability of the future coating will depend on the correct choice. Today there are several types of systems that can be used to fill floors.
Electric floor
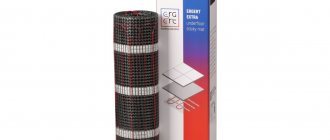
The most suitable option for creating a heated self-leveling floor. The heating electrodes are not very thick, which reduces the cost of bulk mixture, and, as a result, the cost of repairs.
Electric floor
Infrared floor
Modern type of heating system. Due to the film elements, the system differs in thermal output performance. In addition, the film is thinner than the electrodes of the electrical system, so installing a self-leveling floor using such a heating system will cost you much less than the previous option. But there is one peculiarity - film floors are considered a new product, so their cost is much higher than the previous option.
Water floor
The most popular heating method, which is rightly called classic. Many consumers ask the question: is it possible to fill a warm water floor with a self-leveling floor? Quite, but the procedure is not considered sufficiently appropriate. The main reason for this is the size of the pipes laid in the floor - filling them will require a large amount of mixture, and a self-leveling floor will not seem too cheap to you. In addition, the pouring process will last in several stages so that the coating dries quickly and is of high quality. Ultimately, the thickness of the self-leveling floor for a water heated floor will be maximum when compared with the installation of other heating systems.
Basic principles of selection
It is necessary to find out which self-leveling floor leveler is exactly right for the owner before purchasing it. By what parameters is the choice made?
- The humidity in the room is determined.
- It takes into account which rooms will be used: bedroom, bathroom, kitchen.
- Is leveling or finishing being done? Coarse and coarse solutions are suitable for roughing. For finishing, thin finishing ones are used.
- What is the nature of the foundation? Levelers for laying a thicker layer are used to level strong unevenness and holes, cracks and splinters. For a wooden base, a special composition is purchased.
- What should the result be: a floor with noise absorption effects, thermal insulation or non-slip? Special compositions are produced for underfloor heating systems.
- With or without decorative trim? The choice is made by the owner of the building.
- Different types of self-leveling floor levelers have different full hardening times: for regular ones - 30 minutes, for quick-drying ones - 15 minutes.
- The expiration date indicated on the packaging must be observed.
It is of no small importance which floor leveler to choose. Based on the goal the owner sets, the material needs to be purchased.
General tips for use
Floor leveling mixtures allow you to complete construction work in a very short time, but at the same time require very careful compliance with the instructions
Therefore, before using them, or better yet before purchasing, it is recommended to always read the manufacturer’s recommendations and pay attention to the purpose of the solution, as well as its suitability for the room. After this you can make a choice. Before use, you should always determine the required amount of material.
Practice shows that to create a one-millimeter screed on one square meter of wooden floor, on average, almost a liter of solution is needed.
Further calculation consists of calculating the area of the room and determining the thickness of the required layer. Next, all numbers are multiplied. This is how you determine how much self-leveling mixture you need to stock up on. All work should be carried out in a room whose doors and windows are closed. The main thing is that there are no drafts.
Operation at other temperatures is undesirable. If it is cold, self-leveling mixtures will not be able to provide adequate strength to the floor, since the water will be released too slowly and the excess formed will destroy the polymers. Working at high temperatures will result in premature evaporation of water. The solution will not have time to spread normally over the surface
The creators of various videos often talk about this.
It is also important to maintain the desired level of humidity. Often its value should be 50-65 percent. You need to use those solutions whose expiration date has not expired. Another important condition is the presence of assistants
The condition is the presence of assistants
It is worth understanding that the work must be organized so that when the last sections are poured, the first row is still liquid. This means that you need to spend up to 15-40 minutes kneading, pouring, and smoothing the solution (the time depends on the characteristics of the product). It is impossible to complete this time without helpers. One person should prepare the solution, another should pour and straighten it. You can speed up the work using an automixer and a pump that supplies the solution.
Review of manufacturers
There are many manufacturers of self-leveling floors. How to make the right choice in all this diversity? What to consider when choosing?
The following global and domestic companies are recognized as the most famous, specializing in the production of building materials:
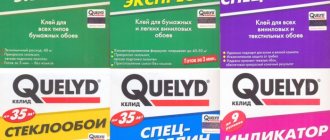
- "Knauf". Brand of a German manufacturer producing a wide range of building materials and dry mixes. The solution contains high-strength gypsum with additives and tiny particles of quartz sand. is considered one of the best manufacturers of building mixtures.
- "Berhauf". An old company, well known on the Russian market, which is actively developing. There is a large selection of different types of levelers that are suitable not only for finishing, but also for simple screed.
- "Volma". Performs the starting variant “Volma. Leveler. Rough”, filling even deep cracks, and the finishing “Volma. Level. Express", when used, the result is a mirror surface.
- "Prospectors". A Russian company that has been producing dry building mixtures for 25 years, which are in demand among customers. It produces a solution that is poured to a height of 10 cm and dries in just two days, which is capable of performing quite serious work on screeding floors.
- "Plitonite". Has a huge selection of mixtures for every occasion. Users trust the products of this brand; they are rarely counterfeited.
Self-leveling mixtures from the named manufacturers are known as products in demand by customers, durable, quick-drying.
Definition of zero level
The most suitable marking tools are a laser level and a slatted level. The second one is quite primitive, so it is not so difficult to deal with.
Before marking control points, you need to remove debris, dust, and dirt from the surface of the ceiling. Afterwards the base line is determined. The line is drawn parallel across the entire area of the room. The same distance is measured from the ceiling to the floor, points are placed that are connected horizontally, slightly above the floor level. At this stage, the highest mark is determined, since, based on it, you need to count down for a fresh coating.
Procedure for working with the laser:
- Prepare the floor as in the first case.
- The beam of the device is installed at the highest point.
- Place the laser beam along the wall.
- After installing the device, fix the panel contours. If necessary, you can draw contours on the elevation of the wall using a ruler, so you don’t need to concentrate on whether the mark is high or low.
- Having made the highest mark, you need to fix a construction rope on the floor, one of the ends of which should be extended to the wall marks that lie adjacent to each other and opposite. When you realize that the tension level of the cord is light and there are no drops, the height is determined correctly. If there is a tight tension, most likely there is a bump somewhere, which, if detected, needs to be eliminated using a chisel or hammer.
Working with a laser can damage the cornea of the eye, so it must be protected with glasses.
Dry mixes
Stores sell options for floor levelers from foreign and Russian manufacturers. It's hard to decide which one is better to choose. Therefore, first you need to carefully study their features and choose one that is suitable for a particular surface.
- "Knauf" - a self-leveling floor leveler - significantly simplifies the screed technology. This is a dry mixture based on building gypsum and cement, special additives and quartz sand. Its advantages are that it does not shrink, the solution has a high compression density, and a high setting speed (6 hours). Layer thickness - 10–60 mm.
- Self-leveling floor leveler "Plitonit" is used as a solution for leveling concrete floors, adjusting cement and gypsum screeds. It is used for laying ceramic floor tiles, parquet, and other coverings inside dry and wet residential areas.
- "Tribon" as a self-leveling floor leveler is used for interior work in rooms with normal humidity. Universal, consists of a complex composition, which includes sand, cement, gypsum. The solution is used for work on wood and concrete, suitable for both mechanical and manual application.
- Self-leveling floor leveler "Tribon Knauf", consisting of a mixture of cement, gypsum, and additives, which are dominated by calcium silicates, is also used for screeding. Quartz sand is added as a filler. The material is used indoors in dry and humid climates. There is a system for heated floors.
After screeding, a self-leveling floor leveler is used for painting, although many owners want to leave it in its original form. They prefer to lay linoleum, parquet or carpet. But the concrete material, although durable, experiences chemical attack, is damaged, and individual parts break off due to mechanical damage. For this reason, it requires painting. This is a certain way to protect the coating, and not just give an aesthetic appearance to the room.
What are levelers, what types are they divided into?
General information, classification
In principle, you can level the floor with a regular concrete screed by independently preparing a solution of appropriate grade strength from a standard set of ingredients - cement, sand, and, if necessary, crushed stone or gravel. It would seem - why “fence the garden”?
The answer is simple - with a leveler everything turns out much faster and easier.
The benefit is that levelers are a ready-made mixture of dry components, with carefully adjusted proportions of the components. When producing such compositions, their purpose is taken into account, and therefore the characteristics and specific quantities of ingredients are adjusted to the optimal combination. In the process of preparing the working solution, the user only has to mix the dry mixture with the amount of water specified in the instructions (again, no amateur work), knead it, and you can proceed to pouring. The likelihood of making a mistake that could affect the quality of the future screed is minimized.
No hassle: if you do not make a mistake with the amount of water, then the risk of getting an insufficiently high-quality solution is minimal.
The range of construction families for this purpose offered for sale is very wide. Therefore, it is important to be able to navigate this diversity in order to acquire exactly what is required to complete the task at hand.
According to their purpose, all levelers can be divided into two large groups.
- The first is compositions for the initial, rough leveling of the floor surface. Such mixtures make it possible to pour screeds with a thickness of 70÷80 m, and sometimes even more, in one pass. Rough levelers are always made on a cement base, and sand of a fairly coarse fraction is used as a filler - such a screed is stronger, and the composition itself is cheaper to produce.
An example of a coarse leveler is for screeds with a thickness of 10 to 100 mm, including for pouring “warm floors”.
Many of the rough compounds can be used as a screed covering pipes or cables of a “warm floor” system.
- The second group is compositions that make it possible to perform a final fine leveling of the surface, that is, to make it, in principle, suitable for the subsequent laying of any finishing floor covering.
They can use cement, gypsum, or a combination of these materials as a binder. The mixtures are prepared from very finely ground ingredients. This is not surprising - such solutions allow you to pour super-thin screeds that level the surface to perfection and are only 2-3 millimeters thick! And at the same time, ensuring the proper strength of the created layer.
One of the popular finishing levelers is capable of creating a durable layer of just 2 millimeters!
- You can, if you wish, select a third group. We are talking about universal levelers that can be used for both rough and final leveling. That is, their instructions show a very wide range of thicknesses of the ties created
The universal leveler is perhaps the most convenient, but at the same time the most expensive.
Such material is usually somewhat more expensive than “narrow-profile” levelers. But using it saves a lot of time - in many cases, the operations of eliminating defects and finishing alignment are performed simultaneously in one “sitting”. And time during construction or renovation also, directly or indirectly, has a very sensitive cost.
The name of many of the above-mentioned leveling compounds is often supplemented with the term “self-leveling.” Behind this term lie the peculiarities of the technology for using such solutions. The fact is that when laying them, the physical property of the surface of the liquid to take a position corresponding to the horizontal plane is actively used. That is, it is necessary to mix the fluid solution sufficiently (and the proportions of water specified by the manufacturer are precisely designed for this consistency), pour the required amount of the finished mixture onto the floor, distribute it over the area, help the air bubbles to escape - and physics will do the rest. That is, if the technology requirements are met, the poured layer should form a perfectly flat horizontal surface.
Distributing the poured composition with a needle roller - the master only helps, and the main work of leveling the surface is carried out by gravitational forces.
For a self-leveling composition to have such qualities, and after pouring to set and gain strength in a fairly short period, a simple mixture of binder and filler will not be enough.
Therefore, such mixtures necessarily contain a lot of polymer additives, which provide high plasticity with good fluidity, excellent adhesion to the base, rapid hardening without significant shrinkage, and the strength of the created coating. The chemical composition of such additives is often a trade secret of the manufacturer.
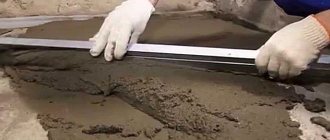
By the way, not all levelers are used exactly according to this “fill-in” technology. Compositions for rough floor leveling are often laid by analogy with a conventional concrete or cement-sand screed (which, by and large, is what they are). That is, with the installation of a system of beacons and guide profiles for subsequent alignment of the filled layer using them using a rule.
Rough levelers are often used the “old fashioned way”, that is, with manual leveling using the rule according to beacon profiles.
When using such levelers, the floor can also be given a planned slope - this is sometimes necessary, for example, in baths, in showers, where a slope towards the drain is organized to drain water.
* * * * * * *
There is also a separate category of polymer self-leveling floors. But this is, rather, a technology for creating a finishing coating - using such compounds for leveling would be too wasteful. That is, it would still not be entirely correct to classify them as levelers. Although, of course, small surface defects can be removed with them.
Advantages and disadvantages of factory-made levelers
Just a few words about the “pros” and “cons” of such compositions.
The positive qualities include the following:
- A high degree of ease of working with them - the component compositions are already ready, all that remains is to dilute them with water.
- Very often, leveling the floor will not require the creation of a complex system of beacons - a few reference points will be enough.
- The pouring process itself is carried out very quickly, with well-coordinated work by the team.
- Thin leveling layers (and finishing levelers, as we have seen, make it possible to create them) do not greatly weigh down the floor structure. An ordinary screed can hardly be made thinner than 20 mm. This also includes economical use of materials - for the same reason.
- The strength gain is very fast. After just a few hours it will be possible to move on the filled surface. And after a couple of days, move on to the next technological operations.
The optimal combination of components ensures that the coating hardens quickly - after a few hours you can move on it.
- High-quality levelers exhibit very little drying shrinkage.
- A wide variety of such mixtures allows you to choose exactly what is required in a particular case.
We must not forget about some of the disadvantages or “vulnerabilities” of such mixtures:
- Such levelers do not forgive mistakes - neglecting the requirements of the technology will lead to looseness of the screed, the appearance of cracks and other defects. No liberties are allowed. Including in matters of ensuring optimal conditions for pouring and hardening the floor.
- The apparent simplicity of installation technology for a beginner can be deceptive - and mistakes, as already mentioned, are usually not forgiven. And inviting a brigade is not a cheap matter.
- In any case, the use of such levelers will cost more than pouring a screed from homemade concrete or cement-sand mortar.
Overall, of course, the pros far outweigh the cons.
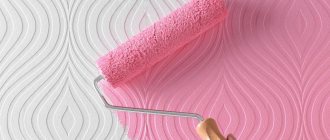
Painting the floor
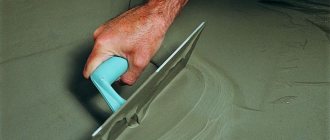
Lightly sprinkle cement onto the still fresh layer and grind it with a trowel. The result is a strong crust that is easy to paint.
There are 3 types of enamels for painting floors:
- Acrylic. They consist of resins and polymer additives and are water-based. Penetrating into the pores of concrete, they create a protective film on the surface. The result is a matte or glossy surface. The paint dries quickly and is mainly used in residential areas.
- Polyurethane. The surface of these enamels does not allow moisture to pass through, and is not afraid of exposure to ultraviolet rays, mechanical stress and shock. The paint is used primarily for industrial floors and exterior applications. But it takes a long time for the floor to dry.
- Epoxy. They can even be applied to recently laid surfaces. They withstand high mechanical loads, provide good insulation, do not fade, and do not wear out for a long time. Such enamels are used to cover industrial floors and public buildings.
You need to stick paper tape on all sides of the area to be painted. The paint is applied evenly and not too thickly for quick drying. A day later, the concrete floor is painted a second time. The masking tape is removed.
Acrylic enamel dries faster. Within a day you can walk on the painted surface. Floors coated with epoxy paint dry quickly. Polyurethane enamels dry longer than others. You will have to wait about 2 weeks for complete drying.
One of the pressing issues in construction is determining the standard for using leveling agents.
Use of material
To determine which self-leveling floor leveler is better, you need to calculate the consumption of the material that will be used in the work.
Before applying the topcoat, certain mixtures should be taken. This is needed for:
- saving materials;
- preparing a rough foundation;
- long-term coating service.
Before using the leveler, you need to know that the mixture is suitable for use for no more than 20 minutes. For this reason, it is necessary to determine the consumption of base material per 1 m2.
Leveling technology (step-by-step instructions)
For the leveling process, it is customary to prepare the following tools:
- Wide spatula;
- Needle roller;
- Container for solution.
The zero mark is always determined using a level. The primer should always be applied using a roller or brush.
- Before work, you need to find two points: the highest and the lowest.
- It is also important to measure the difference between them. This is important for calculating the leveler consumption.
- It is always written on each package. Technical indicators of composite consumption per square meter.
- Next, you need to determine the area of the room in square meters, and then estimate the material consumption.
- After this, you can prepare the surface. Use a metal spatula to remove construction debris.
It is also important to seal any gaps in the wall surface. Small cracks can be sealed with a deep penetration primer.
It is always necessary to carefully study the composition of the primer used. You need to work with a roller that can reach hard-to-reach areas.
If the primer absorbs too quickly in any area, it is best to apply a second coat. Leveler - the mixture is best stirred with a drill to eliminate small bubbles.
First, liquid is poured into the container, and then the leveler is gradually added. Apply the leveler with a spatula and carefully level the surface. As soon as the layer dries, you can lay the floor covering on the leveler.
Counting expenses
First you need to determine the smallest layer thickness in order to find out how many bags will be needed for pouring. Then calculate the area of the room to be filled.
Next steps:
- Determine the slope of the room. Measure the surface at different angles. Calculate the height difference by drawing a horizontal line along the perimeter.
- To find the average height, divide the result by 2.
- Add the allowed height to the displayed value. This is how the minimum floor thickness is determined.
- You need to look at the solution consumption per 1 m2.
The consumption of self-leveling floor leveler can be calculated using the formula:
- H = (H1 - H2) : 2 + H3,
Where:
- H1 – minimum height to level;
- H2 – maximum;
- H3 – solution thickness;
- H – permissible layer thickness.
For 1 sq. m of coating requires approximately 1 liter of clean solution with a thickness of 1 mm.
Advantages and disadvantages
Before we begin to describe the coating technology, it would not be superfluous to justify all its advantages and disadvantages. Important advantages:
- Elasticity.
- Smoothness.
- Gloss.
- Invulnerability.
- The ability to qualitatively fill all cracks, joints, and crevices.
- Easy to mix.
- Fast application.
- High drying speed.
- Ability not to shrink.
- Small layer thickness.
- The mass does not prevent pouring over the insulating film.
Some disadvantages may spoil the impression, but this does not detract from good quality characteristics:
- Before starting work, it is necessary to ensure that the floor is free of differences and large cracks.
- The slightest deviation from the norm when mixing the solution threatens to dismantle the entire coating.
- Installation of the coating requires certain skills and experience.