Wallpaper is the most popular finishing material: easy to use, with a wide range, a rich palette of shades, colors, patterns, different thicknesses and properties. How to glue wallpaper, end-to-end or overlapping, is determined based on the specific situation and the selected type of material.
But even such a simple pasting of walls with roll products requires care and precision in calculations. The reliability of the coating, its durability, and overall appearance depend on correct joining.
Tools
To hang wallpaper without seams or visible joints, the first thing you need to do is take care of the adhesive that matches the type of wallpaper and suitable tools.
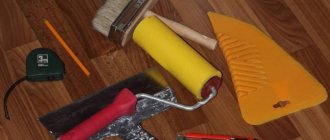
To work you will need:
- pencil, tape measure, plumb line or level;
- container and wooden stick for mixing glue;
- spatulas - metal and plastic wallpaper, scissors, sharp knife;
- brushes, rollers, rags.
Preparing the walls
The secret to success when wallpapering lies in preparing the wall.
- You need to start by completely removing the previous coatings.
- The next stage is plastering with a gypsum compound, which copes with most irregularities and crevices.
- Next is putty to remove roughness.
- The final operation is a primer, which increases the density and moisture resistance of the putty.
All stages of preparing walls for wallpaper are described in this article.
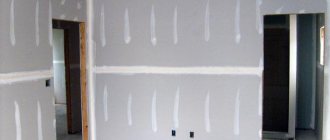
Step-by-step instructions for treating plasterboard surfaces before gluing are here.
If the walls have gained shine, it means that everything has been done correctly, the glue will lie on them evenly and the wallpaper will adhere well.
Advice. To check if the walls are ready, attach a piece of cellophane to the surface with masking tape. If after a day the inside becomes foggy, you should wait a while with gluing. If the film remains unchanged, you can start working.
Where is the best place to glue vinyl?
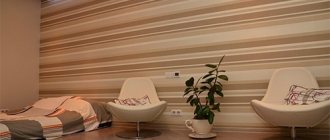
Based on its properties, this material is best used for covering the surface of kitchen walls, since it is not afraid of moisture.
It is also suitable for decorating wall surfaces in new buildings, since it does not form cracks when the house shrinks during operation due to its elasticity.
It is not recommended to stick it in the bedroom because the PVC surface does not breathe well, which adversely affects the microclimate of the room.
The preparatory stage consists of the following points:
- Leveling and cleaning walls;
- Preparation of tools and auxiliary materials;
- Strip cutting.
Where to start
If preference is given to wallpaper made of non-woven fabric, vinyl or cork, the beginning border does not matter, because the joining makes the seams invisible. But still, one of the following options is usually chosen:
- From the window - according to a long-standing tradition.
- From the door, which is convenient to use as a vertical line.
- From the corner, if it has the correct shape, although such places are rarely even. But using a plumb line or level, you can mark a perpendicular next to it, retreating a distance identical to the width of the wallpaper, and start gluing from there, returning to the corner itself later.
- From a major landmark. When there are many passages and windows in a room, it is worth starting with the largest object.
- From several lines. The method is used when there is a large window, and pasting is carried out from it in different directions.
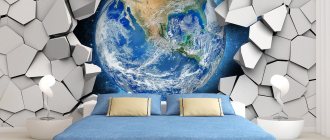
USEFUL INFORMATION: How to hang photo wallpaper on a wall with wallpaper
Material selection
When choosing a material, you need to pay attention to some features:
- Presence of edge. There are often products on sale that have a dark base color and assume that gluing will be done end-to-end. But such rolls have a white stripe that does not allow wallpaper to be joined without prior trimming. This defect refers to manufacturing defects that complicate the work.
- Relief. Wallpaper can be smooth or corrugated. The first option is much more difficult to glue, because it is necessary to achieve ideal evenness of the wall, otherwise the offset edges will not have a single plane.
Violation of technology will lead to the fact that over time the joints will spontaneously separate
- Width. The smaller the roll size, the more strips you have to glue.
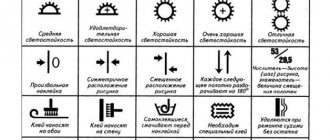
- Marking. To simplify things, manufacturers provide products with special symbols that give an idea of how to join the pattern. The following options are distinguished: The arrows are directed towards each other. This type involves placing the picture at the same height.
- The arrows are shifted. An offset of half the repeat is required, the exact size is indicated separately.
- The arrow points to zero. The pattern does not need to be adjusted.
- The arrows are pointing down and up. This means that the second stripe is turned over.
By marking it is easy to determine the method of joining the pattern
Important! It is better to give preference to proven brands and marks to eliminate problems due to defects discovered during the finishing process.
Wallpaper cutting
The roll is rolled out on the floor and cut into the required lengths with sharp office scissors, taking into account the margin and matching of the pattern. Wallpaper with a large or embossed pattern is cut out with particular care.
When cutting, it is important to consider the size of the repeat - the height of the pattern repeated on the wallpaper.
Simple calculations are carried out. For example, the size of the repeat is 50 cm, the height of the wall being pasted is 280 cm. The number of repeats that will be placed at this height, rounded to the nearest whole number, is determined.
280 : 50 = 5,6
We round up to a higher value, we get 6 - the number of incomplete rapports that fits in a strip from the ceiling to the floor.
50 × 6 = 300 cm – the required length of the glued sheet.
We stack the cut sheets.
Advice. Marks made on the back of each sheet and showing the top of the canvas will help you avoid confusion during the gluing process.
Various customization options
In addition to how to properly glue wallpaper on a non-woven basis, many owners who have taken on the task of carrying out repairs on their own are also interested in the issue of matching the pattern.
Same types of trellises are not in such great demand as models with attractive ornaments or other fillings. Several techniques have been invented for fixing such paintings; each of them is worth getting to know better.
Direct docking
Every professional tiler, without hesitation, will answer that the quality and beauty of the entire repair depends on the location of the first sheet. To avoid bevel, use a plumb line; with this tool you can make successful markings.
After which it is important to adhere to it exactly; even a 1 mm deviation at the end of the room will create a gap of 5-10 mm.
Having chosen a direct joining, it is necessary to first make calculations, select a repeat - this is the 54 cm segment of the pattern that is not repeated, after each such section, the manufacturers of canvases introduce the next repetition.
This approach to creating cladding helps craftsmen cut one roll into several blanks, and the pattern on them will clearly coincide.
Offset docking
When wondering how to glue non-woven wallpaper using this method, a beginner needs to understand two features:
- The basis is taken to shift the report by 1⁄2 part of the length of 54 cm.
- Every second sheet will have differences in the design.
The process of docking with displacement cannot be called one of the easiest, but the end result of the work will certainly please the homeowner. A person will be able to observe a completely different, original and unique pattern by simply shifting the report by 27 cm.
When marking and cutting the workpieces, you should exercise maximum care, take your time and double-check the correctness of the calculations several times.
Free docking
If you want to minimize the presence of waste, you should choose this particular method of implementing your plan. But the approach will be relevant in the case of purchasing canvases with small patterns located symmetrically to each other.
When analyzing the nuances of how to glue vinyl wallpaper on a non-woven base with free joining, the correct measurements of the workpieces play a huge role; for this, the distance from the floor to the ceiling is carefully calculated.
It will not be superfluous to first draw a partition for the first and subsequent sheets; such manipulations are carried out using a tape measure and a pencil; if necessary, make the marks bolder, you should take a marker.
Counter joining of wallpaper
Initially, the master fixes the trellises with an overlap, while perfectly matching the pattern on the cladding; subsequently, the remaining stock will be cut off. To draw a knife without losing the line, you usually use a wooden block or a large metal ruler.
There is no need to glue the edges; the fixing mixture is applied only to that section of the fabric that will match the pattern; to make the cut, you should prepare an exceptionally sharp knife.
Most often, experienced craftsmen prefer models with replaceable blades; if you choose the wrong device, burrs will remain on the wallpaper, which are quite difficult to get rid of, and the process itself will seem very painstaking.
How to glue paper wallpaper and paper-backed vinyl end to end?
For paper wallpaper:
- We select and prepare glue from starch with an antifungal additive according to the manufacturer’s instructions.
- Lubricate the first strip evenly and leave it in the folded state for 3-7 minutes to soak.
- We glue the canvases to the wall with a neat and very tight alignment of the edges. The joints can be additionally glued with PVA.
Note! When wet, paper wallpaper stretches, so it is important that the same time interval is maintained for each panel from coating with glue to gluing it to the wall. After drying, they shrink, so the edges of the sheets need to be adjusted as tightly as possible so that gaps do not form between the sheets in the future.
The conditions for gluing vinyl wallpaper with a paper base are similar to the rules applied to canvases made entirely of paper. They are also pre-coated with the glue intended for them, given time for impregnation, and then glued to the surface.
USEFUL INFORMATION: Comparison of vinyl and non-woven wallpaper: which is better?
Rules
The general gluing rules are similar to those described above.
The difference is that in this case the glue is applied to the canvas.
After coating the paper base with glue, the strip is kept for some time so that the substrate absorbs the applied glue well.
Do not overuse the amount of glue, as this may lead to the formation of a gap along the joining line after the strips dry.
You should also take into account that after swelling, such wallpaper can stretch a little in length, so you shouldn’t roll it out too much with a roller.
When carrying out work, drafts should be avoided.
Video on the topic:
By following all the recommendations, you can cover walls with vinyl wallpaper efficiently and without errors.
Wallpaper is the most popular finishing material: easy to use, with a wide range, a rich palette of shades, colors, patterns, different thicknesses and properties. How to glue wallpaper, end-to-end or overlapping, is determined based on the specific situation and the selected type of material.
But even such a simple pasting of walls with roll products requires care and precision in calculations. The reliability of the coating, its durability, and overall appearance depend on correct joining.
Features of butt gluing of vinyl wallpaper on non-woven and non-woven
These coatings, which have many advantages, differ for the better in their gluing technology. They do not need to be coated - just apply glue to the wall. Everything is done much faster, the problem of wallpaper getting wet disappears, they do not shrink when drying.
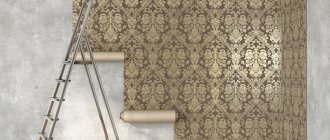
- Using a roller, the wall is covered with an even and homogeneous layer of glue. A brush is used in hard-to-reach places.
- You should wait until the glue is absorbed into the wall and dries. Then the glue is reapplied to the area that will occupy one piece of wallpaper.
- The first canvas is applied to the wall without pressure, making sure that the side edge does not move from the vertical line. After making sure that everything is in order, the wallpaper is pressed against the wall and, constantly smoothing, they begin to stick. It is convenient to do this using a wallpaper spatula or rubber roller. Air bubbles are removed using the same smoothing movements.
- The next canvas is glued like the first, but the edge of the already pasted wallpaper is taken as a guide. The joints are carefully smoothed.