Published: 02/23/2016
In the previous topic, we talked about the fact that 3D wallpaper for walls has not only advantages, but also disadvantages.
Continuing this topic, we will look at the features of gluing realistic 3D wallpaper.
Our comments and useful tips will help you glue the canvases without outside help.
Neglecting the basic principles of gluing can negate the entire positive effect of a three-dimensional pattern.
For this reason, we advise you to carefully study all the information below, as its importance cannot be overestimated.
Preparation of canvases
Before gluing 3D wallpaper on the walls, you should lay it out somewhere on a clean area of the floor in the form in which it should be glued.
This approach will work with small pieces or rolls.
If we talk about large-scale panoramas, you will inevitably need additional help in combining the canvases and controlling the entire drawing.
Ask your loved ones or friends for help, since mixing large panoramas is not an easy and risky task.
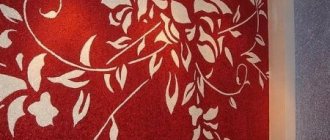
What is 3D wallpaper?
Large format design, computer modeled and applied to a roll of paper, vinyl or non-woven material. With the help of some reflective particles, it gives the impression of a three-dimensional image.
Connecting joints
Increased attention should be paid to butt and seam joints.
If there are visible gaps in the elements of three-dimensional 3D wallpaper, all realism will be disrupted.
When gluing the next fragment, we strongly recommend that you return to the previous seams each time and make sure that they are even.
The presence of cracks will ruin the effect of all your work.
Help from professionals
If you doubt your abilities, it is better to hire specialists who will perfectly install your new realistic 3D wallpaper.
If you have never glued wallpaper before this moment, it is better to pay money to other people than to ruin the glue, the canvases themselves, and your own nerves.
There is a lot of money at stake, and there is no point in taking risks.
How to care for 3D photo wallpaper
3D wallpaper does not require complex care. To avoid contamination, use mild detergents. This is possible due to the water-repellent properties of the surface, which is made of polyester.
Proper care will prolong life
The surface is fade resistant, non-flammable and can withstand minor damage.
Experiment
If you're already eyeing realistic wallpaper, be prepared to experiment.
Try to imagine in advance what kind of designs you would like to see in your home, what color tones you would like to use.
Don’t be afraid to combine three-dimensional designs with other types of wallpaper that can complement the 3D effect.
Rely on the mood
This means that you should consider the feelings and emotions that the 3D drawing evokes.
For this reason, you should choose new 3D wallpaper for walls.
Never take canvases that cause you even the slightest hostility or rejection.
Over many years of use, unpleasant wallpaper will drive you crazy.
Take these nuances into account and make the right choice, relying on your feelings and experiences!
3D wallpaper is a new word in interior design. With their help, you can create a cozy atmosphere indoors, temporarily transport yourself to warm countries, walk along the streets of Milan or Paris, or find yourself in a sunny forest clearing. You can use this wallpaper to cover part of a wall or the entire room - including the ceiling - everything will depend on your wishes and capabilities.
3D wallpaper allows you to create an original and inimitable interior.
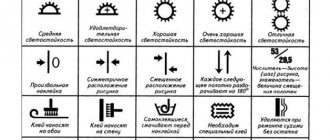
Features of care
If all stages of the work were done strictly according to the rules, then the result will be a single picture without visible seams or displacements of parts of the picture. Photo wallpapers have varying degrees of moisture resistance; depending on this, different methods of care and cleaning are used. You can determine the level of water resistance by special markings on the wallpaper packaging. One wave icon means moisture resistance, two waves mean washable wallpaper, three waves mean super washable. The wave above the brush means high stability and can be washed with a brush and detergents.
Features of care depending on the type of photo wallpaper:
- paper wallpapers without a laminating coating are afraid of moisture, so they need dry cleaning and careful handling. Dust is removed with a vacuum cleaner with a soft brush or a dry soft cloth;
- moisture-resistant wallpaper can be vacuumed and wiped with a damp, well-wrung-out cloth, or brush off dry dirt;
- textile wallpapers do not have a protective film, they are vacuumed, and stains are carefully cleaned or removed with a special stain remover;
- Waterproof and laminated materials are washed using non-abrasive mild detergents. Hard brushes and chemically aggressive substances cannot be used to clean wallpaper. Wash without pressure, immediately removing moisture from the surface with a dry cloth;
- in areas of the wall that are regularly exposed to direct sunlight, the wallpaper may fade and the paint may fade. To solve this problem, it is necessary to shade the wall picture or cover it on top with a protective composition against damage by ultraviolet radiation;
- textured surfaces, especially sand and canvas, can quickly accumulate dust; they need to be cleaned more often than smooth and glossy canvases.
By choosing the design you like in the store and pasting the photo wallpaper with your own hands, as well as carefully caring for the canvas, you can enjoy beautiful landscapes for many years, wake up in your bedroom as if on a tropical island, and in the children’s room play with children and cartoon characters from fairy tales, fly to space and admire the underwater world of the ocean. Any painting will become the center of the interior, decorate and transform it.
Preparatory work
You will need:
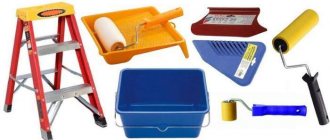
- building level; beacon (rope with weight); putty; even spatula; sandpaper; antifungal primer; flute (wide brush); tape measure.
Using a beacon for smooth gluing of 3D wallpaper.
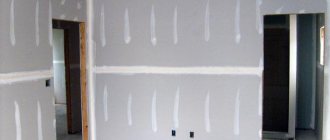
Before gluing wallpaper, you need to prepare the walls. All old finishes must be removed, this applies to both paint and wallpaper.
Then you need to remove all the nails and dowels from the wall and check the surface for deep scratches and dents. If you find such defects, then eliminate them with putty, then sand them with sandpaper. Also check the plaster for flowability; if it begins to crumble after a small impact, then it is better to re-plaster the walls.
You only need to glue 3D wallpaper onto a perfectly flat surface. For this reason, it is necessary to check the walls using a building level and a beacon. If you do not have such devices, then you can proceed as follows: in order to make a beacon, take a regular rope and tie a weight to it, and use a long ruler instead of a level.
Using a beacon, draw vertical lines on the wall (along which the wallpaper will be glued), measure with a ruler the distance from the wall to the rope (along its entire length), as well as between the horizontal markings (it should be the same). If you find the slightest deviation of 2-3 mm, then the wall will have to be leveled, otherwise you won’t be able to paste the wallpaper end-to-end, which is unacceptable in this case. The slightest error will simply ruin the whole impression, and no 3D effect will be achieved.
After the wall is leveled and marked, begin priming. Do not underestimate this point, firstly, the soil will not allow the wall to “eat” part of the glue, which will allow the wallpaper to stick well.
Secondly, 3D wallpaper is a fairly dense material that does not allow water to pass through. As a result, mold can form underneath them, so treating the walls with an antifungal primer is simply necessary. The solution is applied 1-2 times using a brush (wide brush), the work is left until the surface dries completely.
Pasting 3D wallpaper
Scheme for applying glue to wallpaper.
You will need:
- glue for heavy wallpaper; container for diluting glue; special brush; rubber roller.
There is no way to glue wallpaper alone, since the canvas is quite wide, and the work requires special attention. Work should be carried out at a temperature of +20-25º C (in extreme heat or cold, there is a high probability of the canvas coming off).
It is important to avoid drafts, so you need to work with doors and windows closed. This rule should be observed for several days after gluing. If the room is very hot, then you need to increase the air humidity, just put a few buckets of water.
The first step is to dilute the glue according to the included instructions.
There are some nuances here: the container for dilution must be perfectly clean, first pour in water, then make a funnel using a wooden handle, then add glue, continuing to stir. The water should not be warm or hot, otherwise the glue will form lumps. After this, you need to unfold the wallpaper on the floor in order to see the picture as a whole and not confuse the sequence of gluing the canvases.
When gluing this type of wallpaper, the glue is applied to the wall, and not to the canvas.
Scheme for smoothing wallpaper with a rubber spatula.
This is done using a special brush.
It is necessary to glue wallpaper from the corner of the room, strictly adhering to the markings that were made using a beacon. The canvas is applied to the wall, then they begin to glue it, moving from top to bottom. Using a rubber roller, remove air bubbles; this should be done from the center to the edges.
Make sure that the first strip is glued strictly according to the markings, then all other strips will be easy to join. It is necessary to glue 3D wallpaper only end-to-end, there should be no overlaps, and it is important to be careful not to break the line of the design when joining.
If after gluing you still find that air bubbles have formed on the surface, then carefully pierce them with a thin needle. In the case when it is necessary to cover adjacent walls with 3D wallpaper, special attention should be paid to the corners. To do the job as neatly as possible, take a smooth spatula and wrap it with cloth several times.
Using such a device, you can easily glue wallpaper in the corners. Pasting 3D wallpaper with your own hands is quite a complicated matter, requiring careful preparation of the walls and maximum attention. The expert advice outlined above will help you cope with this difficult task on your own.
- Date: 03/02/2015 Rating: 45
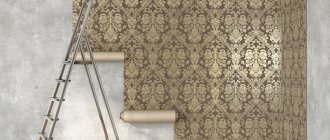
Currently, 3D wallpaper is becoming an increasingly popular decoration for the interior of a room. Of course, such pleasure costs much more than ordinary wallpapering, but you have to pay for beauty.
3D wallpaper looks very elegant as a decoration for various rooms. Gluing them is quite difficult. Many people turn to special organizations for help, but you can do this yourself.
Wallpaper gluing sequence diagram.
Those who decide to glue 3D wallpaper themselves should understand in more detail how to glue 3D wallpaper.
In fact, many people have no idea how to perform this process. There is nothing supernatural about this. They are glued in the same way as regular vinyl ones, but the pattern shown in the panorama is very carefully adjusted.
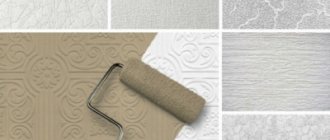
What types of photo wallpapers are there: classification of materials
When choosing wallpaper for your home or apartment, you first need to decide on the image that will best fit into a specific interior. To better understand the variety of products, you should look at photos of wallpaper. Wall coverings are chosen not only taking into account visual and aesthetic characteristics - it is also necessary to pay attention to their other characteristics. Photo wallpapers are divided into groups based on the following criteria:
- base material;
- texture features;
- the presence of additional decorative effects;
- compliance with a certain style.
The base material plays a key role in ensuring the correct technology for gluing wallpaper, because the reliability of fixing the canvases on the wall depends on the base material. This classification category is the broadest and includes the following types:
The base material plays a key role in ensuring the correct wallpapering technology
- paper-based wallpaper;
- canvases with a vinyl layer;
- photo wallpaper on non-woven fabric;
- wallpaper with a textile base.
Helpful advice! In order to understand how photo wallpaper is glued in a particular case, you need to study all the specific characteristics of the product, select the right glue and follow certain instructions.
Paper and vinyl photo wallpaper: photo examples of wall decoration
Previously, photo wallpapers were produced exclusively on paper. In modern construction stores you can find products that are devoid of the main disadvantages of paper, characterized by easy gluing and a long service life. Still, paper wallpaper still finds its consumer. The advantages of the material are environmental friendliness and affordable price. Paper-coated walls “breathe” easily, and any adhesive can be used. The disadvantages of photo wallpaper made from paper lie in the properties of the material itself:
- rapid wear;
- low level of strength;
- lack of moisture resistance, which contributes to the appearance of fungus and mold;
- burnout due to exposure to sunlight;
- do not hide flaws on the walls.
Thus, taking into account the listed disadvantages, before gluing paper photo wallpaper, you need to make sure that the room is quite dry and protected from excessive exposure to ultraviolet rays.
Walls with paper photo wallpaper “breathe” easily, and any adhesive can be used
Vinyl photo wallpapers are opaque dense canvases with a soft two-layer base consisting of paper and PVC. This base has heat- and moisture-resistant properties, so photo wallpaper can be washed and cleaned using various products. The surface also requires the application of any embossing. The material does not emit toxins, does not rot, and mold and mildew do not grow on it.
When gluing, the material is able to stretch, thereby facilitating its fixation in uneven corners and in places where the walls have a complex structure. It is characterized by durability and strength. Texture helps hide defects and joints. Disadvantages: airtightness and high cost; for gluing they use a special compound that is applied to the wall.
Textile and non-woven photo wallpaper on the wall: features and characteristics
The non-woven base is a combined fiber fabric that is not subject to stretching even when wet and does not shrink when dry, thereby ensuring ease of gluing. The coating is easy to clean, so it is suitable for decorating bathrooms and kitchens. At the same time, non-woven fabric wears out easily and is susceptible to other mechanical influences.
Before gluing non-woven photo wallpaper, you need to purchase special glue. It is applied exclusively to walls, which eliminates the appearance of air bubbles and helps hide unevenness, and joints become invisible. Non-woven wallpapers are breathable, they do not pose a threat to human health, and therefore are suitable for decorating bedrooms, living rooms and children's rooms.
Before gluing photo wallpaper on a non-woven basis, you need to purchase a special glue
Helpful advice! Paper wallpaper can be made moisture resistant using lamination technology.
Textile wallpaper appeared a long time ago and has not lost its popularity. Their structure consists of a bottom non-woven paper base layer and a natural fabric covering. Any image and photographs can be easily applied to this type of wallpaper and hold up well. Cotton, linen, silk and even velor are used for their production.
Textile wallpapers do not fade when exposed to ultraviolet radiation. It is the textile covering that is best suited for creating images for high-resolution photo wallpapers and models with a self-adhesive coating, so it is the most expensive type of wallpaper. When gluing textile wallpaper, the wall is carefully leveled and primed, and the glue is applied to the canvas and left for a certain time.
Surface and Image Preparation
It is very important to prepare the surface on which the 3D wallpaper will be glued. There should be no rough spots or dents on the wall, otherwise the drawing will not turn out clear.
Scheme for removing old wallpaper.
It is worth making sure that the old coating is completely removed. There should also be no nails or screws on the wall. They must be removed in any possible way. The wall should be treated with an antifungal primer.
Wallpaper perfectly allows moisture to pass through, which can lead to the very rapid appearance of fungus on the wall. You won’t be able to glue 3D wallpaper alone. You will have to enlist the support of at least three people. In order not to mix up all the parts of the products, they need to be laid out on the floor in such a way that a complete picture is obtained.
In this matter, the most important thing is to start correctly, and then the work will go like clockwork. It is worth remembering that the temperature in the room should not be lower than 25 ° C. Markings must be made on the wall to the nearest millimeter. Next you need to prepare the glue.
Return to contents
How to glue 3D wallpaper without glue? Of course not.
In the case of 3D systems, you need to select glue for rigid elements.
Scheme for manual spreading and gluing of wallpaper.
This type of glue sets quite quickly.
At the same time, it is characterized by the highest strength. The most important thing is to correct mistakes as quickly as possible so as not to spoil the drawing. It must be remembered that there will be no second attempt with this type of gluing.
The glue must turn out to be real, and for this it is necessary to take into account several nuances. For example, the container in which it will be mixed must be absolutely clean. As for the amount of water, it is indicated on the packaging.
You should not ignore such instructions. When diluting, you need to quickly mix the water with a wooden slats until a funnel is formed, into which you need to pour the composition in a thin stream. In this case, the water must be cold. Only in this case can the formation of lumps be avoided. After all the contents of the box have turned into liquid, you need to stir the solution for another five minutes.
The main thing is to choose the right consistency. Usually the mixing time is indicated on the packaging, but you should not take it literally. You can mix until you get the desired mass.
There is no need to make the glue too thick. It will simply be inconvenient to apply to the wallpaper.
Return to contents
Now it’s worth talking directly about how to glue 3D wallpaper.
Before work, it is necessary to close all windows and doors so that there are no drafts in the room. Otherwise, there is a high probability of elements peeling off the wall. You should not open windows and doors for 24 hours after the wallpaper has been hung.
If you do not follow this rule, you may find that all the products have come off or air bubbles have formed everywhere. This type of wallpaper does not need to be covered with glue in order to stick to the wall. The glue is applied directly to the surface. You shouldn’t forget about this nuance. You shouldn’t immediately press the strip of wallpaper against the wall.
It's better to glue the top part first. In this case, you need to start gluing from the corner of the room. In any case, it will not be possible to completely eliminate the formation of air bubbles.
However, their number must be kept to a minimum. To eliminate them, you need to use a special rubber roller, which you need to run from the center of the strip to the edges. Bubbles will be forced out from under the wallpaper. Most of these products are made to order, so there should be no problems with fitting patterns and pictures.
This is exactly how three-dimensional wallpaper is hung. If you are using a picture that is located on several walls, you should take care of how the elements in the corners will be glued. For these purposes, it is worth preparing a spatula in advance, on which a soft cloth is wrapped. When approaching the corners with a spatula, you need to firmly press the strip against the corner of the wall.
There shouldn't be any problems with this.
The most important thing to remember is that 3D wallpaper is a rather fragile thing. That is why you need to do everything extremely carefully. Otherwise, there is a very high probability of damage to the drawing, which means additional problems and costs money and time.
Thus, we can assume that the wallpapering work is completed. There's nothing complicated about it. Almost every person who has ever glued ordinary products can cope with the task.
By following the above instructions, you can be sure that the work will be completed with the highest quality and in the shortest possible time. Everything will take a few hours of free time. If the wallpaper is applied to one wall, the work becomes much easier, because you don’t have to adjust it in the corners, and this is the most labor-intensive process.
Currently, 3D wallpapers have gained immense popularity; they are increasingly used to create a modern interior design.
3D wallpaper will make the interior of the room extremely interesting and original.
3D wallpaper is a wonderful finishing material with excellent qualities and properties, with which you can come up with an unusual and original interior design for absolutely any room.
However, gluing 3D wallpaper is quite difficult. You can, of course, turn to specialists for help, but such services are much more expensive than gluing ordinary wallpaper. You can glue them yourself, but to do this, you first need to learn how to glue wallpaper with 3D technology, what important points should be taken into account so as not to spoil them, but to enjoy the excellent result in the end.
How to glue 3D wallpaper? — ServiceYard - the comfort of your home is in your hands
Volumetric photo wallpapers have appeared on the radar of designers relatively recently. But this type of finishing is quickly gaining popularity. In stores you can find quite a lot of types of similar finishing materials, and the only thing that stops many apartment owners so far is the question of how to glue 3D wallpaper. Now you will find out about it.
Surface preparation
Wallpaper gluing sequence diagram.
In fact, 3D wallpaper is glued in exactly the same way as regular wallpaper; there is nothing supernatural in this process. You just need to very accurately adjust the pattern depicted on the canvases and carefully prepare the surface where such wallpaper will be glued.
Surface preparation is a very important step in the entire process. The wall must be smooth, without any roughness, unevenness or dents, otherwise the image will not be clear.
The old coating should be completely removed, and any nails or screws on the wall should be removed. You will need to plaster the surface, level it and putty. In addition, the surface must be coated with an antifungal primer, since such wallpaper allows moisture to pass through very well and this can lead to fungus on the wall.
Gluing 3D wallpaper alone is quite problematic; you will need the help of at least two people. After the surface has been prepared, you need to prepare the wallpaper by laying out all the parts on the floor in a certain sequence so as not to mix them up. After this, you need to make the necessary markings on the wall and prepare glue.
Preparing glue and tools
Scheme for removing old wallpaper.
In order to hang 3D wallpaper, you will need glue designed for hard elements. This glue has high strength and sets very quickly. Therefore, errors must be corrected immediately, otherwise the drawing may be damaged.
To get good quality glue, you need to consider some points when preparing it:
- To dilute the glue, you should use only a clean container. You must strictly follow the instructions for preparing the glue and add strictly the amount of water specified in the instructions from the manufacturer. The water for preparing the glue should only be cold, it should be mixed very quickly to form a funnel, in which will need to be slowly filled with the composition. Then the resulting solution should be mixed for another 5 minutes. Only by fulfilling these conditions will the glue be obtained without lumps.
To work you will need the following tools:
- tape measure; stepladder (you can use a chair or table); rags; brush; rubber roller.
After preparing the glue and the necessary tools, you can start gluing the wallpaper.
Important to remember!
3D photo wallpaper on an empty wall, in which there is no furniture or decorative elements, has the property of expanding space.
In advance, before buying 3D photo wallpaper, think about the position of the bed, armchairs, and bedside tables. Proximity to other internal objects may negatively affect the perception of the image. It is important to remember this when choosing 3D wallpaper for a bedroom with an area of 12-15 m², which already has a lot of furniture.
The most popular textures for interior bedroom wallpaper are as follows:
- lush flowers;
- landscapes and mountains;
- seas and islands;
- view from the window;
- nature and forests;
- geometry and ancient frescoes.
For example, photo wallpaper in the bedroom above the bed with images of lavender and orchids, which will literally fill the room with the wonderful aromas of fragrant flowers, look very impressive. When choosing wallpaper for the bathroom, it is recommended to choose calm and pastel shades.
Therefore, 3D wallpaper is a beautiful, progressive and practical material that allows you to achieve unique effects. Volumetric wallpaper, expanding the space and creating the illusion of continuation of the interior, allows you to turn any design idea into reality.
The process of gluing 3D wallpaper: important points and recommendations
Scheme for manual spreading and gluing of wallpaper.
You need to know that 3D wallpaper is a rather fragile finishing material, so you should work as carefully as possible, following all the recommendations. Otherwise, you can easily damage the drawing, which means additional costs and wasted time.
In addition, the following important points should be observed:
Before work, it is better to remove furniture and things from the room that may interfere. Before starting work, you must close all doors and windows so that there are no drafts, otherwise the wallpaper may come off the wall. The air temperature in the room should be between 23-25 degrees.
Windows and doors should be kept closed for 24 hours after wallpapering to avoid the appearance of air bubbles. Apply glue only to the surface, not to the wallpaper. First, it is better to glue the upper part of the pattern, starting from the corner of the room. It is best to remove the resulting air bubbles with a rubber roller, running it from the center of the wallpaper to the edges. Basically, 3D wallpaper is made to order, so there should be no problems with fitting pictures and patterns. If you need to paste a picture that is located on several walls, then you need to think in advance about how parts of the picture will be pasted in the corners.
In this case, you will need a spatula. You should wrap a soft cloth around it and press the wallpaper against the corners of the wall. It is not recommended to glue 3D wallpaper in new buildings built less than a year ago. Even though such wallpaper is quite resistant to various mechanical stress, it can come off due to shrinkage of the building or tear.
Taking into account the above points, you can complete the work as efficiently and quickly as possible.
This will only take a few hours. The most difficult thing in this process is adjusting the wallpaper in the corners when the wallpaper is glued to several walls. Pasting wallpaper on one wall will not cause any difficulties if you follow the above recommendations.
3D photo wallpaper in the interior - standard, single and panoramic
Today, three-dimensional wallpapers exist in three varieties - standard, single and panoramic. The concept of photo wallpaper applies to the last two, since standard 3D wallpaper is presented in the standard sizes of regular wallpaper. The three-dimensional image on such wallpaper is represented by a set of geometric shapes, patterns or abstractions that do not require careful selection of the design.
Single 3D wallpaper is an image on a large canvas of a predetermined size. In essence, a single volumetric wallpaper is a large picture that is pasted on the wall, often decorating the outline with a frame. They will be especially appropriate where there is no need to make repairs yet, but you already want to change the interior a little.
The third type is rightfully considered the most popular among 3D wallpapers - panoramic photo wallpaper. Even without the 3D effect, panoramic photo wallpapers look great, but imagine the effect of realism that becomes possible thanks to a three-dimensional image! Panoramic photo wallpapers are made in the form of a single canvas, designed to cover a wall or even several.
The list of 3D photo wallpapers does not end here - manufacturers make custom-made fluorescent and LED photo wallpapers that please the eye not only during the day, but also at night. Fluorescent wallpaper will look like regular 3D wallpaper in daylight. But as soon as the sun's rays stop illuminating the room, they transform, emitting soft streams of light. True, such wallpaper still requires special lighting from fluorescent lamps. It is thanks to them that the image will become truly alive.