Home » Insulation
Reading time 17 min Published 08/17/2019
Drywall is the most popular material used in construction and repair work. It can be used in any room, even in the kitchen and bathroom. Now many varieties of this material have appeared, including those with increased moisture resistance and thermal insulation. But, despite such advantages, waterproofing is necessary for drywall, especially in the bathroom. Nowadays, stores offer a wide range of different waterproofing materials.
Is it necessary to prime the walls before laying tiles: a step-by-step debriefing from an experienced master
From the author: Hello, dear readers. Kitchen and bathroom renovations are not complete without tiling. Which is quite logical, because it is a multifunctional and visually attractive material. It’s great if you have a trusted technician to whom you can entrust repair work and listen to advice. What if there is no such thing in your environment? Today we will conduct a step-by-step debriefing with recommendations from an experienced craftsman and answer a pressing and frequently asked question: is it necessary to prime the walls before laying tiles, and how to lay them correctly.
TECHNONICOL self-adhesive floor waterproofing - an ideal solution for a frame house
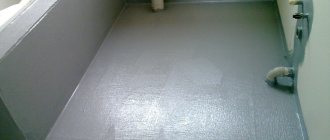
In cases where the structure of a wooden floor is not designed to withstand the additional load from a cement-sand screed, but it is necessary to waterproof the floor, to help builders, TECHNONICOL Corporation has released a new rolled waterproofing product that will serve as a solution in such a situation. We are talking about TECHNONICOL floor waterproofing. This is a baseless bitumen-polymer material intended for waterproofing interfloor ceilings.
Primer application technology
The priming process includes a whole procedure. First of all, the surface of the floor or wall is cleaned of possible contamination. It is advisable to remove the old coating as much as possible.
For example, if a concrete wall is covered with oil paint, it is not always easy to remove the old cladding. In this case, an appropriate primer is used.
The preparatory stage includes leveling the walls with a special putty or plaster mixture. The treated surface must dry well. This applies not only to the walls, but also to the floor.
Leveling and priming the floor before laying tiles is a mandatory requirement.
To work you will need:
- Roller.
- Wide paint brush.
- Capacity.
Important! To achieve the best result, when installing tiles on floors and walls, it is recommended to prime the surface several times. Each previous layer must dry well.
If your walls are covered with gypsum plasterboard, then the question of whether the drywall needs to be primed should not arise. Even if it does not have any finishing, dust accumulates on it during installation and transportation.
The only thing is that drywall sheets should not be primed several times. Otherwise, the top layer of cardboard may become wet, and this will lead to a deterioration in the technical characteristics of the material.
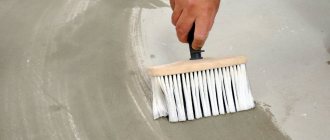
When all the preparatory work has been completed, you can proceed directly to work. You can apply the primer to the wall or floor using a roller or brush.
In the first case, the application speed increases significantly. Some specialists use a spray bottle. This equipment further speeds up the surface treatment process.
It is necessary to ensure that no strong drips form and no puddles remain on the floor. The soil should be evenly distributed over the entire area. It is worth noting when this work needs to be done.
The floor is primed immediately before installation. It is not recommended to do this work several days before laying the tiles. Otherwise, debris may get on the walls and floor. Therefore, to avoid wasting material and not having to do the work twice, the entire area is primed on the day of laying. This will ensure good adhesion of the tiles to the ground.
How long before work can begin after treating the entire area? Typically, on the packaging of the material, the manufacturer indicates the drying time of the composition when applying a certain layer. Therefore, pay attention to the label.
Basic requirements for waterproofing
Proper implementation of waterproofing allows you to protect the finishing of floors, ceilings and walls from the destructive effects of moisture, prevents mold, and provides protection from flooding in the rooms located below.
In order for waterproofing to successfully cope with these tasks, it is necessary to ensure that it meets certain requirements.
The following can be considered the main ones:
In addition to the above, it is recommended to use a primer, which allows you to save on the number of sources and improve adhesion to the insulated surface. Before performing work, it is necessary to clean the surface as much as possible. We have provided detailed instructions on general waterproofing of a bathroom on your own here.
If it is not possible to completely isolate the bathroom, you can limit yourself to the areas most exposed to water, which suffer more from dampness than others.
What is the primer composition for tiles?
A product such as a floor primer for tiles is a special composition applied to the base before tiling work begins. Its main purpose is to improve the adhesion of the cladding to the base. In addition, formulations with additives help solve issues with moisture protection and antiseptics. In some cases, the primer is required to provide anti-corrosion protection.
The compositions are made by combining several components. From such mixing of substances, they strive to achieve improved film formation on materials. The composition usually contains drying oil, some types of resins and other additives that vary depending on the purpose of the primer. The range of modern mixtures is wide. You have to choose from several options for names.
Depending on the structure of the treated surface, tile primer is divided into subcategories:
- compositions for absorbent surfaces - brick, putty, plaster, concrete;
- mixtures for non-absorbent surfaces - tiles, oil paint, metal substrates.
What methods of waterproofing are there?
Waterproofing under floor tiles can be:
- roll or pasted;
- coating
Roll waterproofing
Options for roll waterproofing
Roll waterproofing is a material based on polyester or fiberglass. It is necessarily impregnated with special hydrophobic substances - usually modified bitumen.
To install roll waterproofing, you must use a special burner or moisture-resistant adhesives. Therefore, installing the material on the floor yourself can cause certain difficulties.
To install the rolled fabric on the prepared base, several overlapping strips are spread, after which they are carefully glued. Another significant drawback is the short service life of the waterproofing layer.
Coating mixtures
The group of coating waterproofing under ceramic tiles includes many mixtures that can be easily applied using a roller or brush. Installing a moisture-resistant floor layer does not require much labor.
Depending on the base, coating materials are divided into the following groups:
- polymer;
- bitumen;
- cement-polymer.
Application options for coating waterproofing
Bitumen mixture
Bitumen mixture for tiles is inexpensive, which attracts many buyers. But the material has many disadvantages. This is the need to work with molten and hot bitumen, which requires certain experience and skills.
Bitumen waterproofing is not durable. The standard service life of such a coating is 5-6 years. After applying molten bitumen, an unpleasant odor remains in the room for a long time, which cannot be gotten rid of.
Technical characteristics of bitumen mastic
Polymer-cement mixtures
Polymer-cement mixtures for ceramic tile floors are the best option, combining good quality and low cost. The material is made from cement, polymer additives and mineral fillers. It has high vapor permeability and provides reliable protection against moisture.
Cement-polymer waterproofing for floors is sold in the form of a dry powder, which is mixed with water before use. Once prepared, the solution has a limited application time, so applying it requires certain skills.
Another disadvantage of the material is its absolute non-plasticity. This negatively affects the service life of the waterproofing layer.
Polymer compositions
The best materials for waterproofing tile floors are one-component polymer mixtures. The ready-made solution is applied to the prepared base without much difficulty and provides reliable protection. The created coating is characterized by high ductility and long service life. The only drawback of the material is its high cost.
How long does it take for primer to dry?
To understand when it will be possible to lay the tile material, you need to understand how long it takes for the primer layer to dry. The process of drying the floor primer before laying tiles is influenced by environmental conditions, as well as the constituent components of the product itself. Drying takes from 4 to 12 hours. If the room has high humidity and the temperature is not high, then the process will take longer, and accordingly, at high temperatures and low humidity, drying will take less time.
Under favorable conditions, drying will take the following number of hours:
- Polyurethane – 8-12 (maximum limit 24 hours);
- Acrylic – 2-4;
- Epoxy – 2 hours (maximum time can reach 5 days).
The average consumption of primer compositions is 200-350 g/sq.m. m.
Coating waterproofing: stages of work
You can waterproof your bathroom yourself. All you need is some skill and knowledge of the sequence in which operations to waterproof a bathroom should be carried out.
- 1 of 1
On the picture:
Even if you use moisture-resistant drywall to build partitions in the bathroom, its junction with the bathtub still needs waterproofing. The only concession is that you do not need to prime the sheet before applying waterproofing.
Surface preparation This is the most important stage of waterproofing a bathroom. If a very high-quality waterproofing solution is laid on a poorly prepared surface, it will quickly begin to come off, crack or deform, and eventually allow moisture to pass through.
1 Align. Permissible deviations are no more than 2 mm (in the complete absence of sharp protrusions). The surface should be almost perfectly flat.
2 Cleaning The surface should be cleaned of substances that prevent strong adhesion of the solution: remove stains from building mixtures, varnishes, paints, etc. Next, all dust is removed (it also interferes with adhesion) - a regular vacuum cleaner will do for this.
3 Primer. Before laying the waterproofing, a primer is applied to the base. It is selected depending on how well the surface absorbs moisture. If you purchase the wrong composition, it can ruin the whole thing. Porous surfaces (cement screed, plaster, concrete, etc.) do not require the application of a primer, provided that cement-polymer waterproofing is used. In this case, the surface is simply wetted with water from a sprinkler or using a sponge. This will prevent the waterproofing solution from drying out too quickly.
Attention to the joints! Before applying waterproofing, special attention should be paid to the joints between walls and floors, since they are the main places for leaks. A good solution is to seal them with sealing tape. You can nail slats in these places to close the gap, but they will create irregularities that will be more difficult to work with.
Preparation of the mixture There should be no difficulties with waterproofing based on bitumen or polymers. They are sold ready-to-use. All that remains is to open the package and start applying. Cement-based mixtures are offered in the form of dry bulk materials. Many of them require different amounts of water for preparation; this is always indicated on the package. After water has been filled into the container (the optimal temperature is room temperature), the mixture is poured into it.
- 1 of 1
On the picture:
We remind you that when laying heated floors, you should use waterproofing suitable for operation at high temperatures.
It must be immediately thoroughly stirred so that it turns into a homogeneous mass without lumps. This operation can be performed manually, but it is better to use an electric drill with a special attachment (the volume of the mixture to be mixed is too large, it is quite difficult to “break” it manually). This will make the process faster and better. The solution is left for 5 minutes and mixed a second time, after which it is ready for application. Waterproofing the bathroom must be carried out for a certain time (on average from half an hour to an hour and a half), otherwise the composition will begin to dry out and become unusable.
- 1 of 1
On the picture:
Bituminous waterproofing looks unpresentable, but it is easy to work with: it is sold as a ready-made compound, which only needs to be applied correctly.
Application of waterproofing In accordance with SNiP 3.04.01-87 (“Insulating and finishing coatings”), work on waterproofing a bathroom “must be carried out at a positive ambient temperature and the surfaces to be finished are not lower than +15 ° C and air humidity is not more than 60%. This temperature in the room must be maintained around the clock, no less than 2 days before the start and 12 days after the completion of work.” In some cases, it is not necessary to comply with such strict conditions. For example, some varieties with a polymer component can be applied at temperatures from -20 to +50? C (this information is indicated on the label). Of course, you should not carry out work in frost or extreme heat. These factors most likely will not affect the waterproofing material itself, but the base, when the temperature changes to room temperature, will slightly change its volume. This may be enough to cause cracks to form.
- 1 of 9
On the picture:
The greatest difficulties are caused by the waterproofing of a shower cabin in construction: it is necessary to carry out comprehensive work on waterproofing the floor, walls and their junction with the ceiling of the cabin.
Waterproofing should be applied using a roller, brush or spatula. The layer should be uniform and smooth. The approximate drying time is indicated on the product packaging.
Why do you need waterproofing under tiles?
Is waterproofing necessary in the bathroom when laying ceramic tile flooring? Experts talk about the need to install such products, because waterproofing prevents moisture from penetrating into the structure of building structures. The ingress of water is dangerous for most materials; fungus and mold appear on their surface, which are very difficult to remove.
It is recommended to install a moisture-resistant layer on all enclosing structures, including walls and ceilings. This will protect the room from flooding by neighbors above, and will not allow water to reach residents on the lower floor if users accidentally forgot to turn off the water. Waterproofing materials prevent the development of fungus and mold, and prevent the formation of cracks in the finish.
Cracks in building structures appear as a result of prolonged exposure to moisture combined with sudden temperature changes. Cold air begins to penetrate into the room through through cracks, which can affect the health of people using the bathroom.
Cold air and dampness contribute to the rapid destruction of the material. Under this influence, the plaster begins to break down and chip off, and cracks appear in the paintwork. In this regard, it is recommended to install waterproofing not only under the tiles, but also on the walls near sanitary fixtures and shower stalls, where moisture can enter.
Why is waterproofing work carried out?
The main purpose of the waterproofing layer, which is laid before installing the tiles, is to prevent negative consequences caused by the penetration of water into the floor structure. These include:
Causes of mold and mildew
- the appearance of mold and mildew, which negatively affect the human body;
- destruction of the floor structure;
- water seepage into the lower floors due to emergency water leaks.
This result can be achieved only by following the technology of constructing a waterproofing layer from high-quality and modern materials. It is best to involve professionals who have relevant experience in this process.
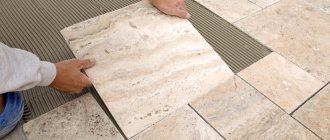
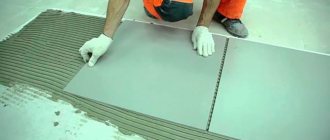
Surface cleaning
Cleaning surfaces before tiling is very important. Unfortunately, many people, especially beginners, are not very careful when cleaning the surface on which tiles will be laid, but in vain. After all, the quality of the facing surface is the key to an impeccable tiled coating.
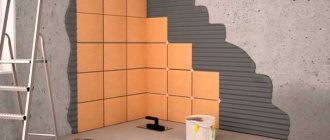
Here is a photo that schematically shows the correct execution of finishing work. In this case, the primer is applied to the plaster before laying the tiles
If the surface on which the tiles are supposed to be laid is already ready for such work, then you can begin laying the tiles immediately. But as practice shows, such luck happens in very rare cases and therefore you have to prepare the surface for laying tiles yourself. Treating the walls before laying tiles should be included in the mandatory repair work.
Advantages and disadvantages
Of course, the main advantage that a waterproofing primer has is the ability to create a moisture-proof barrier that “seals” the surface from water and moisture.
In addition, the moisture-absorbing characteristics of the base are reduced. Thanks to this property, the likelihood of the formation of fungal growths due to constant humidity is minimized.
Like any primer, a moisture-resistant primer for walls enhances the adhesion of the base to the finish, thereby increasing the durability of the decorative material. Good adhesion is especially important when it comes to the need to apply a fairly thick layer, for example, plaster or putty.
The composition, in particular the polymer one, tends to harden the surface. For loose and old foundations, this quality is most important, since in order to improve the performance characteristics and extend the service life of such surfaces, they must have the highest possible strength and reliability.
The waterproofing primer makes the base antistatic – it becomes dust-repellent. The vulnerability of the treated surface to chemicals is also reduced.
The composition is not without several drawbacks. After polymerization, some subtypes of moisture-resistant primers form a vapor-proof layer. This can lead to increased humidity in the room and damp surfaces. In addition, constant humidity requires good ventilation.
The cost of domestic samples ranges from 500 to 700 rubles. per canister 5 liters, and the price of foreign soils is an order of magnitude higher.
It is necessary to work with soil only using personal protective equipment, in particular for hands and respiratory organs.
Do I need to prime the subfloor before laying tiles?
The composition not only increases the adhesive properties of the treated surface, but also removes dust from it, reduces glue consumption, speeds up the progress of tile laying work and reduces labor costs.
Professional craftsmen are unanimous on this issue - it is necessary to use a primer. The mixture, of course, will require money, but the latter will quickly pay for itself, since the amount of glue spent will be reduced, and the finishing coating will last a long time and be strong.
After application, the primer forms a protective film that does not allow moisture to pass through and does not allow microorganisms to multiply. Due to the absence of irregularities and small dust particles, the adhesive will hold the tiles more tightly. It will be more convenient to lay the material, therefore, the quality of work will improve.
The primer allows the glue to retain moisture so it won't dry out or peel quickly.
Properties of the base after treatment:
- a waterproofing film is formed that prevents the absorption of liquid;
- adhesion or quality of adhesion to the cladding increases;
- dust residues and other small particles stick together on the concrete;
- a durable surface is obtained, but air exchange is possible;
- antiseptics in the mixture create an unfavorable environment for microbes, fungus, and mold.
Waterproofing tape: can it be replaced?
The tape significantly increases the cost of waterproofing in the bathroom, but attempts to save on it inevitably lead to a decrease in the reliability of the waterproofing layer. This statement is repeatedly supported by the negative experiences of FORUMHOUSE participants. Many of them believe that doing GI without tapes is completely pointless, it is better not to do it at all - then they will save money on the next repair.
However, the experience of others is not meaningful to everyone, and questions about the need for waterproofing tape remain.
Ution785
Why do you need waterproofing tape? Can't you live without it? What happens if you don't put it in?
You can't do it without waterproofing tape. The rupture of the waterproofing membrane in an individual house can occur due to any movement of the house, and if so, then it occurs precisely in the corners.
The tape ensures that the waterproofing will not break.
But, of course, no one can forbid the homeowner to believe that all these developments can occur in any house except the one that belongs to him.
Our users also categorically do not recommend replacing specialized tapes with something else, for example, a rubber bandage. A rubber bandage will not retain elasticity for a long time and will not provide reliable adhesion of the waterproofing to the base.
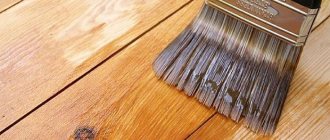
Primer of walls and floors
Having chosen the correct primer composition, you can get to work. The primer of the floor and walls is no different from each other. Primer can be called one of the most pleasant and uncomplicated repair processes; even a child can handle it. The consistency of the soil resembles ordinary water, which must be evenly distributed over the surface.
The first thing to do is prepare the surface. It is necessary to carefully brush away all debris, dust and other contaminants from the walls and floor. Next, you need to prepare the composition - pour the liquid into a convenient container, dilute the dry mixture according to the instructions and mix thoroughly.
The primer can be applied with a roller, brush or even a spray bottle. The first layer must be applied evenly, saturating all protrusions and crevices with primer. Next, you need to wait the time indicated on the package. If necessary, a second layer can be applied.
Waterproofing walls: step-by-step instructions
Waterproofing walls with your own hands is not such a difficult task if you learn all the secrets of its implementation. Many building materials tend to absorb and retain moisture in their pores. Due to capillary suction, water rises quite high through such pores. Saturation with moisture causes loss of strength of materials and their destruction.
This is why waterproofing is needed. Waterproofing the walls from the outside guarantees an extension of their service life.
Purposes and types of waterproofing
Waterproofing is used to protect the underground and above-ground parts of buildings and structures from the effects of groundwater and prevent capillary suction of moisture, as well as to ensure the impermeability of storage facilities of any liquids to the effects of aggressive waters.
Waterproofing brick walls, for example, will not only increase their service life, but will also make the building warmer.
The layer on the enclosed surface formed by waterproof materials is called waterproofing, and work aimed at protecting structures from moisture is called waterproofing.
Depending on the specific application, there are several types of waterproofing.
Depending on the purpose:
- sealing;
- thermal and waterproofing;
- anti-corrosion;
- antifiltration.
By location in space:
- underground;
- underwater;
- ground.
By location on the insulated building:
- external waterproofing;
- internal.
Residential and civil buildings require waterproofing:
- foundations;
- waterproofing walls and floors in basements;
- floors of the first floors in buildings without basements;
- floors and walls in bathrooms and bathrooms.
Advice! Waterproofing plasterboard also requires special attention due to the fact that this material is now widely used in all areas of construction.
In industrial buildings and structures, waterproofing of the following areas is required:
- floors and walls of workshops with wet processes;
- transitions;
- tunnels and metro stations;
- tanks, wells and pits.
Depending on the characteristics of waterproofing materials, the following types of waterproofing are distinguished:
- painting (often used as waterproofing of bath walls);
- pasted (from roll and film materials);
- plastering (includes shotcrete);
In residential premises, waterproofing of walls from the inside is most often done by plastering. This is a well-tested and simple method.
Depending on the design solution, waterproofing is distinguished:
- single-layer and multi-layer;
- reinforced and unreinforced;
- with and without a protective layer;
- ventilated (providing communication between the sub-cover space and outside air).
The type of insulation is selected based on the presence of groundwater pressure, depending on the required quality and strength. This takes into account what degree of dryness is needed in the room, and whether the structure of the structure is crack-resistant.
Preference is given to materials that best meet the initial requirements for waterproofing, taking into account operating conditions. For example, façade waterproofing is used to protect a building from the harmful effects of moisture.
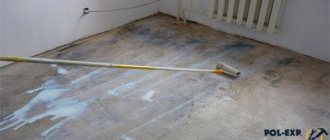
Preparing the surface for waterproofing
Waterproofing work is preceded by preparatory processes. First of all, at the work site, they strive to lower the groundwater level to a level more than 50 cm below the lower waterproofing mark. Then the surfaces are prepared for the application of waterproofing coatings. Different types of bases require different preparations.
Cleaning the wall for waterproofing
Stages of surface preparation of concrete structures
- Cleaning from dirt.
- Removing bumps and irregularities.
- Cutting off protruding ends of reinforcement.
- Sealing cavities and sinkholes with cement mortar.
- Drying the surface.
- Padding.
In cases where waterproofing of a brick wall is needed, surface preparation additionally requires the following operations:
- Cleaning the surface with a sandblaster.
- Wetting the surface to remove small dust particles.
Stages of surface preparation of metal structures
- Removing scale and rust.
- Removing oils (with brushes, scrapers or sandblasting).
Cleaning and leveling surfaces
To ensure good adhesion of the waterproofing to the base, the surfaces are thoroughly cleaned, removing dirt, dust and greasy stains. In this case, a sandblasting machine or metal brushes are used. If there are cavities, cavities, potholes, deep cracks and other defects, they are cleaned and sealed.
When preparing plaster waterproofing for insulation of brick walls and concrete surfaces, notches are made with hand or mechanized tools for the same purpose.
To increase the service life and guarantee the quality of waterproofing of all types (excluding plaster insulation with cement-sand mortar), the surfaces are dried before applying it. This operation is performed using electric blowers, air heaters, lamps and infrared radiation units.
A primer must be applied if bitumen and paint compounds are to be applied to the insulated surfaces. It is performed with a solution of bitumen in gasoline in a ratio of 1:3. If possible, it is better to warm up this composition and the surface: the primer will then better fill the pores of the material.
Sometimes heating the base is replaced by applying two layers of primer:
- A cold solution of bitumen in kerosene or diesel fuel.
- A solution of bitumen in gasoline.
Primer for external and internal walls
The primer is applied to the insulated surface using a spray gun, spray gun or brush.
If the water pressure exceeds 1 m of the water column, then external waterproofing is used (on the water pressure side). If the pressure is less, you can install insulation from both the outside and the inside.
Features of horizontal waterproofing and methods of its implementation
If you need to protect the foundation from the effects of groundwater and protect the walls from moisture penetration, horizontal wall waterproofing is used. It serves as a barrier that prevents water from rising higher. Using horizontal waterproofing, you can protect the basements of buildings, technical and residential premises.
Horizontal waterproofing of walls can be done using various materials. The most common are roll materials that can be applied to the surface hot or cold. In the first case, waterproofing is applied in several layers.
To improve adhesion between them, rolled materials need to be heated quite strongly. Thus, horizontal waterproofing of the foundation or floor is often performed.
Cast waterproofing is also a type of horizontal. It is used in basements and on technical floors, that is, in those rooms that are located below ground level. In this case, hot asphalt bitumen material is used.
When it hardens, a reliable waterproof coating is formed that is well bonded to the insulated surface. This material is also used as waterproofing for residential walls, but rarely. The fact is that the basis of waterproofing here is hot bitumen, the pungent smell of which lingers for a long time.
If horizontal waterproofing of walls in an apartment is required, then preference is given to coating or impregnating materials.
The most common types of coating materials are special mastics and plasters. They guarantee a dense, hard layer of water-repellent material, on top of which any finishing necessary in a given room can be carried out.
Horizontal waterproofing device
When performing horizontal waterproofing, waterproofing materials for walls can be applied in different ways using different materials. Whatever type of materials is used, horizontal waterproofing must be combined with a layer of vertical waterproofing located both inside and outside the building. If necessary, it is possible to use coating materials or moisture-resistant sealants.
The level of the upper edge of the horizontal insulation should be more than 30 cm above the ground surface. If the construction is located on hard and heaving soil, then the upper edge of the waterproofing must be raised to 50 cm above the ground level.
Coating waterproofing is classified as multilayer coatings. There is a hot or cold method of applying it. In this case, standard construction tools are used. Coating waterproofing is designed for several years. At the end of its service life, it needs to be updated.
Pasted waterproofing can be done either single-layer or multi-layer. The hot method of applying it is most often used. In this case, a gas burner is used. When such waterproofing of walls is performed, the materials are pressed tightly against the previously prepared surface, then they are treated with a flame and the resulting surface is leveled with a roller. To protect such waterproofing from damage, it is necessary to create an additional protective layer in the form of a screed or a clamping structure.
Plaster horizontal waterproofing is distinguished from pasted waterproofing by greater resistance to mechanical stress, but less resistance to cracking. It is applied to a previously prepared surface in a layer 2 to 5 cm thick.
When choosing the type of waterproofing, we proceed from the required dryness of the insulated premises, the magnitude of the hydrostatic pressure of water, the crack resistance of the insulated surfaces, temperature and mechanical influences, the aggressiveness of external waters, as well as the available choice of waterproofing materials for walls or roofs. For example, waterproofing wooden walls will reliably protect the structure from rot and mold.
Surface preparation before waterproofing in the bathroom
The surface must be perfectly clean and dry. If there are any oil stains, they are removed using special cleaning solutions. If there are irregularities, they are removed using a grinder. All existing cracks are sealed. The seams between the floor and walls are sealed with sealant. When applying waterproofing to the floor, it is also necessary to finish the walls to a height of 15-20 cm. As for laying tiles on floor waterproofing, it is no different from laying on ordinary surfaces. Except for the glue used, it must be waterproof.
vote
Article rating
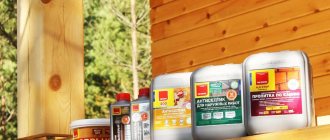
Types of moisture-proof materials for the bathroom
There is no shortage of special moisture-protective products on the shelves of construction stores. It will be difficult for an ignorant buyer to make a choice if they do not know their types and purpose.
Materials are mainly divided according to the components used for their manufacture, structure, and specific properties:
- mastic applied by coating surfaces;
- roll devices , which are applied by pasting;
- pastes and liquids;
- penetrating mixtures used for application to porous substrates.
In addition to the listed materials, powdered mixtures intended for creating waterproofing solutions by dilution are suitable for moisture protection of bathtubs.
If the walls are uneven, you can use special plaster; in addition to being resistant to wet environments, it will ensure leveling of the surface. Finally, for the same purposes, a film made of polymers or rubber is often recommended, which is applied by spraying and forms a powerful barrier after drying.
When choosing a suitable insulator, you need to focus on the recommendations of the instructions, which usually indicate the scope of application of a particular product. You should choose materials recommended for use in interior spaces.
How to choose the right primer for screed
You should start with the fact that the primer should be purchased in construction stores that have the appropriate quality certificates. When purchasing from unverified places, it is possible to purchase a fake.
The following recommendations should be followed when choosing a primer:
- In rooms where there is a high level of humidity (basement, cellar), professionals recommend using an acrylic primer. This type of soil creates a waterproofing film on the surface and does not allow fungi, spores, and mold to multiply.
- To create the dielectric properties of the floor, we use a polystyrene primer. Just remember that it is toxic.
- If a large number of defects form on the surface of the screed, it is more advisable to use deep penetration primers.
- For wooden floors (timber, chipboard, fiberboard) we use primers designed for these surfaces. Such as alkyd, acrylic, glyphthalic.
- Concrete floors should be treated with epoxy primers or acrylic compounds.
- For floors that will be varnished, clear primers should be used. And for floors to be painted, you should choose opaque primers with the addition of pigments of the required color.
It is advisable to apply these recommendations when choosing a primer. But most hobbyists and professionals prefer acrylic primer , with a few exceptions.
Primer for waterproofing
Hello! The following waterproofing was applied to the bathroom floor: » > Do I need to apply a primer before laying floor tiles? After all, water rolls on such insulation in the form of balls and is not absorbed at all. So, will the primer be absorbed? In this thread (/t197732-gruntovka-na-gidroizolyaciyu/">) the question is similar, but not quite. There we are talking about liquid rubber, and not the hydrobification of concrete.
I think the main function of the primer is to bind dust. there was no dust after hydrophobization - no need to prime. tile adhesive with min. water absorption - it will stick. for example sopro 400
C2h5-OH wrote: I think the main function of the primer is to bind dust. there was no dust after hydrophobization - no need to prime.
Trust in the master is the secret to success in repairs.
Now use super-elastic, non-aqueous tile adhesives. expensive.
C2h5-OH wrote: no need to prime. tile adhesive with min. water absorption - it will stick.
psnsergey wrote: non-aqueous tile adhesives
But there are such glues. although, for example, in order to glue tiles to metal, it would be necessary to come up with such glue.
Roman Sirozh wrote: Who advised you to use this water repellent under the tiles?
+1 This is probably about the same as treating a wall with silicone oil. And what can you glue to it later? Now wash off with alcohol
Roman Sirozh wrote: 2- option to apply betocontact
I think it will also roll off. I would rinse with alcohol. Sanded, vacuumed, primed with Tiefengrunt, then GI Giprdesmo, or Weber 822. Next, tiles
PS It seems that someone from St. Petersburg wrote that he likes to treat it with polyfluid, although then he glues it with special glue.
psnsergey wrote: non-aqueous super-elastic tile adhesives
Prok12 uses polyfluid, I use polyfluid. Everything is held on with ordinary mineral glue like K-80 lithoflex. I process the GS before laying the tiles in the SU. True, I use Alpa Polyfluid.
aaaSashaMGGU wrote: The following waterproofing was applied to the bathroom floor: » > Do I need to apply a primer before laying floor tiles? After all, water rolls on such insulation in the form of balls and is not absorbed at all. So, will the primer be absorbed? In this thread (» > /t197732-gruntovka-na-gidroizolyaciyu/) the question is similar, but not quite. There we are talking about liquid rubber, and not the hydrobification of concrete.
What are you all about primers and “non-absorbent balls”
let's start from the beginning.
bathhouse Kumertau city phone number
Did you slope the screed to one corner? And this corner is not under the bathroom. So that if something starts to leak, the water will at least not collect under the bathtub. did you go outside? If you say that nothing will leak, then you are very mistaken))))
These two things are done BEFORE any tiles and hydrophobized water-repellent primers.
Source
What to prime
What primer should I use for ceramic tiles? The answer depends on the type of surface.
Plaster, masonry, drywall, gypsum plasterboard
For gypsum fiber boards, brick and block walls (including plastered ones), penetrating acrylic primer is used. It solves several problems at once:
- Glues the remaining dust on the surface and thereby ensures the most reliable adhesion of the tile adhesive to the wall;
- Penetrating into the structure of the wall material, it increases its strength;
- Reduces water absorption and stabilizes the drying time of the adhesive.
Here are a couple of samples of penetrating primers:
| Image | Description |
| Knauf Tiefengrund : ready-to-use acrylic primer with deep penetration. Country of origin: Russia. Suitable for highly absorbent surfaces (gypsum board, gypsum and chalk plaster). Price per kilogram - from 65 rubles. | |
| Eskaro Aquastop Professional : concentrated moisture-proofing primer. Country of origin: Russia. Eliminates the penetration of moisture into the structure of the main wall (including from tile adhesive); in particular, ideal for walls in the bathroom and other damp areas. Promotes better adhesion of the finishing layer to the base. Can be added to mortars. Before use, dilute with water in a ratio of 1:10. Price per kilogram - from 300 rubles. |
Concrete
What primer should I apply to a floor or wall made of monolithic reinforced concrete under porcelain tiles or tiles?
Here the main problem will be the adhesion of the tile adhesive to the weakly absorbent base. The simplest way to increase adhesive strength is to increase the surface area, which can be achieved by making the base rough, giving it a relief texture. For this purpose, adhesive quartz (with the addition of quartz sand) primers are used.
Is it necessary to prime a floor with a leveling screed? Let's just say: the adhesive primer definitely won't make things worse, and it guarantees reliable adhesion between the tile and the base. Whether the tile will stick securely enough without priming is unpredictable; the primer will eliminate the element of chance.
Let's get acquainted with samples of adhesive primers:
| Image | Description |
| Knauf Betokontakt : intended for application to concrete bases before finishing (in particular, before laying tiles). Average consumption is 350 grams per square meter. Country of origin: Germany. Price per kilogram - from 100 rubles. | |
| Prospectors Concrete Contact : a primer for heavy concrete bases that improves the adhesion of finishing to the base. Country of origin: Russia. Consumption - from 250 grams per square surface. The price of a kilogram is from 70 rubles. |
Adhesion primers are produced colored (usually reddish or pink), which allows visual control of the priming process.
Tile
Is it possible to lay tiles over old tiles? And if so, what should I use to prime it first?
I answer both questions:
- Can;
- The already familiar quartz primer is applied to the old tiles. In particular, the manufacturer of concrete contact “Starateli” specifically stipulates such use of a primer; After applying it, the tile can be covered with new tiles using regular tile adhesive, plastered or puttyed.
Plywood
Is an adhesive or penetrating primer suitable for plywood or chipboard?
No. In the case of materials based on hygroscopic cellulose, the purpose of priming is to prevent the base from absorbing moisture. At the same time, any water-based primer will only cause the wood chips or veneer to swell. I lay tiles on plywood like this:
- The base is soaked twice with drying oil heated in a water bath.
;
It is advisable to impregnate the sheet on both sides and along the edges, otherwise uneven swelling of the veneer can lead to its deformation.
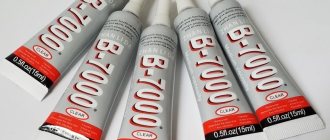
- To stick tiles, I use sanitary or universal silicone sealant
, applied pointwise to the tile. A high-quality sealant (for example, Henkel products) adheres well to wood impregnated with drying oil. For tile seams, I recommend using the same sealant or special silicone grout, which can be easily matched to the color of the finish.