Laying decorative tiles is a long-known process. However, some stages are not given due attention, which can ultimately affect the quality of the repair and the functionality of the tile itself. One of these moments is soaking the tiles in water before directly laying them on the wall. You need to figure out why this is needed and why this stage should not be overlooked.
Type of material
Soaking large-format tiles will require a large container, but sometimes this work is not necessary.
Let's figure out when a tile requires this Ceramic tile:
- Red clay;
- White clay;
- Porcelain tiles.
Red clay tiles, like the one in this photo, need to be soaked.
The material is very porous and soaking will give additional strength to the material. The first two materials, provided that they are single-firing and glazed tiles, require additional processing of the tiles before laying, namely soaking, if they are laid on a cement mixture. Other types of adhesives, such as two-component adhesives or liquid nails, do not require such preparation of the tiles before laying.
This condition applies if the thickness of the tiles is more than 10 mm; for “shards”, tiles less than 10 mm, it is best to simply rinse with water before laying. This tile has a high degree of moisture absorption and extra water before installation will benefit it. In this case, the gluing time will be significantly longer than when laying tiles larger than 10 mm.
Porcelain tiles are a reliable material and easy to install and operate.
Why should you carry out careful preparation work?
Many people neglect the preparatory work and do it reluctantly and poorly. But you can't do this:
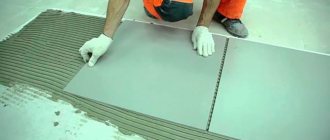
- By saving time on preparation, you will spend much more time laying the tiles “on a layer”. In this case, each tile will need to be laid individually, and different layer thicknesses will be used.
- Installing tiles on a layer leads to increased consumption of tile adhesive, which affects the overall construction costs.
- The durability of the cladding is reduced if the surface is improperly prepared. A sure sign of trouble - the tiles are tapped and a booming sound is heard. This means that there are voids under the tiles, which can lead to cracks and other defects.
How to prepare substrates for installation and why this needs to be done carefully - video
Conditions under which tiles need to be soaked
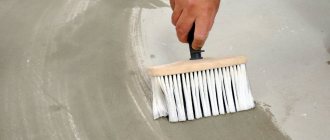
It is important to understand that tile can be conditionally called a pure material. It is most often stored in cold warehouses or open areas. He often travels a long distance to the installation site, and then simply waits for his turn for days or weeks, surrounded by all the repair work. And what do you think, is it necessary to soak the tiles before laying them after such storage? In this case, we are talking about basic cleaning of the material; you need to make sure that the material is slightly contaminated and simply rinse with running water. Everything is quite simple, take a tile and just put it under running water. Then immediately begin laying the tiles, without having to wait for the material to dry.
An adhesive mixture that is too dry can lead to poor installation, but a well-wetted tile can smooth the situation out, which will create adhesion. In any case, the best option would be a properly prepared adhesive composition
conclusions
Modern industry has completely relieved tilers of the need to perform such procedures as moistening the installed materials. Adhesive mixtures and facing coatings have such properties that any additional procedures other than those specified by the technology are considered unnecessary and sometimes even harmful. Any additional moisture can spoil the prepared mixture or prevent its normal adhesion to the working surface of the tile. Therefore, if the instructions for use do not specifically stipulate special conditions, then you should not add something of your own to the tile gluing technology.
Glaze as protection
Of course, you need to adequately approach the question of whether to soak the tiles before laying. There is material that, when soaked, can behave quite unpredictably. This material is called glazed tiles and tiles. It has one feature: on the one hand, the glaze protects the material from moisture, and on the other hand, it does not allow excess moisture to evaporate from the material. And if the material is very thin or has significant porosity, then stains will appear under the glaze from moisture and it will no longer be possible to get rid of them. Should the tiles be wetted before laying in this case and how, if necessary. It is advisable to soak such tiles, but first take one and place it in a container of water. Wait a couple of hours, then remove and dry. If stains do not appear, then you can soak the entire batch for installation, and leave this specimen for use in an area that will then be hidden or for trimming.
Black spots may appear under the glaze after soaking, this is especially noticeable on white tiles
Is soaking necessary if special glue is used?
Many craftsmen are confident that when using modern adhesives, additional moistening of the tiles is not required. Despite this, not every glue has sufficient moisturizing properties.
The method of soaking or simply moistening before applying glue allows you to apply a thinner layer of the composition and distribute it evenly, which saves solution. In addition, applying the adhesive solution to wet material allows the glue to absorb more slowly, which makes it possible to adjust the installation during the process. This nuance is relevant for inexperienced craftsmen.
Floor or wall
You already know that you need to wet the tiles before laying them on the wall to make it easier to move them and level the material. And in the case of a floor, when dry layout is done, and modern marking devices are used for laying, the possibility of error is, in principle, impossible. Yes, in this case the decision depends on the type of material.
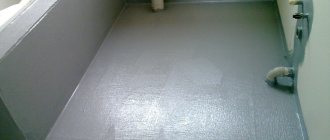
Floor tiles adhere well to the base due to their own weight, but nevertheless, dust must be cleaned from them in any case
Porcelain tiles, which are now most often used for floor installation, can simply be wiped off with a damp sponge and do nothing else. During this operation, the sponge is not wetted abundantly; it is enough if it is simply damp. After each tile, the sponge should be rinsed so as not to add new dust. Thin ceramic tiles need to be soaked to make them stick better; thick ceramic tiles can be cleaned in the same way as cleaning porcelain tiles.
Porcelain tiles do not require immersion in water, but there must be enough adhesive and it should not be dry. Or what awaits you is that the tiles will simply fall off and the repair will have to start all over again
Important Tips
- The optimal temperature for laying porcelain tiles is not lower than plus 5 and not higher than plus 40 degrees.
- Tile adhesives that are used when laying porcelain tiles contain cement. Therefore, be sure to use gloves and safety glasses to protect your skin and eyes from contact with the solution.
- Keep in mind: when applying glue to both surfaces - the base and the tile - the consumption of the dry mixture increases. This is worth considering when purchasing finishing materials.
- Porcelain tiles are not recommended to be laid end-to-end, without seams. The seams between the tiles provide sufficient elasticity - a kind of guarantee that the porcelain stoneware will not crack, for example, when heated. Therefore, seamless installation of porcelain tiles is not recommended if a heated floor system is used.
- The viability of the solution (the so-called period of time when the glue retains its fixing properties) ranges from 1.5 to 8 hours, depending on the manufacturer. Read the label carefully! Therefore, mix the glue in portions.
- Apply glue to a small part of the surface. Only the one that you can completely tile in 10-15 minutes.
What water to soak
We think that the question of whether it is necessary to wet the tiles before laying has been completely disassembled, now we will look at another important question, and what kind of water should be used for this soaking. Everyone has probably heard that the use of unclean water, technical or from a reservoir, will lead to bacterial infection of the adhesive material and it will eventually bloom, regardless of whether it was resistant to fungi and bacteria. The water used must be clean, artesian water, and the container in which the glue is mixed must be clean according to construction standards. We remind you that a professional builder keeps his tools clean and thoroughly washes all containers after each repair job. This simple principle will help you easily decide on the construction team that will carry out your repairs and tile installation.
The water must be clean, washing powder should not be used, after drying it forms a film that will have a bad effect on adhesion
But even this team needs to be provided with access to clean water; you provide this help primarily to yourself, as you save your premises from unpleasant surprises.
Don’t forget that in addition to the tiles, you need to thoroughly clean the base and prepare the room, removing everything unnecessary.
To summarize, professional craftsmen know that thin ceramic tiles require a soaking process, while for all other tiles the wet cleaning principle applies. Beginning craftsmen should also adhere to this principle, and then the reliability of the repair will be at a high level.
Wetting process
To make the work easier, craftsmen advise moistening the tiles. Wet material is easier to place and press into place. It is important to dip in a small amount of liquid. Otherwise it will be difficult to correct. When installing on a concrete wall, a little water is required. It will slow down the setting of the tiles to the wall on which the glue is placed. This is enough to correct the position of the covering material, which only needs to be moistened for about a minute. Use clean water. Liquid from reservoirs will cause bacterial damage to the tiles and lead to the formation of fungus.
When not to do it
In some cases, tiles do not need water.
If you use glue such as:
- liquid Nails,
- silicone composition,
- epoxy tile adhesive (for example, for porcelain tiles).
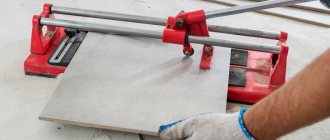
Many experienced tilers agree that moistened tiles are easier to cut. The seam is more even.
What is included in surface preparation
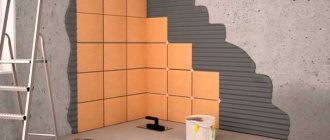
Now let's look at how to prepare walls for laying tiles. You can lay tiles on glue or cement-sand mortar, and the preparation of the base depends on the choice of the type of adhesive mixture. Using a cement-sand mortar, you can lay tiles on an uneven wall, since the layer of this composition will be considerable, which will help cover all the unevenness.
Having saved on leveling the walls before laying the tiles, you will have to tinker for a long time during its installation, trying to level the surface. Since the mortar quickly loses its plasticity, you will have to repeatedly remove the tiles, clean the base of the mortar, and put the tiles back in place.
Then you will need to thoroughly clean the seams - as they say, “the game is not worth the candle,” so we will not dwell on this technology in detail.
It is important! Laying tiles on a wall painted with oil paint can be done using concrete contact
- In order to lay tiles on the wall without small inserts, sometimes it is necessary to build up the base with cement-sand mortar.
- For example, the distance from the corner to the door is 83.5 cm.
- Tile size 20x30 cm.
- It turns out that 4 tiles will lie on this surface, but there is still 3.5 cm left.
- Let's put 1 cm on the tile seam, and 0.5 cm on the tiles on the corner wall - 2 cm remains.
- It is impractical to cut such narrow strips, so the side wall can be increased by at least 1.5 cm, and when laying the tiles, lay out the tiles, slightly increasing the seams so that they lie evenly. Depending on how well the wall is leveled, it depends on what layer of glue will be applied subsequently.
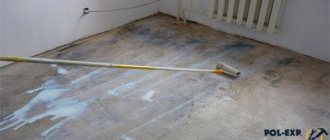
A more progressive method of wall preparation is to thoroughly level the base using cement-sand mortar or drywall “to zero.”
When checking with a rule or wedge, it is allowed that tiny gaps remain. Leveled walls are primed with a composition that has the ability to penetrate deeply into the surface. This method implies that a minimum thickness of glue will be applied.
It is important! If previously plastered and painted curved walls are leveled with cement-sand mortar, the paint is completely removed, and then notches are made on the base. Having dealt with the question of how to prepare the walls, let’s take care of the tools
Having dealt with the question of how to prepare the walls, let’s take care of the tools.