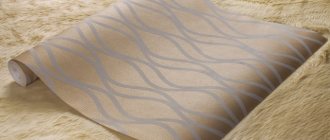
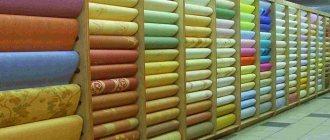
Residential renovations rarely take place without the use of wallpaper. This finishing material is used both in budget work and in the process of creating luxury interiors. Rolled materials are quite easy to use, which allows them to be used by any homeowner who wants to change the interior of their home.
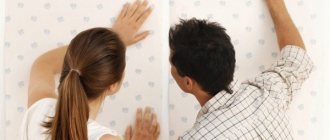
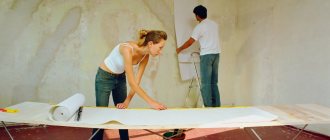
If you haven't done any DIY renovations before, you may find the upcoming undertaking challenging. However, in reality everything is extremely simple. Read our article about how to glue wallpaper together and avoid possible difficulties.
Features of the work
There is a wide variety of wallpaper products on the modern market. The simplest option is paper sheets. They are easy to work with without any help, the wallpaper is quite light and can be fixed with any type of glue. If the budget is too limited, use just this finish, as it is compatible even with ordinary paste, which is prepared at home from water and flour.
If you decide to use non-woven products, then the question of how to glue wallpaper end to end is most relevant to you. This is due to the fact that such products are susceptible to getting wet and stretching. After the glue dries, the fabrics “run together” again, resulting in seam divergences. Similar processes are observed in vinyl varieties, which significantly complicates the work of novice craftsmen.
How to join wallpaper from different materials
To obtain a connecting seam of impeccable quality, you need to study the technical characteristics of wallpaper products. And carry out technological operations taking them into account.
Non-woven
Based on mineral fibers. Their inner side is treated with an adhesive compound. The glue is applied only to the wall surface 15 minutes before gluing. They do not stretch or shrink after drying. The corners are covered with them end to end.
Vinyl
Both the panels and the wall surface are treated with an adhesive composition. Additionally, the joint area is coated with a narrow brush. You need to smooth them out with force. When gluing with an overlap, use a utility knife to cut through both layers of overlap.
Paper
Products with minimal thickness. They need to be glued immediately after spreading the glue, avoiding swelling. The overlap is almost invisible. And it doesn't have to be cut off.
Photo wallpaper
Consist of separate fragments. Each fragment is bordered by a white stripe. It must be cut before gluing. Mark the areas where the fragments will be located on the wall. They need to be glued end to end, following the sequence (indicated on the roll label). You can pre-assemble a photographic image on the floor.
Liquid
They differ from ordinary ones in that they do not require joining, adjustment of texture and pattern. “Sit down” evenly in the inner corners. Carefully go around the outer ones. Masks the curvature of the surface.
How to prepare walls for wallpapering?
Gluing wallpaper so that joints and bumps are not visible can only be done on perfectly flat surfaces. When using thin fabrics, special attention is paid to the quality of the base. Thicker varieties can hide minor defects, but the likelihood of them appearing in the future is quite high.
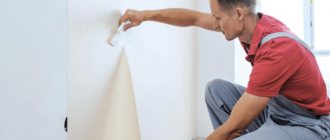
To prepare surfaces for work, remove the old coating. If you have previously used wallpaper, wet it with water and scrape the walls with a metal spatula.
After the work has been done, evaluate the condition of the surface. If there are no large cracks or uneven areas, smooth the base using finishing putty. It is capable of covering defects up to 5 mm deep into the wall.
If the walls are too crooked, level them using plaster along the beacons. The material can be applied in layers up to 15 cm, which allows you to completely eliminate all flaws.
Preparing wall corners
- Save
Even if the walls are plastered according to the beacons and well-puttyed, this does not mean that everything is in order with the corners. Small depressions and grooves are unacceptable; they are filled with putty. Ideally, when puttying and subsequent sanding, the inner corner is given a minimum radius of curvature.
This will allow you to completely remove excess glue and air when gluing. When preparing an external corner, it is necessary to use a perforated corner. This will help create straight lines and properly wallpaper, and will protect the plaster from collapsing during light impacts, which happen, for example, when furniture is moved.
When applying primer to walls, use a roller. Use a brush to thoroughly prime the corners. Choose the order in which you will paste the sheets and decide where to start. It may be more convenient to start at the edge of the window or door opening. To start, choose a wall with a less noticeable corner, such as where a cabinet will sit.
Take in your hands a narrow strip of wallpaper, cut to width from a roll. Walk with it along the selected wall, trying out options for the arrangement of sheets. When choosing an option for how to properly wallpaper corners, strictly follow the rules:
- sheet joints in the corners are unacceptable;
- no matter how smooth the corner may seem, do not plan to cover it with a single sheet;
- Instead of an overlapped sticker, use an overlapped sticker followed by a double cut.
Shifting the starting point, select such a location on the wall for the first panel so that approximately the middle part of the next panel falls on the corner walls. Using a plumb line and a sharp pencil, mark a vertical line on the wall. It is not necessary to draw a solid line, which may later become noticeable.
You can make barely noticeable centimeter-long marks every 20–30 cm and draw a line not from the very joint, but, say, one centimeter to the left or right, so that this line is subsequently closed. Such an inconspicuous line will serve as a reliable guide and will not appear later at the junction itself, as sometimes happens.
Gluing the first panels
Let us recall the sequence of the stickers:
- Open the wallpaper with or without a selection of patterns (according to the instructions on the roll).
- Apply glue to the walls, canvas or walls and canvas (according to the instructions).
- If the fabric is glued, fold it so that the glue does not dry out prematurely.
- Glue the canvas on the wall from the ceiling down, aligning with the vertical mark or with the extreme edge of the already pasted canvas, aligning the pattern.
- Carefully remove any remaining air with a roller or brush, smoothing from the center to the edges.
- Using a wide spatula and a utility knife, trim the top and bottom of the panel, smooth it again with a roller, apply glue if necessary, and smooth it again.
- Save
- Save
How to wallpaper: inner corners
- We cut out a strip from a single piece of cloth, 5 centimeters wide greater than the distance from the last piece to the corner (we measure at the ceiling, in the middle and at the floor, take the largest), the remaining piece will be glued after the first.
- We coat it with glue (according to the instructions for the wallpaper) and stick the prepared canvas, smoothing it with a roller or brush, first on the wall, then in the corner and then a strip on the next wall, removing excess glue and air.
- In places where the wallpaper wrinkles noticeably, we make horizontal cuts 5–10 cm apart.
- Using a plumb line, we draw a vertical line for gluing the remaining piece of canvas so that it overlaps 2 cm onto the previous canvas in its narrowest part.
- We coat and glue the remaining canvas, aligning the smooth edge with the applied vertical line, smoothing to remove any remaining glue and air.
- We prepare the knife; to do this, before each cut, we break off the tip of the knife according to the marks on the blade.
- Using a knife and a wide spatula, we cut without tearing, in one step, both layers of the canvas so that the cut passes a centimeter from the edge of the second strip.
- We remove the cut excess, if necessary, bend the edges and add glue, roll it with a roller.
After double trimming, an invisible joint remains. If you don't succeed the first time, remove the pasted strips and repeat with great diligence. It will definitely work out, and you will know how to properly hang wallpaper in the corners.
- Save
Pasting the external corners of the room is carried out in the same order and in compliance with the same rules: we carry out the markings so that there are no joints and do not try to paste them with a solid canvas.
After gluing the first corner piece of canvas, the wrapped part of the wallpaper should be at least 5 cm. Apply glue to the next canvas according to the markings so that the overlap in the narrowest part is at least 2 centimeters. Save
Useful advice from experts
- If you find an air bubble and it does not smooth out, pierce it, remove the air, pour in a little glue with a syringe and smooth it with a roller.
- Sometimes when trimming from above, below or at the window and doorway, the wallpaper gets chewed. Let them dry a little and repeat the cutting. Perhaps the knife has become dull and it's time to change the blade.
- Do not allow drafts in the room, this can lead to premature uneven drying and peeling of the canvases.
- De-energize the sockets and switches in the room in advance and remove their frames. You can return it to its place immediately after pasting.
- When gluing to problem areas, add 10% PVA glue to water when preparing the glue.
- If old wallpaper is difficult to remove, wet it with primer using a paint roller. Remove immediately before the primer dries.
Preparing for work
If you are going to glue the wallpaper back to back (as with the previous strip), treat the walls with a deep penetration primer. It will ensure good adhesion to the surface and remove dust that appears during the process of sanding the walls.
Next, you can start working on wallpapering. Pre-prepare the following set of materials and tools:
- wallpaper glue;
- measuring tool (long ruler or tape measure);
- pencil for marking walls and canvases;
- stationery knife;
- small width paint brush;
- glue roller;
- wallpaper roller with rubberized roller;
- a stepladder or a strong and stable stool.
Choose wallpaper glue depending on the type of roll products. To glue the joints of non-woven wallpaper (as well as their vinyl analogues), special compounds are purchased that bear the appropriate mark.
Wallpaper selection
Don't skimp on the quality of wallpaper. The final result depends 70% on this. You need to pay attention not only to the design and price, but also to the material from which they are made.
- Paper wallpaper. Despite the environmental friendliness of the material and its low cost, this choice is not the most suitable for butt gluing. They quickly absorb glue and shrink in size when dry. Therefore, it is impossible to predict the result of the work. If, however, other options are not even considered, then it is better to take multi-layer ones.
- Non-woven wallpaper. They are made from cellulose and synthetic fibers. When dry, they do not deform. For small defects, the walls hide the unevenness well.
- Vinyl wallpapers. Foamed vinyl applied to interlining is easy to glue. In addition, it hides wall imperfections well. Wallpaper with silk-screen printing is only suitable for a perfectly smooth surface.
- Fiberglass wallpaper. Their texture resembles fabric. They need to be glued with special care, as they are ready for painting. It can be applied multiple times. Therefore, to change the interior, you don’t have to re-paste the wallpaper.
Regardless of what wallpaper you choose, there are general operating principles that will help you get the job done efficiently.
We begin to cut the rolls
To quickly and efficiently cover walls with wallpaper, immediately divide the roll into several strips of the length you need. To do this, measure the height of the walls, add 5 cm to the resulting parameter and make the first cut.
Unwind the roll further, attach the previous strip to it and, at the cut point, bend the sheet in the opposite direction. So mark the entire skein. Using a utility knife, carefully cut the fabric where it is folded.
If you use products with a selection of patterns, then the joints of the canvases should be invisible. How to glue wallpaper without seams and joints? Use the following method:
- Unroll the roll to the length you need and cut the first strip.
- Turn the first piece over with the pattern facing up and unroll the roll next to it.
- Position the second strip so that the pattern between adjacent strips matches.
- Cut off the second strip, and simply cut off the excess wallpaper that remains on top.
In this way, cut out all the purchased rolls. Please note that one package of wallpaper produces 4 pieces of wallpaper without matching. If the design needs to be compared, there will be 3 whole canvases from each roll.
What tools are needed?
- Paint roller with medium length bristles.
- Two brushes: wide and narrow. The wide one is used to spread the glue over the wallpaper, the narrow one is for the edges where the wall connects to the ceiling and floor.
- Pressing spatula (made of rubber or plastic). They iron the canvases on the wall.
- Foam roller yellow or black. Yellow is used to smooth pasted sheets with a relief pattern, black is used to smooth out smooth sheets.
- Cone roller. Seals the strips inside the corner.
- Paint bath.
- Tape measure/long ruler.
- Pencil with soft lead.
- Plumb and level.
- A stationery knife with a snap-off blade.
- Metal spatula.
How to glue wallpaper at the joint: technology
The main rule that should be followed in the process of arranging strips at the joint is that the work is done so that no voids form between the strips.
Pasting the walls begins from the window, along the first straight surface. To do this, cover the back side of the canvas with wallpaper glue and fold it in half. After this, take a plumb line and draw a straight line on the wall (from ceiling to floor). Now unfold the canvas, bring it to the wall, press its upper part against the wall. In this case, align the edge of the strip along the intended line.
The pasted strip must be smoothed with a special spatula or roller. After this, you can fix the second strip. To ensure that the seams are not noticeable, glue the next sheet flush with the previous one, without allowing the edges to overlap each other.
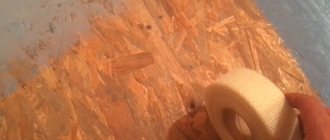
When understanding the question of how to properly glue the joints of non-woven wallpaper (and paper sheets), you should pay attention to a special tool - a seam roller. They need to go through all the joints, which will allow the material to be securely fixed in this area. After the glue and canvas dry, such a seam will become invisible.
Docking depending on the type of material
We have already looked at how to combine wallpaper of different colors, but what about wallpaper of different types? In order to find out, let's study the properties of different types of wallpaper.
Liquid
Liquid wallpaper is distinguished by its wear resistance , they serve as an excellent alternative to all the usual wallpaper. However, you need to be careful when gluing and joining them in the area of ceilings and slopes (how to dilute and apply liquid wallpaper?).
Non-woven base
The popularity of non-woven wallpaper is due to its high quality, which is not inherent in other types of wallpaper. These benefits include:
- Strength.
- Fire safety.
- High heat and sound insulation.
- Do not fade when exposed to sunlight.
- A wide range of choices: both expensive and cheap options.
When gluing non-woven wallpaper and joining it, you must strictly follow the instructions on the packaging, otherwise the canvas may not adhere well to the wall or become covered in blisters.
Vinyl
This type of wallpaper must be glued end-to-end, its base is covered with glue. Vinyl coverings are highly durable, and this even allows for re-fitting to the wall . It should also be taken into account that this wallpaper takes a long time to dry, and when working with it you need to control the temperature and humidity of the air, and also avoid drafts.
How to properly create seams on the outer corners of a room?
In the inner and outer corners the wallpaper is glued in a special way. If you need to decorate an outer corner, then you can glue wallpaper without joints. As in the technology described above, first coat the canvas with glue, place half of it on one edge of the corner, and wrap the other half on its second edge. This way you will get a smooth surface without cutting.
This method can only be used on perfectly even angles. If the surface is curved, the second edge of the canvas will lie unevenly, and folds will form. In such situations, it is better to make a seam.
While fixing the canvas on one side of the corner, bend its edge onto the second wall. Then glue the second strip, but place the edge of the canvas clearly at the corner. Such a seam will not come apart over time and will look neat and beautiful.
What does direct joining of wallpaper 64 cm mean?
A few simple steps will help you determine how many rolls you need to cover a room. Calculate the perimeter of the room to be covered, taking into account windows and doors. Also check the length and width of the roller.
If you glue wallpaper without adjusting the pattern
, then calculating the number of rolls will be simple:
- Determine the perimeter of the room
The perimeter of a room is the sum of all its sides. To calculate it, we use the formula:
P = 2 * (A + B), where A is length, B is width.
For example
: Let's calculate the perimeter of the living room 7x8 m. Let's add up the size of all its walls - and we get 2 x (7+8) = 30 m.
If the room has a complex shape, then to make the calculation you will have to measure each side separately or study the technical plan of the room.
How many wallpaper panels do you need for a room?
Let's find out how many wallpaper strips are needed for a room by dividing the perimeter by the width of the roll.
For example
: The perimeter of the room is 30 m, and the width of the wallpaper is 1.06 m. Divide 30 by 1.06 and we get 28.3. We round the result up - total: 29 panels.
How many panels do you get from one roll?
Let's count the number of full panels in one roller, dividing its length by the height of the ceiling.
For example
: The length of the roll is usually 10 m. The ceiling of the living room is 2.75 m. It is recommended to add a small margin of 5 cm to it for ease of alignment. Therefore, the ceiling height in our case will be 2.8 m. If we divide the length (10 m) by this number (2.8 m), we will get 3 full panels from 1 roll.
How many wallpapers do you need in total?
Let's divide the total number of panels in the room by the total number of panels that are obtained from 1 roll.
For example
: Calculation in our case: 29 (number of panels) divided by 3 (number of strips from 1 roll) and with rounding we get 10 rolls.
If you are wallpapering with a large pattern
, then make sure that the pattern on adjacent stripes matches exactly. This is important for designs with large flower bouquets, luxurious monograms and other large patterns. At the same time, take into account rapport - the distance through which the pattern is repeated on the wallpaper strip. For “Palette” wallpaper it is usually 16, 32 or 64 cm.
So, let's make amendments to our calculations, provided that the repeat is 32 cm. Let's count how many repeats there are on one panel. We divide the ceiling value by rapport: 2.8 / 0.32 = 8.75 and round up - the pattern is repeated 9 times on one canvas. Next we multiply by the repeat value 9 x 0.32 = 2.88 m - the new height taking into account the repeat.
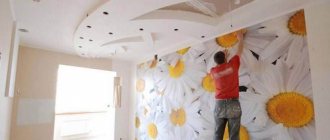
Making internal corners
Since every room also has internal corners, every novice craftsman should know how to properly glue wallpaper joints in such places. Since these surfaces are rarely smooth, creating a beautiful seam from two canvases is quite problematic. To ensure that the canvas lays beautifully, do the work as follows:
- On one wall of the corner, place the strip so that one of its edges overlaps the other wall a few centimeters.
- Fix the second sheet in the same way: so that its edge slightly covers the adjacent strip.
- Take a long rule or ruler, apply it to the corner and use a utility knife to make a cut from the ceiling to the floor. In this case, you must cut through 2 layers of wallpaper.
- Remove the rule and remove excess parts of the canvas.
This method allows you to design the corner so that the junction of the two strips is completely covered with finishing and there is no seam divergence on it.
How to make a joint when using different types and types of wallpaper?
There are several universal joint options that will suit different types of wallpaper:
- we make a classic joint. Wallpaper is glued to the wall with ungreased edges. Next, you should draw a line and trim the joint. After which the ungreased part is treated with glue and glued.
- horizontal stripes. In this case, draw a straight line along the level, glue the upper part, then the lower part.
Of course, for a beginner in wallpapering, difficulties may arise, but the desire to learn, to make it enjoyable for yourself, will help you overcome all difficulties and next time it will be much easier.
Wallpapering the bathroom
How to make an even seam if the edges of the roll are slightly frayed?
It often happens that as a result of damage to the packaging or due to improper storage, the wallpaper can become frayed on one or both sides of the roll. What should you do if you come across just such a product? How to glue the joints of vinyl wallpaper (or other types) so that they remain invisible?
In such situations, the first strip is glued using the standard method, and the second strip overlaps the first strip. To do this, on a strip that has a curved and disheveled edge, you need to draw a straight line (stepping back 1-2 cm).
The second stripe must be placed exactly along the applied markings. Now, using a ruler and a knife, carefully remove the excess part from the top and bottom layers. This way you get an even and invisible seam. Additionally, it should be rolled with a roller.
Causes of problems
Difficulties are often inherent in inexpensive wallpaper, although they are not excluded when choosing expensive materials. The reasons for this may be non-compliance with the rules for transporting and storing wallpaper. When purchasing, you should carefully inspect the edges of the rolls. If they are wrinkled or damaged, this will definitely be visible after gluing the strips to the wall.
Incorrect gluing is the main cause of defects at the joints of wallpaper
The unpacked roll should only be stored in an upright position.
If dark wallpaper has an unpainted edge, this oversight must be corrected using a dark pencil.
If bubbles appear
If in some places the wallpaper has come away from the walls or the seams have become noticeable, the canvas can be re-glued. But the situation with bubbles on the walls is already more unpleasant. Wrinkles and air bubbles always appear immediately after wallpapering. However, the next day the canvases should be leveled and smoothed out.
If there is air left in some places, you can carefully pierce the wallpaper with a needle and fill the empty space with glue from a syringe. A large number of defects cannot be removed using this method; in such situations, the canvas will have to be completely re-glued.
To prevent bubbles from appearing, you should follow the technology for gluing the roll finishing. Make sure there is no draft in the room. The air temperature should not fall below 20 degrees. Windows and doors can only be opened on the 2nd day.
Docking options
There is no clear answer to the question: which docking is best. Each method depends on the type of wallpaper, its design, as well as the manufacturer’s recommendations. Let's look at some methods for joining wallpaper.
Straight
This type of joining involves combining patterns at the same height.
It is used for those types of wallpaper in which the pattern in each roll starts from one place and is evenly distributed over the entire area of the roll. If your wallpaper shows two arrows pointing towards each other, then this indicates a direct connection . The number indicated there indicates the interval in which the pattern is repeated. That is, if the number 64 is indicated, then this means the pattern is repeated every 64 centimeters. It also follows that for a wall 250 centimeters high, you need to cut 256 centimeter panels and remove the excess part.
Displaced
This joining involves shifting the pattern of the next strip by exactly half (relative to the pattern of the previous section of wallpaper). This mechanism resembles a chessboard, where each cell is offset relative to its neighbor.
free
In this case, there is no need to combine the details of the patterns relative to each other - you can do this arbitrarily. It is allowed to cut the wallpaper in any combination, without taking into account the visual component.
Combination of materials of different colors
When it comes to wallpaper of different colors, here you can fantasize and experiment. You are given a choice: follow the instructions, or rely on your own taste. However, you must take into account that a transition element is needed that will soften the color gap . In this case, you can use planks, baguettes or braids, but you need to select a transition element of the color that would be in harmony between two adjacent canvases.
Attention
Attention! We are only talking about wallpaper of different colors, but not different types and thicknesses - they must be identical. Joining wallpapers of different textures and thicknesses is not advisable.
What glue should I use for making seams on wallpaper?
The construction markets offer a wide variety of adhesive products, which are intended for different types of fabrics. Separately, you can purchase glue for fixing wallpaper in the seam area. These varieties are distinguished by the presence of a polyvinyl acetate emulsion in their composition, which makes the glue more dense and durable.
Such compositions should be purchased for heavy fabrics, since ordinary glue cannot always reliably fix such seams. In all other situations, you can use a standard composition designed to work with all types of fabrics.
To prevent the adhesive from leaving stains on the front side of the wallpaper, excess adhesive must be removed immediately when gluing the seams. On some types of fabrics, dark stripes may appear at the seams. They are wiped with a slightly damp sponge after the glue has completely dried.
Insulating wallpaper: a universal material for the comfort of your home
Wallpaper for walls is the most popular finishing coating that immediately transforms the room. Taking into account the huge range, you can choose the material to suit absolutely any style and interior design.
If residents feel discomfort from extraneous noise, and have to spend large sums on heating, it is recommended to choose not only a decorative, but also a very practical finishing option - thermal wallpaper, or insulating wallpaper. This innovative material will eliminate the need to attach conventional insulation and will immediately make the house more comfortable.
Let's sum it up
If you have not made repairs before and have no idea how to glue the joints of wallpaper (paper, vinyl or non-woven), study the instructions from the manufacturer of the product you have chosen. For the first time, you should not choose expensive canvases. Experts recommend practicing on simpler varieties, which will help you assess your own strengths and the complexity of the upcoming work.
In general, this process is not particularly complicated. With proper preparation of surfaces and the right choice of glue, wallpaper joints can be made smooth and almost invisible. Difficult areas in the form of corners and boxes will require special attention, but the rules listed above will help you cope with them too.
Advantages and disadvantages
Do meter-long wallpaper have any advantages? Without a doubt. The standard wallpaper sizes were changed for a reason:
- There are fewer seams, and the boundaries of the meter-long coating are practically invisible. There is a feeling that the wall decoration is a solid canvas.
- It takes half the effort, physical effort and time to cut the roll.
- The budget is saved because some wide wallpapers are cheaper than narrow ones.
Foreign manufacturers offer different roll widths. In Italy it comes in 70 cm and 106 cm, in Belgium - 90, 100 and 140 cm.
Which wallpaper is more suitable for a small bedroom? The meter ones also look great. But be picky about the choice of material. The most environmentally friendly option is non-woven covering.
After purchasing a wide roll, you may encounter the following disadvantages:
- With uneven walls and many protrusions, it is difficult to glue meter-long wallpaper.
- It is unlikely that you will be able to glue them correctly and beautifully without an assistant.
But all the disadvantages of a wide roll can be solved, right?
Rules for quality gluing
There are rules to get the desired result:
- Work can start from a corner, window or doorway.
The order of stripes when gluing from the window - The glue is applied according to the selected type of material. If processing of canvases is required, it starts from the middle.
- If the alignment is done in a crooked corner, then the strips are laid with an overlap of 10 to 20 mm. If possible, it is better to avoid any joining in the corners.
- To avoid peeling the edges, they are coated with a more durable glue.
- Seams may stand out because too much time has been spent smoothing them out.
If the work is done correctly, the surface will acquire the desired decorative effect.
You can smooth the canvas thoroughly using a plastic wallpaper spatula.
What is wallpaper rapport, and why is this parameter important when working with glass wallpaper?
The variety of wallpapers offered by specialized retail outlets and numerous specialized online stores often confuses property owners who are planning to update the interior of their home. Despite a fairly large assortment of different types of wallpaper in retail sales, they have many common properties and characteristics, one of which is rapport. This parameter is very important, since the final appearance of a city apartment or country house after the renovation depends on it.
Before answering the question why rapport must be taken into account when working with glass wallpaper, let’s try to figure out what “rapport” is. Like many other words that have long been firmly established in the Russian language, the word “rapport” came to us from the French language. The word "rapport" has several meanings in French. If we discard the first and quite obvious-sounding semantic block, which includes such translation options as “report”, “report”, “review” or simply “report”, there will be a second semantic block containing concepts applicable to wallpaper: “ ratio", "ratio" or "ratio". Following the logic of translation, wallpaper rapport is a cyclically repeating part of a pattern or ornament. Moreover, in this case we are talking about cyclicity, which can be observed on wallpaper canvases in the longitudinal direction - along the canvas. A pattern or ornament repeated across the canvas can also be called rapport, but its indicators are not important when gluing wallpaper. In other words, rapport is the distance expressed in measures of length (meters or centimeters) between identical, repeating elements of wallpaper design.
Various industry standards and GOSTs distinguish several types of repeat, joining and pattern fitting:
- free joining , in which rapport is not taken into account, and the wallpaper is pasted without adjusting the pattern;
- direct joining , which requires taking into account rapport, but gluing wallpaper without displacement (that is, the pattern or ornament is located strictly vertically on the walls);
- offset docking , which is a special case of the previous option, but adds an offset to the pattern fitting procedure. In this case, the label indicates both repeat and offset, for example 50/25, where 50 cm is repeat, and 25 cm is offset. When gluing wallpaper with this method of adjusting the pattern, it is located on the wall as a “ladder”;
- counter joining means that each subsequent wallpaper sheet should be turned “upside down” in relation to the previous sheet.
Now that we have learned what rapport on wallpaper is, let's figure out why this parameter is so important when working with glass wallpaper. At first glance, it may seem that rapport is important only when working with ordinary wallpaper that has some kind of typographic design. It is clear that wallpaper hung without matching such a pattern on adjacent canvases will look at least strange on the wall. Fiberglass wallpapers are textured wall coverings that can be painted and do not have a color pattern that would need to be taken into account when gluing. But you still need to adjust the glass wallpaper, as well as take into account the rapport on some articles and types of wallpaper.
How do you need to adjust glass wallpaper if their canvases only have a textured, relief ornament formed by the interweaving of glass fibers? Simple glass wallpaper from the classic Wellton Optima collection and the professional Oscar series do not have a repeat, but matching the pattern for them is no less important than maintaining the repeat. Such classic glass wallpaper is adjusted using a weft thread that loops across the canvas between the warp threads. For such an adjustment, a very small shift is enough, often 1-2 centimeters, so that the weft thread from one fabric smoothly transitions into a similar thread on the second fabric, without losing its “movement”. And if on the edge of the first fabric the weft thread is above the warp thread, then on the second fabric it should “dive” under the same thread. And vice versa: the weft thread coming out from under the warp thread on the first fabric should continue with the weft thread of the second fabric, rising above the warp thread. With this adjustment, the joining seam on the glass wallpaper turns out to be almost invisible, since the pattern of the looping weft thread is preserved on the adjacent canvases.
All glass wallpaper from the Wellton Decor design collection have a repeat pattern, which must be taken into account when gluing the canvases. Moreover, on Wellton Decor glass wallpapers, direct joining of the pattern is almost always used, without displacement, although shifting of the pattern on some articles is possible. For example, glass wallpaper “Butterflies” can be glued either in a straight line or by shifting the ornament located in the center of the canvas. Speaking about rapport, it is important to understand that its size does not mean that this number of centimeters needs to be cut off and thrown away. The number of pieces of canvas cut out for adjustment directly depends on the repeat of the specific article of glass wallpaper and the height of the room being covered, and sometimes practically nothing goes to waste.
And finally, it is worth mentioning the most convenient way to adjust the pattern on textured glass wallpaper. It is best to adjust the pattern not on the wall, but on the floor, after first cutting off the first canvas to the height of the ceiling with a small margin and rolling out the blank next to it for the second canvas. If necessary, you can use additional bright side light, which perfectly reveals the textured pattern on any glass wallpaper. Having combined two canvases on the floor, you need to find on them the “transition” of the textured pattern from one canvas to another, and mark this transition with arrows, drawing them with a regular pencil. After this, on the wall you will only need to combine these arrows to achieve perfect joining of the glass wallpaper according to the pattern and get a beautiful and invisible joining seam. And after painting, all technical pencil marks will be hidden under two layers of paint and will not spoil the appearance of your home.