MesterulManole
30342 0 9
MesterulManole June 12, 2017Specialization: many years of experience in finishing works of residential and office premises, dachas, country cottages, etc. Hobby: cycling in all its forms
Often cosmetic repairs are the need to disguise defects in old plaster
Curved walls are a problem in many old apartments. Of course, building surfaces can be leveled with plaster, but sometimes there is no time or money for this, and therefore it is easier to glue wallpaper for uneven walls, which will hide the relief. I will talk about which finishing materials to choose for visual alignment of walls. As a result, you will be able to hide the condition of the old plaster.
What types of wallpaper to glue on uneven walls
It is clear that it is better to stick the canvases on perfectly smooth walls. This will not only simplify the process, but will also make the room beautiful. However, it is allowed to use certain types of wallpaper on uneven walls to hide defects.
It is clear that the best option in this case is thick and dense canvases and products with a relief pattern. Here is a list of products that can be used for uneven walls:
- Paper canvases. Such wallpaper hides uneven walls. You just need to choose duplex products consisting of two layers. The thickness allows the canvas not to stretch much, so after drying the likelihood of surface curvature is reduced.
- Liquid wallpaper. The structure of the material resembles plaster or putty. This makes it easy to apply. And if there are small cracks on the wall, they are filled with the composition.
- Vinyl wallpapers. It is difficult to hide unevenness with such products, since the surface of the material is glossy. However, vinyl wallpaper has a textured surface with a specific pattern. These options are ideal for hiding surface irregularities.
- Non-woven trellises. This is thick wallpaper with relief applied. We can say that this is an ideal option that will help get rid of problem areas. The irregularities will visually disappear or become barely noticeable.
But in order to hide imperfections on the walls, you need to not only look at the appearance of the wallpaper, but also at its features, such as the pattern on the surface, texture and density of the canvas.
The correct sequence of actions for gluing wallpaper for painting
How to prepare the surface
The results of the work depend on how the surface is prepared. It is important to make sure that after this the walls meet certain requirements. In this case, the preparation technology involves the following steps:
- To begin with, the entire apartment is disconnected from electricity. Otherwise, sockets and switches cannot be removed from their mounting location in a safe way. It is better to take separate care of the wire insulation.
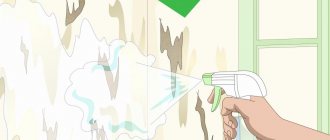
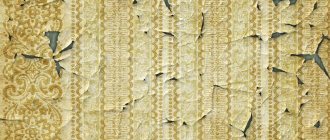
- The previous finishing material is removed if the room is old. The trellises are soaked, removed manually, or spatulas are used. The tiles are bleached. Paint is removed mechanically or with chemical compounds. The main thing is to preheat the layer using a hair dryer. A warm soapy solution helps remove the whitewash before gluing.
- Antibacterial impregnations are used to treat suspicious areas associated with a high risk of fungi and mold formation.
- The joints between ceilings and walls and floors receive the most attention. It is necessary to level the surface so that only right angles are preserved. Then it will be easier to glue wallpaper for painting.
- The surface is treated with a primer, then adhesion between surfaces becomes better. The easiest way is when the repair is completely done by hired craftsmen.
All you have to do is wait until the primer dries, then proceed with subsequent work with glue.
Marking and cutting
The main thing is that the sections of wallpaper are connected to the surface as evenly as possible. Otherwise, the appearance will only worsen with each new trellis. Creating markings before moving on to other stages protects against such troubles when processing walls.
The sequence of work is not so complicated:
- First, choose a corner with wallpaper from which to start working. This is usually the wall on which the window is located. This is how a starting point is chosen. A distance equal to the width of the purchased trellises is marked from the edge. Subtract 2-3 cm from the value. This is the so-called pass for arranging corners.
- Ideally straight vertical lines are marked using a plumb line. This is a guideline for further work, including along the edges.
- Use a starting strip drawn in pencil. We retreat from it a distance identical to the width of the trellis. After this, draw a second line. This marking technology is used for all walls. Then it will be impossible to fix the pasted wallpaper.
- After this, they move on to cutting the roll. The distance from floor to ceiling is measured using a tape measure. This needs to be done in several places. A 10 cm margin is added to the results. The use of baguettes involves reducing this figure to 3 cm. Then a construction knife is taken for leveling.
Particular care is required when working with glass wallpaper. The respirator provides complete protection against damage. Then the materials will be glued without harm to health.
If the walls are painted without wallpaper, the surface must be perfect. Otherwise, most of the defects will be visible on it. Thanks to the wallpaper, this issue is partly removed. The canvases will be easy to remove and repaint in a different color if necessary.
Wallpapering
Wallpaper strips prepared for gluing are treated with glue and folded in such a way that the surface treated with glue touches each other, after which they are rolled into a loose roll. It is advisable to prepare 5-7 strips at once. The strips coated with glue should lie for 15-30 minutes to ensure that the substrate is evenly saturated with glue.
After this, using a roller, apply glue to the wall to a width slightly greater than the width of the wallpaper strip. Try not to stain the ceiling with glue. The first strip is glued from the window along a vertical line marked with lace and paint. Never focus on corners - they are often crooked.
The strip is smoothed first in the middle, then, displacing air and excess glue, to the edges, from top to bottom. The canvases are glued end-to-end, as tightly as possible to each other, but without overlaps. After gluing, the edges of the strips are rolled with a rubber wallpaper roller.
Smooth out the stripes only with a plastic wallpaper spatula. Excess glue is removed with a damp cloth or foam sponge. All work must be carried out with windows and doors closed. They can be opened only after the wallpaper has completely dried - after 2-3 days.
We glue paper wallpaper and vinyl wallpaper on a paper backing
There are practically no differences here from working with conventional trellises. The canvases themselves in this case are distinguished by increased thickness and length. Wallpapering for painting has the following nuances:
- The cut sheets are laid out on the floor. The main thing is that the surface is smooth and clean.
- The back side is covered with adhesive. A maklovitz brush is a must-have device for carrying out work. Corners and edges of canvases are the weakest points; they are handled especially carefully. No part of the materials should protrude.
- It is unacceptable to leave areas that have not been coated. Otherwise, air bubbles will form. It is best to use glue with special additional indicators. A special dye in the composition helps to evenly distribute the material over the surface. The adhesive becomes transparent when it dries.
- The strip is folded like an accordion or in half. Then the sheet is better saturated with the composition. The adhesive for processing is selected depending on what base is used.
- While the base is impregnated with the composition, you can cover the walls with a thin layer of the mixture. The area behind the marking line is also captured, but not much. Excess glue is removed in a couple of minutes.
- The starting strip is fixed in its place. The main thing is to glue it clearly and evenly in accordance with the markings.
- Air and excess glue are expelled with rollers and spatulas. Use a sponge or rag to get rid of any remaining glue. It is important to ensure that tools and materials do not dry out too much.
- The entire wall is covered using this principle. The next strips go end-to-end with the previous ones. The edges must be placed close to each other, because after drying the paper shrinks somewhat. You need to be especially careful in corners and near openings.
- After drying, get rid of excess edges, very carefully, otherwise gluing will not give good results.
Products with bright patterns
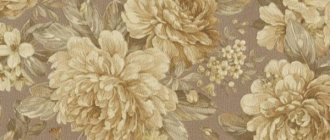
A bright, rich and intense pattern is best; it will help hide all imperfections. Since when using plain trellises, all irregularities will be emphasized. Therefore they should be avoided. Abstract drawings that are randomly located on the surface have proven themselves especially well. They distract and attract the eye. As practice shows, it is better to use small patterns on the surface, for example, images of flowers or monograms. But, it is better to buy wallpaper that does not require selection of a pattern, so that the joints do not highlight the unevenness on the wall even more.
As for geometric patterns, they are not suitable for hiding irregularities. After all, the curvature of the walls will only stand out more as a geometrically even figure, straight lines will be distorted and will immediately catch the eye.
Criterias of choice
Before you begin choosing the necessary material, you should understand how a wall flaw manifests itself. There are two ways to detect unevenness:
- tactile method;
- in a visual way.
The tactile method uses skin receptors, for example, the hands. There is one way to hide minor defects from such inspection - use embossed material. Visualization is much easier to mislead. Since unevenness is revealed by the contrast between light and dark areas, this contrast should be kept to a minimum. To do this, you can use one or more methods:
- use diffused light;
- change the angle of the light flux;
- change the reflectance.
For the first method, embossed wallpaper is again suitable. Light, hitting convex places, cannot create clear boundaries indicating the difference, and then the impression of evenness is created. Used when there are large areas of depressions or mounds.
A sharp transition between two surface levels can be smoothed out with thick material, since it will not be able to repeat such a configuration. Therefore, where chips and cracks exist, this will be the best solution.
When the wall is mostly flat but has slight bulges, the reflectivity should be reduced. Glossy paper has the highest reflectance, so its use is strictly prohibited. Matte would be better. In addition, dark colors absorb light well. The ideal approach is to use different colored shapes, especially if dark colors will be placed on the bumps.
Attention. Using wallpaper with a pattern - a repeating pattern - will be impossible, so they are not suitable for uneven surfaces.
There are also other subtleties associated with wallpaper.
Texture wallpaper
Smooth wallpaper will not help hide the imperfections of the walls, but, on the contrary, will emphasize them. Therefore, you only need to buy texture options. These are some types of vinyl products, photo wallpapers and non-woven products. The main requirement is a voluminous and convex pattern.
You need to choose foamed vinyl or products made by hot stamping. Tapestries based on non-woven fabric for painting also make unevenness invisible. As for photo wallpaper, the best option is images that imitate natural texture: stone, plaster, decorative brick, wood. In addition, this will create an indescribable style inside.
For the effect to work, you need to choose products with a matte rather than glossy surface.
Thick wallpaper for walls
There is a pattern - the denser the wallpaper, the more imperfections on the wall they hide. Single-layer paper options have low masking ability. But thick wallpaper for uneven walls is just right. Since the price of dense products is higher, you can use duplex paper trellises. The price is low, and they are easy to use.
Vinyl and non-woven wallpaper are better in this regard. The first ones are made by hot stamping and their density ranges from 200 to 300 g/m2. Some manufacturers create canvases with a density of 400 g/m2. They are not afraid of wet cleaning, they are not afraid of light mechanical damage, and, of course, hide the imperfections of the walls.
Non-woven products are heavy and dense. They have a long service life, and to apply them you do not need to prepare the walls to perfection or seal small irregularities and cracks.
Tips for covering uneven walls
To hide imperfections, it is important not only to choose the right wallpaper for uneven walls, but also to paste them correctly to prevent even bigger mistakes. There are several tips to help you cope with the task:
- It is important to measure the strips with a small margin. Moreover, the greater the curvature of the walls, the greater the margin at the bottom and top of the strip.
- When working, you need to use a plumb line and a level to make sure everything is glued correctly. The starting strip must be glued strictly in a vertical order, and all subsequent ones must be aligned with it.
- It is recommended to glue wallpaper end-to-end. Otherwise, distortions on the surface may spoil the final result.
- If the distortions on the wall are minor, then it is enough to use thick vinyl or non-woven fabrics.
- When the ceiling also has a curvature, the uneven edge of the strips is hidden using a ceiling plinth.
As a result, even if the walls in the room are crooked, with defects and unevenness, wallpapering will help hide them. The main thing is to choose the right type of wallpaper, its texture, color and patterns on the surface.
Styles
Designer decoration of apartments offers dozens of different styles. Among them there are those who will help turn existing disadvantages into advantages.
Rough industrial style does not imply that the walls of the room will be perfectly smooth. Deliberate carelessness of finishing is what is inherent in this direction. The rough structure of concrete or uneven brickwork will look appropriate in such an interior.
Dyeing in dark colors
Ombre technique
This type of coloring has long crossed the threshold of beauty salons. It is even used in clothing design, creating spectacular interiors. Gradation of shades of the same color with a transition from saturated to blurry will help decorate surfaces with flaws.
Painting problem walls without prior leveling is a difficult and exciting task at the same time. After studying the advice of professionals, you need to choose the type of wall covering - wallpaper or special paint. Don’t be afraid to experiment: sometimes a non-trivial approach leads to amazing results , because you can create an attractive and original home interior.
What products will highlight wall defects?
It is important to know that some products can have exactly the opposite effect. Therefore, it is important to choose the right wallpaper, avoiding the following options:
- Canvases with a strict geometric pattern. This is especially true for horizontal or vertical stripes.
- Tapestries with light or pastel colors. Defects will only be highlighted and noticeable even more.
- Paper wallpaper consisting of one layer. They are thin and will reveal even the smallest imperfections on the surface.
- Plain products, without drawings or patterns on the surface, as well as without a relief part.
- A large pattern on the surface will not work either.
It is important to understand that wallpaper that is too heavy and dense on uneven plaster can quickly peel off, and all efforts, time and money will be in vain.
Considering all the tips and tricks, it is easy to hide imperfections on your walls using regular wallpaper. The main thing is to choose the right canvases, take into account the presence of a pattern and stick them with all the recommendations. You need to understand that no one will give a 100% guarantee. If you need a perfectly flat surface, then it is still better to level the walls.
