Practical and comfortable bath legs today no longer just have a load-bearing function. Quite often, such accessories are used as an auxiliary device that allows you to install the font evenly. In addition, modern bath legs, especially those made in a sophisticated style, are great as decoration for even the simplest bathroom bowl. Such an expanded purpose of supports has led to an increase in the assortment, which is difficult to understand, so it is important to determine the purpose of the accessory, the subtleties of replacement and installation, and thereby answer the question of how to choose legs for a bathtub?
Fastening methods
There are many ways to mount a cast iron or acrylic wash basin without using supports. For this, brick, metal frame or foam blocks are used. But installing a claw-foot bathtub is the easiest and most convenient option for those who want to do the work themselves. When installed correctly, the legs perform 3 important functions: weight distribution, leveling the bottom and raising the bowl to the required height. The supports are secured using the following methods:
- Using wedges. To do this, you need to match the holes on the “ears” located at the bottom of the bowl with the holes in the legs, and then drive a wedge into them. This type of fastening of supports is not rigid, so when fixing it is impossible to damage the enamel or deform the bathtub.
- Using bolts. This fastening method is also used to install a cast iron or steel model. It differs from the previous one in that bolts are used instead of wedges. When fixing the legs in this way, there is a risk of twisting the bolts, deforming the bottom of the bowl, and damaging the enamel.
- Using metal pins. Steel hot tubs are often mounted using a rigid structure of 4 legs, fixed to the eyes, and then pulled together with long metal pins.
- Using a self-adhesive layer. The installation of an acrylic bathtub is carried out using auxiliary legs, which are attached to the bottom using a self-adhesive layer.
The design and method of fastening the supports is determined by the characteristics of the bath. An acrylic hot tub, which is light in weight, is placed on a frame, the legs of which perform only an auxiliary function, and cast iron models are mounted only on high-quality supports designed to withstand significant loads.
Support Features
Based on the functions of the legs for a cast iron bowl, they are divided into types:
- decorative - the accessory is purchased exclusively to decorate the bathroom space. It has no other functions;
- supporting ones - play the role of a reliable support and do an excellent job of supporting the bathroom. Installing a font on support options is the most popular solution when installing bathtubs in a city apartment;
- intermediate - this is a special type that performs auxiliary functions in combination with another supporting structure.
The choice of a specific type in this case is largely determined by the type of bathroom and the fact of how it will be installed.
Nuances when installing an old bathtub on supports
When installing an old bathtub on freshly purchased “legs”, it is advisable to follow the following rules:
- check the complete set of supporting parts;
- carefully select the installation location;
- decorate the junction with the bowl;
- install a brick structure that increases the stability of the structure;
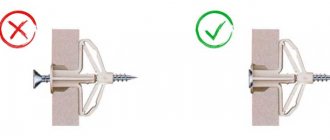
- when installing near a wall, additional fastenings to the latter should be used;
- to avoid the appearance of mold and rust, all surfaces are treated with special means before installation;
- It is best to use universal legs that fit any, even the oldest, font.
It is important to pay attention to the appearance of the bathtub stands. They should be in harmony with the bowl itself, with the entire decoration of the bathroom
Tips for further care
The new bathtub is installed and pleases with its whiteness. Now it is important to provide proper care in order to maintain its original appearance longer.
- Each time after hygienic procedures, the surface should be washed with a soft sponge with the addition of gel detergent. Abrasive cleaning powders and aggressive chemicals will have to be put aside.
- Wash off foam and dirt with running water from a watering can.
- All that remains is to wipe the enamel with a cotton or microfiber cloth, otherwise the water drops will leave unsightly traces of chlorine and calcium after drying. In the future, they will lead to the destruction of the enamel.
Simple rules of care will help avoid stains and scratches. The surface will no longer turn matte and porous, prone to the accumulation of dirt.
Brief characteristics
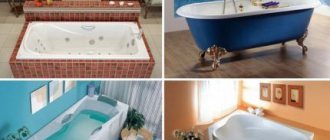
In the past, bathtubs with elegant legs were a distinctive feature of the decoration of noble rich houses and royal palaces. Times have changed, and such unique bathroom decoration can be found quite often. Bathroom legs have ceased to be a hallmark of luxury, but have become available in their range and cost.
The presence of such an accessory in the bathroom makes even a small bathroom without unnecessary frills more solemn and colorful. This type of decoration is also practical. After all, in addition to recreating royal luxury, this is a completely functional element of the bathtub design. Legs allow for secure installation of the bathtub. In turn, this guarantees your safety while using it. With the slightest desire and some effort, such decoration can easily be combined with any bathroom interior.
Video instruction
Instructions
First, let's look at the material from which the bathtub is made; your further actions to secure it in place will depend on this.
If you have a bathtub, then its undeniable advantage is durability; it also retains heat for a long time. However, it is incredibly heavy and not every floor can support it, so it is advisable to build a podium for it.
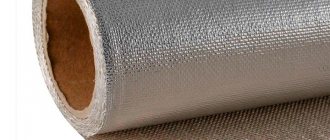
If the bathtub is made of steel, then it is much lighter, cheaper, easier to install, but its service life is shorter than that of cast iron. The significant disadvantages of such a bath include the noise that the water makes when you fill it. Even your neighbors can hear it. Therefore, before installation, it must be coated on the outside. It will dampen sounds and help keep you warm longer. Also, a steel bathtub quickly loses its attractive appearance: the enamel easily falls off.
Another material from which bathtubs are made is acrylic. These baths are very comfortable, beautiful, non-slippery and retain heat well. But their main drawback is low strength. No matter how much manufacturers praise acrylic bathtubs, there have been cases when such a bathtub simply could not withstand the weight of an overweight person and its legs were pressed inward.
Most often, bathtubs are placed on legs. But the problem is that if you just place it on the floor, it will wobble while you take a bath, which is not very pleasant. What way out of this could there be? In the case of, build a podium in the place where it will be, so that the legs of the bath remain on the floor, and the podium supports only the bottom. The podium is made of brick and leveled using a bubble level. Then, together with an assistant, install the bathtub on the podium and, if necessary, adjust the height of the legs; this will be easier to do, since now the bathtub rests not on them, but on the podium.
The general principles for installing and securing the bathtub are as follows: * Place the bathtub on one side and mount an overflow pipe outside in case the bathtub overflows, and an outlet at the bottom of the bathtub;
* Connect the floor siphon to the outlet and overflow of the bathtub;
* Now attach the legs to the bathtub and the siphon is inserted into the sewer pipe.
* Move the bathtub close to the walls
* Caulk the joint between the siphon and the drain;
* Place wooden plates under the legs of the bathtub so that the bathtub is installed with a slight inclination towards the drain, otherwise water will constantly accumulate inside the bathtub;
* Once the bathtub is securely fixed and the height is adjusted, it is necessary to seal the gaps between the bathtub bots and the walls using cement or putty. It is better to place a ceramic rim on top of the sealing layer.
Is it worth making the supports yourself?
Instead of purchasing legs, you can make a brick base under the font; this will not help save much, but it will give the structure a monolithic quality. Such a pedestal will be justified for very massive baths.
It is done quite simply, the bricks are fastened together using mortar, and a larger layer of 5-6 cm is placed at the junction of the mortar bath so that adjustment can be made. Then a font is placed on top and while the solution is fresh, the level is adjusted.
Some people try to make legs using metal pipes that are welded to the bottom of the hot tub. This is not the best option, because... The reliability of this installation method remains in question, but it allows you to save only 100 - 200 rubles.
Bath frame: what is it made of?
An example of a homemade welded frame for a bathtub
Making a frame for a bathtub with your own hands is not difficult, especially since you can use a variety of materials. The only main condition is strength and the ability to withstand extremely high loads (the weight of a bowl of water and a person). In addition, the material must have a protective coating that protects against high humidity, direct ingress of water and does not deform from temperature changes.
- Wooden beam. The material is affordable and durable, but has one significant drawback - it can begin to rot. In addition, the structure of wood is deformed by changes in temperature, high humidity, and if your timber does not have high-quality protective treatment, it is better not to use it.
Aluminum profile frame
Advice! Advantages of timber: ease of processing, affordability. In addition, to create a wooden frame for a steel bathtub, you do not need special tools; if you wish, you can get by with a hacksaw for wood/metal and a regular screwdriver with a set of attachments.
- The metal profile for plasterboard structures has one significant drawback - low strength. This material is not exactly designed for the heavy load created by the bathtub bowl. Profiles are best used for decoration or making an additional frame. In this case, the entire bulk will fall on the supports, which must be extremely durable, and the frame will only distribute the load and serve as a supporting element.
Bathtub frame made of natural wood
Important! If you only have a metal profile and you have to make a frame from it, the structure must be strengthened. For example, a wooden beam impregnated with a special composition against corrosion and rotting. In this case, you will get a universal bathtub frame, but purchasing two materials may not be entirely financially correct
In this case, you will get a universal bathtub frame, but purchasing two materials may not be entirely financially correct.
- A bathroom frame made from a profile pipe, according to professionals, is considered one of the most optimal. Depending on the strength, a profile bath frame will withstand a non-standard cast iron bathtub. There are practically no disadvantages, except for possible metal corrosion, which can be eliminated using a special product (primer).
Important! A bathtub stand made of a profile pipe requires welding, and this is the only problem that a home craftsman may encounter
The question of what the bathtub stand will be made of can be resolved with the help of other materials, which are quite sufficient
But when choosing something for yourself, be sure to pay attention to the strength and protective characteristics of the product
In addition, it is important to correlate the technical properties with the full load that the bowl will exert. Remember, it is better to have a durable but lightweight metal frame for a bathtub than a massive wooden one. The costs of materials will be repaid by a long service life and your peace of mind.
The costs of materials will be repaid by a long service life and your peace of mind.
Remember, it is better to have a durable but lightweight metal frame for a bathtub than a massive wooden one. The costs of materials will be repaid by a long service life and your peace of mind.
Criterias of choice
It is important to choose the right design for each shape of acrylic bathtub. When starting to choose, you need to know the parameters of the bowl:
When starting to choose, you need to know the parameters of the bowl:
- length, width, depth;
- thickness of the sides.
It is the last parameter that largely influences the choice. A bowl with an acrylic wall thickness of 5 mm is considered durable and can withstand surface loads. Cheaper bathtub options (1 mm thick walls) require installation with a frame.
Traditionally shaped products can be purchased with a rectangular design. Bowls mounted in the corner are available with a pentagonal frame. The choice of product for a stationary acrylic bathtub entirely depends on the financial capabilities of the buyer.
On sale there is a choice of manufacturers and metal thickness, which is important for the frame design
Product with reinforced structure
Accessories that come with an acrylic bowl make it heavier. Therefore, for strengthening, a reinforced frame is needed. An entire metal platform is used for the same purposes. For this design, the material is important, as is its thickness.
The metal frame must be treated with anti-corrosion agents.
When purchasing an acrylic bowl, professionals pay attention to the frame offered with the product. Durable is sold with a frame that has supports only in the corners
All-welded indicates a low quality bowl. But without a frame, it is impossible to achieve a strong installation of an acrylic bowl
The durable one is sold with a frame that has supports only in the corners. All-welded indicates a low quality bowl. But without a frame, it is impossible to achieve a secure installation of an acrylic bowl.
Self-assembled frame
It is not always possible to find an acrylic bathtub with a frame that would fully satisfy all wishes. Therefore, many are interested in how to assemble and install a frame for an acrylic bathtub themselves.
There are two ways to assemble and install an acrylic bowl on a do-it-yourself frame:
- on brickwork;
- installation on a structure made of plywood and timber.
It is almost impossible to do a DIY frame for an acrylic bathtub with installation using the first method yourself, without being a specialist. The brickwork will follow the contour of the bowl.
Installing a bathtub on bricks
No factory frame? No problem! We can install an acrylic bathtub on bricks. This option is even more reliable compared to the method of installing a bathtub on a factory-made frame.
The support can be solid or columnar.
Installing a bathtub on a solid brick base
Example of installing an acrylic bathtub on a brick
First step. We temporarily install the bathtub in the place of its future installation and project a drain hole onto the base. This will give us the opportunity to leave a gap in the substrate to connect the drain.
Second step. We lay out the bricks over the entire supporting part of the container. We select the height so that the sides of the bath rise above the floor by no more than 600 mm. At the same time, we take into account that we will still have a 2-3 cm pillow made of polyurethane foam.
The bricks are laid on traditional cement mortar.
Third step. We assemble a frame made of sheet plywood around the perimeter of the brickwork. The height of such sheets should exceed the masonry by the thickness of the foam substrate. Don't forget to leave the drain hole unfilled.
Fourth step. We evenly foam the surface of the substrate with polyurethane foam, without going beyond the boundaries of the frame. We immediately apply pre-prepared sheet plywood onto the foam. We use moisture-resistant sheets 10 mm thick.
Foaming the bottom Installing a bathtub on a brick
Fifth step. We tightly plug the drain of the acrylic bathtub. At the same stage, we prepare about a liter of water and wooden supports to regulate the level of installation of the container.
Sixth step. We pour the previously prepared water into the container and place the bath on the substrate according to the building level.
Seventh step. While the polyurethane foam has not hardened, we adjust the evenness of the installation of the bathtub using supports. As a result, the water in the container should be evenly distributed around the drain, and the level should show “0”.
Eighth step. Having aligned the bathtub, pour water into it to about half the volume. Under the weight of water, the foam will not be able to lift the container, and the bath itself will take on the required slope.
Ninth step. Let the foam dry and remove the bath. If the edges of the container must be recessed into the wall, first outline the outline of the edge on the surface, and then make a recess in the wall for the edge of the bath. A hammer drill will help us with this. If a groove is not provided (this is not recommended if the walls are made of blocks, plasterboard or other lightweight material), at the level of the lower cut we simply fix a beam impregnated with an antiseptic, or a steel corner. We will additionally strengthen the supporting bar at the end with stops.
Tenth step. We return our container to its place and connect it to the sewer. We fill the gaps between the container and the bricks with foam. We install a decorative screen and baseboards.
Example of a bathtub installed on bricks with mosaic finishing
Installing an acrylic bathtub on brick supports
Installing an acrylic bathtub on brick supports
First step. We bring the container into the bathroom.
Second step. We mark the base at the location where the brick supports are installed. The most correct option is to erect the pillars closer to the edges of the bend of the acrylic bathtub. If the container is long, an additional support can be erected in the middle.
Third step. Having outlined the places for laying the supports, we begin to prepare the cement mortar. We don’t prepare too much - we have to lay out no more than 20 bricks, so we don’t need any extra expenses.
Fourth step. Let's start laying. We place the support for the back of the bathtub at a height of 190 mm, and the pillar for the front edge of the tank is erected at 170 mm. The height of the middle support, if needed, is selected according to the situation, depending on the design of the bathtub being installed. The difference in height of the pillars will provide conditions for efficient drainage of water from the container.
Laying bricks Laying bricks
Fifth step. We give the masonry about a day to dry and install the bath. We place the container slowly, moving it tightly towards the walls. We fill the gaps between the bricks and the bathtub with sealant.
If desired, you can additionally fix the bath to the wall using dowels and a metal profile. This type of fastening is used quite rarely, but still occurs.
Having made sure that the installation of the bathtub is correct, stable and even, we connect the sewerage system, install the mixer, mount the decorative screen and lay the baseboard on the bathtub.
What are the types of support structures?
Recently, the quality of interior design of a room for taking water procedures has been of considerable importance. A wide range of materials and new technologies allow for the most unusual decoration of this room. Feet for plumbing fixtures are a great addition to the overall design. These elements are most often supplied with the font by the manufacturer. It is not advisable to change them to self-selected ones; you can simply strengthen them by equipping them with additional parts.
Types of legs
During the installation of tanks, legs are used, which are divided into several types:
- supporting, capable of supporting the weight of the structure itself, the volume of liquid collected in it and the weight of the person in it;
- auxiliary (temporary), designed to provide a level that allows the weight of the bath to be equally distributed over the brick elevation during the installation process;
- decorative, which are beautiful overlays to add aesthetics, and made of any material.
Decorative version of the legs
To install the legs correctly, you should carefully study the structure of the support:
- If double-sided construction tape serves as the fastening material for the legs to the font, then this design is of an auxiliary nature. It is not able to withstand heavy loads for a long time, but it can fully guarantee the required height for placing the tank in a horizontal position on an equipped brick pad.
- The degree of stability and reliability of fastening the bathtub on the support can be improved, thanks to the elements permanently mounted at the bottom of its bowl. Usually this can be achieved using a special fixing part; for heavy structures, it most often takes the form of a kind of bracket with holes for fastening.
- For lighter steel models, the legs are made in the form of a mounting plate.
- The supporting elements of acrylic bathtubs are mounted to the bottom of the bowl, and to prevent unintentional movement, special safety pins are attached to the sides.
Support legs
The reliability of installation and ease of use of the bath directly depend on the competent selection of supporting structures.
Self-production
Support structures can be purchased at specialized stores that offer a wide selection, or you can make them yourself. To accomplish this task, you will need certain materials and tools:
- pipes having a diameter of 50 millimeters;
- metal corners;
- means for measuring length (tape);
- electric welding equipment;
- sheet rubber in the form of gaskets with a thickness of three millimeters.
Pipe for making a support
In the process of performing work, the bathtub is first measured, this happens thoroughly, taking into account all its sides, a measuring tape is used. This procedure will allow you to determine the length and height of homemade supporting elements. Next, you will need to cut 4 pipes, according to the measurements taken, which will later become legs.
In addition to the pipes, two metal corners are cut in four copies; they will be necessary to connect the legs at the transverse edges of the bathtub (ends). Cutting metal corners is also carried out only after the required measurements have been completed.
Corner for building legs
After preparing all the component parts, the supports are welded to the bathtub bowl: one element in each corner. It is recommended to stick sheet rubber on the areas where the main emphasis comes. In the area of the ends, homemade supports should be connected horizontally with metal corners, this will give the legs stability.
It is worth noting that for the manufacture of the supporting structure it is necessary to use pipes made of strong and durable material. Only this type of metal will allow the tank to become as stable and reliable as possible during operation. The length of the legs must be the same, otherwise the bathtub will not be able to stand level, and something will need to be placed under the support.
Elements for the legs of your own making will require a small amount of material and physical costs, which is much more profitable than purchasing a kit in a store. If you have all the necessary materials and equipment, as well as a little experience in the field of manual labor, you can make such a sample on your own in a short period of time.
Brick "pillow"
This option as a homemade bathroom support is considered the simplest. This design is not soft and is able to hold the tank at the required height above the base. This solution benefits from the fact that it eliminates the possibility of displacement when a person’s weight is placed on the side. This situation with traditional legs leads to a certain tilt and makes owners worry about possible damage to the drain elements with subsequent leakage.
In order to build two transverse racks, you need to stock up on thirty bricks, some of which will need to be sawed to fit tightly around the bottom with a bending configuration. The thickness of the joints must be adjusted so that the rule located on such a “cushion” has a strictly horizontal position, which can be checked using a level.
Stages of work
Before you begin installing the tank, you must first fill the “cushion” with cement mortar and only then place the bowl on top of it. This sequence will allow for smooth fixation. It is necessary to leave a certain gap of several millimeters between the ends of the font and the walls of the bathroom. During subsequent work, it will be filled with polyurethane foam and covered with silicone.
It is also possible to apply foam to areas where the bottom will come into contact with the “cushion”; in this case, the bowl will be able to lie softer, without the need for leveling, and therefore without the possible occurrence of scratches in this process. Using a level, you will need to repeatedly check the position of the tank; you should also fill it a little with water and then monitor how the drainage system functions.
Bath on bricks
An alternative to a pillow can be a self-made frame, which will require corners and several ordinary pipes. A recess is measured under the edge located on top of the sides of the bath, and four pipes are welded to the inner surface at equal distances.
In order for the structure to be reliable, in its middle part the pipes are connected with corners, in this way a strong frame is obtained. If the tank has a rectangular shape, then a similar frame can be built directly under the sides, thanks to this there will be no need to weld the racks, since it will be enough to simply insert the bowl into the prepared frame.
Preparation for use
After completing all installation work, it is necessary to carry out many different operations, without which it is impossible to fully use the bathroom:
- A mixer and a system for draining and possible overflow are installed, after which the water pipes are connected.
- The structure is checked for leaks; to do this, with the drain closed, the tank is filled with water. After some time, all connections are inspected for leaks. If they are detected, they can be easily eliminated by applying a sealant.
- The next step is to eliminate the gap between the tank and the wall of the room. For this purpose, you can use curb tape, sealant or a special corner.
- Finally, decorative procedures are carried out. In order to hide all unattractive elements from prying eyes, a screen is installed under the bathtub. It, like the legs, can be made independently; for this you will need drywall and facing tiles. You can also purchase a sliding system made from plexiglass or plastic.
Thus, constructing legs for a bathroom with your own hands can be a budget option, thanks to which the use of this tank will be accompanied by comfort, which supports from the manufacturer cannot always guarantee.
Types of bath bowl supports
Bathroom legs are distinguished according to the maximum load they can withstand, methods of fastening, and wear resistance. Parts are selected depending on the shape of the bottom - the tighter they fit, the more securely the object is held.
Plumbing stores offer the following options:
- load-bearing - they are entrusted with a supporting function. The weight of the swimsuit is evenly distributed over all four legs, eliminating deformation of the floor and curvature of the bottom of the bowl. This is the best option for heavy cast iron products. The fastening is rigid, the finished structure does not wobble or slip;
- auxiliary – used for installing a bathtub on uneven floors, which increases its level of stability. Such legs are used to temporarily raise the bath to a height, with subsequent installation on a podium made of brick or stone;
- adjustable - their heights can be easily changed using special screws. This option is also suitable for installing a hot tub on very “crooked” floors, but for independent (without supporting supports) installation of cast iron structures, this option is not suitable;
- decorative - beautiful-looking false legs that do not serve as a support. Such overhead parts are made of copper, porcelain, ceramics, and have the appearance of animal or bird paws, vines, various intricate weaves, pyramids, trees, masking unaesthetic-looking load-bearing structures.
The main thing is to correctly decide on the type, size and design of the legs, the bathtub itself and its components.
How to choose legs
This bathroom accessory can be purchased complete with a bowl. This is the most successful option, since in this case it will match the size of the bowl. You can choose it separately from the cast iron bathtub. This is a cheaper option, but here it is important to be smart and ask for the opinion of experienced specialists.
Important points must be taken into account:
- functions;
- fastening method;
- accessory design;
- height.
Let's look at these factors in detail.
https://youtu.be/d-R1uxmLV3M
Dimensions
A wide range of steel bathtubs allows you to choose a model that meets all basic requirements. Among modern models, you can easily choose a suitable bathtub for small apartments and spacious country houses. But do not forget that when choosing a suitable model, you must also take into account how much the bathtub weighs. When calculating, you need to additionally take into account the weight of the water in the filled bowl and the weight of the person.
A steel bathtub can have either a standard or the most bizarre shape.
Manufacturers offer steel bowls in various configurations.
- Rectangular is the standard and most common option. Such models often have rounded sides. A rectangular bathtub is an excellent option for small bathrooms.
- Round is an unusual and interesting option. Such models themselves can become an element of luxury in bathroom design. Depending on the dimensions, manufacturers offer one-, two- and even multi-seat bowls.
- Oval is an excellent option for a classic-style bathroom interior. Laconic and simple models have no corners and, depending on the size, can accommodate two people at the same time.
- Corner - can only be installed in large bathrooms. When choosing such a model, it is necessary to take into account that corner baths are left and right, symmetrical and asymmetrical. Such non-standard bowls visually free up the central part of the room.
- Hexagonal - bowls of complex shape can have different shapes. Such models can be installed both in the corner of the room and in the center.
Modern manufacturers produce classic models of standard sizes and symmetrical shapes. But some models can also have a curved and sophisticated shape, or give the interior a certain futuristic feel.
Based on dimensions, bathtubs can be divided into three categories:
- Small-sized ones can be installed in small rooms; their dimensions vary from 120x70 to 140x70 cm, while such bowls do not clutter up the space. Today, manufacturers produce models for people with limited mobility. So, for example, you can purchase a compact bowl 120x70x80 cm with a seat.
- Standard ones are considered a classic option; bowl sizes can range from 160x70 to 170x75 cm. Such models are suitable for installation in standard apartment buildings.
- Large-sized ones with dimensions from 180x80 and larger are designed specifically for spacious rooms. A bathtub of this size is only suitable for tall people. Those of average height will find it quite uncomfortable to be in a filled bowl.
In various models, the width can be in the range of 60-160 cm. The depth, as a rule, varies from 38 to 48 cm. But you can also purchase unusual options. For example, a steel bathtub can have an asymmetrical shape and have an original design. With its help you can complement a standard or non-standard layout. Its peculiarity lies in the fact that the bathtub has three sides, two of which are in contact with the walls, and the third has an oval or shaped shape.
Legs for steel bathtub
Supports for a steel bathtub have a design of less rigidity and are made from sheet iron, which provides them with the necessary strength. These legs are a metal profile with adjustable structures on both sides.
Manufacturers offer other options for supports for steel bathtubs:
- a three-dimensional structure consisting of 4 supports at once, which are placed on the eyes in the bottom of the bathtub and tightened with pins. This configuration has much higher rigidity than simple options; to brighten up the unsightly appearance of the legs, you can install decorative overlays on them;
- frames are a more expensive type of bathtub legs, the steel body of which is held by a frame that includes additional elements; With the help of frames, it becomes possible to install the hot tub absolutely level relative to the floor, and the safety margin allows it to withstand any load.
Installation of decorative supports
Installing decorative overlays is easy and takes very little time.
Usually everything is extremely simple. The font will need to be turned on its side or on the reverse side for installation to proceed as conveniently as possible. Decorative supports are sold in a very wide range, but you can always make non-standard products with your own hands. For production, gypsum, plastic, metal pipe and other materials are usually used. It all depends on the imagination and experience of the person who will be involved in the production and installation of the product.
When making homemade bath legs, it is worth taking into account the design features of the main supports. For example, if the main supports on the bathtub are adjustable, then installing decorative trims on them may make it difficult to adjust them in the future. Design ideas can be gleaned from various catalogs, construction stores and specialized literature.
Features of cast iron baths
Many owners of “Stalin” and “Khrushchev” buildings are happy owners of Soviet-style washing containers. Even after 50 years of use, bowls made of this unsightly but reliable metal have not lost their strength. The weak point of cast iron bathtubs is the enamel coating, on which chips or cracks form over time. Modern models made of cast iron are equipped with a stronger and more durable polymer coating, thanks to which they are practically “immortal”.
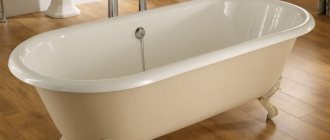
Cast iron bath
This type of sanitary bowls has the following features:
- Heavy weight. Each cast iron bathtub, despite its modest size, weighs 100-150 kg without taking into account the mass of the poured liquid and the bathing person, which makes installing and transporting such models with your own hands much more complicated.
- Slow cooling. Hot water poured into a cast iron bathing container heats its surface evenly and quickly, but cools slowly.
- Narrow size range. Containers for washing made of this metal are produced in a limited range of sizes and models. Typically, manufacturers produce rectangular or oval bowls with a depth of up to 60 cm, a width of up to 90 cm and a length of up to 170 cm.
- Easy to install. The heavy weight of the bowl allows you to install this type of plumbing equipment yourself, using only 4 supports.
Installation of a cast iron bath
We recommend installation in the following order:
- Bring the disassembled bathtub into the prepared room;
- Make sure in advance that the floors in the room are absolutely level, otherwise you will have difficulty adjusting the stability of your bathing vessel;
- Strengthen your legs.
It is better to do this in the room itself, since it is impossible to bring a cast iron bathtub with legs attached to it into the bathroom of a modern apartment. There are several types of bathtub legs, they can all be divided into those that can be adjusted and non-adjustable:
- if you have a set of non-adjustable legs, then in order to install the vessel at the desired height, you can simply saw them off;
- If the product is provided with a set of legs with a support-screw adjustment system, then installing it to the required height will not be difficult.
To make it easier to install a set of legs on the bathtub, turn it upside down. If it was purchased with a set of legs, there should also be brackets for mounting. First install the brackets themselves on the vessel, and then attach the legs to them using mounting bolts.
Important: when purchasing a cast iron product, pay attention to whether the legs are included with brackets and whether they are all intact. Without brackets you will not be able to secure the legs on the bathtub
Install a drain siphon and water overflow device
Install a drain siphon and water overflow device
A siphon with an overflow device can be included in the general kit, or purchased separately. A siphon is installed in the lower hole of the bathtub to drain the water, then from the outside it is connected to an overflow device, which is fixed in the upper drain hole of the cast iron product. Be sure to use silicone gaskets when attaching to seal the connections
Install a drain siphon and a water overflow device. A siphon with an overflow device can be included in the general kit, or purchased separately. A siphon is installed in the lower hole of the bathtub to drain the water, then from the outside it is connected to an overflow device, which is fixed in the upper drain hole of the cast iron product. Be sure to use silicone gaskets when attaching to seal the connections.
Place the assembled bathtub in place:
Check the horizontal installation along the upper sides using a building level. Cast iron bathtubs have a shape in which, if installed correctly, the bottom has a slight slope towards the drain hole. If the installation is not horizontal, you will have to further adjust it using the legs. In this case, the distance between the bottom of the bathtub and the floor should not be less than 14.5 cm; make sure that the side of the bathtub does not deviate from the wall by more than 0.2 cm
This is important to ensure the tightness of connections and prevent water leakage during water procedures; if the distance between the bathtub and the wall is minimal, then the gap can be easily sealed using silicone glue; if the gap is larger, it can be closed with a special waterproof plastic tape. To prevent possible damage to the enamel when installing the bathtub, cover it with thick plastic wrap. To prevent possible damage to the enamel when installing the bathtub, cover it with thick plastic film
To prevent possible damage to the enamel when installing the bathtub, cover it with thick plastic wrap.
Connect the drain siphon to the sewer system. When renovating the premises, you have already taken care of leading the sewer pipe to the location required for installation. When connecting the siphon and water overflow system to the sewer pipe, use the included connecting rings and silicone gaskets. Make sure that the siphon is positioned above the sewer outlet.
Important: first place a silicone cuff on the sewer outlet to ensure waterproofing of the connection. Install a protective screen
You can purchase it ready-made or make it yourself
In order to correctly calculate the height of the screen, you should take into account the height from the floor of the bathtub installed on legs. Standard sizes of finished screens are from 55 to 60 cm
You can purchase it ready-made or make it yourself. In order to correctly calculate the height of the screen, you should take into account the height from the floor of the bathtub installed on legs. Standard sizes of finished screens are from 55 to 60 cm
Install a protective screen. You can purchase it ready-made or make it yourself. In order to correctly calculate the height of the screen, you should take into account the height from the floor of the bathtub installed on legs. Standard sizes of finished screens are from 55 to 60 cm.
Necessary preparations and tools
A cast iron bathtub is a rather heavy object and the base for its installation must be strong. The best option is a concrete screed covered with thick ceramic tiles.
When installing on bases with insufficient strength, it is recommended to use steel pads made of sheets 5-10 mm thick under the legs.
The walls are finished before installation, if this is a major renovation, or only the wall behind the bathroom is tiled to recess the edge and reduce the gap. You can make a groove into which to insert the edge of the font. The gaps are sealed after installation is complete.
It happens that the bathtub does not fit in size or the contour needs to be aligned. It needs to be cut, but how? Cast iron and enamel can be cut well using a grinder and a cutting wheel. The cut is cleaned with a coarse-grained disk, and then with small fractions along the entire perimeter.
For installation you will need:
- cast iron bowl with legs and a set of fasteners;
- building level;
- hammer and wrenches;
- wooden block for temporary support;
- marker and border tape;
- silicone sealant;
- siphon with gaskets;
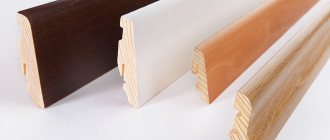
- plastic baseboard.
In some cases, red bricks and cement mortar may be needed.