From compressed air | 02.10.2016
Finishing, and especially plastering work, cannot be considered particularly productive. It is not for nothing that in the recent past the labor intensity of erecting the walls of buildings was estimated at 30...35% of the cost of finishing work. Since then, plastering stations have appeared, but they are economically justified only with significant areas of plastered objects. In addition, they are characterized by a significant consumption of plaster mortar, and the finished premises require labor-intensive cleaning. Therefore, the appearance of such a tool as the hopper bucket was a kind of revolution in the field of individual and low-rise construction.
How to make a plaster ladle with your own hands?
The bucket niche itself is made of stainless steel, all seams are welded. The shovel comes in various shapes and sizes, it can be improved for specific purposes, even combined models can be made with several nozzles at the same time. But such a bucket weighs much more. Most private owners prefer lightweight aluminum models of bent shape, connected by soldering and self-tapping screws. When connecting, cracks and gaps should not be allowed, otherwise there will be a loss of mortar and its slow compaction due to loss of water. The problem of gaps is solved with the help of rubber seals, corners and linings.
The bucket is equipped with a comfortable and durable handle located under the working hand. It is made from bent steel or aluminum tube; no plastic is used.
Spray guns and nozzles with nozzles are installed on the upper edge of the bucket. Homemade buckets have less power, but are more versatile, but factory models are often equipped with several nozzles at the same time. It is recommended to install nozzles when spraying paint and adhesives, then productivity increases. Nozzles are not used for concrete mortar; they do not fully fulfill their mission.
The finished hopper bucket is placed on the spray gun, to which the hose from the compressor is attached. When using a homemade hopper, it is better to increase the distance to the surface to be coated to 20 cm due to increased scatter. You need to take care of a manual hopper in the same way as a factory one.
The only drawback of manual hoppers is their limited use. With their help you can only process walls. Plastering ceilings is inconvenient and the consumption of mortar increases sharply. If you already need to process the ceiling, then you can remake the bucket or buy a spray gun of a different design.
Using a hopper plastering bucket with a compressor station is often the only correct solution when plastering large areas. The difficulty that builders face is leveling the mortar. But with proper skill, certain practice and experience, any plastering work with a hopper will be carried out with the highest quality and in the shortest possible time.
Rating of the best plastering ladles for 2022
Budget models
2nd place: “Zitrek SN-01”
A good example of an Eastern European brand, although considered a budget option. It is more positioned as a model for wall work. The volume of the bunker is sufficient, but it is difficult to call it very large. There are 4 output nozzles, and the solution can be applied to the surface in a layer of 5 millimeters. It has a long and ergonomic handle, a high-quality body with anti-corrosion coating.
| Name | Index |
| Manufacturer country | Czech Republic |
| Bowl volume, liters | 3.5 |
| Number of nozzles, pieces | 4 |
| Required pressure, atmospheres | 2021-05-04 00:00:00 |
| Price, rubles | 2800 |
Zitrek SN-01
Advantages:
- Bowl of sufficient capacity;
- Low price;
- Long handle.
Flaws:
- Anti-corrosion is provided only by the coating.
1st place: “Zitrek SN-02”
This model is designed specifically for ceiling work. The case is made of stainless steel. Using this tool, it is quite possible to achieve uniform distribution of the entire solution over the surface to be treated with a minimum layer of 5 millimeters. The hose kit includes a “European adapter”; with its help, the ceiling surface is perfectly processed with an average performance of 4 atmospheres with an exhaust of 320 liters per minute. The device is capable of working with fine-grained mixtures of 6 millimeters.
| Name | Index |
| Manufacturer country | Czech Republic |
| Bowl volume, liters | 3.5 |
| Number of nozzles, pieces | 4 |
| Required pressure, atmospheres | 2021-06-04 00:00:00 |
| Price, rubles | 2900 |
Zitrek SN-02
Advantages:
- Cast stainless steel housing;
- Efficient compressor;
- Hose with a diameter of 18 millimeters.
Flaws:
- The handle is somewhat loose - will have to be strengthened additionally (with rivets).
Mid price segment
2nd place: “PROFMASH KSH-4”
An excellent device for processing vertical surfaces. It requires slightly increased pressure with a limit of 8 atmospheres, however, it has four nozzles with an increased width of up to 18 millimeters. It is characterized by a high application speed - approximately 60 square meters per hour. Although it is considered a semi-professional model, it has become popular due to its ease of use and affordable price. It requires a good mix of the solution, especially with granules (i.e., it makes sense to strictly observe the consistency). Similarly, we can talk about the need for quality maintenance - nozzles need to be cleaned with special care.
| Name | Index |
| Manufacturer country | Russian Federation |
| Bowl volume, liters | 3.6 |
| Number of nozzles, pieces | 4 |
| Required pressure, atmospheres | 2021-08-06 00:00:00 |
| Price, rubles | 4100 |
PROFMASH KSH-4
Advantages:
- High processing speed;
- Increased nozzle diameter;
- The best ratio in terms of price-quality.
Flaws:
- Requires careful and thorough maintenance.
1st place: “HYVST 07-OMG-II”
This pneumatic bucket is made of full stainless steel, which indicates an increased operational service life of the device. Positioned by the manufacturer as the best device for applying the composition to vertical surfaces. Experienced experts recommend using this model for applying liquid wallpaper. The kit comes with several attachments, providing versatility of use and excellent performance. The hopper does not have a large volume, however, this affects the ease of use. Plastering should be done from a distance of approximately 5 centimeters.
| Name | Index |
| Manufacturer country | People's Republic of China |
| Bowl volume, liters | 3.5 |
| Number of nozzles, pieces | 4 |
| Required pressure, atmospheres | 2021-08-06 00:00:00 |
| Price, rubles | 4500 |
HYVST 07-OMG-II
Advantages:
- Increased length of the complete hose – 15 meters;
- Productivity – about 40 kilograms of dry mixture per hour;
- The holes are optimized at an angle of 90 degrees.
Flaws:
- Need to work at close range.
Professional samples
2nd place: “TeaM K350”
This wall hopper is specifically designed for working on wall surfaces. Produced by the world famous Italian brand “Team-M”. The body is entirely made of the strongest stainless steel. The device itself is a compact device that is not difficult to use. Productivity is quite high. The connection to the compressor is of the “Heka” standard, which means it can even be connected to a car compressor. In general, most elements can be completely replaceable, although this is not stated by the manufacturer. The diameter of the nozzles has been increased to 20 millimeters.
| Name | Index |
| Manufacturer country | People's Republic of China |
| Bowl volume, liters | 3.5 |
| Number of nozzles, pieces | 4 |
| Required pressure, atmospheres | 2021-08-06 00:00:00 |
| Price, rubles | 4500 |
TeaM K350
Advantages:
- Extremely light weight - only 2.6 kilograms;
- Increased nozzle diameter;
- The handles do not have a common defect - there is no play and no additional reinforcement is required.
Flaws:
- Not detected (for its segment).
1st place: “Pegas 2721”
Hopper bucket from Russia - it specializes exclusively in automatic equipment in the field of construction. The connection to the compressor is made according to the universal “Heka ½” scheme. The manufacturer insists that the equipment is adapted for the use of AT ALL (!) all known building mixtures, including compositions with whole sand. General reviews say that the device is of very high quality and is suitable for all types of finishing and construction work. At the same time, excellent work with adhesive mixtures is claimed. The working distance can vary from 5 to 25 centimeters.
| Name | Index |
| Manufacturer country | Russian Federation |
| Bowl volume, liters | 3.5 |
| Number of nozzles, pieces | 4 |
| Required pressure, atmospheres | 6 |
| Price, rubles | 7200 |
Pegas 2721
Advantages:
- Versatility;
- Increased productivity;
- Ability to work with fractions of 1 centimeter.
Flaws:
- Not found.
Design and purpose
The basis of the design of a plaster ladle, or hopper, is an open metal container with a long two-handed handle. In the front part there are a number of holes for the outlet of the sprayed plaster solution. There is a fitting at the back for connecting a hose with compressed air. The supply valve allows you to regulate the supply of compressed air and, thus, the performance of the device.
The hopper is designed to cover large areas of surfaces to be finished with plaster mortar. The device applies the solution in an even, thin layer. The next layer fits well on the previous one, this makes it possible to level out surface unevenness.
One device is capable of applying up to 50 m3 of solution per hour.
Thanks to effective application, the solution does not fall on the floor. Depending on the qualifications of the plasterer, this makes it possible to save up to 35% of the plaster composition.
The device can apply not only plaster, but also other building mixtures.
Types and principle of operation
The operating principle depends on the type of device.
Manual
It is worth mentioning the construction ladle, or Shaulsky ladle, which is a container with a semicircular bottom on a handle. With a precisely measured movement, the plasterer applied the mortar, portion by portion. Working with such a device requires high qualifications, excellent coordination of movements and acquired skills.
Hopper
Hopper does not require highly qualified workers, just general construction skills and a good eye. In a mixing container, dilute the solution over the entire area that is going to be plastered. Thanks to the high performance of the hopper, it will not have time to harden. The solution, portion by portion, is poured into the container to the top, the device is brought to the next area and the air supply is turned on. The air flow, trying to go out, carries along the particles of the solution, accelerates them and throws them with force onto the surface, promoting adhesion. If necessary, the area is passed over and over again, leveling out the depressions.
Plaster hopper bucket
After application is completed, the solution is smoothed out with a wide spatula.
For different types of solution that differ in consistency, specialized replacement nozzles that are screwed onto the holes can be used.
On average, the device consumes one portion in 5-10 seconds, after which the air is turned off and the next one is applied.
Based on the location where the solution is applied, hoppers are divided into two types:
- wall, for application on vertical surfaces, they spray the solution directly in front of them at an angle of 45°;
- ceiling-mounted, the nozzles on them are directed upwards and the composition is applied upwards to the ceiling.
Hoppers with a built-in compressor are also available. They are noticeably heavier, but do not require a source of compressed air. A power supply of 220 volts is sufficient for operation. The performance of such a device is lower than that of a pneumatic device with an external air supply.
How to make a pneumatic bucket yourself?
The advantage of a homemade ladle for applying plaster to a wall over a factory one is obvious: making it yourself is cheaper than buying it. Compared to the manual method of applying plaster, the mechanized method provides greater productivity.
A bucket is a container with four walls, a bottom and a partially closed top. You can make a pneumatic bucket for plaster with your own hands from a sheet of iron (stainless steel is suitable) or from an old 5-liter canister, cutting off the top from it. The front wall is necessarily metal, it is located obliquely. The sloped wall and partially closed top allow the mixture to be applied to walls and ceilings with equal efficiency.
Observe the proportions: nozzle diameter – 5 mm, distance from it to the front wall of the bucket – 16-20 mm. Make the front hole with a diameter of 10-12 mm. For connections, use steel or aluminum blind rivets. Additionally, the gun is attached to the rear wall with two pieces of duralumin. This must be done because the solution is heavy and the sprayer is usually made of aluminum. On the left (for left-handers - on the right) a handle is attached to the pneumatic bucket at an angle of 45 degrees.
The handle is a ready-made gun designed for various pneumatic tools. It can be purchased at a specialty store. The same gun acts as a valve that regulates the air supply when pneumatically applying plaster to the wall. The front part of the gun is attached to a hole made in the bucket.
What is a hopper bucket - its features and application
In the old fashioned way, craftsmen threw leveling mortar onto the walls using a round-shaped construction bucket. Based on this simple tool, a mechanical device was developed, somewhat similar to a spray gun. An elongated hollow handle was attached to the bowl and a compressor was connected. As a result, the plaster began to be sprayed onto the base using compressed air under pressure supplied through a handle. Plaster is supplied to the surface from an enlarged reservoir through embedded nozzles near the bottom.
The classification of factory pneumatic buckets is carried out according to differences in design. Knowledge about this allows you to correctly decide which option is needed for a particular object:
- For plastering walls. The characteristic feature here is that the handle is positioned perpendicular to the tank. The solution exits through the nozzles at a right angle. To make it more convenient to hold a heavy container, an additional handle is attached to the back wall of the bucket.
- The ceiling hopper differs from the first type in the angular position of the elongated handle and nozzles. This allows you to spray the solution on surfaces that are located above the master’s head. In this case, the working mass does not splash out onto the floor.
- The universal tool involves plastering both vertical and horizontal structures. This is possible due to the replaceable nozzles, which are mounted at different angles. Versatility also applies to working mixtures, since the permissible filler fraction depends on the size of the outlet openings.
The purpose of the hopper includes spraying the working solution onto the ceiling or walls. In the instructions, the manufacturer indicates the limit values for the filler fractions of the mixtures. This is rough or finishing, decorative plaster, putty, liquid wallpaper.
The nature of the compositions is different: cement, gypsum, polymer. The mass should be homogeneous, without lumps, thicker in consistency than for working by hand.
Hopper bucket operating technology
Externally, the hopper bucket resembles a spray gun, and uses an almost similar method of application. Before starting surface finishing work, connect a compressor to the equipment in question, connect it with a rubber hose to a bucket, and then fill it with the required working mixture. After opening the pneumatic valve, compressed air begins to flow into the bucket container, along the way capturing fine particles of the working solution with the nozzle. Next, the flow comes out of the nozzle and is distributed over the surface being treated in accordance with the manual movement of the bucket.
For the manufacture of the device’s bucket, thin-sheet stainless steel is used: this allows to increase the service life and at the same time reduce the weight of the tool.
Working with the device requires certain skills, since the plastering process itself occurs with some changes, contrary to traditional technology. It consists of sequentially performing the following steps:
Wetting the ladle with water. This is necessary so that the emerging adhesive forces of adhesion of the working mixture to the walls do not prevent its exit through the nozzle to the outside. Preparing the mixture itself. When using traditional plaster components - sand and cement - it should be prepared less viscous, and it is better to generally use gypsum-based solutions. To increase productivity and convenience of working with a hopper bucket, it is advisable to add modifying additives to the main mixture. Preparations for plastering the surface of the wall or ceiling itself. For this purpose, it is necessary to clean it from dust, dirt and unevenness, set beacons, and moisten it. Sometimes, to increase the durability of the coating, the surface is reinforced with fiberglass mesh or geotextile, or coated with primer compounds.
Prepare the required supply of solution at the rate of 30…40 l/h. With a standard bucket capacity of 3...4 liters, its complete emptying occurs in just a few seconds, so the volume of the working mixture should be sufficient to plaster the surface with a layer of 10...20 mm. As a rule, up to 60 kg of ready-made plaster mixture in bags is used in one go; for larger volumes, it is more rational to use a concrete mixer. Depending on the nature of the liquid mixture used, the distance to the work object is set. For industrial hopper bucket designs this is 40…50 mm. Next, the composition is sprayed without interruption. During breaks in work, the tool must be thoroughly cleaned of any remaining working solution. To do this, lower the empty bucket into a large container of water and turn on the compressed air supply. The process should be carried out until only air begins to come out of the nozzle.
The final finishing of the surface (grinding of unevenness) is carried out in the same way as with conventional plastering.
Preparation of surfaces and tools
Before starting work with the tool, be sure to prepare walls, ceilings and other surfaces as with regular plastering. To do this, they are cleaned of dirt and dust, degreased, slightly moistened and special beacons are set. If necessary, the wall is additionally reinforced with mesh and strengthened with a composite primer or other suitable means.
A standard hopper for a household compressor with 5-7 atmospheres consumes working fluid quite quickly, approximately 40-50 liters in 5-7 minutes. Therefore, before you start finishing, you need to prepare a solution with a reserve and pre-practice in order to understand the principle of the device and its features, especially if it is made at home.
The solution is prepared strictly according to the instructions prescribed by the manufacturer of a particular finishing material. For mixing, use a construction mixer, a drill with a special attachment, and in the case of a large volume, use a mixer or portable concrete mixer.
Advantages and disadvantages
Let us outline the main advantages of the “hopper”:
- More grip. Due to the pressure and force of impact of the mixture on the base, adhesion to the surface is enhanced.
- It is intuitively easy to use. Even a beginner can use such a device, and the quality of work will not suffer. The joining points of different portions of the solution will not be visible.
- Simplicity and convenience of design. The tool has a comfortable handle. You won't be distracted by adjusting to it.
- Its sizes vary. You can choose the most optimal option for yourself, based on the volume of planned work.
- Spray precision. You will not waste extra material, and the thickness of the processed surface will be more uniform compared to manual work.
- The use of finishing materials of different compositions and colors. In addition to the fact that the “hopper” can be used not only for plastering, it is suitable for interior work and finishing facades.
- A wide range of. The market for such products allows you to choose a device made of reliable and high-quality material that is rust-resistant.
- Affordable price. You will stay within your budget, save time, and get high-quality and durable coating.
- Easy to care for. If you regularly wash the device after use, it will serve you for many years.
- Finishing a plane with a complex configuration. It will apply the composition where it is difficult to do with a regular trowel or spatula.
- Variability of configurations. Industrial products are equipped with additional compressors, which make it possible to work with different types of surfaces.
- Highly appreciated by professionals. Experienced builders note the relevance of using a “hopper” as an auxiliary device when working with different mixtures.
Let us also note the disadvantages of a plaster ladle:
- The solution used must have a certain consistency. If this is not adhered to, it will drain from the surface of the treated base.
- This device is not considered for purchase if it is not planned to be used constantly. If you need to finish a small area one time, there is no point in buying such a tool.
- The quality of the treated surface directly depends on the preliminary preparation of the base. If you ignore this fact, the quality and durability of the finished surface may suffer.
- According to professional experts, in the case of applying several layers, the time spent on spraying is not much different from working by hand.
- Failure to clean the device in a timely manner will cause its failure. The dried solution clogs the nozzle, which automatically disables it when the unit is turned on.
Advantages of a homemade device
During manual work, the mixture is prepared and applied to the wall in small sections. Drying occurs unevenly, which leads to unevenness and cracks.
When using mechanics, the solution can be saved by saturation with air during the process of mixing and spraying under pressure. For finishing 1 sq. m with the manual method it takes 16 kg, mechanized - 13 (calculation is approximate, depends on the thickness of the layer).
| Manual application | Application of Plastering Machine | |
| Mixture quantity | Prepare in small portions as it hardens quickly | Large volume, fast consumption |
| Consistency | Every batch is different | Same, no lumps |
| Application area | Gradually, on part of the wall | Immediately on the entire surface |
| Saving solution | No. Loss occurs | Yes. With constant stirring, air becomes saturated and it increases in volume. |
| Working hours | For a long time. Requires several people | Fast. Two people can cope |
| Result | Due to uneven drying, cracking and collapse of the entire layer is possible. | Under pressure, additional adhesion of the mixture to the base occurs |
| Surface | Scaly | Rovnaya |
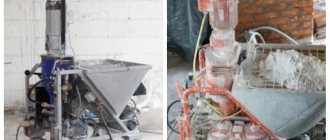
A do-it-yourself plastering machine, assembled from what you found in the garage, can make finishing work easier.
DIY hopper bucket
The device in question is easy to make with your own hands, especially since there are a sufficient number of workable versions. The corresponding working drawings of some of them are presented below.
The main element of the hopper bucket, which you will make yourself, is the container itself. You will have to purchase components, but as a compressor you can use any home unit that is capable of developing a compressed air injection pressure within 60...70 atm, with a flow rate of at least 500 l/min. The volume of the compressor receiver must be at least 50 liters.
The minimum pressure parameter for a homemade device is especially critical, because otherwise, the mixture will be supplied unevenly, its consumption will increase, and the quality of the finishing surface will deteriorate. For the same reasons, it is not recommended to adapt vacuum cleaners-blowers for these purposes: the air flow of some models can reach the required parameters, but the absence of a receiver will lead to sudden pressure changes during operation.
When developing a drawing of a bucket, it is worth taking into account ergonomic indicators - if the total mass of the device exceeds 5...8 kg, then long-term work with it will be impossible.
The capacity of a DIY hopper bucket must meet the following requirements:
On the hose connection side, the container must have a hinged lid, or, preferably, a sliding lid. This will protect the operator from spilling the working solution when plastering inclined or horizontal surfaces, especially ceilings. The diameter of the inlet hole cannot be less than 1.2...1.5 mm: with small holes the device often clogs, and with large holes - over 5...6 mm - the pressure at the outlet of the mixture from the ladle drops sharply. The dimensions of the outlet nozzle flare are also of great importance. Its main parameters are the angle of the conical part (no more than 70...900), and the length of the nozzle. In particular, with a length exceeding 200...220 mm, the distance between the bucket and the surface being processed increases, which will negatively affect the accuracy of the work. The material used for the container is aluminum or sheet steel (tinplate has very high flexibility, and therefore such containers will be deformed after several cycles of use). Each option has its own advantages. For example, an aluminum bucket will be much lighter, but the sheet blank will have to be connected into a spatial figure using self-tapping screws, and the joints will have to be sealed with rubber seals. A steel ladle can be welded, but the thickness of the sheet should not be more than 0.8...1 mm.
A device for pumping air into car tires can be used as a pneumatic valve. In extreme cases, a regular ball valve will do, but it will not allow you to instantly shut off the supply of the mixture, and its specific consumption per unit area of the surface being treated will increase.
A video of the operation of a homemade hopper bucket is presented below.
Design Features
The device consists of several parts that are present in any hopper bucket design:
- Spray nozzle. Gives the working mixture the required speed and disperses it.
- Capacity. Designed for storing the mixture. The performance of the hopper bucket depends on its shape and size.
- Pneumatic control valve. Ensures the flow of solution into the nozzle.
- Fitting with outlet nozzle. Helps move the solution at a certain speed.
- Handle. It is located at the desired angle and is responsible for moving and controlling the device.
Industrial-type hopper buckets are immediately equipped with compressors that are designed specifically for working with construction mixtures - cement, gypsum, lime, etc.
Depending on the specific type of mixture, the hopper bucket nozzles can be changed, because they have different spray angles (ranging from 30–90 degrees). The top of the bucket container is equipped with a closed part, which is located on the compressor connection side.
This detail prevents the solution from spilling while plastering the ceilings.
Technology of using plaster ladles
The method of using the tool resembles the technology of working with a spray gun. First, a compressor is connected to the bucket using a rubber hose. After this, plastering begins, provided that the surface has already been thoroughly prepared.
Preliminary stage
Debris, dirt, dust and grease stains are removed from the base in advance. Beacons are installed 20 cm from the corners of the walls, which are placed at equal distances. The profiles are aligned vertically and their correct position is checked with a level. On large bases, intermediate beacons are additionally installed.
Plastering
Prepare a solution from cement and sand (for example, in a ratio of 1:3) or dilute the ready-made building mixture. Mix it with a mixer until smooth and free of lumps. The finished mass should not be too liquid; it is better if the consistency resembles porridge.
The solution is placed into the container, the device is connected and the mixture begins to be applied. It is necessary to work until the entire portion of the composition is finished. It may happen that one hand gets very tired from the movements, then you need to rest a little or start using the other hand.
When the solution begins to extend beyond the profiles, its excess is removed and the beacons are moved higher. If there are holes left on the wall, they are filled with a trowel (by hand). After the mass has dried, it begins to be rubbed and finished.
Cleaning the pneumatic bucket from plaster
After completing work with the plaster mixture, you must immediately clean the ladle of its residue. Dried lumps are quite difficult to remove. If the solution has frozen, you should spray the tool with water or immerse the container in warm water
It is also important to clean the nozzle immediately, because if it is clogged, the bucket may break immediately after turning it on again
Instead of an epilogue
Having analyzed the domestic market for the equipment in question, we can safely say that the domestic manufacturer confidently occupies an “above average” niche in this segment, and its products are quoted at a fairly high level. However, this again can only be attributed to “Professional” level products. Otherwise, household consumer demand is clearly not focused on purchasing high-quality equipment and is limited only to the budget or mid-price segment. This circumstance is largely due to the reluctance of the average consumer to do such work on their own.
Advantages of a hopper bucket
- Nice price.
- You can purchase separate attachments.
- Saving solutions.
- Easy to use.
- Durability.
- For operation, no special skills are required.
- With it, plastering the walls will go 2 times faster.
- Coverage quality.
- Increased adhesion.
- This plastering bucket is pneumatic.
After working with the hopper bucket, it must be thoroughly cleaned immediately. If this is not done immediately after work, the remaining mixture will dry out and will interfere in the future and may damage the pneumatics of the equipment. It will not be very easy to remove dirt later. If the mixture has dried out, you need to lower the ladle into water to soften it.
Advantages
The advantages of using the most primitive and low-productivity unit are that the solution is used without loss, it is supplied much faster than manually, and no professional training is needed to work with a homemade design, because a person understands how a simple mechanism works and makes the most of it. uses its power. A homemade pneumatic bucket or a small hopper can significantly make the developer’s life easier and speed up the finishing work. This device operates manually or from a 220 V electrical outlet.
Advantages and disadvantages of buckets
The advantages of devices such as plastering ladles are beyond doubt:
- serious saving of solution, and therefore money;
- reduction of time spent on plastering surfaces;
- high precision, accuracy of application of the mixture;
- the ability to work with almost all types of liquid finishing materials and building mixtures;
- high productivity of the process both on smooth substrates and on surfaces of complex configurations;
- improving the quality of the finished coating by increasing adhesion to the base;
- Suitable for external and internal work.
Even a beginner can work with a hopper bucket - this device is simple, and the instructions for factory models are clear. The price of buckets is low, especially those sold without a compressor included (even ordinary automobile compressors can be attached to them).
The products last quite a long time, but subject to timely cleaning and regular maintenance. If the device is made of metal, it can be washed without any problems. Hopper buckets are sold in a wide range, with different technical parameters and performance.
There are few disadvantages to the hopper bucket. If plastering work is carried out in several layers, then it is better to practice the manual method of applying the mortar: this way the application will be carried out faster. In addition, the removal of excess composition will need to be done immediately, otherwise later it will harden tightly. If time is delayed, you will have to soak the top of the instrument in a container of water.
Questions of wise choice
First of all, you need to decide how often and for what purposes the device will be used. It is advisable for a professional plasterer to purchase expensive and reliable equipment, the service life of which is significantly extended. Of particular importance is the productivity of the cartouche gun in liters per minute - for domestic use, 170 liters is enough, but for professional workshops this value is too small.
It is extremely important to pay attention in advance to various defects, chips and cracks on the case. Also, replaceable attachments should be screwed in without much effort, the trigger in the gun should be pressed smoothly, and there should be no play. In cases where the gun is equipped with an air valve, this is a positive point that allows you to adjust the pressure and improve the quality of work.
From this it can be seen that the main points when buying a hopper will be:
- Its purpose is ceiling, wall, or universal with different attachments;
- Ease of use – material of the hopper container, size of the nozzles, ergonomics of the handle;
- Container volume - you do not need to choose too large, since, accordingly, the volume of the mixture that can fit and the weight of the device will increase. However, the small hopper will have to be refilled more often;
- Availability of replaceable nozzles - most buckets are equipped with nozzles for spraying the solution at different angles (and this already indicates the versatility of the device);
- Quality of manufacturing materials - optimally the device should be made of stainless steel. However, there are also budget models on the market that will not last long - the surface coating will quickly peel off, and the metal will easily corrode. This is especially true for tin ladles.
How to make a ladle with your own hands?
How to make a plaster ladle yourself?
Despite the fact that a ready-made bucket can be bought at a hardware store for relatively little money, or rented for temporary use at an affordable price, there are craftsmen who prefer making this device with their own hands. As a rule, you only need to assemble the bucket itself, because all other spare parts will have to be purchased.
All parts for the hopper are cut out of a metal sheet, after which all spare parts are connected using self-tapping screws. In this process, the main thing is not to allow a gap to form between the edges of the product, otherwise the solution will leak out of all the gaps. You can avoid such a nuisance if you use metal corners or overlays.
If you used slightly stronger materials, for example steel, to make the hopper, then it is better to replace the screws with welding, as a result of which the possibility of leaks will be eliminated.
When you make your own bucket, install a durable and comfortable holder on it. According to experienced finishers, it is better for the holder to be on the left, which will allow the main load to be distributed on the right hand. But, for a left-handed person, the holder will need to be fixed on the right side.
Buckets for applying the plaster mixture are also equipped with fasteners that can hold the spray gun, as well as a hole where the device is directly inserted.
I would like to note the fact that buckets made by yourself are less powerful than ready-made analogues from the store, which are equipped with two, three or four nozzles.
Some particularly inventive craftsmen increase the number of nozzles, thinking that in this way they can increase the performance of their device. However, 1 liter of solution is sprayed from one hole in 15-20 seconds, but it all depends on the consistency of the mass used.
DIY plaster ladle
The bucket must be placed on the spray gun, onto which the hose leading from the air compressor must be secured.
Using a do-it-yourself ladle is no different from using a factory-made ready-made device, one nuance - keep a slightly larger distance between the ladle and the wall being processed (about 20-25cm).
While working, monitor the process and make sure that when scooping the mixture, it does not stick to the outside of the bucket.
You need to care for a model assembled by yourself in the same way as a factory one: the device is washed in a container with water, after which the remaining mass is wiped with a rag.
I would like to place a small emphasis on the fact that a homemade ladle is no different from a ready-made one, if you do not take into account one nuance: you can only work with them on the surface of walls. It is very inconvenient to treat ceilings with a homemade device and you will need to make a hopper with a slightly modified design, and in special cases, buy a completely different spray gun with an ergonomic holder
In general, the process of plastering surfaces brought to automation will help you save a lot of time and your physical strength. The main difficulty in using a hopper is that you will need to level the solution over the surface of the walls after spraying it.
The principle of operation of the unit and the technology of applying the solution
For mechanized application, you need to become familiar with the operating principles of the machine.
- Pour the dry mixture into the container.
- Water is added in a certain proportion.
- The components are thoroughly mixed, the solution is saturated with air.
- The surface of the wall is covered with the mixture using a hose.
- Various nozzles, rules, spatulas are used, which reduces the completion time.
Important! Consistency of the solution: when squeezed into a fist, a lump is formed that does not release moisture. The plaster is laid in an even layer on the surface of the wall.
Plastering instructions:
- The base needs to be cleaned. It should be free of oil stains, moisture, and mold. The surface is dry and clean.
- Measure the curvature of the walls. This is done using a level.
- It is necessary to install guide beacons.
- Connect the plastering machine to the power supply and ensure the water supply.
- Pour the dry mixture into the container of the device.
- The solution enters the chamber through the feed auger to be mixed with water.
- The machine mixes the mixture during its operation.
- Using a mortar hose, the plaster mixture is applied to the surface.
- The solution is leveled and given time to dry. They are finishing the corners.
- The stages are controlled at the construction level.
- Minor irregularities are eliminated.
Before applying the plaster mixture, the surface is treated with a primer. The working solution is used at a temperature of 5−29 degrees.
Additional Information! If there is no water supply at the site, use a pump that supplies liquid from any container.
What mixtures are suitable for application by machine:
- fixation of the corner profile is carried out with a solution with a special composition;
- when plastering the facade, it is needed with the mark “for external work”;
- Gypsum-based plaster is used indoors.
Compressor connection
To supply air from the compressor to the pneumatic bucket, you will need a hose with a cross-section of no more (and no less) 9 mm. A black or blue oxygen hose is suitable for this. Red hoses are not designed for high pressure, so they cannot be used.
, which produces a hopper-bucket for plaster, if buckets with several plugged nozzles or mini-buckets are used, recommends ordinary hoses with standard quick-release connectors for connection. This connection is also quite sufficient for mobile mixtures. But if a large air flow is required, such a connection is not suitable for thick solutions, because the cross-section of the adapter in the quick release and compressor adapter unit is 7 mm.
A prerequisite is the use of a shut-off device at the outlet of the receiver, for example, a ball valve. You can install it yourself. How to do this, watch the video. There you can also see how to increase the permeability of the quick release and adapter at the outlet of the pneumatic unit.
Required Compressor Specifications
The main element of the working design of the entire tool under consideration is the compressor. The quality and speed of processing will directly depend on its characteristics. In many situations, the hopper places increased demands on the volume and pressure of the supplied air, which is incomparable with a conventional cartouche gun. It is worth noting that the compressor must be selected based on the characteristics of the remaining elements of the device in order to create an optimal variation of the tool that will be fully operational. Thus, the average statistical characteristics can be called:
- Working pressure 6 atmospheres;
- Exhaust flow (minimum) is 350 liters per minute;
- The number of active cylinders is two;
- Receiver volume (minimum) – 50 liters.
For a cartouche pistol, these requirements will be slightly lower:
- Working pressure 4 atmospheres;
- Exhaust capacity (minimum) – 160 liters per minute;
- Number of working cylinders – 2 pieces;
- Receiver volume (minimum) – 25 liters.
How to do it yourself?
You can make a hopper bucket for wall and ceiling plaster yourself. To do this, you will need tools, materials and a diagram (you can consider different drawings, choosing the one that is clearer to you). It is worth noting that a device with a solution volume of 6–8 kg is sufficient for operation. If you approach the implementation correctly, a homemade unit will work no worse than its store-bought counterpart.
There are several main points of step-by-step instructions.
Take a ready-made drawing or make it yourself (to do this, draw its outline, indicating all the parameters to scale). Transfer the drawing layout onto thin metal or aluminum sheets in full size. Using a grinder, cut out each blank for the future bucket along the marked lines. Using a welding machine or autogen, assemble the cut pieces into a single structure. After this, attach the handle with the inlet fitting for the air hose to the body, not forgetting to pay attention to the choice of the outlet. All that remains is to select the power of the air compressor and attach it to the welded plaster container.
For more information on making a hopper bucket, see below.
Criterias of choice
To choose a suitable plastering ladle, you should determine for what work you plan to use it. The main parameters by which a device is selected are as follows:
- specialization: wall or ceiling;
- hopper capacity, for external plastering work you will need a larger ladle;
- ergonomics: the device should be comfortable to hold and move from side to side and from top to bottom;
- price: a quality device cannot be cheap.
When choosing a plastering ladle, you need to keep in mind the capacity of the hopper
. The reputation of the manufacturer, how long it has been present on the market, and the development of a network of service centers are also important. Construction stores in Moscow and other cities offer a wide range of devices for every taste and budget.
What technology is used to apply plaster using a ladle?
Using a ladle for plastering
At the very beginning of work, it is necessary to install beacons and moisten the surface to be treated with water. If you plan to apply a layer of concrete or some other solution to the surface of a concrete structure, you need to fix the reinforcement.
Since plastering the surface using a hopper is done very quickly, in 3-5 minutes. During operation, such a device consumes about 60 kg of finished mass, so prepare a large amount of solution in advance. It would be nice to put this process on automatic: use a concrete mixer or mortar mixer.
The solution must be sprayed immediately after mixing it, selecting the throw distance according to the expected effect. Most often, the hopper is kept at a distance of about 5 cm from the surface to be processed. After the application of the mass has come to an end, the plaster must be leveled as a rule, left to dry, and then rubbed.
Washing the hopper is not difficult. To do this, the upper part is lowered into a container of water, after which the device is turned on so that the compressor blows out the nozzles. If a little solution remains on the work surface, you will need to remove it yourself using a rag.
When you plan to pause the plastering process for some time, even if not for long, you will need to rinse the hopper and leave it in water until work is resumed.
Tips for using the device at work
The solution must be applied evenly and consistently (this is why a hopper bucket is used). You should work quickly to avoid overspray or drying out of the mixture, especially when using gypsum plaster, which dries in 3-5 minutes.
You need to hold the wall tool by the handle on the right or left side, and with the other hand hold it by the bracket on the hopper itself. The ladle itself is used as a scoop, the working mixture is scooped out of the container and the excess is shaken off the outer walls. The device should be moved smoothly, strictly along the exposed beacons, with progressive movements from bottom to top. The standard pressure when the device is turned on is 6 atmospheres, then it is reduced to the optimal 4-5 atmospheres, which is sufficient for normal operation.
Next, using a rule or a regular smooth lath, the surface of the wall is rubbed, removing the remnants of unnecessary plaster. In order for the solution to adhere better, it is prepared thicker than in the case of manual work. The distance from the bucket to the wall is determined depending on what effect is ultimately desired. The optimal distance is 10-15 centimeters.
For textured plaster, you can experiment with the pressure and diameter of the inlet nozzle on the hopper or think about special nozzles for these holes. To create a “fur coat” effect on the surface, the solution is mixed more liquid and additional additives are added, the shovel is kept as close as possible to the wall at a distance of 2-3 centimeters and the pressure is reduced. To obtain a flat surface or use a finishing layer of plaster, the wall distance is increased to 20-25 centimeters.
Upon completion of the finishing work, the ladle is washed, the remaining solution is removed, and the nozzles must be blown empty with a compressor, placing the tool in water. It is left there for 2-3 hours and only then dried at room temperature. Plastering walls and ceilings during renovation or construction is one of the most difficult stages of work, so mechanizing labor by using a hopper bucket will significantly save your time and effort and allow you to achieve a better finish.
Making your own plastering ladle
If necessary, you can make a hopper bucket yourself if you have all the materials and consumables available.
Blueprints
The main element of the bucket is the container, and it is its manufacturing that you need to pay close attention to. When choosing the size of the container and creating a drawing, you should consider the following requirements:
- the presence of a sliding or hinged cover on the hose supply side, as well as holes for a pneumatic valve;
- inlet diameter - more than 1.2–1.5 mm and less than 5 mm (if the hole is too small, it will clog, and a large hole will cause an excessive pressure drop);
- the length of the outlet nozzle bell is up to 20–22 cm (too long a bell negatively affects the accuracy of work), the angle of the conical part is 70–90 degrees.
Drawing of a ladle for plaster
The container should be made of thin sheet steel or aluminum. If you take tin, the part will quickly deform. An aluminum bucket will be an order of magnitude lighter than an iron one, but individual sections will have to be connected with self-tapping screws, and the joints will be strengthened with rubber seals.
A steel container can be welded, which is much more reliable. The optimal sheet thickness is 0.8–1 mm.
The pneumatic valve for the container can be taken from a device for inflating car tires, or a ball valve can be adapted for this purpose. The latter is used as a last resort, since instantly shutting off the supply of plaster will become impossible, and its loss will be inevitable.
As for the compressor, its purchase is not mandatory if you have a car unit with a compressed air pressure of up to 60–70 atmospheres. When the pressure is too low, the mixture will not be applied evenly and the quality of the finish will be reduced.
It’s good if the flow rate of the working mixture is from 500 liters/minute. The volume of the receiver in the compressor should be 50 liters or more. When developing a drawing, you also need to take into account that the total weight of the hopper bucket must be less than 5–7 kg, otherwise long-term work with it will become impossible.
Tools and materials
In addition to the listed consumables and devices, for the manufacture of a hopper bucket you will need:
- metal pipe for handle;
- nozzle;
- washers with a diameter of 10–12 mm according to the number of nozzles;
- Bulgarian;
- metal scissors;
- electric drill with a set of drills;
- marker;
- sharp knife;
- tracing paper;
- metal ruler;
- welding machine or self-tapping screws, rivets (depending on the chosen option for fastening the parts).
Stages of making a ladle
First, transfer the drawing lines to the metal using tracing paper and a marker, or scratch the contours with a knife. The container pattern is cut out with metal scissors or a grinder. If necessary, you can divide it into several elements and then weld them. The workpiece is bent along the lines of the lower plane, and the front and back parts are welded to it. If fastening is done using self-tapping screws, allowances of 1 cm are left.
Then proceed as follows:
- Attach the top handle of the bucket.
- Holes for the nozzles are drilled in the lower part and secured with steel washers.
- Make a hole opposite the nozzles for the spray bottle.
- A nozzle is installed inside the container to mount the compressor.
- Two reinforcing plates are cut out of steel and attached to the side walls of the bucket.
For a trial test, fill a ladle with solution, connect it to a compressor and apply plaster to the wall, experimenting with different pressures. If desired, such a device can be made in a couple of hours. A hopper bucket will seriously reduce the time for plastering walls and reduce the labor intensity of the process, so when performing a large amount of work, it is worth using this device.
Features of the technology of use
Before starting, you need to install “beacons” at a distance of 150 - 300 centimeters from the end to the beginning of the wall. For ease of marking, you can attach additional ones between them. The distance between them is filled with solution from a pneumatic bucket in such a way that it minimally extends beyond the boundaries of the “beacons”. At the same time, the solution should not be too liquid so as not to spread over the surface, and not too thick so that the compressor can cope with splashing. Then, usually one and a half meters with gentle movements, the mixture is distributed from bottom to top along the wall, removing excess solution and without touching the “beacons”.
IMPORTANT! During operation, the bucket must be kept at a distance of 5-6 centimeters from the surface! If you remove the tool at a distance of 10 centimeters, you can already get an unnecessary “fur coat” effect.
Making your own hopper bucket
Making this device yourself is quite easy, although its retail price is relatively low. If you have a pneumatic gun and a compressor, then you only need to make a bunker container. “Everything about everything” will take no more than 2-3 hours, and “any” finances will still be saved.
Necessary materials:
- Tin (steel, aluminum) sheet is thin, from 0.4 to 1 millimeter thick;
- Directly air gun;
- 6 washers for 3 nozzles size M10-14;
- Welding machine or riveter;
- Drills (10-14 mm) and drill;
- A grinder with a cutting wheel or metal scissors.
Step-by-step manufacturing process:
- You must first make allowances of 20-30 millimeters if you intend to connect with rivets;
- Transfer the cut-out diagram drawn on whatman paper or thick cardboard to a metal sheet;
- Cut, bend at the seams, rivet or weld the resulting template;
- It is necessary to drill three holes in the front part and strengthen them on both sides with washers of the required diameter using rivets.
- On the back wall, on the contrary, make a hole for the nozzle of the air gun;
- Mount the air gun;
- Attach the handle to the top of the hopper container using rivets;
- Using the Heka coupling, connect the entire structure to the compressor.