It’s quite difficult to imagine any home renovation without a roller, because these simple tools are used today not only for painting surfaces, but also for wallpapering rooms, priming walls, leveling self-leveling floors, and applying various reliefs to walls.
Due to such a wide use of rollers, one universal design was not enough for them, so modern painting tools are classified according to several parameters at once. These are the size, certain design features and, of course, the material from which the working surface is made - the so-called fur coat.
Velor.
Its coat consists of very fine pile. It may differ slightly, but everywhere the length of the hairs will be approximately one to three millimeters. It is not suitable for ceilings and walls as it absorbs very little paint. Therefore, painting with it takes a very long time and is labor-intensive. There will be stripes and missing areas. A large amount of paint will flow and drip. Therefore, you are guaranteed increased fluid consumption. They are even more inconvenient to prime. Why might you need a velor roller?
It is best suited for varnish work. It perfectly applies and rolls varnish onto parquet, wooden doors, and wooden tables. (any wooden smooth, even structures). The varnished surface will be almost the same as from a spray gun.
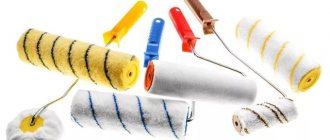
Sizes and types of paint rollers
In turn, paint rollers differ in the length of the coat, the width and diameter of the working surface.
- Small rollers up to 15 cm long and up to 3 cm in diameter are used for painting narrow or small surfaces, or hard-to-reach places.
- The average roller has a length from 15 to 25 cm and a diameter from 5 to 9 cm. Rollers of this size are considered universal; they are used for most painting jobs, as well as for leveling wallpaper when gluing.
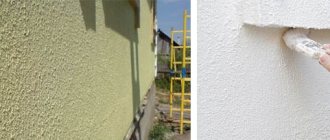
- Large roller. Its length is over 25 cm, and its diameter is from 8 cm. Such rollers are used for facade painting. Working with such a tool requires professional skills and some experience.
The handle length of the rollers also varies - from 35 cm to 50 cm. If necessary, you can purchase a telescopic handle. It will lengthen the roller, and then you can use it to paint a surface that is high up without using a stepladder.
Roller models
There are several types of paint roller
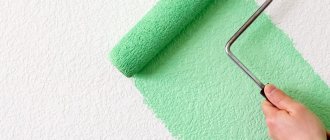
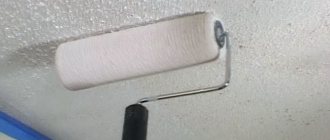
- For painting. They are used for painting walls, ceilings, applying varnish, primer, etc. The soft coat absorbs the paint, then it is applied to the surface with a rolling motion.
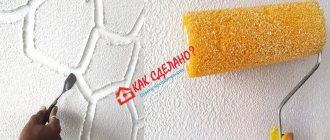
- Textured models for plaster. With their help, you can create all kinds of reliefs and patterns on a plastered or painted surface.
A type of textured roller is paneled. It is intended for creating decorative paintings on walls without using a stencil. - Needle rollers. An option for self-leveling flooring is a roller with rubberized spikes. They are used to remove air bubbles from a poured solution or when working with viscous paints.
For drywall, the roller has sharp spikes that pierce the surface so that the material is better saturated with moisture and can be bent to the desired shape. Also, such a roller is also used during repairs to remove old non-woven or vinyl wallpaper from walls. - Corner roller. This is a narrow wheel of small diameter on a clasp with a handle. This roller is used for painting corners or hard-to-reach areas of the room.
- Roller for pipes and radiators. This model is like an elongated wire handle, at the end of which two or three rollers are attached. The diameter of these rollers may vary depending on the diameter of the pipe.
- Pressure (or stitching) roller. This is a design with a dense rubber or polyurethane coating. It is used when gluing wallpaper to smooth and remove air bubbles.
Material for roller coats
The types of material from which roller coats are made are quite varied.
- Polyamide, nylon. This is an artificial fiber with increased resistance to chemical attack and abrasion. The length of the pile varies from 8 to 20 mm. Such coats are used mainly for applying water-dispersion paints. The longer the pile, the easier it is to apply paint with such a roller on a rough surface.
- Acrylic (polyacrylic). A synthetic fiber that resembles wool, but with a dense pile. This type of pile allows you to reduce the amount of splashes during painting. Also suitable for applying water-based paints, but not suitable for chemically aggressive materials.
- Polyester. Outwardly it resembles a padding polyester. It has excellent paint absorption and retention abilities and does not leave lint when applied. But it is very short-lived and has low durability.
- Fur covering. Includes both real and faux fur. Natural fur is made mainly from sheep's wool. Suitable for using various enamels, varnishes, oil and water-dispersion paints, but recommended for working with lime. If the wool is poorly processed, then such a roller may leave fluff on the surface to be painted.
Faux fur (vestan) is used for applying all types of paints. In connection with this, a faux fur roller coat is considered universal. - Velours. This is a woven backing with plush pile. They don't splatter paint or roll off. These rollers are used for finishing smooth surfaces. Resistant to solvents. Such rollers are used when working with alkyd paints, oil-based and water-dispersion paints.
- Foam rubber. Used for working with water-dispersion paints and water-based varnishes. This coat quickly restores its original shape, but during the process small bubbles remain on the surface, making it uneven.
- Flock. Polyurethane fiber glued to a textile base. Very durable, waterproof and environmentally friendly material. Used for finishing painting of particularly smooth surfaces.
As a rule, the manufacturer indicates on the packaging what types of painting a particular roller is intended for. When choosing a model, base it on what you need the roller for.
Attaching the roller coat to the roller
There are several types with which the fur coat is attached to the roller.
- Glued look. A strip of fur coat is wrapped in a spiral around a roller treated with glue. The connection is made end-to-end, and because of this the roller is seamless. When working with such a roller, the paint is applied evenly, without forming streaks, but due to the fact that the coat is not removable during this application, it cannot be replaced. The roller will have to be thrown away when it has served its purpose.
- Thermo-glued. This is a method of thermally welding the coat material onto a roller. The material strip is wound onto a roller heated to the maximum permissible temperature. The surface is also seamless and does not leave marks on the painted surface. These rollers are more durable than glue rollers.
- Replaceable coats. Such coats are fixed on the roller with special plugs.
With large pile.
Their pile length is from one and a half to two or more centimeters. They are excellent for structural, relief decorative coatings. For example, facade decorative coatings. Thanks to the large pile, all holes, ruts, and any small irregularities on the surface are soaked the first time. You can roll out wallpaper glue on walls and wallpaper, but not always. It applies the glue in a thick layer, so after smoothing, a lot of glue can come out from under the wallpaper. Also, wallpaper can be greatly deformed and even tear when smoothed. It can be used as a primer, but thick, long hairs do not hold it well. Consequently, a significant portion of the liquid may end up on the floor.
Which roller to choose for applying glue to wallpaper
Since wallpaper is not as durable as walls, you need to work with it more carefully. Therefore, the best option for applying glue to wallpaper is a paint roller with a fur coat. The bristles should be medium or short, from 0.5 to 1 cm. The bristles should be straight and hard. Width – 20 or 25 cm.
However, as many have noticed, if you use a foam tool for gluing, there are no significant differences. It is enough to work carefully and the result will be the same. And if you consider that foam tools are somewhat cheaper, then there is nothing wrong with using them. Here everyone decides for themselves what to do.
Some even use a paintbrush to apply glue to the wallpaper. This is also a good option.
As you can see, among the many tools for wallpapering, there are those that are responsible for a specific process. Some rollers are used for applying glue, some for finishing joints, others for rolling sheets. It cannot be said that there is some universal option suitable for all cases. For example, there is no way to properly process joints with a paint roller and make them invisible. And taking into account the fact that the price of each of the tools is low, it is better to buy them all. Then the quality of the finishing work will be at the highest level, the joints will not be visible and the wallpaper will not peel off.
With medium pile.
They are the most versatile of all. The length of the hairs is approximately one centimeter. It is soft, so it holds even primer well. Excellent coverage on flat surfaces and decorative coatings with slight relief. The shagreen on the surface after painting remains small, the most optimal. Fur coats for them are also made from natural materials (sheepskin). When painting ceilings and walls, not a single fallen hair remains on the surface. They are durable and suitable for priming, painting, and applying wallpaper paste.
Recommendations before painting walls
Considering the tips below will improve your technique of working with a roller, which will affect the quality of the repair:
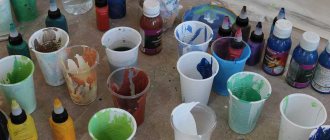
- The estimated area for cladding must be measured in order to know the required amount of material. A large assortment of water-based and acrylic paints in the retail chain will help you decide on a color. Their consumption is always indicated on the jar label, and the drying time is also indicated there.
- After painting, it is worth purchasing a primer, putty (deep penetration, starting, finishing), sandpaper, masking tape, and plastic film.
- You will also need additional tools - a bucket, brush, gloves.
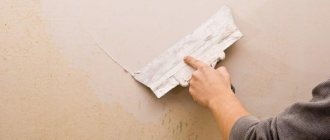
- The surface that is going to be painted must be carefully prepared. Old layers of paint and wallpaper are removed with a scraper. After the surface is degreased, cracks and chips are sealed with putty.
- Using an emery block, rough edges are removed (sanding walls), and any dust that appears is removed with a damp cloth.
- To ensure strong adhesion of the paint to the base, the entire prepared surface is treated with several layers of acrylic primer. As a result, the painting will be smooth and durable.
- Each subsequent layer of primer is applied only after the previous one has completely dried.
- The paint is diluted according to the instructions on the can. The emulsion is poured into a tray and you can begin painting after putting on glasses.
Such recommendations will be useful to those who want to know how to properly paint walls with a roller.
Foam rubber.
We do not recommend painting with them. The liquid is squeezed out strongly. Sometimes, instead of spinning, it simply slides along the surface. Foam rubber may roll to one side. You can apply wallpaper glue with it, but keep in mind that the old foam rubber is destroyed. In practice, there was one very unpleasant case: after gluing thin, smooth wallpaper in a certain direction of the sun's rays, the entire wall ended up with small tubercles. It looked terrible. I had to re-paste the wallpaper. As it turned out, there were many very small pieces of foam rubber under the wallpaper. Such debris is very difficult to notice in the glue, since wallpaper glue has a yellowish tint. But among these rollers there is one for priming absolutely any surface.
He has a thick foam coat. The diameter of the main shaft is only 10 mm. The diameter of the coat is 60-70 mm. They are excellent for priming any uneven surfaces, brick walls, corners. It holds the primer and distributes it evenly over the surface. There are also thin rollers 100 mm wide, with medium pile.
They are convenient for painting narrow slopes, niches, and hard-to-reach places.
Preparing walls for painting, painting with a roller
To use a roller to paint walls, you first need to prepare the room. It is necessary to remove curtains and furniture (or move them, cover them with film or special covers).
If necessary, cover the floor with cardboard paper, cover the doors and windows with plastic film (you can use cloth, but there is a possibility of leakage), and cover the baseboard with paper tape.
Preparing the walls comes down to a number of operations:
- after turning off the power supply, remove the covers from switches and sockets;
- Cover the remaining “insides” with masking tape;
- if necessary, remove heating radiators;
- cleaning and making the surface smooth: removing wallpaper (if any), hiding defects with putty, sanding dried walls.
Pallet for paint
The work requires the availability of basic and auxiliary equipment:
- screwdriver, knife, paint tray;
- set of rollers, sanding accessories.
After all the preparations, having chosen a roller for the walls, you can start working:
- the tray is filled with a small amount of dye;
- the roller is dipped and rolled out to remove excess and distribute the coloring matter evenly over its surface;
- painting begins from the corner, then spreads in any convenient direction;
- to avoid the appearance of streaks, move the tool smoothly, without pressure, from top to bottom and back;
- The corners are painted with a brush. For information on the types of rollers, watch this video:
The remaining layers are applied only after the first has dried.