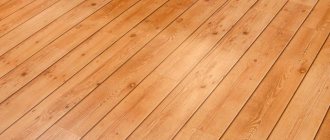
Laminate occupies a leading position among all floor coverings.
Disputes about the quality and practicality of the material have not subsided since its appearance on store shelves, but its popularity and demand are constantly growing, which in itself characterizes the attitude of consumers towards laminate.
It combines all the best qualities of flooring that should be present in the material, and has the widest selection of color, texture and panel material options.
The possibility of self-installation and partial repairs makes the coating as convenient as possible for all users.
The only requirement for the material is a high-quality base that can ensure stable operation of the coating in the correct mode.
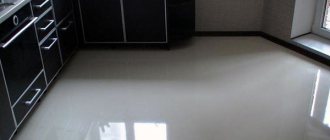
Do I need to level the floor for laminate flooring?
The structure of the laminate is a continuous sheet made up of individual panels. They are connected to each other by special connecting elements - locks. Their presence allows you to align the position of the panels relative to each other, ensures an even plane, and the absence of cracks or gaps in the canvas.
In this case, the canvas itself is laid on the base, the position of which determines the condition of the coating surface. If there is a slope or fold on the base, then the canvas will repeat its shape and lie in the same way, which will negatively affect the performance of the coating .
It’s even worse if the surface of the base has differences in height or small depressions throughout the entire plane. The load on the canvas will become uneven; at some points it rests on the base, at others it hangs above it.
When a load appears on the coating at the sagging points, a significant force appears on the locking part, aimed at breaking the lock. In these places, cracks will appear, gradually widening as the castle is destroyed.
During wet cleaning, water will enter them, accelerating the process of breaking the lock joint, and ultimately the material will be destroyed and rendered unusable . In addition, the voids under the panels become a source of noise and rumble when walking, which will be appreciated by family members and neighbors below.
Preliminary laminate layout plan and its consumption
Laminate flooring can be laid parallel and perpendicular to the windows, diagonally in the room. If you have experience, you can lay out a mosaic from laminated panels of different colors and textures.
If this is your first attempt at laying laminate flooring yourself, it is advisable to choose the option of laying the panels perpendicular to the window. The joints will be less noticeable if the panels are laid so that the light from the window illuminates the surface parallel to the seams.
So, the solution to how to properly lay laminate flooring has been found. Time to start doing the calculations. By multiplying the width and length of the room where the laminate will be laid, the area is determined. For a perpendicular layout, 7% is added to the area, for a diagonal layout - 15%. Next, the resulting figure should be divided by the size of sq.m; they are written on the package with the selected laminate. Thus, the required number of packs for a specific room is calculated.
What is a self-leveling floor?
A self-leveling floor is a layer of leveling screed formed by a special compound. Various options for mixtures are available in stores, their choice is very wide . A special feature of the material is that the drying time of the compositions is relatively short - from 1 to 3-4 hours, depending on the thickness of the application.
This is much faster than when pouring a conventional sand-cement screed, which is highly appreciated by users. The ability to level the floor surface in a matter of hours and begin laying the laminate is the main property of the compositions, which is why users prefer to use self-leveling floors.
IMPORTANT!
Despite the curing time stated by the manufacturers for the mixtures, it is recommended to continue repair work no earlier than 24 hours after pouring. Final hardening of the composition occurs after 10 days.
Selection of laminate
Laying laminate flooring on a self-leveling floor
After completing all the preparatory work, you can begin choosing the laminate. Today, the market offers a huge number of varieties of this material, which compete both with its traditional rival - linoleum, and are increasingly crowding out other types of finishing coatings, such as porcelain stoneware or tiles for cement floors.
Properly selected and installed laminate flooring will last for many years. However, it is important not to forget that the selection of laminated panels should be based not only on the brand and color of the laminate, but also on the combination of the floor covering with other interior elements, for example, wallpaper.
How to determine whether a self-leveling floor is suitable for leveling a surface
To determine the suitability of a self-leveling floor, it is necessary to inspect the surface of the subfloor and determine its condition. The material creates a relatively thin layer (up to 6-7 cm maximum) , so it is necessary to find out whether it is possible to level out flaws in the surface geometry in this way.
In addition, it is necessary to inspect the surface for possible cracks or holes into which material may leak during pouring. If there are any, it will be necessary to eliminate them before pouring and ensure the integrity of the base.
Surface priming
This procedure is mandatory, because it prevents moisture from penetrating the self-leveling floor into the base, which promotes natural drying.
Priming is done as follows:
— splash a small amount of primer onto the floor; - distribute it evenly over the entire floor area with a brush, brush or roller; - cover every square centimeter.
Priming before pouring the screed must be done so that the base does not take up moisture from the self-leveling floor, which can prevent the self-leveling floor from spreading evenly.
Advantages and disadvantages
Self-leveling floors have a lot of advantages:
- Smooth smooth surface.
- Fast drying time, repairs can be continued the next day.
- Self-leveling floors are easy and quick to clean, their care is simple and easy.
- Long service life - up to 20 years, according to manufacturers' statements.
- Complete sealing of the layer. If you spill water on the surface of the self-leveling floor, there is no threat to the neighbors below.
- The presence of antistatic properties is of great importance for laminate.
Disadvantages include:
- Preparation of the subfloor before pouring is quite complex and labor-intensive.
- Dismantling a self-leveling floor is quite complicated and requires significant effort.
- The cost of work and materials is quite high.
These properties of the coating must be taken into account when choosing a method of leveling the floor under the laminate.
What to start from when choosing the optimal composition?
When choosing a specific composition, several evaluation criteria must be taken into account.
- Where will the floor be poured?
— In the living areas of a house or apartment, any mineral mixtures are suitable, taking into account the level of humidity in the room. Epoxy or polyurethane coatings, “self-sufficient”, that is, without subsequent finishing, are quite suitable. If a “warm floor” is planned, then this must be specified by the manufacturer.
Self-leveling polymer 3D floors have become widely used in residential premises. True, you need to carefully consider whether such a finish will soon become boring and whether it will become an irritating factor.
— In the bathroom, toilet, if you plan to cover it with tiles, then cement-based compositions (the use of combined cement-gypsum ones is allowed). Polymer compositions are also excellent - as an independent coating.
— In the kitchen, it is better to use mineral-based compositions if you plan to finish the flooring with laminate, linoleum, or tiles. Seamless polymer coatings, which can be given the necessary decorative effect, are also suitable.
— Bathhouse - the requirements are similar to the bathroom, but it is better to exclude the use of cement-gypsum mixtures.
— Porch, balcony, pedestrian area in front of the house, etc.: the characteristics of the mixture must necessarily indicate that it is frost-resistant. Naturally, compositions with a gypsum component are completely excluded. Polymer or polymer-cement compositions that are resistant to abrasion and have a rough surface are welcome.
— Garage – the optimal choice would be a polyurethane coating. As an option, leveling is done with a cement composition, and then a thin, up to 5 mm wear-resistant polyurethane layer is poured.
- What thickness of fill is expected?
Everything is simple here - the manufacturer must indicate the range of acceptable thicknesses. And violating these recommendations means risking the strength and durability of the floor.
The range of permissible thicknesses for pouring the self-leveling compound must be indicated by the manufacturer
In addition, the initial conditions and the cost of the material should be taken into account. Filling expensive finishing compounds with a layer of more than 5 mm is extremely wasteful. Therefore, for rough leveling of the surface, you can select “simpler” self-leveling compounds, and then, after such a base has hardened, perform the finishing fill. And it’s better if these mixtures are from the same manufacturer - they are maximally adapted.
- On what basis will the pouring be carried out?
— Any composition can be poured onto a concrete base (floor slab) after appropriate preparation.
- On a wooden base or on insulation (penoplex and the like) - preliminary pouring of a floating (not connected to either the base or the walls) cement-sand reinforced screed 40 mm thick is required. After this, a thin-layer finishing composition is applied. True, the manufacturer of the mixtures may stipulate other conditions - this must be clarified in the instructions for use of the compositions.
Special self-leveling mixtures are available for sale specifically for complex bases - wooden, bitumen, hardboard, etc.
— For waterproofing (bitumen), for old tiles, preliminary pouring of a reinforced floating screed is also required. For screed, by the way, a self-leveling mixture can also be used - compositions are produced specifically for such purposes.
- What kind of external floor finish is expected?
Any mineral compositions are suitable for tiles, but must take into account the degree of humidity in the room, as discussed above.
Under other coverings (laminate, parquet boards, linoleum, carpet, etc.) any, including polymer ones. The only question is how cost-effective it will be to use expensive polymer bases in such a case.
Laminate prices
laminate
- How quickly will the coating harden?
It should be correctly understood that the terms specified by the manufacturer usually only indicate the possibility of people moving along the poured surface without the risk of deformation. But this is still far from complete maturation of the coating. It will gain final strength and readiness for full operation much later - the period can be from one to four weeks.
The fact that you can move on the floor after just a few hours does not mean it is ready. For information on the timing of full ripening, see the detailed instructions on the packaging.
Be sure to pay attention to another time indicator - the viability of the prepared solution. That is, the time during which it is necessary to distribute the mixture over the surface before it begins to set. If you plan to work alone, and even with insufficient experience, it is better to choose compositions with the highest possible indicator - 40÷60 minutes, otherwise you can simply ruin all the results.
Find out when it is necessary to repair cracks in a self-leveling floor and how to carry it out from our new article on our portal.
- Mixture consumption.
A parameter showing how much material is consumed on average to fill 1 m² with a layer thickness of 1 mm (or 10 mm - different manufacturers may have their own “standards”, but converting one to another is not difficult). On average, this figure varies from 0.8 to 2 kg/m² with a layer of 1 mm.
The maximum consumption is observed for self-leveling cement-based compounds. But this is “smoothed out” by lower cost. Knowing the “certificate” consumption rate and the parameters of the room (its area, difference in floor level, planned minimum thickness of the poured layer), you can calculate the amount of material that will need to be purchased for the work.
Our online calculator below will help you with your calculations. It provides the ability to calculate both by the known area of the room (the area for filling) and by size (for rectangular rooms). The calculation result is shown taking into account the 5% reserve.
Calculator for calculating the required amount of mixture for pouring a self-leveling floor
Go to calculations
Main types
There are 4 types of self-leveling floors:
- Cement-acrylic . Traditional mixtures based on Portland cement. Durable and able to withstand sudden temperature changes.
- Polyurethane . Compounds that provide a highly durable yet flexible coating that can withstand moisture and chemical compounds.
- Epoxy . Durable, resistant to various chemical influences compositions. Withstand contact with water without damage.
- Methyl methacrylate . They provide high surface quality and can be poured at relatively low temperatures.
The choice of one type or another is determined by financial capabilities and operating conditions of the coating.
NOTE!
For residential premises, polymer mixtures will be the best choice; they provide a better set of qualities and moisture resistance.
List of manufacturers
The question of which brand of self-leveling floor is better is significant. Indeed, this parameter can have a decisive impact on the installation result. For this reason, we decided to clarify.
Vetonit
The brand specializes in the production of dry formulations that have excellent quality characteristics. Varieties are individual and differ in the time it takes to harden.
Knauf
The brand produces floors based on gypsum in combination with quartz sand. This is a good brand that is liked by both professionals and amateurs. Its self-leveling floor products are suitable for use in rooms with moderate humidity characteristics. Plus, the composition combines well with other solutions.
Volma
Company from the Russian Federation. Specializes in the production of self-leveling floors from the budget segment of products.
Moment (Ceresit)
The brand's self-leveling floor is used as a starting surface. Some types have the ability to harden quickly. This allows you to reduce operating time to a minimum.
Floor primer
Before pouring the floor, it is necessary to apply a layer of primer mixture. This is done to improve the adhesion of materials, compact and strengthen the upper layers of the base, and increase their waterproof properties.
If there are greasy stains on the surface, a layer of paint that is difficult to remove, or other materials that negatively affect the adhesion ability of the self-leveling floor composition and the base , you should use the Betonokontakt primer, which is created specifically for such situations and connects all finishing materials well with unsuitable bases .
If the subfloor is in normal condition, a double layer of deep penetration primer is sufficient - a primer that binds or strengthens the upper layers of the floor.
Advantages of the most common floor coverings
The most common brands of “liquid” floors have a number of advantages:
- They are strong, wear-resistant and durable.
- Easy to apply and does not require special knowledge or technique.
- Thanks to the large selection of colors and decor, they can be used in almost any room and interior.
- Self-leveling floors are easy to clean and repair, tolerate chemicals well and are hygienic.
- In case of fire, they do not burn, but melt at temperatures above +100 degrees. However, when melted, toxic smoke is produced.
Installation of beacons
To ensure proper distribution of the mixture over the floor surface and horizontal control, beacons are installed before pouring. They are straight strips of metal that are installed on the floor at the height of the screed and allow you to control the pouring parameters . Beacons are installed in rows with a pitch of about 1 m on small piles of mortar - pads.
Before installing beacons on the surface of the walls of the room along the entire perimeter, you need to draw a horizontal line at the level of the top point of the fill. Its position is controlled by the building level. A laser level is very suitable for such tasks, providing a high-quality, even plane and horizontal level.
The beacons rest against a horizontal line with their ends, which guarantees their position . The middle parts are slightly pressed into the straps, the position of the beacons is controlled by the building level. Correctly installed strips with their upper edges create an even, horizontal plane, allowing you to level the mixture without errors or distortions.
Can't do without a backing
When wondering how to lay laminate flooring on a concrete floor, many people assume that an underlay will be required, and this is absolutely true. By laying laminate flooring on a good substrate, you can significantly extend its service life.
The backing for a laminate is similar to the insole in a shoe. This includes waterproofing, heat conservation, and shock absorption; it is also impregnated with antibactericidal compounds.
The best option that meets all the requirements is polyethylene foam or extruded polystyrene foam. The substrate made of these materials, in addition to everything, also provides sound insulation.
There are substrates that are more effective and more expensive. Bitumen-cellulose with cork chips is an excellent substrate, but not suitable for “warm floors”. When buying it, it is worth remembering that you will need a ventilated baseboard.
Of particular note are polymer substrates with a self-adhesive base. Laying laminate flooring with your own hands on a concrete floor with such a backing is very convenient.
Preparing the mixture
The mixture is prepared according to the instructions on the package. To do this, you will need a capacious container, the volume of which will allow you to prepare a sufficiently large amount of material at a time. How long does it take for the mixture to dry? The mixture sets quickly, so you need to immediately fill as large an area as possible, ideally the entire room at once .
Some formulations require some time for the mixture to mature (several minutes), others can be used immediately after dilution with water. There are also ready-made mixtures that do not need to be diluted, but only need to thoroughly mix the composition.
Preparing the base for the screed
When installing any screed, you must first prepare the base.
The preparation of concrete floors is prepared in the following sequence:
- We clean the surface of old coatings, remove flaking and damaged areas.
- If there is exposed reinforcement, clean it and treat it with phosphoric acid to remove rust
- We carefully repair the cracks and clean the seams between the slabs.
- We cover the areas prepared for repair with primers and seal them with cement-sand mortar or special repair mixtures.
As a result, we get a rigid, solid, clean base, ready for installing any screed.
I recommend! Apply two layers of concrete primer to the repaired base to increase strength and better adhesion to subsequent layers.
Base waterproofing
Waterproofing a reinforced concrete base can be done
- thick polyethylene film;
- roofing felt;
- roofing membrane;
- liquid bitumen mastic.
We apply or install insulation on the walls 10-15 centimeters above the backfill mark.
Figure 2. Waterproofing the base under the screed.
We lay the film sheets and the membrane in whole sheets, if necessary, fasten them together with tape.
We glue the roofing material onto the bases with an overlap and gluing with bitumen.
To waterproof the passages of risers through the ceilings, we use sleeves and silicone sealants.
Important! In places where pipes pass through risers of engineering systems, install sleeves and seal the joints with silicone sealants.
Do-it-yourself mixture pouring technology
Before starting work, you need to make sure that the beacons are placed correctly and their position, and prepare the necessary tools (a wide spatula for leveling the composition, usually a needle roller).
Along the perimeter of the room, at a height from the subfloor itself to a mark 2-3 cm above the thickness of the fill, an elastic damper tape is installed, cutting off the screed from the wall and allowing it to have a small space for thermal expansion.
The mixture is poured in strips between the beacons. Work should begin from the far corner opposite the exit, so that when operations are completed you can leave the room without damaging the pouring surface.
The composition is distributed between two adjacent beacons, leveled with a wide spatula and a rule, resting on the beacons, and finally calibrated horizontally and in thickness. Using a needle roller, the composition is rolled, gets rid of air bubbles, and adheres better to the base .
IMPORTANT!
In a similar way, the next strip is filled between the beacons and so on, until the area of the room is completely covered. Upon completion of the work, the room is closed and the required time is allowed for the filling layer to harden.
Required tools and materials
To carry out all work on pouring a self-leveling floor, the following tools are needed:
- roulette; - level; - spatula or trowel; - brush or brush; - bucket or basin; - needle roller.
You will also need materials such as:
- cement or gypsum; — damper tape; - water; — dry mixture of self-leveling floor.
Tools and most materials can be easily purchased and prepared.
Before purchasing a dry mixture of self-leveling floor, you must first make the appropriate calculations.
Wet screed
Traditional cement-sand screed for leveling concrete bases.
For greater strength and to prevent cracking, it is better to reinforce it with steel or special plastic mesh.
We install beacons from a metal profile. Steel pipes can also be used for these purposes. We fix them with quick-drying mixtures of plaster or alabaster.
We prepare the solution in a mortar mixer or any suitable container using a hammer drill with attachments or a construction mixer.
Pour cement and sand into a container with water in a ratio of 1:3 and mix thoroughly.
I recommend! To prepare the screed mortar, use ready-made building mixtures. They contain a balanced composition of the necessary components that increase the plasticity of the solution and the quality of the base.
Place the finished solution between the beacons and level it using the rule.
After a day, we remove the beacons, and the cavities from them are sealed with a solution and rubbed.
The finished screed must be covered with film or moistened regularly.
This screed will dry for at least a month.
After drying, cover the surface with two layers of primer.
Laying the laminate is allowed after the screed has completely dried.
Figure 6. Construction of reinforced cement-sand screed.
Dry screed
Dry screed can be used if the height of the room allows, as well as if it is necessary to insulate and soundproof the floors.
First of all, we install beacons made of timber or metal profiles on the prepared base, following the marks of the top of the backfill.
We place the beacons at such a pitch that it is convenient to level the dry backfill with a rule or a wooden lath.
We check their horizontality using a hydraulic or laser level.
Important! Attach a damper tape made of foamed polyethylene to the wall around the perimeter of the room to prevent deformation of the coating.
We fill expanded clay between the beacons.
Figure 3. Expanded clay backfill device.
To create a dense base, it is better to use a mixture of expanded clay of various fractions.
We carefully compact the backfill and level it. Give it a day for the mixture to thicken.
On the backfill we lay two-layer gypsum panels of the Knauf system, specially designed for flooring. You can use GVL sheets, laying them in two layers, fastening them together with self-tapping screws.
The joints between the sheets and panels, as well as the recesses from the screws, are sealed with putty. We remove excess putty and sand the surface to give it a perfectly smooth state.
Figure 4. Dry screed device.
The dry screed is ready for laying the laminate immediately after production.
I do not advise! Install dry screed in kitchens and bathrooms where flooding is possible. If water gets into the thickness of the expanded clay, it can only be removed by dismantling the coating and removing all the wet backfill.
This screed does not burden the floors and underlying structures due to the lightness of the expanded clay used in its composition.
The insulation is not susceptible to microorganisms and rodents, is fire-resistant and durable.
Excellent heat and sound insulation properties allow it to be used over unheated and noisy rooms: garages, boiler rooms, pumping rooms. It is easy to hide engineering communications and wiring in it.
Actions after leveling the base
Once the floor is level, you can begin laying the underlayment under the laminate. This layer is necessary to increase heat and noise insulation. The material also acts as a shock absorber, hiding minimal unevenness remaining after the screed is created. You can use: polyethylene foam (additional waterproofing), bitumen-cork substrate, simple cork as an environmentally friendly material, etc.
Bottom line
If you carry out all the above steps correctly in compliance with the technology, then the laid laminate will look aesthetically pleasing in the photo and during visual inspection. Each of the above methods of preparing the base has certain advantages and disadvantages, but they are united by ease of implementation.
With minimal skills, straight hands and sufficient desire, laminate flooring can be laid without the help of specialists. If you had to turn to them, they will take responsibility not only for carrying out the work, but also for selecting all the necessary components, naturally, taking into account the wishes of the customer.