Before laying the finishing floor covering when renovating an apartment, it is necessary to prepare the base. The service life of the floor in the future will depend on this.
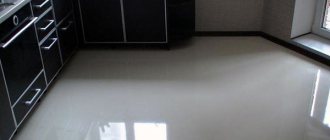
The base must be made strong and absolutely level. Self-leveling flooring is fully consistent with these qualities; it is a self-flowing and quick-hardening mixture.
If desired, everyone can fill a self-leveling floor with their own hands, regardless of the manufacturer, the technology is almost the same for everyone.
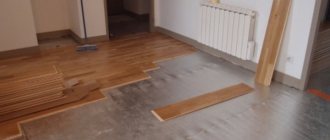
Self-leveling floors can be poured onto concrete, wood, metal and other substrates. After complete drying, ceramic tiles, laminate, carpet and other floor coverings can be laid on it.
Kinds
All self-leveling floors can be divided into several large types depending on the binding material:
- polyurethane;
- epoxy;
- gypsum;
- on a cement base.
Polyurethane self-leveling floors
As the name suggests, their base is polyurethane. They have high strength, immunity to chemical influences, and wear resistance. Increased elasticity prevents cracks.
Can be used in both residential and industrial premises.
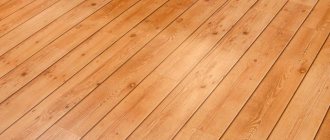
Polyurethane flooring can be poured onto almost any substrate: floorboard, laminate, metal, concrete.
Epoxy self-leveling floors
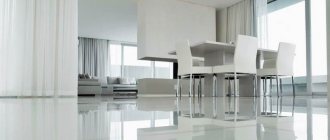
The basis of the epoxy floor is epoxy resin and hardener. These are the most beautiful polymer self-leveling floors; a good craftsman can use it to create a real work of art.
The floor can be transparent with any pattern, glossy like glass or matte. It is very hard, resistant to various chemicals and mechanical stress, but is afraid of pinpoint impacts.
Epoxy floors are recommended for areas with high loads (schools, cafes, offices) and for residential premises due to their high decorative properties.
Due to the more complex manufacturing technology, it is recommended to entrust their filling to specialists.
Self-leveling cement-based floors
These are cement-based dry mixtures to increase plasticity and greater spreadability, special modified additives are added to them.
Suitable for leveling large differences, cracks and other defects on the subfloor.
Used as a base for laying the finishing floor covering on it:
- laminate,
- tile,
- linoleum, etc.
One of the leaders in the modern construction market is the fast-hardening mixture OSNOVIT SKORLINE T-45; using its example below, step-by-step instructions for pouring a self-leveling floor in an apartment will be given.
Osnovit Skorline T-45 is used for surfaces with unevenness up to 10 cm, both for final leveling and preliminary leveling. It is non-shrinking, high strength and crack resistant.
It is also suitable for those who want to install a “warm floor” system. This is facilitated by its high self-leveling and spreadability.
Founder Skorline T-45 complies with all hygiene standards in force in the Russian Federation, it is environmentally friendly and does not contain harmful impurities. When hardened and completely dry, the surface is completely smooth and does not require further sanding.
Video instructions for pouring self-leveling floor:
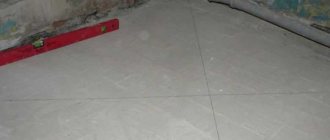
Visual inspection of screeds before laying coatings and repair of screeds
When accepting finished work, many clients are interested in how to check whether the screed meets the standards. If you do not have any special tools at your disposal, you can conduct a visual inspection of the poured surface before laying the finished floor. So, the surface should not have cracks or other visible defects. It should be dry and should not crumble; if the screed crumbles, it means it is loose and poorly made. The screed can be checked for looseness in a primitive way - by scratching it with a door key or another sharp metal object. It must be taken into account that the screed must be dry. CPS 5 cm thick dries within 28 days in dry weather. Drying a freshly poured base using a heated floor is strictly prohibited; it can lead to cracking and collapse. Near the walls and around the columns, if any, there should be expansion joints that are filled with elastic material, such as polystyrene foam or polystyrene. Changes and unevenness are discussed between the client and the master before starting work and depend largely on the type of coating that will be laid on this surface. For laminate and parquet boards, permissible differences are no more than 2-3 mm/2 linear meters. It is checked: a rule or level 2 meters long is placed edgewise on the floor surface in different directions and the gap between the floor and the rule (level) is measured. For installation of ceramic tiles or porcelain stoneware, as well as for carpet, tolerances may be rougher. To lay various PVC coatings when pouring screed, maximum evenness of the floor is necessary, because all irregularities will soon appear on the surface of the coating itself, and the coating will take the exact shape of the subfloor. In these cases, restoration of the screed is simply necessary. The minimum thickness of the DSP is 5 cm, so all unevenness of the low-quality screed will have to be repaired with self-leveling mixtures or resurfacing.
Advantages and disadvantages
Below we present the general advantages and disadvantages of self-leveling floors.
Advantages:
- aesthetic appearance;
- relative ease of filling;
- hardness, high impact resistance;
- durability 10 years or more;
- high adhesion, the ability to pour on almost any substrate;
- hygiene, ease of cleaning and operation;
- there are no seams or joints;
- fireproof;
- resistant to various chemicals;
- maintainability.
The self-leveling floor will meet all the described advantages if the technology for filling it is fully followed.
Flaws:
- high price;
- complexity of technology;
- the floors “do not breathe”, regular ventilation of the room is necessary;
- cold, it is necessary to insulate;
- difficulty of dismantling.
How to choose a self-leveling floor
The choice of type of self-leveling floor depends on:
- future load;
- the material from which the initial base is made, on which the pouring will be performed;
- presence of defects;
- thickness of the future layer;
- type of finishing floor covering.
For living rooms in an apartment, a polyurethane self-leveling floor is better suited, and in the bathroom, an epoxy floor with increased moisture resistance is recommended. Both types can be used without finishing.
An industrial self-leveling floor is suitable for administrative and commercial buildings; it has increased strength and can easily withstand heavy loads from various loads and traffic of a large number of people.
Polyurethane self-leveling floors are more hygienic, waterproof and safe and are the best choice for residential premises.
Required Tools
You can fill the self-leveling floor with your own hands using the following tool:
- bucket or other container for mixing 20-25 liters;
- needle roller;
- drill or special mixer with an attachment;
- squeegee for drawing out the solution with an adjustable gap;
- wide spatula;
- special paint shoes;
- polyethylene film;
- level.
Pouring self-leveling floor step by step instructions
As mentioned above, here are instructions for pouring the fast-hardening mixture Osnovit Skorline T-45.
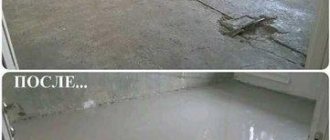
Preparing the base
The base under the self-leveling floor in the apartment must be cleaned of all kinds of stains, paint, crumbling coatings, vacuumed and dry.
All further operation of the self-leveling floor depends on this stage.
Product on topic
- Add to cart
View
Polyurethane glossy paint “VP-1003”
472 ₽
- Add to cart
View
Self-leveling roofing "Crovleks"
422 ₽
- Add to cart
View
Self-leveling polyurethane flooring for sports surfaces "PUR-ELASTANE-SPORT"
548 ₽
- Add to cart
View
One-component polyurethane primer “VP-1001”
454 ₽
- Choose …
View
Polyurethane paint for sports markings
4409 ₽ – 18612 ₽
- Add to cart
View
Polyurethane impregnation “VP-1002”
372 ₽
- Add to cart
View
Polyurethane putty
436 ₽
- Add to cart
View
Polyurethane gloss varnish
356 ₽
- NEW!
Add to cart
View
Polyurethane primer PUR SOIL
383 ₽
- NEW!
Add to cart
View
Polyurethane compound for self-leveling floors PUR POL
444 ₽
- Add to cart
View
Polyurethane varnish AQUA-PUR
1264 ₽
- Add to cart
View
Polyurethane matte varnish
686 ₽
Calculation of mixture consumption
The consumption of self-leveling floor components is affected by the quality of the base - the worse it is leveled, the greater the consumption. High-quality application of primer in several layers also helps reduce the required materials.
The average universal value for calculating the consumption of dry mixture is 1.3-1.8 kg per 1 square meter of floor with a layer thickness of 1 mm.
A more accurate consumption can be found on the packaging of the dry mixture; it may vary depending on the type of floor and manufacturer.
Preparing the base
The pour-on floor leveling technology is generally more forgiving of the condition of the base than conventional or dry screed. With the exception of one point - the moisture content of the base. Water vapor, pushing through the fill, destroys the polymer films between the granules of the mixture, and the coating begins to crumble. Therefore, it is highly advisable in any case, before filling, to install waterproofing with a wide vent around the perimeter so that fumes do not penetrate into the leveler. How? More on this below.
Concrete
Preparing a concrete base for pouring includes the following operations:
- Sealing cracks.
- Primer.
- Waterproofing.
- Thermal insulation and mesh laying.
The primer and mesh have already been mentioned; thermal insulation is a separate big topic. Sealing cracks with waterproofing is the same, but for filling these operations there are features that we will consider.
Small cracks are repaired using conventional methods. If there are gaping (2 mm or wider) and active ones located along the perimeter and diagonals, then you must first check using non-destructive testing methods to see if the entire ceiling is destroyed. If so, what kind of alignment is there, the house is in disrepair.
If not, then in the process of cutting cracks, cuts are made perpendicular to them with a width of 2-3 mm, a depth of 40-50 mm and a length of 150-200 mm, in increments of 200-250 mm. The cuts will create technological seams that “spread” the load. They are sealed along with the cracks.
Now about waterproofing. It is almost always needed; a zero result in a floor moisture test is a rare exception, and even then the situation can change, especially if the house is new. Firstly, polyethylene cannot be laid under a continuous covering; moisture diffuses through it. The floor filled with leveler should only breathe around the perimeter, so you need waterproofing or other special material. But before laying down the film, you need to paste over the corners.
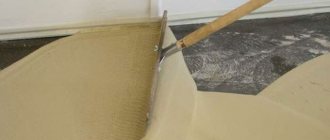
Foam tape for gluing corners
The corners are covered with polystyrene foam tape. In addition to an outlet for fumes, it will also create an expansion joint. Foam tape is available in different types, incl. to create hidden expansion joints in concrete monoliths, but we need a special one for corners. It can be recognized by its color (not white), smaller thickness (3-5 mm) and, most importantly, by the groove extruded along the axis, along which it bends, see fig. The tape is glued with drops of silicone in increments of 100-250 mm; nitro glue can corrode it.
Tree
Wood flooring needs to be play tested first. To do this, use a plumb line in a tripod hastily made from scrap materials (pipes, slats, fishing rods) with a height of at least 1.5 m. The device is installed in the center of the room. The tip of the plumb line should almost touch the floor; a sheet of paper with a drawn cross, concentric circles, etc. is slipped under it. markers.
Then they walk around the room, monitoring the deflection of the load. More precisely, due to the slope of the floor, because the load still hangs vertically. The size of the floor play is related as the height of the suspension to the length or width of the room, depending on which direction the greatest deviation is noticed. The limit value is 1.2 mm per 1 m of the corresponding size; if more, the flooring needs to be sorted out or completely removed and poured over the base.
For example, a tripod 1.8 m high; room 2.5x4 m. The largest deviation of 2 mm in length was recorded. Overall game (4/1.8)*2 = 4.44 mm. There are 1.11 mm per 1 m of length, you can fill it.
Note: The room being tested must be completely empty.
Next, we open any board (or parquet block, or laminate slab) near the wall that is most suspicious of moisture, and inspect its underside and joists, if the flooring is laid on joists. Suddenly, traces of dampness, rot, mold, or a bug are discovered - again, we put off the leveling and start laying.
If everything is OK with the stability and integrity of the flooring, then you need to fill the cracks with sawdust mixed with liquid nails until the thickness of sour cream. You can also use ready-made wood putty, but not water-based. Roughly planed wedges are driven into wide (wider than 2 mm) cracks before puttingty and then planed flush with the surface. Now all that remains is to cover the corners with foam tape, apply waterproofing, as for concrete, and mesh, as already described. We remind you that wood leveler is needed on plaster and polyurethane with microfiber.
Cracks in the self-leveling floor
If the pouring technology is not followed, cracks may appear on the self-leveling floor. They can be large all the way down to the base or superficial and small.
The main causes of cracks:
- Pouring onto a wet concrete base.
- Movable, fragile foundation.
- The required amount of water when preparing the mixture was exceeded.
- The expiration date of the dry mixture has been violated.
If small cracks up to 1 cm appear, there is no need to refill the entire floor. You can fix them by doing some minor repairs:
- widen the crack;
- remove dust using a vacuum cleaner;
- apply primer and dry;
- Fill the crack with new mortar.
Compliance with the pouring technology will make it possible to create a strong and even base for the installation of any floor finishing covering.
Conditions for using the technology
A self-leveling floor is a quick way to create a perfectly flat surface. The composition sets very quickly, after which you can begin construction or finishing work. Self-leveling material is poured for the following purposes:
- organizing a screed to level the concrete in preparation for the finishing coating. The idea of pouring a thin layer from 2 to 30 mm is a way to eliminate unevenness of the old surface;
- performing a screed when laying waterproofing from roll, film materials on oiled concrete or wood. The layer should be 30-60 mm;
- performing thermal insulation before insulation. Monolithic self-leveling floors rise 30-60 mm above the main surface;
- laying water or electric heated floors. Self-leveling material hides communications. The fill should not be more than 30 mm.
Important! The total surface layer in the latter case is no more than 60 mm. This way less energy is consumed.