Greetings! Repair requires not only financial and physical effort, but also a strong nervous system.
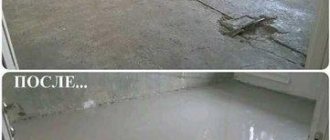
The main advantage of a self-leveling floor is the high speed of formation of an absolutely even, durable layer and the possibility of laying coatings not a month, but just a few days after pouring.
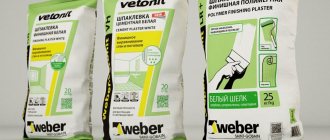
You will find many offers on the construction market, and it is very difficult to choose something truly worthwhile. In this case, many factors must be taken into account to ensure that the dry mixture fits your repair parameters. I will talk about products that are produced under the brands “Starateli”, Weber, “Volma”, “Bolars”, “Osnovit”, Bergauf, Ceresit.
Marking
First of all, you need to find the zero point of the level. To do this, using a regular or electronic level, draw a line from below along the wall above the base of the floor along the entire perimeter.
Then, using a tape measure, and possibly visually, the highest place of the base for filling is located, where a mark is placed below the line.
Above this mark, taking into account the planned thickness of the screed, a control line is drawn along the perimeter of the walls, at the level of which the floor will be poured.
The best self-leveling floors for leveling surfaces
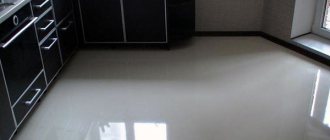
Leveling self-leveling floors allow you to eliminate defects on foundations. Most often, after drying, tiles, parquet, laminate or linoleum are laid on the formed surface. Experts liked the following building mixtures.
Prospectors Fast Hardening
Rating: 4.9
The easiest way to level the floor is with the self-leveling floor Starateli Quick-hardening. This gypsum-based composition is optimal for living rooms, hallways and kitchens. The prepared solution is highly mobile, which allows you to level the surface within 40 minutes. But the hardening time is quite short (4 hours). The manufacturer allows a mechanized pouring method; the leveling layer ranges from 5 to 80 mm. Considering the affordable price, experts gave the product first place in our rating.
Users are satisfied with the affordability, fast curing time, and smooth surface. But when leveling on your own, difficulties arise, so it is better to entrust this work to professionals.
Advantages
- high solution mobility;
- fast drying time;
- possibility of mechanized application;
- wide scope of application.
Flaws
- difficulty in self-leveling.
Bergauf Easy Boden
Rating: 4.8
Those users who prefer to do their own repairs in their house or apartment should take a closer look at the composition of Bergauf Easy Boden. Despite the German name, the product is made in our country. However, in terms of cost, it is inferior to the leader in the rating. Thanks to the cement base, the self-leveling floor is easy to use. In addition, it can be used in wet areas (bathtubs, showers, toilets). You can easily apply the prepared solution on your own; the manufacturer allows for the possibility of mechanized pouring. The base can be a concrete slab or a “warm floor”.
Builders are pleased with the ease of installation and leveling, but the coating takes longer to harden than gypsum-containing analogues. The disadvantages include the high price.
Advantages
- easy to prepare and level;
- versatility of use;
- moisture resistance;
- high quality.
Flaws
- high price.
Rating of the best self-leveling floors
| Nomination | place | Name of product | price per kg. |
| The best decorative self-leveling floors | 1 | Teping Floor 205 PU | 387 ₽ |
| 2 | GLIMS HEAVY DUTY HD drymix | 57 ₽ | |
| 3 | Arturo EP2500 | 1 100 ₽ | |
| 4 | Polymerstone-2 | 425 ₽ | |
| 5 | Elakor-ED | 315 ₽ | |
| 6 | Monopol 5 | 500 ₽ | |
| The best self-leveling floors for leveling surfaces | 1 | Prospectors Fast Hardening | 12 ₽ |
| 2 | Bergauf Easy Boden | 17 ₽ | |
| 3 | VOLMA-Nivelir Express | 19 ₽ | |
| 4 | Knauf-Tribon | 14 ₽ | |
| 5 | Unis-Horizon | 17 ₽ | |
| 6 | Scorline FK45R | 20 ₽ | |
| 7 | Vetonit-5000 | 25 ₽ | |
| 8 | Ceresit CN-175 | 23 ₽ | |
| 9 | BOLARS Finish SV-1010 | 18 ₽ | |
| 10 | Litopol De Luxe | 12 ₽ |
Pouring process
Filling must be done continuously, the entire square footage of the room in one day. It is best to start the process from the far corner of the room and gradually move towards the exit.
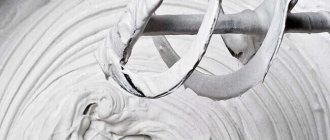
By its nature, the solution is similar to thin sour cream. 1 liter of material spreads on average onto a pancake with a diameter of 40-45 centimeters.
If you have never had to deal with such work, it is better to first look at a photo of a self-leveling floor for a bathroom on the Internet.
After the solution is evenly distributed over the entire area of the bathroom, an aerobic roller is used to remove air bubbles. The builder puts on special attachments, takes this tool and calmly steps on the self-leveling floor.
The roller must be rolled over the entire area for about 20 minutes. The roller cannot be removed from the solution.
Which is better, screed or self-leveling floor?
| Type of leveling coating | Advantages | Flaws |
| Screed | + affordable price + evens out large differences (from 2 cm) + wide range of finishes | — installation of beacons and special tools are required — surface quality is low – large layer thickness (at least 2 cm) |
| Self-leveling floor | + easy leveling of the base + possibility of independent use + high surface quality | - high price — the coating cannot be restored - you can even out small differences |
Bathroom Design Ideas
As a decoration, you can often find adding sparkles to the decorative layer to create a shimmering effect or acrylic elements, as well as real small objects: coins, shells, marble chips. To obtain floors with a 3D effect, the required image is printed on film.
Most often, 3D floors are made with marine motifs
No less popular is imitation of the water surface.
With the help of high-quality images you can achieve an impressive effect
An example of a self-leveling floor with grass covering
After installing the base layer, the decor is carefully (without bubbles) glued onto the carefully leveled surface of the poured floor, then covered with a thin protective layer on top.
Once the floor has dried and gained the necessary hardness, you can enjoy a durable, beautiful and hygienic coating for many years.
Padding
In order for the surface to absorb better, it is necessary to apply a layer of primer. To achieve a higher level of adhesion, you need to apply a deep action acrylic primer. To strengthen the cement base, primers are used.
The process itself is indicated in the instructions for the purchased primer. To make the right choice, it is best to choose a material with universal properties.