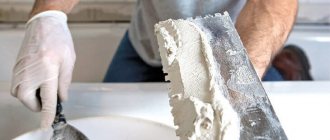
In order for walls covered with wallpaper to look beautiful, the walls must be properly prepared and carefully leveled. For this purpose, special putties are used, which not only make the surface of the walls smooth and even, but also effectively hide all defects.
High-quality putty should adhere firmly to the wall, and additional coatings should adhere well to it, be it paint, wallpaper or other finishing material. Accordingly, when choosing a putty, it is necessary to take into account what surface it will be applied to, what components are included in the composition, and how effectively the finished mixture will fill the unevenness.
To make choosing a putty easier, we have compiled a list of parameters that people pay attention to when choosing, and a rating of the best putties for walls under wallpaper according to the 2022 version.
Rating of the best putties for walls under wallpaper in 2022
| Place | Name | Price | Rating |
| The best putties for walls under wallpaper by price/quality for 2022 | |||
| 1 | TEX latex Pro | Find out the price | 9.9 / 10 |
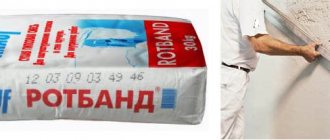
| 2 | KNAUF Rotband Pasta Pro | Find out the price | 9.8 / 10 |
| 3 | Weber LR+ | Find out the price | 9.7 / 10 |
| The best gypsum putties for walls under wallpaper | |||
| 1 | KNAUF Uniflot | Find out the price | 9.9 / 10 |
| 2 | PUFAS Full+Finish | Find out the price | 9.7/ 10 |
| 3 | Prospectors finishing | Find out the price | 9.6 / 10 |
| The best polymer putties for walls under wallpaper | |||
| 1 | Ceresit IN 95 | Find out the price | 9.9 / 10 |
| 2 | Prospectors Finish Plus | Find out the price | 9.8 / 10 |
| 3 | Roussean STILLEPLAST | Find out the price | 9.5 / 10 |
| The best putties for walls on concrete under wallpaper | |||
| 1 | TEX latex leveling finishing Profi | Find out the price | 9.9 / 10 |
| 2 | DANOGIPS Dano Box 1 | Find out the price | 9.7 / 10 |
| 3 | Basic gypsum putty | Find out the price | 9.6 / 10 |
| The best inexpensive putties for walls under wallpaper | |||
| 1 | Universal acrylic varnish | Find out the price | 9.9 / 10 |
| 2 | TEX finishing Pro | Find out the price | 9.8 / 10 |
| 3 | finishing Super | Find out the price | 9.7 / 10 |
Criteria for choosing putty
First of all, you should consult with experienced finishers about the type of putty. If the walls and ceilings are uneven, then rough leveling using a starting compound will be required first. Then you can bring the surface to perfect evenness and smoothness using the finishing mixture. Some all-purpose putties combine the capabilities of starting and finishing products. But they are recommended only for relatively flat walls.
The compositions also differ in the degree of readiness. The easiest way to work is with ready-made mixtures, which just need to be mixed before use. But dry powdery materials must be properly mixed with water to obtain a homogeneous viscous mass.
Putties vary significantly in recipe. Cement-based mixtures are considered inexpensive and durable. A bright white surface can be obtained using a gypsum composition. Polymer and acrylic putties perfectly combine plasticity and versatility. But in cost they are superior to cement and gypsum materials.
Based on applicability, a distinction is made between products for interior use, which are susceptible to exposure to moisture and temperature changes, and mixtures for external use. This feature must be taken into account when finishing a bath or kitchen.
Our review included the best putties. When compiling the rating, the following criteria were taken into account:
Source
How to choose putty for walls under wallpaper in terms of price/quality ratio?
To prepare the walls for subsequent wallpapering, a special type of putty is used. It applies easily and evenly to the walls and dries quickly. In addition, in most cases the finished coating does not need to be further rubbed to level it.
Among other parameters, pay attention to:
- Consistency. Most inexpensive putties are sold in the form of a dry powder, which is diluted with water immediately before use. If your budget allows, it is better to buy an already prepared mixture. It is completely ready for use, and the owner can be sure that the putty will have the optimal consistency for uniform application.
- Surface. Putty is chosen based on the material from which the walls are built. Concrete, brick, wood and plaster have their own compositions with optimal adhesion.
- Basic component. To speed up finishing work, it is better to buy polymer putty. It comes ready to use, is easy to apply, dries quickly and does not require sanding. In dry rooms with a stable temperature, you can use gypsum putty. It is better not to use cement-based compositions. Despite their affordable price, they are difficult to apply, and the coating itself takes a very long time to dry and requires grouting.
Which is better for deep leveling?
Starting putties. With their help, it is possible to eliminate all errors in plastering work and cracks. It is coarse-grained, applied to surfaces up to 20 mm. Knauf NR putty (starter) – gypsum putty, applied in a layer from 4 mm to 15 mm. The main direction is leveling the surface before finishing coating. After mixing, the solution quickly hardens; after 15 minutes, work stops. Does not shrink. Ceresit CT 29 starting – performing work on a concrete, brick, cement-sand wall. It is used to seal cracks and recesses left after plastering.
The maximum applied layer is 20 mm. Not suitable for use in rooms with high humidity. After mixing, the solution can be used for 50 minutes. It takes 10-15 hours to completely dry on the surface. High strength. Kreisel 662 is universal - it contains cement and lime. Apply a thin layer to the surface covered with plaster, as well as without coating. Has high adhesion. Use the mixture in rooms with high humidity. The maximum layer is 3 mm, there is shrinkage. When cracks are detected, in addition to putty, reinforcing tape must be used. It will prevent the crack from getting bigger...
The best inexpensive putties for walls under wallpaper
If the walls in the room are initially devoid of serious flaws, but they still need to be leveled before wallpapering, you can buy inexpensive putty.
Universal acrylic varnish
| Expert rating: ⭐ 9.9 / 10 | |
| Owner review | |
| A good putty, we used it at the dacha on OSB panels and at home on concrete, smooth, applies well, suitable for walls and ceilings. Does not flow, does not crack when dry, good adhesion. Apply in several layers, dries quite quickly. It was convenient to work. You can take more. I recommend for purchase. |
Despite the fact that this putty is inexpensive, it is provided in a ready-to-use form. It should be borne in mind that the product is not suitable for masking serious defects, although it boasts excellent adhesion.
Thanks to this, it can be applied not only to concrete and plaster, but also to brick walls. To ensure that the finish coat is perfectly smooth and the putty itself fills all defects, it is better to apply it in several layers.
Since the putty has a fairly thick consistency, it will not be difficult for the user to apply it not only to the vertical surface of the walls, but also to the ceiling. In this case, the product will not flow or splash. In order for the putty to adhere better to the surface, the walls must be clean and dry.
Specifications:
- dry in 24 hours;
- application material: concrete, brick;
- purpose: walls, ceiling.
pros
inexpensive but easy to use putty;
increased resistance to cracking;
very good adhesion.
Minuses
not suitable for wood.
TEX finishing Pro
| Expert rating: ⭐ 9.9 / 10 | |
| Owner review | |
| Moderately durable. It dries quickly, so don't leave it open for long, and it's not very durable, so if you need to seal a large space, don't take the finishing one (this is a comment for those new to renovations like me) The quality is good, it fits perfectly, dries quickly and is easy to sand. Great choice! |
If you need to quickly level the walls or ceiling for wallpaper or painting, but the budget for repair work is limited, you should give preference to this putty. Despite the affordable cost, it has the necessary characteristics for carrying out preparatory work.
The putty is provided in a ready-to-use form and can be easily applied using a regular spatula. In addition, the consistency of the putty is quite thick, so it is easily applied not only to walls, but also to the ceiling.
The product itself does not contain toxins and has no unpleasant odor, dries in about a day and does not crack after complete drying. Another feature of the putty is that it can be applied in several layers for perfect leveling, but you will have to wait until the previous layer has completely dried.
Specifications:
- dry in 24 hours;
- application material: concrete, plasterboard;
- purpose: walls, ceiling.
pros
cheap but high-quality putty;
Suitable for concrete, plaster and drywall;
does not flow when applied to the ceiling.
Minuses
For perfect alignment you need to apply several layers.
finishing Super
| Expert rating: ⭐ 9.9 / 10 | |
| Owner review | |
| Everything is as in the description, easy to work. Easy to apply, sands well, forms a reliable, strong surface, suitable for decorative plasters. Excellent putty, elastic, dries quickly, white. It applies well and does not run off like many others. There are no disadvantages, the putty dries quickly, does not crumble, and it is convenient to putty. |
Using this putty, you can easily level the surface so that paint or wallpaper looks more attractive. The release form is a dry mixture, but instructions for preparing the working solution are given on the packaging.
Due to this, there will be no difficulties in preparing a solution of the required consistency. If the surface of the walls is uneven or has serious defects, it is better to apply the putty in several layers.
It should be borne in mind that, despite good adhesion, each layer of putty needs to dry well. Each layer dries for about a day, and to obtain a perfectly even coating, all layers need to be sanded. Because of this, the duration of finishing work can be long, but this disadvantage is compensated by the affordable cost of the product.
Specifications:
- dry in 24 hours;
- application material: plasterboard;
- purpose: walls, ceiling.
pros
does not flow when applied to the ceiling;
even beginners do not have any difficulties preparing the working solution;
does not smell and does not contain toxins.
Minuses
Supplied without spatula.
Putty work
Puttying walls with your own hands is quite doable and is not a difficult task. The base must be dry and clean. This is important to remember and know, otherwise the whole puttying process will go down the drain.
Tools and materials
To carry out puttying work you will need:
- narrow (10-15 cm) and wide (40-60 cm) spatulas;
- putty material (starting, finishing);
- sanding block (with abrasive mesh);
- containers for diluting putty;
- foam sponge;
- drill, hammer drill, screwdriver;
- brushes, roller for priming walls;
- sandpaper or grout mesh;
- level.
Stage-by-stage execution of work
- Preliminary preparation. Initially, you should clean the surface, dry it, remove areas of grease, old putty, and paint. The surface should never be dirty, wet or frozen. This negates the degree of adhesion of any putty material. As a result of such an error, the putty may fall off in entire layers.
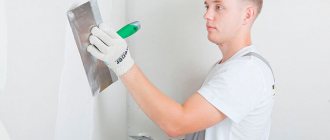
- Surface primer. This stage should not be neglected. The primer is applied between all putty layers, as well as after the final finishing layer before wallpapering. It provides additional strength to the connection.
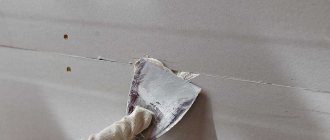
- Applying putty. Depending on the base and purpose of the room (the choice of putty has already been discussed), one or another type of putty is applied, as well as the required number of layers. Each layer must dry well and then be treated with a primer. The starting putty is applied with a large spatula in portions, diagonally. In order to avoid visible transitions, each portion is applied with a slight influx onto the previous layer. The tool must be held at an angle of 30-35º relative to the surface. The finishing layer is applied no earlier than a day later. A narrower spatula is used, and the layer thickness is reduced to 2 mm.
- Final primer. It is carried out immediately before wallpapering the walls.
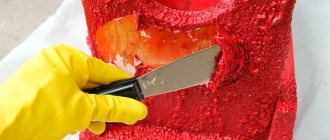
Puttying corners
Smooth and clear corners are very important for walls on which you plan to glue wallpaper. This process is very responsible and a little time consuming for beginners.
Craftsmen recommend leaving excess material at the corners, then rubbing with abrasive until the corner is correct. A special corner spatula is very useful here; it should be used to work according to the principle of “supporting the walls.”
If necessary, you can use a silicone tube or a plastic pastry syringe, through which the required amount of putty mixture is squeezed out. Next, the corners are sharpened with abrasive.
Slope putty
Slopes are puttied using the same method as corners or walls. However, the process itself is quite painstaking, and it is quite difficult for beginners to cope with slopes. It is recommended to use an angled spatula and check the evenness with an abrasive.
Which company should you choose?
It is not recommended to buy cheap putty from a little-known brand. It is possible that even after proper dilution, the composition will turn out to be too thick or thin, and the dried coating will become covered with cracks.
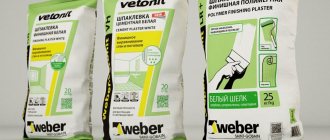
We analyzed the assortment of the modern market, studied reviews from users and professional builders, and found that in 2022, the companies TEX, KNAUF, Weber, PUFAS, Rusean, Ceresit, DANOGIPS and Lakra were recognized as the best manufacturers of putties for walls under wallpaper.
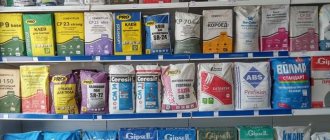
Range
Today on the construction market you can purchase putties from different manufacturers. Rough and finishing putties are represented by such brands as:
- Glims;
- Pufas;
- Knauf;
- Weber;
- Vetonit;
- Prospectors;
- Shitrock;
- Promaster et al.
The material is sold in paper bags (dry mixes) and plastic buckets (ready-made putties). The price difference is due not only to the variety of manufacturers, but also to the quality of the material, as well as the fillers they contain (varnishes, drying oils, polymers, coloring pigments).
The most common and popular type of wallpaper putty is the product of Knauf.
Bedroom design in Provence style: is putty relevant here?
Polymer
The newest finishing material is polymer putty, very well suited for preliminary finishing work before painting and wallpapering. Its use is advisable before finishing. It owes its name to the presence of binders such as latex or acrylic.
The latex option is suitable for interior decoration of walls made of OSB, plywood, plasterboard, concrete and wood, as well as for exterior work. Acrylic-based putty is used only for ceiling and wall decoration indoors. Among the positive qualities are:
- increased strength;
- durability;
- no odor;
- ease of use.
Prices
The most attractive prices are considered to be for brands that are little known, as well as for local manufacturers. These include:
- Irkom;
- Ircom-Color;
- Sniezka;
- Vidaron;
- Triora et al.
Although the prices of these products are affordable, they have disadvantages: severe shrinkage, rapid hardening of the diluted mixture, cracking, etc.
Popular brands Caparol, Ceresit, Knauf, Kreisel, Polimin, Sadolin, Sopro, Tikkurila, Mapei, Schonox are usually more expensive than the previous ones or in the same price range as them. Most of the listed putties are strong, durable, and after their application an even and smooth coating is formed, ready for subsequent work.
Those who are starting to master the art of construction should take universal mixtures. With them you don’t have to think about the starting or finishing line-up, but their price is usually twice as high as each of the previous ones. Craftsmen give preference to gypsum mixtures, but each tiler chooses the product with which he is most comfortable working.
Cost calculation
First of all, you should know that two main indicators are taken into account, on which the amount of consumption depends. So this is:
- curvature of walls;
- selected type of putty.
It is possible to calculate the putty consumption using a calculator. To do this, you should select the type of finishing material for the walls and calculate the parameters.
The calculation process, especially if you do not use an online calculator, provides for an accurate calculation of its consumption for a certain wall area. For these purposes, it is necessary to be able to calculate the thickness of the layer. The first stage consists of thoroughly cleaning the wall surface, after which level beacons are placed on it, that is, points are determined to identify deviations. The next stage involves taking measurements from the plane, after which the results are summed up and divided by the number of points. The result obtained on the calculator is an indicator of the thickness of the plaster layer.
An example of calculating plaster: you need to plaster a wall of 20 m2, which is filled up by 10 cm. The installation of beacons is carried out at 3 points, the deviations in them are 2, 3 and 7 cm. So: (2+3+7) /3=4. The average thickness of the plaster layer is 4 cm.
The next stage involves calculating the consumption rate per 1 m2. The average data is indicated on the packaging, for example, that for 1 m2 with a layer of 10 mm you need 9 kg of dry plaster. And to calculate its consumption in a layer of 4 cm, it follows: 9 × 4 = 36. The result obtained is nothing more than consumption per 1 m2. It will be much more convenient if you use a calculator for this.
Advice! Each manufacturer has its own consumption standards per square meter, including such indicators as area, type of putty, type of wallpaper chosen for gluing, etc.
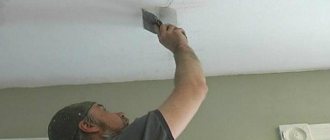
Finishing putty
Applying the finishing putty is a very important stage, since it is precisely this that is designed to hide the last remaining unevenness on the wall before wallpapering. The process of preparing the mixture is the same as for the starting putty.
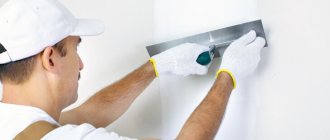
How to apply the finish correctly:
- Use a small spatula to scoop up a little of the composition;
- Apply to a large spatula;
- Using a large spatula, spread the putty in a thin layer at an angle of 45 degrees.
After applying the finishing putty to the wall, you need to let it dry and smooth out all the unevenness with a mesh. Next, you can start gluing wallpaper.
conclusions
The process of puttingtying walls for wallpapering is quite a labor-intensive process , focusing on physical expenses; based on close attention and healthy pedantry. From a technological point of view, the procedure cannot be called complex, and inaccuracies and defects can be corrected before final finishing.
In addition to significant savings, plastering walls with your own efforts will allow a beginner to get used to it and gain basic skills in finishing. Now you can navigate the topic of wallpaper putty, which one to choose. Thus, we can describe the procedure for choosing the best putty option for walls. Also read the material about putty for concrete floors.
Source