Is it possible to make a self-leveling floor on a wooden base?
It is possible to make a self-leveling floor on a wooden base if the base itself is in good condition. When planning a renovation, you need to take everything into account. If the cost of replacing boards is more expensive and requires additional major repairs of walls, support beams, and other important load-bearing elements, then it is better, if possible, to remove the wooden floor altogether and pour it over concrete. It is also important to follow the pouring rules, performing all the work step by step, as stated in the instructions.
Important! In some cases, rotten wooden flooring can be replaced with fiberboard slabs.
Inspection and repair
Before making a new covering, especially a self-leveling floor in a wooden house, you should carefully inspect and, if necessary, repair the existing flooring. To do this, do the following:
- the surface is inspected for clearly visible drying out and cracks;
- one board is torn off and assessed for fungal and mold damage;
- boards are inspected to identify large areas of damage;
- the surface is checked, boards are found whose attachment to the support joists is broken.
Self-leveling flooring on wooden floors: main advantages
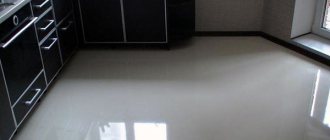
Self-leveling flooring on wooden floors has long been popular among designers. Experienced repairmen also appreciate this type of decorative floor covering. Let's take a closer look at the technical characteristics and decorative qualities that make self-leveling floors a leader among other alternative coating options. List of advantages:
- The self-leveling surface has no seams where dirt usually gets clogged. In addition, seams often cause damage to some types of coatings. Fragments of material begin to peel off from the base in such places;
- the surface has antistatic properties, so it is easy to clean and wash;
- Wood-look self-leveling floor will last for several years. The coating has high strength, anti-corrosion properties, is resistant to mechanical damage and exposure to chemicals;
- The coating retains heat for a long time and practically does not conduct sound. The clicking sound of heels on him is practically inaudible;
- a huge selection of design in various colors, using drawings, repeating patterns, textures.
What to consider when choosing a self-leveling mixture
Be especially careful when choosing a mixture, because with a wide selection, it is unlikely that you will find an option that would be suitable in all cases. Therefore, when choosing a polymer coating, first consider a number of important factors:
In addition, it is worth paying attention to the manufacturer. Both domestic and foreign companies offer polymer mixtures on the Russian market; each of them has its own secret manufacturing technologies, and the price of the products directly depends on this. The more expensive components in a mixture, the higher its price.
The most popular brands:
Attention! The Bergauf polymer mixture has high thermal insulation and sound insulation properties, which makes it popular if you want to cover a wooden base with a self-leveling floor.
There are many more popular brands, we have listed just a few of them. Keep in mind that not all brands have the same installation technology, so before you start installing the floor covering, carefully read the instructions on the packaging.
Requirements for a wooden base
It is possible to make a self-leveling floor on a wooden base, but first you need to check that the floor boards meet the following requirements:
- Damage to wooden elements must not be allowed. Fungal infections, holes made by insects, corrosion - all this can cause poor-quality repairs and additional expenses.
- The surface must be smooth and polished.
- Significant differences in floor level and sagging of individual floorboards should not be allowed.
- The plank surface must be well secured. If the boards are long, then it is advisable that an additional support beam pass under them at the middle level.
- The boards should not creak.
Important! When making a self-leveling floor for a wooden floor, it is necessary to correct existing violations of the requirements for the base. Elements that are damaged or affected by fungus or insects are replaced with new ones. The tension can be changed by updating the fastenings or installing an additional support beam underneath.
Is it worth pouring a 3D floor in other rooms of the house or wooden cottage?
In large rooms, the poured floor should not occupy the entire area.
When choosing a place where it would be correct to make a three-dimensional image in the floor, you need to be guided by the following considerations:
- in the room where such a coating is supposed to be poured there should not be heavy traffic (that is, a hallway or kitchen will not work);
- the room should have more of an aesthetic than a practical function (living room, for example);
- in large rooms, the poured floor should not occupy the entire area (firstly, you need somewhere to walk, and secondly, an image under your feet that is too large will be poorly perceived visually).
Types of mixtures used to fill wood floors
There are four types of mixture that are used to fill wood flooring. They differ in properties, characteristics and cost. Some of them may release harmful substances during pouring or even after it. Let's take a closer look at each type:
Epoxy-urethane
The mixture is toxic, so it is recommended to carry out all work wearing a protective mask and gloves. It is characterized by high cost and certain difficulties in filling technology. This self-leveling floor will last no more than 30 years. However, it can be easily repaired. The surface has antistatic properties. Resistant to mechanical damage and chemical agents, temperature changes and excessive humidity.
Polyurethane
The mixture is applied to many types of surfaces, but for some time it releases toxic substances even after pouring. The cost is high, and installation requires experience. The finished floor does not retain heat. Only lasts 10 years. However, it has several positive characteristics that other mixtures do not have:
- does not burn;
- does not slip;
- has antistatic properties;
- does not allow or absorb moisture;
- the high plasticity of the material contributes to slight depreciation when pressure is applied to the surface, so cracks do not form under mechanical stress;
- not exposed to chemicals.
Epoxy
Suitable only for screeding on a concrete base. Releases hazardous substances when poured. The cost is low. Such a coating must be treated with varnish polyurethane on top. It may become chipped from falling heavy objects. Floors slip when wet. The top layer is erased from the pressure of chair legs and heels. It takes 3-6 days to dry completely. After this, the surface becomes hard, does not allow any type of liquid to pass through and is not exposed to chemicals. It is also highly resistant to fire.
Methyl methacrylate
The high cost of the mixture is justified by its long service life. If properly filled, such floors will last at least 40 years. Releases toxins only when poured. This mixture is used using various colors. The finished floor is not afraid of excessive humidity, ultraviolet radiation, heat or cold. The floors are ready within two hours after pouring. Quite rarely they have to be repaired before the expiration date. But if such situations happen, the repairs can be carried out without problems on our own.
Important! To avoid mistakes when choosing a mixture, you must carefully read the recommendations on the label. The manufacturer always writes all the main characteristics, as well as what basis this composition is suitable for. Mixtures that are recommended for use on concrete pavements cannot always be used on wood.
Advantages of leveling mixtures
Special thin-fill mixtures are produced for filling wooden surfaces. They are designed specifically for contact with lumber, and give excellent results if certain mandatory conditions for their use are observed. The formulations offer the following benefits:
- They form a thin, flat surface that independently equalizes height differences.
Source ytimg.com
- Quickly applied and dry.
- Protect the wooden surface from destruction.
- They have sufficient plasticity to withstand changes in temperature and humidity.
Any material has restrictions on its use, and so do leveling mixtures. The recommended thickness of the poured floor ranges from 5-20 mm. If you want to compensate for a larger difference in height, be prepared for increased costs: more mixture will be required. The work will also become more complicated, because you will have to additionally use reinforcing mesh.
Preparing tools
To avoid any problems during the work, when installing self-leveling floors on wooden floors, you should prepare all the necessary tools in advance. To fill the wooden covering you will need:
- rollers;
- container in which you will mix the solution;
- brushes;
- container with which you will measure water;
- primer;
- hand construction mixer;
- wooden pegs or wedges;
- wide spatula;
- sealant;
- roller equipped with spikes;
- nail puller;
- angle grinder;
- hammer;
- fine-grained sandpaper equipped with a holder;
- benchmark beacons;
- construction vacuum cleaner;
- damper tape;
- waterproofing mixture or dense polyethylene film;
- individual protection means;
- colored marker;
- laser or water level.
The list may be supplemented with other types of tools, depending on the condition of the base and what will be needed during repairs. Some of the tools listed may not be useful. The list contains only those items that experienced specialists recommend using for self-leveling wood flooring.
We level the floors with our own hands - a minimum of difficulties
The procedure for filling a wooden floor base with a self-leveling mixture is quite simple. Proceed like this:
- Treat the floor with a moisture-proof primer solution. Pros advise in some cases to make a special flooring from a polyvinyl chloride membrane. It is used in situations where the room has constant high humidity.
- Use double-sided construction tape to seal all joints between the wall surfaces and the floor.
- Place a mark on the wall up to which the base will be treated with the self-leveling mixture. If necessary, install special guides on the floor (they simplify alignment). However, if you have minimal skills in performing repair work, you can do without additional beacons.
- Attach the reinforcing mesh to the floor base using staples.
- On the threshold, install a wooden batten, the height of which is taken to be 2–3 cm higher than the expected level of filling the floor with the self-leveling mixture.
- Using a special mixing attachment and a drill, prepare the leveling compound in a clean bucket or other container. The mixture should be homogeneous, easy to use, without lumps.
Pouring a wooden floor base with a self-leveling mixture
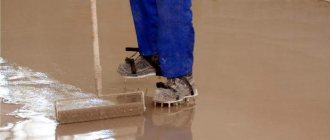
Now that the composition is ready, pour it in small portions onto the floor base and distribute the composition using a wide spatula or a needle-type roller. Filling should be done as quickly as possible. If you hesitate, the solution may dry out.
Technology of pouring floors onto wood
To avoid financial losses on remodeling, it is important to follow the stages of the work being carried out and follow the instructions recommended by experienced craftsmen. At the beginning, the surface is prepared, unevenness is removed, and then work is done on waterproofing. The solution is prepared immediately before pouring. When everything is ready, proceed to the main stage, which is also the final stage. Let's take a closer look at the instructions for each stage on how to fill a wooden floor with self-leveling flooring.
Preparing the wooden surface
To level a wooden floor, the wooden base is cleaned of dirt and carefully inspected for damage. All damaged parts are replaced with new ones. The preparation of the wood flooring is as follows:
- remove the baseboard;
- the surface is scraped;
- the floor is cleaned of debris, dirt and dust;
- apply a primer, and after it dries, mark the cracks with a marker;
- putty cracks;
- apply two more layers of primer, adding sawdust to the top one;
- A damper tape is glued around the perimeter of the room using pegs and a level.
Important! When applying several layers of primer, it is necessary to wait until the previous one has completely dried before applying each subsequent layer.
Requirements for floor waterproofing
A film or other moisture-insulating dividing material, for example, isolon, is spread evenly over the entire surface. If the material is tape, then it is covered with an overlap. In this case, the width of the whip should be at least 8-10 cm. It is also important to place the edges of the material on the walls. The height of the establishment is approximately 12-15 cm. It is not recommended to use waterproofing mixtures for wooden floors. Some of them have the ability to penetrate the structure of the tree and destroy it from the inside. Cement insulators are also not suitable for wood floors. Firstly, the composition turns out to be fragile due to insufficient liquid for ripening. Secondly, the finished floor turns out to be uneven and loose.
Preparation of bulk solution
To get a good solution, you must follow the following instructions:
- Fill a clean container with water, which should also be clean. Water temperature +5 - +25 °C.
- Pour the dry mixture into the water.
- Mix the mixture gently with a hand mixer for 7 minutes at 500 rpm.
- Let the solution rest for 5-10 minutes, then repeat the procedure with the mixer.
Important! The expiration date for the finished solution is written on the packaging. Usually it is 20-30 minutes.
Pouring self-leveling floor
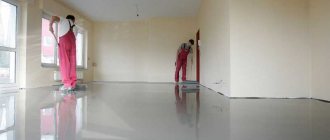
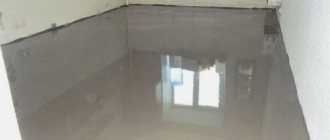
They start pouring the mixture from the farthest corner of the room, heading towards the exit. The surface is leveled with a spatula and a needle roller. There should be no bubbles or unevenness. After completing the work, you must wait until it dries completely. The timing of complete readiness is different for all mixtures. Therefore, when making a self-leveling floor on wood, it is better to follow the instructions written on the package.
How to prepare a wood base
High-quality preparation of the rough base for pouring affects further work and the service life of the self-leveling floor. Therefore, the wooden base is prepared carefully. The following tools may be required to carry out the work:
- hammer;
- nails, screws;
- grinding machine or machine with a grinding attachment;
- nail puller;
- vacuum cleaner;
- sandpaper;
- sealant or putty.
- putty knife;
- dense polyethylene;
- damper tape;
- construction knife.
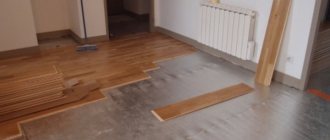
Before starting work, remove the baseboards and assess the condition of the flooring. If its surface is uneven, covered with paint, varnish, or grease stains, it is cleaned with a grinding machine. Nails and screws protruding above the surface are unscrewed or recessed into the floor. Rotten, “playing”, chipped boards are replaced with new ones. Damaged parquet or laminate flooring is removed.
Attention! You can clean varnish or old paint with special paint removers, which are sold in hardware stores.
Potholes, pits, chips, cracks are covered with sealants, putty, sawdust and PVA glue. The glossy surface is sanded with sandpaper to make it rough for better adhesion to the filling mixture. All this is done to ensure that the base is perfectly flat and monolithic.
If the board base has dried out or is severely damaged, it is covered and leveled with plywood, chipboard, OSB with a thickness of at least 15 cm. To prevent them from creaking in the cracks, the voids are filled with chalk powder, and then sheets of particle boards are nailed to them or screwed with self-tapping screws. A gap of about 1 mm is left between them.
The optimal distance between fasteners is 35-50 mm. If nails or screws protrude above the surface, they are driven 0.5 mm deep with a hammer. Then the prepared base is cleaned of dust, dirt, construction debris with a vacuum cleaner, a damp cloth and allowed to dry completely.
The cleaned surface is primed to protect it from moisture, mold, and mildew. Priming is carried out in two layers: first, they simply cover it and let it dry, and then sawdust or sand is added to the primer, which promotes better adhesion of the self-leveling floor to the base and is treated with this composition.
For your information! Instead of a second layer of primer, a reinforcing mesh is glued, which improves adhesion to the bulk solution.
The final stage of preparatory work is creating a waterproofing layer of polyethylene and laying damper tape around the perimeter of the room. Polyethylene is laid over the entire area of the room with an overlap of 10 cm. And its edges are placed on the walls to a height of at least 10 cm. The thickness of the damper tape is 1-2 mm.
Self-leveling flooring on wooden floors: possible mistakes
When making self-leveling floors themselves, owners often make the same mistakes:
- The liquid turns out to be viscous, so it cannot always level itself to a corner or edge. It is necessary to help the mixture spread evenly over the surface using a spatula;
- the needles on the roller should be 1-2 mm larger than the fill layer;
- It is necessary to correctly measure the height of the room not only around the perimeter, but also in the middle of the room, in order to avoid the appearance of depressions and bumps.
Is it possible to level the floor with gypsum plaster?
Gypsum screed, unlike cement screed, does not shrink. It turns out to level the floor perfectly evenly with gypsum plaster.
Interesting materials:
How to propagate geranium at home using cuttings? How to propagate hydrangea from cuttings? How to propagate an orchid at home using cuttings? How to propagate pelargonium from cuttings? How to propagate lilacs using cuttings? How to propagate currants using cuttings? How to propagate thujas with cuttings? How to propagate thuja from cuttings? How to propagate thuja at home using cuttings? How to propagate begonia from cuttings?
Recommendations from experts
To ensure that a self-leveling floor on wood lasts a long time and pleases homeowners, experienced craftsmen recommend using mixtures based on polymer acids. Polyurethane coating is suitable for any floor area in the house, but for areas with high humidity it is better to use epoxy filler.
For plank bases where there are small cracks, you need to use sealant or wood glue mixed with sawdust. Before pouring any type of polyurethane-based material, it is recommended to apply a primer.
Making a self-leveling floor on wooden floors with your own hands is not difficult if you follow the instructions exactly and listen to the recommendations of experts. Think over the design in advance if you are going to use color or ready-made color mixtures during the pouring process.
If you take into account all the nuances, follow the rules and stages of pouring, then the self-leveling wood floor will delight you for many years with its durability and presentable appearance.
Polymer floor in the bathroom of a private house (cottage)
This is exactly the room where a self-leveling floor would be most appropriate.
This is exactly the room where a self-leveling floor would be most appropriate. No one usually wears shoes here, so the coating is unlikely to get scratched. Polymers are not afraid of moisture, mold will not grow on them, and they are easy to clean. Moreover, it is easy to create a three-dimensional image on a water (marine) theme that is perfect for the bathroom.
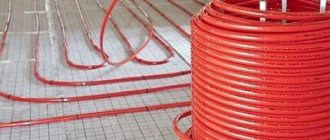
Another pro factor is that the surface is much warmer (in terms of tactile sensations) compared to traditional bathroom tiles. If desired, nothing will prevent you from “heating” the self-leveling floor using a water or electric in-floor system. As for possible harmful emissions, their likely negative impact here will be minimal, since each member of the household spends a minimum of time in the bathroom, moreover, these rooms are always equipped with an effective ventilation system.
