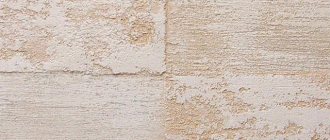
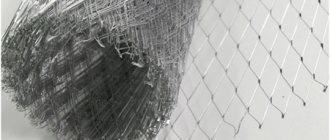
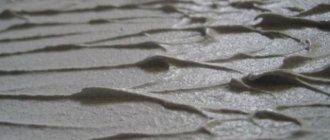
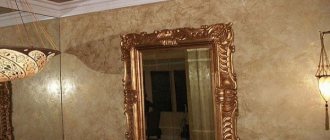
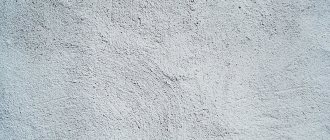
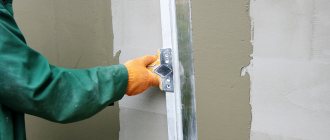
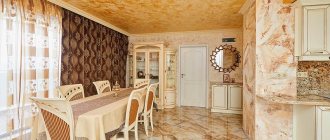
I recently completed another project where decorative plaster was chosen as the finishing material. The customer liked the texture of Grotto, which is similar to satellite images of the Earth. Plaster is often called “Map of the World”. I will talk about this simple application technique further. But first, a few photos.
On the left is plaster, on the right is a world map (satellite photo). It seems?
Features of Grotto decorative plaster
This plaster differs from other mixtures in the method of application. With its help, you can create a relief two-layer finish or make the work surface perfectly smooth.
The advantages of Grotto coating include:
- Seamless. Covering with wallpaper or panels leaves seams and joints visible to the eye, which cannot be said about Grotto plaster.
- High strength, resistance to temperature changes and mechanical damage. It is difficult to damage the dried, correctly applied mixture. It can be used for exterior finishing, since it is not afraid of precipitation or changes in weather conditions.
- Resistance to moisture. Grotto decorative plaster mixture can be applied in damp rooms. It is not afraid of water and fully retains its qualities when wet.
- Immunity to household chemicals. A dried layer of plaster that becomes dirty over time can be washed with soap solutions. Therefore, it is successfully used in rooms with high pollution, for example, in hallways and children's rooms.
- Environmental friendliness. The material is made from natural ingredients, so safety for humans and the environment is completely guaranteed.
- Antifungal properties. Decorative coating protects walls from fungi and mold, and prevents the appearance of stains of natural origin.
- Durability and wear resistance. Thanks to its durable layer and resistance to negative influences, the coating lasts a long time without requiring frequent repairs.
Decorative plaster grotto: what it consists of
It is no secret that the basis of the grotto coating is natural lime. Environmentally friendly material plus an affordable price makes this type of finishing very popular. If we compare Grotto with other plasters that are popular today (Venetian, travertine, Ottocento, etc.), then the cost of application will be approximately the same for all, but the cost of the material we are describing is lower.
Plastering grotto walls
Each master has his own style of applying decorative plaster. The technique differs in the force applied, the direction in which the hand moves, and even the way the spatula is held. The final result depends on this, which will never be 100% identical for two masters.
But besides this, grotto plaster has one feature that also affects the result. It's about the method of application. The most common textured finish is a two-layer finish (usually a mixture used to imitate natural stone, limestone, other rocks and even tree bark). But you can also make the surface smooth and uniform like Venetian plaster.
Grotto plaster
Types of decorative plaster based on putty
Now we move on to the most interesting part: what exactly can be done with this mixture and what result should we expect? Today there are a large number of variations of decorative plaster. It is curious that a mixture prepared on the basis of finishing putty can repeat almost every one of them.
Among the most well-known types, it is worth highlighting such options as:
- bark beetle - imitates a wood surface eaten away by insects (a very interesting wormhole effect is obtained),
- under the stone - by applying several layers, carefully trimming and smoothing them, you can create characteristic rock veins on the wall,
- shading - it is characterized by the effective intersection of broken lines and is performed with a plastic or metal comb,
- simple decoration - done using an ordinary trowel and allows you to create fancy geometric patterns and strokes on the surface.
Indoor wall decoration in bark beetle style
On sale you can find a huge number of stencils - rubber rollers with a ribbed figured surface. With their help, you can give decorative plaster effective patterns and unusual shapes.
Of course, Venetian and textured plasters are especially popular. They are quite difficult to implement and apply, but they look amazingly beautiful. If you apply the solution to plexiglass or light-transmitting plastic, previously treated with sandpaper, you can create stylish lighting.
Putty-based decorative plaster can be polished and painted. It has great potential for artistic design, so it is used to implement the most daring design projects.
What Grotto looks like (interior photo)
Grotto refers to textured decorative plasters with low relief. It is used for interior decoration of walls in bedrooms, living rooms and any other rooms.
When covering the “world map” with special wax, it becomes resistant to moisture, making it possible to decorate bathrooms, as well as wet cleaning of walls.
Often the “islands” on the plaster are glossed and polished to a shine, which looks very cool. But this requires professional decorative plaster; it is unlikely that it will be possible to achieve such a result with ordinary putty.
The texture of the “world map” plaster is similar to the surface of natural stone.
What does it look like
Decorative plaster got its name due to the external similarity between photographs of the globe taken from space and the resulting image on surfaces. To achieve the expected result, you need to pay attention to the information on the packaging; the inscription must contain the phrase “world map”. Manufacturers offer the material in a variety of colors. It is possible to select a plaster composition to suit the design of any room in the house.
- Textures can be made not only in a variety of shades, but also create the desired reflective effect:
- matte surfaces - suitable for finishing large sunny rooms;
- glossy walls - good for small rooms, they create the illusion of expanding space;
- mother-of-pearl plaster – mother-of-pearl gives a noble shine, is applied locally, this is an excellent solution for living rooms and halls.
You can entrust textured wall decoration to a specialist or do the work yourself. The master will perform grotto plaster quickly and efficiently. You need to independently acquire skills, study what materials and tools are needed, and learn how to use them.
How to create a Grotto texture
We level, prime and dry the surface on which we are going to apply decorative plaster (if this has not been done previously). We mix the plaster in water and add putty, mixing these two materials in a 1 to 1 ratio. Thanks to the putty, the composition will become more plastic and will take longer to set. Alternatively, there may be one plaster, but such a composition will be more complex to work with.
To apply the mixture we use two trowels of different sizes. We put a larger mixture on the ironing board, after which, with a light force, without pressing, we apply a smaller one. As a result, some of the solution should stick to the smaller trowel. Now we apply the second iron to the wall.
At this stage, we create a uniform pattern texture on the wall surface. We move evenly, leaving islands of approximately equal size with the drawn solution. To transfer the plaster remaining on the larger float onto the smaller tool, we press the second float with slightly more force.
After about 20 minutes of the working process, we will stop and smooth the drawn composition using a clean iron moistened with water. If the mixture sticks to it, remove it using a spatula. Having smoothed the treated area, we continue to apply the solution. Applying and smoothing the solution one by one, we plaster all the walls in this way.
When the applied composition has dried, we go over the walls, using a wide façade spatula to knock down sharp protrusions. And after that, we take a long-nap roller and paint our treated surfaces.
The mother-of-pearl coating gives the Grotto an excellent look. When the paint is dry, we can use a mixture of pearlescent pigment and primer with a ratio of 1 to 1, and for application take a foam roller, and it must be semi-dry. In this case, the pigment will remain on the protruding parts of the walls.
After a couple of hours, we move on to applying matte interior varnish, for this we take a roller with a long pile. It is better to apply the varnish in at least 2 layers to form a moisture-resistant surface. This way, if necessary, we can wash our new walls and refresh their excellent appearance.
DIY grotto
Applying the Grotto plaster mixture is not difficult, thanks to the plastic composition of the solution. The operating principle and sequence are practically no different from the use of other types of plaster.
Tools and materials
To create a decorative Grotto covering, you must use:
- gypsum plaster;
- paint for covering walls;
- pearlescent pigment and varnish;
- putty.
The tools you will need are a container for mixing the material, a spatula, sandpaper, a building level, a grater and a trowel, a lint roller, a flexible spatula, a trowel, and a suede mitten.
Preparing the mixture
If the master decides to prepare the composition himself, it is necessary to dissolve the plaster in water and add putty. Both components are mixed in equal proportions. The putty will give the composition plasticity and prevent it from drying out prematurely. If desired, you can use one plaster, but working with such a mixture is much more difficult.
Surface preparation
The walls are first cleaned of dirt: old coatings, pieces of wallpaper, grease. Seal and repair holes, potholes, and cracks. Be sure to prime the surface for adhesion and dust removal.
The next preparatory stage is the application of quartz sand. This is done with a brush or roller. After 3-4 hours, the layer dries and becomes suitable for applying plaster.
Application technology
The first main layer is applied smoothly, evenly, leaving no gaps.
Do not put the spatula in the bucket. You need to use an auxiliary tool to ensure that the work is accurate and of high quality.
Often the first drying time is 12 hours . Much depends on the ambient temperature and the wall itself. As soon as the layer has dried, proceed to the next stage.
The finished mixture is applied to a large trowel and transferred with light movements onto a flat metal spatula to create a relief decor (or a narrow trowel). It is applied to the wall, creating a uniform pattern across the entire wall. They move slowly, leaving as identical islands as possible with a slightly drawn solution.
20-30 minutes after application, smooth the drawn mixture with a large trowel soaked in water . If the mixture sticks to the surface of the tool, use a regular spatula. When the working area is smoothed, continue applying the material to the remaining walls.
After the relief layer has completely dried, a façade spatula is used. They go over all the walls, eliminating sharp protrusions. At the end of the work process, they begin painting with a long-nap roller.
Valera
The voice of the construction guru
Ask a Question
When applying Grotto from putty or other components, direct sunlight must be avoided. The temperature of the treated surface should not be lower than 10°C and higher than 30°C. Indoor air humidity should not exceed 80%. The finished coating layer must be protected from moisture for 2-3 days.
Finish coating
The mother-of-pearl coating
gives the interior a beautiful look . When the paint dries, mix the pearlescent pigment and primer at a ratio of 1:1. Apply the finished composition with a foam roller (preferably semi-dry). In this case, the pigment lies evenly on the protruding edges.
When the pigment layer has dried, begin applying varnish . To do this, use a roller equipped with long pile. It is necessary to apply varnish to the walls twice to form a moisture-resistant surface.
Necessary tools and materials for applying Grotto plaster
Decorative grotto plaster is produced by different manufacturers. The basis of the material is:
- natural lime;
- sand;
- small marble chips;
- linseed oil.
In addition to the plaster mixture, you may need:
- putty - for correcting small irregularities;
- cement-sand or gypsum mortar, depending on the original finishing material on the walls - for sealing larger defects;
- primer - for better adhesion of the plaster layer to the working surface;
- acrylic paint;
- decorative wax for finishing coating.
Set of tools required for work:
- Venetian trowel;
- stainless steel spatulas;
- fine-pile roller;
- sponge or foam roller;
- sandpaper;
- brushes
Required material
To complete the finishing, it is fashionable to prepare the mixture yourself or buy ready-made ones. For the classic “grotto”, lime mortars are used. They are suitable for both interior work and facades.
Expert opinion
Alexander Guryanov
Plasterer and decorator
You can create a “world map” texture using any gypsum plaster or putty. The main thing in the work will not be the material, but the technique of execution. But I note that it will be easier to work with professional decorative materials and the visual effect, of course, will surpass the appearance of ordinary putty.
What you can buy:
Elf Grotto. Lime based
V.G.T. White acrylic paste with marble filler
Optimist. Map of the islands.
Decorazza Travertino naturale. Limestone.
Current prices:
travertine plaster
Advice. You can look for decorative coverings like Travertine in stores; its structure is ideal for Grotto.
Preparing walls and other surfaces
It is highly recommended not to ignore the preparatory stage, which is a prerequisite when using any plaster. Venetian finishing has the highest requirements, since the layer thickness is no more than 2 mm:
- It is necessary to completely remove the old coating from the walls, leaving no residue. Fill cracks and potholes, as well as remove mold, grease stains, dust and other contaminants. That is, the surface should become as clean as possible.
- The walls are coated with a primer taking into account the base material.
- You also need a smoothing step using sandpaper, after which you need to remove the dust.
- At the end of the preparation, the walls are dried.
For pronounced relief such as bark beetle, the Versailles coating requirements are not strict. It is acceptable to leave minor defects that will be hidden under the thickness of the plaster.
The material of the walls, in turn, also imposes certain obligations. Gas silicate blocks have a high level of water absorption, so without preparation they are able to draw all the moisture out of the solution. As a result, the strength of the coating is lost, which can crumble. For this reason, such a surface must be covered with three layers of primer (no less), which will form a dense film.
Mixing putty
In this case, if a polymer composition of the required consistency is used, then the usual mixing of the components is carried out. In the case of using a dry mixture, you will need to use a bucket of the required volume, the appropriate amount of water, composition and auxiliary component. The mixture is first diluted and then thoroughly mixed using a construction mixer.
Subsequently, an auxiliary component is added to give a decorative effect. At the end of the process, the composition is thoroughly mixed, after which you can begin to work.
Options for structural putty mixtures
In such homemade products, the main role is given to filler particles. These are grains or fibers of mineral, organic or synthetic origin. Due to their inclusion, a coating with an original and unique structure is formed on surfaces.
Structural plaster is obtained by using other components:
- flocks;
- broken parts of shells;
- sand (river or quartz);
- balloons;
- any type of metal powder;
- mica, foil (crushed);
- granules (polymer, ceramic);
- sawdust.
Recipes for budget structural plasters:
1. With marble chips (for interior decoration). Ordinary dry putty (4 parts) is poured into the prepared container, then fine marble chips (1 part) are added. Add water until the desired consistency is formed. It is better not to add color to the solution, but to paint the finished coating.
Water
Marble chips
Ordinary putty
2. Travertino plaster and other textures. To create this material, a gypsum mixture containing mineral additives (Satengypsum) and gypsum putty containing polymer additives (Fugenfüller) are taken. Plus coarse sand (3 parts). First, the dry mixtures are mixed together, only then a gentle amount of water is added to form the desired consistency.
3. Bark beetle. In this case, granite or marble chips of a suitable fraction are added to the putty. The amount of additives is no more than 10-15% of the total volume.
Most of the components for preparing structural plaster can be found not only in various stores. Mother Nature herself provides a wide range of shells, pebbles, sand and other ingredients.
Important!
It is necessary to sort, wash and dry to get rid of dust, otherwise the strength of the future coating will decrease.
The clay, including lime, is pre-soaked and then passed through a sieve (you can use a nylon stocking) to remove unwanted inclusions.
Acrylic putty is most often used to imitate the structure of marble.
How to apply decorative grotto plaster
In principle, the process of applying grotto is not particularly different from applying other decorative plasters. Almost the same sequence of work. So, how to apply grotto decorative plaster with your own hands?
- The surface must be thoroughly cleaned of old wall coverings. If necessary, it needs to be leveled.
- The next mandatory step is priming. This is not only good adhesion of the material to the walls, but also dust removal from surfaces.
- First, quartz sand is applied. This can be done with a brush or roller.
- After drying (3-4 hours), you can begin directly applying the plaster. The first layer is applied completely, in an even, uniform layer. The drying time of the first layer reaches 12 hours.
- After the first layer has dried, you can apply the second layer. It is not applied all over, but in islands. In this case, the solution is also applied to the spatula not in a continuous layer, but in slides. To do this, it is better to put the mixture in small parts on some flat surface and scoop it up onto a spatula. At this stage, a spatula with a perfectly smooth metal surface made of stainless steel is used (popularly called a “trowel”).
- When the “islands” are dry, you can begin smoothing. They do this not in one or even two approaches, each time increasing the pressure on the spatula.
- At this point the application is considered complete. But if desired, you can apply varnish or wax to the top layer to give it the necessary decorative properties.
Applying decorative grotto plaster with your own hands
This is how, step by step, decorative grotto plaster is applied. If you do not have experience, then it is better to entrust this matter to professionals. Otherwise, you may be disappointed with the result. Although in fact this coating looks very impressive.
Interesting video
This master class shows how to make a Grotto from ordinary Rotband type plaster.
In the next video, the master uses professional decorative plaster. The “islands” are waxed and polished to a shine.
In this simple way you can perform Grotto yourself. Share your experience and ask your questions in the comments below, I will answer everyone.
Previous
Decorative plasterHow to make a stencil for plaster and apply a pattern to the wall
Next
Decorative plasterMarmorino plaster: all the subtleties of creating an Italian classic!
Technique for drawing the “World Map”
To work you will need:
- Applying the 1st layer of mortar: Venetian trowel (trowel), narrow spatula;
- Creating texture: sponge or swab made of polyethylene film;
- Painting: white acrylic paint + one or two colors, roller and sponge;
- Finishing coating (optional): decorative wax, felt or soft cloth for polishing.
Let me clarify that you can paint plaster in several ways:
- In bulk, when color is added to the material, it is plastered in the finished color. Suitable for polymer ready-made solutions.
- Painting after the mixture has dried. The tops and depressions of the relief are highlighted with different shades of paint or tinted wax.
So, let's move on to the technique of drawing a “world map”.
Step 1. Cover the entire finishing area with the prepared solution in one thin layer 1.5 - 2 mm thick. Apply the plaster from the container onto the trowel with a spatula and level it evenly. Leave until completely dry. The time depends on the material used.
Step 2. Apply the same plaster to a sponge or crumpled bag. Press it against the wall without pressing hard. The entire surface is covered with such a “fur coat”, the tops of which will then be smoothed.
Step 3. When the applied solution began to dry, take a trowel. Carefully smooth out the tops of the relief and form “islands”. Movements should be multidirectional. To completely smooth out the texture, you need to moisten the tool with water and walk over the plaster again, glossing it.
Step 4. After the walls have completely dried, prepare the paint. The colors are mixed with a white acrylic base to obtain the desired shade. Paint the entire wall evenly with a roller. Let the paint dry.
Step 5. To highlight the tops (islands) of our “world map”, you can use paint with the effect of silver, gold, azure, etc. There are many options here, whatever you like. Apply a little paint to a regular foam sponge and rub the tops with light movements; there is no need to paint the first layer of plaster.
Step 6. Coating with decorative wax will add gloss to the finish and protect it from moisture, which is important for kitchens and bathrooms. Wax can also be tinted. In this case, after application it will slightly change the color of the surface; after polishing, the new shade will remain in the depressions of the plaster.
Grotto, application technique
- 24 December 2022 16:17:12
- Reviews:
In this article we will show how to apply grotto from medium-grained and coarse-grained decorative plasters.
Show this article to your master or apply it yourself if you like to work with your hands.
Cover price:
- Quartz soil - from 60 rub. m2
- Decorative plaster - from 300 rubles per m2
- Glazing - from 100 rubles per m2
We provide consultations by phone (viber, whatsapp).
This technique is incredibly popular due to its simplicity! You will be able to apply a beautiful and predictable relief, even if you are working with decorative plaster for the first time. The main thing is to strictly follow the recommendations in the article and choose the right material.
There are many advisers on the Internet who recommend regular dry putty instead of specialized putty. Choose this option only when appearance is not important to you. It will look organic in a municipal building or during a budget renovation. In the interior of an apartment or country house, dry putty looks foreign and significantly reduces the cost of repairs. In addition, the finishing coating is not as strong as when choosing decorative plaster, even if it is inexpensive.
Choosing coverage
Which decorative plaster to choose? It all depends on the style of the interior and your budget. A good option is cellulose-free medium-grain
compositions that compact well, for example Modena from Dessa Decor.
Coarse-grained
plaster is more expensive, and I recommend it when creating antique interiors. A good option is Rustic from Decorazza. We always select coverage individually according to the customer’s wishes and budget. To understand your preferences, send a picture of the interior that you like, and we will select for you options for decorative coatings from different price categories.
Preparing the walls
Basic preparation is enough, as for most decorative plasters. The surface must be free of gross defects and not crumble. Anything that crumbles must be sanded and primed with a strengthening primer. Fill potholes and cracks with putty. The surface is ready, you can start applying the grotto. First you need to go over it with a specialized quartz primer. We highly recommend not skipping this point. The primer significantly improves the adhesion of the plaster to the wall, which simplifies the work and makes the coating stronger. We apply quartz with a short or medium pile roller, trying not to miss areas on the wall. We wait a day for it to dry.
Applying the first layer
The next day we begin working with decorative plaster. First you need to decide what recesses your future coating will have: smooth or shagreen.
If they are smooth, then skip this point. For rough ones, you need to stretch the decorative plaster in an even layer over the wall and, without waiting for it to dry, roll out the surface with a shaggy roller. The pile of the roller lifts the material, forming a smooth, rough surface. The more you press on the roller, the more you smooth the coating, reducing the texture. We roll and create the kind of fur coat that we want to see in the recesses in the future. Apply in small areas. It’s more convenient to work with two people: one applies it with a spatula, the other then rolls it out with a roller.
Photo of a grotto in the interior of a living space
With this plaster you can create a truly unique interior. The variety of colors and textures will allow surfaces with this finish to fit into almost any interior.
Grotto plaster in the interior photo
As you can see, grotto plaster in the interior of a house or apartment is suitable for any style. The main thing is to choose the right color, texture and type of finishing layer.
This is a safe coating, so it can be used to decorate living rooms, bedrooms, children’s rooms, and its moisture-resistant properties allow you to decorate hallways, bathrooms, toilets and kitchens with grotto.
Recipes for making decorative plaster
Now let's talk about how to prepare the mixture and what you need for it. When mixing decorative plaster at home, you can safely use a variety of materials and additives, which opens up a lot of opportunities for experimentation. All the necessary ingredients that will be required during the work are available at a hardware or hardware store.
With PVA glue
This is one of the most common recipes. To prepare you need:
- take a deep container with a volume of about 10 liters, rinse it thoroughly and dry it,
- pour 6 kg of putty into it,
- add 2 liters of water,
- knead the mass
- pour in 0.2 liters of ordinary PVA glue.
The resulting solution should be carefully mixed until a homogeneous mass is obtained. Alternatively, PVA glue can be replaced with a grout mixture intended for drywall in proportions of 1:1.
With primer
This cooking recipe is no less simple and in many ways resembles the scheme described above, but there is one important nuance that should be taken into account. The solution is also prepared from 6 kg of dry mixture, which is mixed with a primer. It must be added until the consistency of the solution resembles homogeneous sour cream.
To make the resulting mass better quality, it is recommended to add a small amount of grout mixture intended for seams. When preparing the solution, you should use a standard white primer.
Mixing dry putty mixture on a primer
Gypsum based
Gypsum powder compositions are also excellent for preparing decorative plaster at home. To do this you will need:
- mix 6 kg of gypsum mixture with 2 liters of water (the liquid must be strictly at room temperature),
- knead the solution until smooth,
- add 0.2 liters of PVA (in this case it acts as an additional adhesive that ensures good adhesion of the components).
The resulting solution has a pleasant consistency. It fits perfectly on walls and opens up great opportunities for layer-by-layer surface decoration. If desired, color can be added to obtain a mixture of a specific color.
With marble chips
This is a very interesting recipe that is popular in professional circles. This mixture is indispensable in cases where you need to make decorative plaster of the “bark beetle” type.
One part of the crumb is mixed with 4 parts of finishing putty. After this, water is added until the mass becomes homogeneous and sufficiently viscous, as in the cases above. After drying, you can add the desired dye.
Venetian
One of the favorite options, however, the preparation of this solution is associated with additional difficulties. You need to buy a mixture containing fine-grained crumbs:
- malachite,
- marble,
- quartz.
When preparing the mass, slaked lime and colors of the desired shade are added. The solution must be mixed until it becomes a thick paste (it should not be too liquid).
Secrets of budget renovation: do-it-yourself decorative plaster using ordinary putty
For those who are used to counting their expenses, repairs can be compared to a fire or moving. The cost of materials, rough and decorative, is affordable, and zealous owners use some tricks that allow them to save a lot and get a decent result. In today's HouseChief review, we will show you how to make decorative plaster using ordinary putty yourself, and we will share the secrets of working with it.
Decorative plastering is a classic interior design technique
Read in the article
Putties that can be used as a basis for creating textured mixtures
If you have set yourself the goal of making your own decorative putty, look for a gypsum base. The best, although not the cheapest, option is finishing putty mixtures from Knauf and Ceresit.
Knauf putty is good because it practically does not shrink, does not crack and adheres perfectly to the surface. It can be used in the bathroom and kitchen, and the consumption of the mixture will be relatively small
Ceresite lags somewhat behind in this regard, but with it you can count on good results in interior decoration on concrete and cement walls.
For comparison, we note that Knauf Rotband putty costs about 330 rubles for a 25-kilogram package, Ceresit - 430, and the cheapest decorative plaster will cost you from 560 rubles for the same package. Someone will probably say: “So the difference is not so great, where are the savings?” But remember that to make decorative putty you will add different fillers, and the resulting yield will be about 20% more. This is where the coveted savings lie.
knauf rotband ceresit plaster
Do-it-yourself decorative plaster from ordinary putty: options for preparing the mixture
It makes sense to bother with making decorative mixtures only when you are categorically not satisfied with ordinary finishing plaster. If you're just going to paint the walls and fill them with furniture, there's not much fun in the fuss of mixing and searching for textured ingredients.
It’s another matter if you intend to use putty to create an accent wall or you urgently need to hide some flaws in the surface
In this case, there are several simple technologies for making mixtures:
Example 1 – do-it-yourself textured plaster using fillers and regular putty
If you need to get a voluminous result with an interesting texture, you need to add fillers to the plaster. Their role can be stone chips, coarse sand, loose foam, small sawdust and synthetic fiber. The filler is added to the plaster in a ratio of 1:10, that is, for one part of filler you need 10 parts of putty. Violation of proportionality leads to poor adhesion of the composition.
Such textured mixtures are usually spread over the wall surface in a continuous layer or decorated with a notched trowel
The only difficulty in preparing such a solution is the mixing process. The filler must be evenly distributed throughout the entire composition, and then, during the application process, the plaster must be constantly stirred so that the heavy filler does not settle to the bottom, and the light filler does not float.
Advice! To mix textured plaster, use a construction mixer. With its help, you will not only achieve uniform mixing, but also get rid of color joints.
Example 2 - how to make decorative plaster from PVA glue and simple putty
For the mixture you will need 12 kg of gypsum plaster, 4 liters of water and a half-kilogram package of PVA glue.
The resulting composition is durable and has high adhesion to complex surfaces.
It can be applied with a roller, shaped spatulas, or even a simple brush, applying strokes in random directions. You can learn how to make decorative plasters using PVA with your own hands in numerous MK videos, but in practice the process is very simple and does not require specific skills.
PVA construction glue
Example 3 - Versailles and Venetian plaster from simple putty
The Venetian mixture has one distinctive feature: it forms a smooth surface, without the roughness that is usually present on simple plaster. To give the same properties to the homemade mixture, acrylic-based varnish is added to it.
This inexpensive polymer composition will make the putty not only smooth, but also resistant to water.
Comment Mikhail Starostin Head of the repair and construction team Ask a question “The putty and varnish will have to be applied in one day - the mixture cannot be stored for more than a day. In addition, during the work you need to constantly stir the composition so that a film does not form on it.
To give the mixture the desired shade, tinting paste is added to it. It is possible that you will have to mix the plaster several times. In order not to miss the chosen tone, the paste should be added not to the mixture, but to the acrylic varnish. To increase the hardening time of the Venetian, plasticizing additives are added to it. At home, regular dishwashing detergent can play this role.
Decorazza Stucco Veneziano classic Venetian plaster
Do-it-yourself application of textured putty on the wall
If you are planning to make an imitation of a stone cut in a room using decorative elements, you will find this short master class useful:
How to apply decorative plaster with your own hands using different tools
You can achieve an interesting textured structure using several methods, including using tools and devices from your home arsenal. We have selected for you video and photo examples of how to apply decorative plasters with your own hands.
Trowels and spatulas for applying decorative plasters
We showed you how to operate a simple spatula and trowel in the master class. Other methods are also possible. For example, a notched trowel can leave parallel grooves. In this way, it is easy to create an intricate chaotic pattern with deep relief. You can find master classes on applying decorative putty on the Internet.
In addition to spatulas and trowels, it is possible to use a trowel to create an unusual texture
spatulas and trowels
Secrets of applying decorative plaster using rollers with your own hands
The use of a roller is perhaps one of the most primitive methods of giving uncured plaster a relief appearance. The result directly depends on what is on the surface of the tool. Keep in mind: if you choose a roller with a fur or fleece cover, make sure that the fibers do not pull out during the process.
Otherwise, the pile will remain on the walls, and it will be very ugly
Rubber or wooden rollers can imprint a clear pattern and even ornamental stripes on the putty. To achieve a high-quality result, you need to regularly wash and wipe the roller.
Video on how to apply textured plaster for walls yourself using a roller:
Advice! Do not buy plastic rollers - they quickly fail, and this is reflected in the appearance of the surface.
Improvised devices for creating relief
You can make your own tool for creating a relief surface from scrap materials. Polyethylene, fabric, ropes or even newspapers will be used. If you crumple up fabric or paper, it will leave clear imprints on the uncured plaster. The main thing is not to overdo it with the pressure.
You can wrap a rope around a regular round roller and it will become embossed.
You can even apply patterns with a broom: thin branches of millet will leave shallow grooves on the surface, which will appear more clearly after painting
Do-it-yourself finishing painting and varnishing of decorative items
Textured putty can be repainted - in this regard it is very practical. If you want to paint, for example, in two tones, then first apply the first tone with a brush, and then, after the paint has dried, use the second paint and a hard roller. It will only paint over the protruding layer of putty.
For final gloss and safety, it is recommended to cover walls with a decorative coating with a varnish composition. The best choice for interior decoration is transparent acrylic.
You can add a little glitter to your varnish to liven up your interior.
acrylic varnish for walls
Popular methods of decorative plaster design
If you are not ready to experiment with your own relief, use one of the popular types of coatings. You can study catalogs and master classes on creating the surface you need.
Do-it-yourself stencils and prints on decorative plasters: photos of masterpieces
In finishing materials stores you can easily find silicone stamps or stencils for plaster. This tool is sprayed with a little water and then applied with slight pressure to the wall with uncured putty.
Thus, leaves with clear veins, flowers, bricks or leather texture appear on a flat surface.
Applying decorative plaster with a stamp yourself, in this video review:
