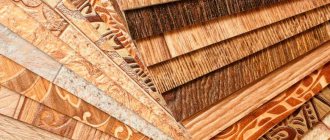
Linoleum is a popular floor covering, the use of which is quite wide. The material is used for laying on surfaces made of wood, concrete or other coverings. But it should be remembered that before installation, preparation of the floor for linoleum is required. The lifespan of linoleum depends on the quality of the base, so different surfaces should be prepared correctly. More details about preparing the floor for subsequent linoleum flooring will be discussed in this article.
How to prepare a floor for linoleum
Types of screeds
Leveling the floor under linoleum is a mandatory procedure. This coating does not tolerate irregularities, differences and protrusions, which can cause deformation and damage to the material.
A screed is the most suitable option for leveling the base under linoleum.
There are several types of ties, differing in device technology and material of manufacture:
- dry;
- semi-dry;
- wet cement-sand;
- self-leveling, self-leveling.
Old linoleum flooring
This becomes possible when the old material is firmly attached to the floor and has no unevenness, torn areas, or deformations. Then you can safely lay a new covering on it. Immediately before flooring, it is necessary to apply glue to the old surface and degrease it. If the expired coating does not meet the presented requirements, then it is unsuitable for the role of a substrate.
Preparing the base for the screed
The base for the screed must be perfectly clean, hard and durable.
We remove all unnecessary things from the room, remove old coverings and remove the old, destroyed screed.
We examine the slab for the presence of defects, delaminations, cracks.
Foundation repair
We repair cracks and seams between the slabs.
We remove dust using industrial vacuum cleaners with water filters that retain small particles.
We repair irregularities, damage and cracks with repair compounds or screed mortar.
It is better to seal the seams between the slabs with mortar using reinforcing mesh.
Important! I recommend treating the repaired and cleaned base with penetrating primers for better adhesion of the screed to the base.
Screed level marking
Using a laser or hydraulic level, mark a horizontal line at a level of 0.5-1 meters from the floor. This will be level zero.
From this line we take measurements to the floor and determine the highest point of the base.
Subtracting the thickness of the screed, about three centimeters, we mark the mark for the top of the screed. We transfer the top line of the screed to the wall, along the perimeter of the room, using a tapping cord.
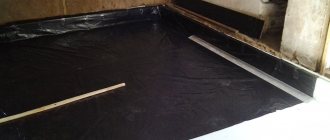
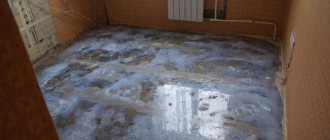
Figure 2. Waterproofing the base under a polyethylene screed.
Base waterproofing
To prevent moisture from entering the reinforced concrete floors and to prevent flooding of the underlying premises, we waterproof the base.
Usually used:
- plastic film with a thickness of at least 100 microns;
- roofing felt;
- roofing membrane.
It is better to seal the passages through the ceilings of pipes and risers with silicone sealants.
We carry out waterproofing by going onto the walls 5-10 centimeters above the level of the screed.
We lay the strips of roofing felt overlapping and fasten them with construction tape.
We lay the membrane or film in one piece.
Apply liquid bitumen mastic evenly to the surface of the slab and along the entire perimeter of the wall to a height of 10 - 15 centimeters
Important! Attach damper tape around the perimeter of the room. You can take a ready-made one or cut it out of foamed polyethylene. It should be three to five centimeters wider than the thickness of the screed.
Prices for linoleum restoration products
| Means | Description | Price for the smallest package (RUB) |
| Forbo Eurocol 893 | Cleaner for natural coatings. | 300-500 |
| FL Fourcover | Professional, used for washing linoleum. | 300 |
| DEC | For hand washing. | 300 |
| Glutoclean | Concentrated product. | 700 |
| HG | Concentrate for washing and polishing, does not require rinsing. | 600 |
| Citric | Restores the shine of artificial turf. | 700 |
| Mastic Eurokol | For rubbing coatings and giving them shine | 800 |
Dry screed
It is a covering made of sheets of gypsum plasterboard, gypsum fiber board, plywood or special double-layer panels for Knauf floors, over dry expanded clay, quartz sand or polystyrene.
First of all, we arrange beacons for uniform dry backfilling. Wooden blocks or metal U-shaped profiles are suitable for these purposes. The height of the profile should be equal to the thickness of the backfill.
The profiles are laid on the base with the sharp edges up.
Figure 3. Installation of beacons for dry screed.
We lay the first row of profiles along the long wall, at a distance of 10-15 centimeters from it. The next rows are laid in increments of approximately 100 centimeters.
Important! I recommend laying the mayaki in increments 15-20 centimeters shorter than the length of the rule that will be used to level the dry mixture.
For dry screed, it is better to use expanded clay of different fractions, which creates a more durable and dense layer.
We pour the expanded clay mixture evenly over the entire surface of the floor, tamp it and level it along the beacons.
A day later, we lay the sheets of drywall, carefully adjusting and coating the edges with construction adhesive. We lay the second layer of coating at intervals, fastening them together with self-tapping screws, in increments of no more than 50 centimeters, embedding them into the slab.
We seal the fastener caps, seams and joints between the sheets with putty. After drying, remove the remaining mixture and sand the surfaces with sandpaper, a special mesh or a grinder.
Figure 4. Dry screed device.
Advantages
- excellent noise and heat insulation;
- fast construction speed: no need to wait for the solution to dry.
The main disadvantage of dry screed is that in case of flooding it is impossible to remove moisture from it. The only way out is to dismantle the coating and remove the wet expanded clay.
I do not advise! Use dry screed in apartments with low ceilings and install it in bathrooms.
Dry screed is ideal for installing floors in a private house on the ground, or for covering cold basements and unheated rooms.
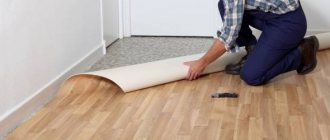
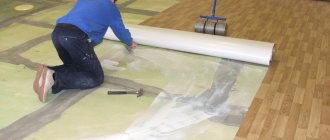
Laying
Before gluing linoleum to the floor, you need to know one very important rule: for rooms whose area does not exceed 25 m², do not use an adhesive composition. Of course, this only applies to those cases when one solid or, in extreme cases, two pieces of material are used. In this case, it will be quite enough to fix the material under the baseboards. You can use double-sided tape at the joint.
The process of fixing linoleum with skirting boards
So, let's look at each step of the work in detail:
- Having made sure that the roll of linoleum, which you previously unrolled, has rested for a sufficient amount of time and has leveled off, we place it in such a way that one of the sides is located almost flush against the wall, and the gap is only 3-5 mm. The material should overlap slightly with respect to the remaining three walls.
- If the area of the room is large enough and it is impossible to use one sheet, you will have to work with the joints. First of all, attention should be paid to adjusting the joints so that these places look aesthetically pleasing. Only after this can you proceed directly to laying the pieces, again, not forgetting about some overlap on the walls. Very often the surface of linoleum has some kind of design, ornament or pattern. In this case, there is an additional need to combine the pattern at the joints. The most important thing is to do it properly in the middle of the room. This is also important if the pattern is repeated in the next room, and you need to combine it in the doorway. To do this, one of the sheets of coating must be shifted until the pattern matches.
- This stage is relevant if you have to work with several pieces of linoleum that have a pattern. Most often, the pattern imitates parquet or tiled flooring, that is, it consists of the intersection of straight lines. In this case, in order for the coating to look as neat as possible, these lines should not be located at an angle relative to the walls. Such linoleum will look beautiful only if the lines are located strictly parallel.
- After this, you need to adjust the linoleum to the ledges and niches that are in the room. In fact, you almost always have to deal with this, since niches under the window sill and in the doorway are common. In this case, in order to avoid mistakes and not spoil the material, you need to first measure the depth of the niche.
How to cut linoleum in various cases: consideration of examples
As a first example, let's look at the features of working with a corridor. In this case, the first overlap, which should correspond in size to the depth of the niche, is made near the front door. To do this, you first need to simply measure the depth of the niche and wrap the corresponding section of the covering. Then all that remains is to carefully cut off the excess sections on the sides so that the remaining piece fits perfectly inside. In the same way, linoleum is adjusted to all other niches that exist.
Another case that is encountered much more often in the kitchen than in the hallway is the presence of a ledge. In this case, to carry out the most accurate measurements, it is necessary to lay the linoleum to the protrusion and tuck it in. The depth of the protrusion must be measured, and then the resulting value must be marked on the material. After this, all that remains is to carefully trim the coating.
Before you start cutting linoleum, you need to securely fix it
Except for these situations, there is nothing complicated in the process of adjusting linoleum. It is enough just to bend the linoleum slightly to the wall so that it fits as tightly as possible to it, and then, using a knife and a ruler, carefully trim the material. This method is suitable if the renovation is carried out in an apartment of an old house, the walls of which may not be perfectly even. The main thing is not to rush, so as not to accidentally cut off too much.
Sequence of semi-dry screed installation
A distinctive feature of semi-dry screed is that for its production a minimum amount of water is used, which is necessary only for hydration of the cement, as well as reinforcing fiber, which significantly increases the technical properties of the solution.
Beacon device
Beacons for installing such a screed can be made from any metal profile.
The profiles can be fastened with self-tapping screws, cement or gypsum mortar.
It is possible to construct beacons from screed mortar, laid in the form of a continuous strip and leveled.
Leave the beacons from the solution to dry for one or two days, then you can pour the screed.
Preparation of the solution
The mixture for installing a semi-dry screed is prepared in a special device
— a pneumatic supercharger installed at the construction site.
The components of the solution are loaded into the hopper of the device, where they are mixed until homogeneous and the finished solution is supplied under compressed air pressure through a hose to the installation site.
When leveling a small area, the mortar mixture can be prepared on site.
For this purpose, it is better to take ready-made dry construction mixtures, in which all proportions are precisely met. The solution must be prepared in accordance with the instructions on the package.
Important! You can check the correct consistency of the solution by squeezing a small amount of the semi-dry mixture in your fist. A dense lump that does not crumble should form, without releasing moisture.
Laying the mortar
We distribute the solution, supplied through a hose or prepared at the installation site, between the beacons, starting from the far corner of the room, using the rule.
After two hours, the laid screed must be sanded with a disc grinder. To prevent pushing when moving on a freshly laid base, you need to wear special concrete shoes on your feet.
If necessary, remove the beacons and seal the resulting seams with a semi-dry solution.
Cover the surface of the screed with plastic film to protect it from drafts and ensure uniform drying.
After a day you can move on the floor, after 3-4 days you can lay tiles, and after three weeks you can lay linoleum.
Advantages of semi-dry screed
- a perfectly flat base, does not shrink and does not form cracks;
- the possibility of the solution getting onto the underlying floors is excluded due to the minimal amount of moisture in the solution;
- performing any slope;
- possibility of mechanization of work;
- short drying time.
Semi-dry screed is ideal for underfloor heating systems.
Figure 6. Semi-dry screed using a heated floor system.
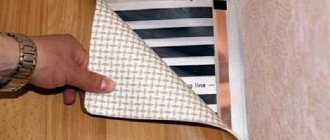
Preparation of material and selection of tools for laying linoleum
Preparing the material involves not only cutting it, but also storage conditions. The ideal temperature regime in which linoleum should be before installation is considered to be from 15 to 25 ° C. This is due to the increased fragility of the coating when exposed to low temperatures. Therefore, if you have to lay linoleum with your own hands in the winter, then you definitely need to bring it into the room in advance and, without unrolling it, let it lie for at least 12 hours.
Helpful advice! In order to further avoid waviness of the coating, after the linoleum is unrolled on the surface, you need to leave it for a while before proceeding with cutting and laying.
While the linoleum rolled out on the floor is being leveled, it is worth thinking about having all the tools necessary for self-installation:
- a sharp knife with a short blade (a shoe knife is best);
- scissors;
- roulette;
A construction knife is great for cutting linoleum
- a simple pencil;
- a long ruler, a building level or just a straight line.
All of the above will probably be found in any home craftsman's pantry. So for installation there is no need to purchase any expensive tools, which is another indisputable advantage in this case.
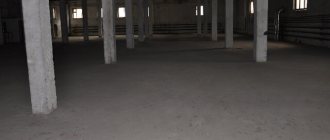
Wet screed device
The cheapest traditional type of screed, made from sand and cement.
A wet screed is susceptible to cracking and shrinkage, so it is recommended to reinforce it with metal or plastic mesh.
For such a screed, beacons arranged for semi-dry screed are suitable.
The main thing is to check the evenness and horizontality of their installation along and across, according to the level.
It is better to prepare the solution for wet screed in a concrete mixer or using a construction mixer. A small amount of the mixture can be kneaded by hand, in a large container or bath.
Pour sand and cement into a container with water in a ratio of 3:1 and mix until uniform.
We lay the cement-sand mixture along the installed beacons and level it. After a day, the beacons can be removed, and the remaining cavities can be sealed with the same solution and rubbed.
Figure 7. Wet screed device.
We cover the finished screed with polyethylene or regularly moisten it to prevent the formation of cracks.
A wet screed gains strength and dries for at least a month.
Before laying linoleum, such a screed must be primed with penetrating primers and then dried thoroughly.
The advantage of wet screed is its low cost.
In other respects, it is noticeably inferior to other types of alignment.
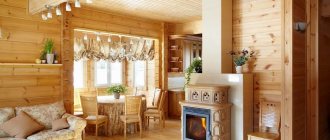
How to properly care for linoleum to extend its service life
As already mentioned, the quality and technology of laying linoleum largely determines its service life. Therefore, having figured out how to glue linoleum, you should also take an interest in how to care for it. Here are some recommendations from experts that will help maintain the aesthetic appearance of the coating for a long time:
- Detergents containing solvent or acetone are strictly prohibited when caring for linoleum;
To care for linoleum, you should choose non-aggressive detergents.
- if for any reason the integrity of the coating was damaged and a hole appeared on the linoleum, you can make a patch in this place. But in this case, you should make sure that the pattern on the coating matches perfectly, and the seams are even and minimally noticeable;
- It is worth taking care of the presence of a protective layer, which can be made using a special composition. It is applied to the surface and then thoroughly polished. This coating becomes thinner over time, so it needs to be renewed periodically (about 2-3 times a year).
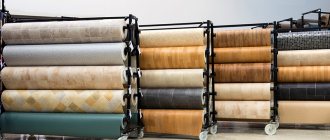
How much does it cost to lay linoleum: prices for materials and labor
The question of the cost of certain repair work always remains relevant. Of course, this is what determines the costs and largely decides which option you choose. But it is difficult to unequivocally answer the question about the cost of such work, since much depends on what the linoleum is glued to and what kind of material we are talking about.
The top layer of good quality linoleum is always abrasion resistant
The cheapest household linoleum will cost about 200 rubles per meter, but most likely such material will be quite thin and will not last too long. A more or less high-quality coating will cost about 400-500 rubles/m. It is important to understand that if you lay linoleum, the price of which is too low, then at the first load it will most likely be damaged, so you should not save too much.
Anyone can figure out how to glue linoleum without any problems. This does not require any special skills or abilities. You just need to take into account all the recommendations for choosing and laying the covering, and then the new floor will delight you with its appearance for many years. Of course, especially durable and reliable material will cost much more, but everyone must decide on the advisability of such an investment independently.
Self-leveling self-leveling floor
Self-leveling flooring is much more expensive than traditional screeds, but this is compensated by the speed and ease of manufacture.
For self-leveling floors, special polymer compounds are used, which are diluted in strict accordance with the recommendations.
When making a solution, it is better to use a construction mixer designed for heavy loads, and pour the dry mixture into water, and not vice versa.
The thickness of the solution may depend on the required thickness of the screed. When installing a leveling layer 2-3 millimeters thick, we make a liquid solution; if it is necessary to install a thick layer, we make a thicker leveling mixture.
Important! It is imperative to attach a damper tape around the perimeter of the room, which will serve as a shock absorber during shrinkage of the polymer compositions.
When pouring a self-leveling floor, it is recommended to use special landmarks made in the form of a metal tripod with a moving central element, which sets the required level, as beacons.
Pour the prepared mixture onto the floor surface and level it using a wide metal spatula. To prevent the formation of bubbles in the screed mass, we roll the floor surface with a special spiked roller.
Figure 8. Self-leveling screed device.
After installing the floor, we dismantle the beacons.
You can move on this floor already on the second day.
Lay linoleum after the self-leveling floor has completely dried.
Drying time directly depends on the thickness of the layer.
Self-leveling floors are installed in a thin layer, up to two centimeters, and serve as a finishing leveling layer.
Commercial linoleum care
This type of flooring has a thick protective layer. Thanks to this structure, the material is well resistant to various mechanical influences, ultraviolet radiation and abrasive forces.
Commercial linoleum cleaning is carried out in the following ways:
- cleaning the surface dry using a vacuum cleaner and broom;
- wet cleaning;
- cleaning floor coverings using mechanical means.
When choosing a specific method, you need to focus on the condition of the coating. To make heavily soiled linoleum shine, it must be treated by mechanical means. It is better not to bring the floor covering to this point by carrying out dry and wet cleaning.
To create additional protection, special products are used that cover the material with a wax or polymer film. Such compositions are applied to a previously prepared dry base. After treatment, the coating is left for 10 hours. Cleaning the floor with abrasive substances promotes maximum wear and tear.
To minimize this impact, special mats are placed near the front door to remove sand and other abrasive particles from shoes. In addition, it is necessary to prevent contact of the floor covering with shoe polish. This substance causes yellow spots to appear on the coating.
During dry cleaning, it is prohibited to use aggressive cleaning agents and solvents. Single-layer commercial linoleum is rubbed with a special mastic to create a protective layer. For daily cleaning, special products for linoleum are used; stubborn stains are removed from the surface with solutions made from improvised substances at home. After this, the area is washed with warm water and wiped with a dry soft cloth.
Installation of a base for linoleum on wooden floors
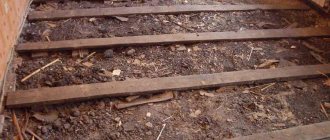
The best option for leveling the base of a wooden floor is to lay plywood.
First, we arrange logs from wooden blocks or strips of plywood, three to four centimeters wide. We fasten them to the wooden floor with nails or self-tapping screws.
We lay the plywood sheets offset so that the joints of the sheets are on the joists. We secure the laid squares with countersunk self-tapping screws.
I recommend!
Leave gaps of 1-2 millimeters between the sheets of plywood to prevent deformation.
On top of the plywood, you can lay a second layer of wood fiber sheets or hardboard.
Figure 9. Laying plywood on a wooden floor.
The seams between the sheets, as well as the holes in the screws, are sealed with putty and sanded.
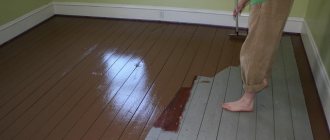
We apply an adhesive solution to sheets of plywood or fiberboard or hardboard and glue the linoleum.
The advantage of this method is that immediately after installation the base is ready for laying linoleum.
Completion of work: advantages and disadvantages of hardboard
One of the last types of work includes finishing. You need to take a serious approach to the selection of materials for this, namely the choice of flooring. When you choose hardboard, careful preparation of the base is necessary. It is the most practical solution: it will help hide unevenness of the entire floor, while the outer side of the linoleum will be as smooth and even as it was originally. Another advantage is the low price of fiberboard boards, compatible with decent quality, which is similar to expensive analogues.
Be sure to pay attention to its characteristics, namely: the strength of the material, its wear resistance, abrasion resistance, moisture resistance, and high insulating characteristics. This material will serve you for a long time.
Leveling with plywood
If you need to level quickly, then this is just the case. You won't find a faster way. In a room with a small area, this operation can be completed in 3-4 hours and immediately after that you can begin laying linoleum.
If the floor is wooden and relatively smooth, with only minor flaws - for example, where the boards meet (chips of a thick layer of old paint, small potholes), then leveling with plywood will be the best of all methods.
A sheet of plywood is simply laid on a wooden floor and screwed with self-tapping screws. The method is also suitable for cement floors with minor damage and no obvious bumps. In order to achieve an even more impressive result - a high-quality, flat surface, the plywood is covered with fiberboard sheets on top - it costs very little, but will make your floor perfect.
Plywood or chipboard is essentially a universal material for leveling with your own hands; it can hide both small differences and large flaws. If, after checking the floor level, you find a large difference, you will need a method of fastening to joists.
The logs are laid as follows. Boards 30–40 mm wide are cut to the desired length of the room. Then, along the line of the future placement of the board, special PVA-based wood glue is laid out. It is not recommended to use cement, as it is too brittle and will quickly collapse.
Logs are set according to levels in the same way as beacons. The voids between the glue bridges are filled with wedges from boards or strips of wood with glue. The logs are laid out at a distance of 50 cm from each other. If a large load will be concentrated on the floor, this distance should be reduced.
To save material, simplify installation and prevent incorrect sawing, solid sheets of plywood are laid overlapping on the floor, marked at intersections and cut according to marks.
Remember two important points. First, do not allow the cut lines of four sheets to converge at one point, lay them so that only two points converge. And second, leave allowances of about 7 mm between the wall and the chipboard sheets - the gap will compensate for thermal expansion and eliminate unnecessary noise from friction during deflection.
After the glue has dried, screw on the plywood sheets, pre-treating the edges with sandpaper or a rasp. They are screwed on with the same wood screws. Not to be confused with metal screws! For those made on wood, the thread pitch is twice as large as those made on metal.
Leveling mixtures used
Before purchasing a leveling mixture, you need to understand their varieties. There are several self-leveling mixtures, differing in type. They are intended for:
- Rough alignment.
- Finish coating.
- Local elimination of defects.
Coarse leveling mixtures provide for the correction of serious unevenness. Such solutions can be applied in a layer of up to 5 cm, so they are suitable for medium differences in floor unevenness.
For final leveling, more liquid mixtures are used, which smoothly spread over the entire surface. Used to correct minor differences. The maximum layer thickness is 10 mm.
For local elimination of defects, the third type of mixture is used. They involve eliminating cracks and holes in a certain area of the floor.
Also, mixtures differ in composition, in which the main substance can be:
- Gypsum.
- Cement (Information about the composition of cement, its properties and brands can be found here)
- Epoxy resins.
- Polymers.
Cement ones can be applied in a layer of no more than 5 cm. Such mixtures also serve as a primer. But this alignment option is short-lived.
Gypsum can eliminate unevenness up to 10 cm. This mixture dries quickly, has good thermal conductivity, strength and minimal shrinkage.
Solutions with epoxy resins wear off very quickly and have low strength. The surface slips from spilled liquid, so such options are rarely chosen for the home, more often for laboratories.
Compositions that contain polymers are characterized by good strength, resistance to temperature changes, water resistance, and durability. But this type is quite expensive.