Tile covering is one of the most reliable options for decorating floors in the bathroom or kitchen. It is not afraid of moisture, is quite durable and will serve for decades without complaints if everything is done correctly. When laying tiles, it is important to follow certain rules, then the base will be reliable and durable. When installing this material, you should use a composition such as a tile floor primer. It will ensure a reliable connection of the finishing coating to the subfloor.
Floor primer for tiles
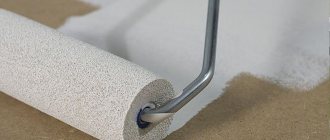
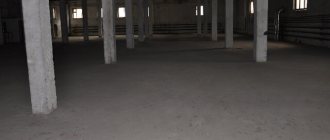
Laying ceramic tiles on the floor
Why do you need a primer?
The stage of preparing the surface for laying tiles has several main points that must be completed so that the finishing material holds firmly. And priming the surface is one of them, and a mandatory one at that.
For this work, a composition such as a primer or primer mixture is used. It is a mixture of special components, which, when dry, create a kind of film on the rough base. The composition of the primer mixture includes drying oil, various polymers, organic compounds, as well as synthetic resins. It looks like a cloudy white liquid or is available in powder form, which must be mixed correctly to obtain the desired consistency.
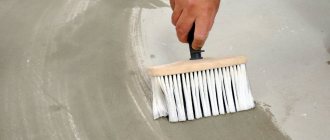
Applying primer to the base
The primer is applied to the floor prepared for work immediately before laying the tiles and is necessary to improve the adhesion between the subfloor and the finishing material.
On a note! A primer is not only a composition that improves adhesion, but also a material that increases the water-repellent properties of the base and has an antiseptic effect.
In the photo, a roller is the main working tool when applying primer
Previously, priming surfaces under tiles was done with ordinary PVA glue. Now a lot of professional compounds from various manufacturers have appeared on the market, which have much better abilities than glue.
Beneficial features
Loose surfaces that absorb moisture well should be treated several times
Should I prime the floor before laying tiles or not? This is a question asked by many people who encounter this for the first time.
If you ask advice from specialists, you can get the answer that the action is considered mandatory when performing almost any repair or finishing work.
On loose or porous surfaces, several coats can be applied. Using a primer on a concrete base followed by laying tiles leads to the following results:
- Strengthens the surface and binds it. The liquid penetrates deep into the pores, strengthens the structure, thereby making it more resistant to dynamic and static loads.
The primer will protect the adhesive layer from delamination
- After the base is treated with a primer, the tile adhesive adheres better to the surface.
- With its help, you can ideally prepare the surface for laying tiles. The primer coating effectively covers all remaining dust particles.
- If you do not pre-treat the surface, the tile adhesive will dry out too quickly, as moisture from the bottom layer will be absorbed into the surface. The result will be delamination of the layer and gradual peeling of the tile.
You can evaluate the impregnation almost immediately after laying the tiles. The floor will not leak and have unpleasant odors typical of mold.
Pros and cons of primer
The primer is undoubtedly a necessary material; it has a lot of advantages and only one drawback. Thanks to the composition, it is possible to significantly increase the adhesive properties of the treated surfaces, remove dust from the base, reduce the consumption of adhesive components, and therefore reduce work time and labor costs. And the only disadvantage of using soil is that you have to spend money on it. However, in light of the advantages the mixture has, we can safely say that buying a primer is a worthwhile investment.
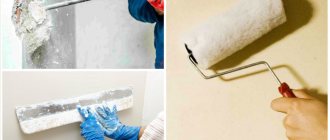
Primer application process
Attention! There is no point in sparing the primer during application, but a layer that is too thick (especially deep penetration primers) entails the risk of the applied layer peeling off.
Drying time when tiles can be laid
The drying of the primer composition is affected by environmental conditions: temperature, humidity, drafts, etc. But each variety has its own lifespan under favorable conditions:
- acrylic dries in 2-4 hours;
- epoxy – 2 hours;
- polyurethane – 8-24.
Drying conditions can change in different ways. If there is high humidity and average temperature, the process can last several hours (8-10). If the humidity is low and the temperature is high, the primer for tile adhesive will dry within 2-3 hours.
Do I need to prime the subfloor before laying tiles?
If you ask this question to a professional tile layer, he will most likely be very surprised. And his answer will always be the same - yes. It is quite simple to understand why a primer is needed before laying tiles - just analyze its properties.
Applying acrylic primer before laying tiles
For example, the floor will receive additional protection from moisture and the development of microorganisms, since a protective film will appear on it due to the soil. The adhesive solution will adhere much stronger to the treated base. Also, the soil will reduce the amount of dust on the surface of the subfloor, which means it will be more comfortable to work, and the quality of work itself will increase significantly.
If you refuse to use a primer, the rough surface will quickly dry out the adhesive composition - it will draw out all the moisture from it. Accordingly, the glue applied in this way will simply begin to peel off over time. And also without primer, the consumption of the adhesive composition increases significantly.
Primer of joints between tiles
On a note! On a subfloor treated with soil, the risk of mold growth is minimal.
Types of soil
Now a huge number of different types of primers have appeared on sale, differing in price and quality. However, they can all be divided into certain categories depending on the properties they possess.
Various types and types of primers
First of all, all compositions can be divided into those that are suitable for absorbent surfaces (brick, concrete, plaster, etc.), and those that are used for treating non-absorbent substrates (plastic, metal, paint). Primers intended for use on absorbent surfaces also include deep penetration primers.
Deep penetration acrylic primer
The primer is also divided into special and universal . The latter can be used to treat surfaces both inside and outside buildings, and the former are used to impart certain properties to the surface. Such compositions are not recommended for purchase and use by beginners in the world of construction and finishing works. The main difference between the two types is that they have different degrees of stability and ability to protect the surface of the rough foundation from external factors.
Attention! Each primer can only be used directly for its intended purpose. It is important to follow the instructions on the packaging. Otherwise, the coating will not have the declared properties.
Applying primer to the floor
Also, all soils can be divided into certain categories depending on their composition.
Table. Types of soils.
| View | brief information |
| Alkyd | Allows you to create a reliable and durable layer, penetrating deep into the structure of the rough base. Ideal for applying to the floor before laying tiles. But you shouldn’t apply an alkyd primer to drywall or plaster. |
| Acrylic | The most common type because it is a universal composition. Can be used to treat any surface. |
| Based on gypsum, cement and lime | Suitable for porous plastered surfaces, brick or concrete. Suitable for drywall too. |
Advice! When choosing soil, you should not settle for the cheapest option. It is also not recommended to buy formulations whose instructions for use state that re-application of the product is necessary. It is also not recommended to apply such primer under the tiles.
For porous and loose materials, it is recommended to purchase strengthening types of primers. They can reduce the absorbency of the floor. Adhesive compounds based on acrylic and latex are suitable for tiles.
Deep penetration strengthening primer
How to remove unnecessary things
If the primer accidentally gets on the front surface of the tile, there are several ways to correct the situation.
- First of all, you need to try regular warm water with soap and a sponge or rag.
- This method is only suitable if the primer has just been applied to the surface and has not yet had time to harden.
- It is worth considering that the composition hardens quite quickly, so you cannot hesitate.
If the composition has already dried, you can try to cover the stain with damp rags, this will soften the primer on the front side of the tile, and then carefully remove it with a rag and soapy warm water.
If the primer stain is already old, you cannot do without using special cleaning products for plumbing fixtures. Preference should be given to potent compounds, but without abrasive additives, because they can scratch the tiles. It is also recommended to try glass cleaners in the fight against stains of dried primer, they help a lot.
Composition from folk craftsmen
Many novice craftsmen do not want to spend money on a professional primer and decide to experiment with improvised means. Or rather, with some of the materials intended for laying tiles. There is a recipe for “folk” soil, which was previously successfully used by experienced builders, who have now switched to professional-grade compounds.
So, to create a primer with your own hands, a little cement is mixed with water and PVA glue. First, it is recommended to mix glue and water in a ratio of 1:8, then add cement to the composition. After mixing, the mixture is filtered through cheesecloth and it is ready for use. The shelf life of this composition is 24 hours, so you shouldn’t make a lot of it.
DIY primer
The process of preparing the mixture
For processing, you can use a purchased primer or one you make yourself. To make it yourself you will need:
- one hundred grams of drying oil;
- two kilograms of slaked lime;
- ten liters of water;
- two hundred grams of laundry soap.
To prepare the mixture, three liters of hot water is poured into an empty container, to which drying oil and grated laundry soap should be added. Five liters of boiling water with lime are poured into a separate container, after which both solutions are combined together and mixed. The primer must be strained before use.
It is much easier to dilute the purchased mixture. To do this, you need to open the jar with the composition and mix it thoroughly to evenly distribute the settled components. After this, the required amount of primer is poured into a separate container. To properly dilute the composition, you need to adhere to the following recommendations:
- The alkyd primer is diluted with solvent grade 650 or 649. Instead, you can use a solvent.
- The water-dispersion composition should be poured into a separate jar and diluted with a liter of water.
- The two-component mixture is diluted with a hardener.
- A one-component primer can be diluted with drying oil, water or solvent.
Priming procedure: features
Despite the fact that priming from the outside looks like a completely simple and quick process, it has its own characteristics. So, for example, for highly porous surfaces, it is necessary to purchase a strengthening primer, which contains more adhesives than usual. For concrete slabs or drywall, the popular “Betonokontakt” mixture can be used, which can make the surface somewhat rough due to the sand and various additives it contains.
"Betonokontakt"
Before starting the priming procedure, it is recommended to make small notches on the concrete floor at a distance of about 3 cm from each other, which will allow the tile to better adhere to the base. The easiest way to make notches is with an ax or chisel and hammer.
Advice! Dust from the notch cavity can be easily removed using a brush dipped in water.
In rooms where air humidity is high, it is recommended to use soil that has water-repellent properties. This is especially true if the surface being treated is made of brick. Also, such a base must be treated with a mixture of at least two layers. And the second layer is applied after the first has dried (this information is also relevant for other surfaces, not just brick).
Preparing the base for tiles
All holes, cracks, and chips on the floor larger than 10 mm must be sealed with mortar before priming. Otherwise, the primer consumption will be increased, as the mixture will begin to flow into the gaps.
It is very important and correct to prepare the priming mixture if it is available in powdered or concentrated form rather than ready-made. If the mixing technology is violated, then the composition will be of poor quality, which means that the expected result will not be achieved.
It is convenient to use such a tray for work
Purpose
To prime gypsum fiber board, concrete floors, and plaster on walls, you may need different compositions. In each individual case it is determined whether it can be placed on it or not.
Let's consider the main groups of surfaces that have to be covered:
| Surface type | Description |
| Loose | These are walls that have an unstable foundation and require additional reinforcement. In this case, the soil must contain adhesives, creating good protection for the top layer of the surface. |
| Between layers of coatings | This means applying the composition to the surface before waterproofing, and the second on top of it. This will prevent flooding. |
| Alkali-containing | These are surfaces made of cement screed, new concrete containing alkali. For this purpose, a special composition is used that neutralizes the negative effects of alkali on tiles. |
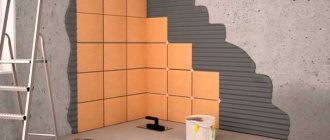
| Smooth, hard and dense | These are fiberboard surfaces, gypsum boards, chipboards, concrete slabs, paint, etc. In all these cases, concrete contact is recommended. |
| Mineral | This category includes plaster, aerated concrete, concrete, cinder block, and brick. Typically, deep penetration formulations are used that close the pores. The presence of polymers in the composition ensures high-quality adhesion. Here you can add a primer for gypsum plaster. |
Preparing the surface for tiles
Before starting work, it is recommended to thoroughly prepare the surface of the subfloor. If it was previously painted, then it is important to remove all the paint. To do this, you can use washes or traditional methods using a hair dryer and a spatula. There should be nothing unnecessary in the room where work is being carried out. It is recommended to remove all furniture and other interior items from there. Otherwise, they may be injured during floor finishing work.
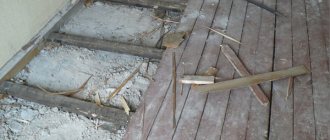
Removing Old Paint from Wood Floors
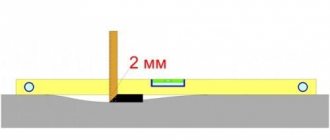
Tiles are a material that requires a level base, and this aspect should not be neglected. Otherwise, the coating will simply break or even come off over time. Therefore, before priming, the floors should be leveled - all protrusions should be removed. You can check the evenness of the base using a long rule - it is laid on the floor, and there should be no gaps of more than 2 mm between it and the floor level. If there are any, the base needs to lay an additional leveling layer - for example, pouring a self-leveling mixture in the case of a concrete base or laying sheets of plywood, chipboard, gypsum fiber - for wooden surfaces.
Stages of using self-leveling mixtures
The bathroom floor is filled with self-leveling mixture
Also, the base should be well cleaned of debris and dust. It is recommended to collect large debris with a brush and broom, and remove dust with a vacuum cleaner. Only a damp cloth can remove the smallest dust particles, after which the base must be dried.
Before you start priming, you should tape the baseboards, jambs and sections of the walls with masking tape or pieces of plastic film. This measure will protect surfaces that do not need priming from getting the composition on them.
Immediately before starting work, it is important to ensure that you have the necessary tools. It can be:
- wide roller - for applying primer to the floor;
- brush – for treating hard-to-reach places and areas along walls;
- tray - the primer mixture will be poured into it for convenient wetting of the roller.
On a note! A plastic bottle with the side cut off can replace the primer tray.
Instead of a tray, you can take a plastic bottle with the side cut off
Work specifics
Conditions in which the priming step is skipped are extremely rare, and the surface must:
- be durable, strong and smooth - without dust and residues of any coatings;
- provide excellent grip;
- have reduced hygroscopicity.
In the vast majority of cases, base materials do not have such characteristics and require special finishing.
When applied, the primer coat is absorbed into the material and forms a thin, smooth layer on its surface with high adhesion ability. It also reduces the ability of the material to absorb moisture from the adhesive mixture, accordingly, reducing consumption and increasing the period for adjusting the masonry. In addition, there are special mixtures with antiseptics that prevent the formation of mold and fungi (especially important for rooms with high humidity).
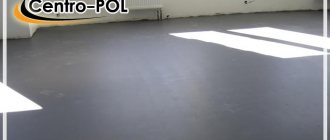
Priming the floor before laying tiles
Step 1. Work begins with cleaning the floor surface and clearing the room where the repairs will be carried out. Everything that can be taken out is removed to another room. The floor should be as empty as possible so that nothing interferes with work. Next, large construction debris is removed using a dustpan and broom, then dust is removed using a vacuum cleaner. It is especially recommended to clean hard-to-reach places, corners, and joints between the wall and the floor.
Preparing the floor surface
Step 2. The surface is inspected for damage and cracks - all of them must be repaired before priming work begins. It is recommended to grind off large protrusions, since the floors should be as smooth as possible.
The base should be as level as possible
Step 3. The primer mixture is used according to the instructions given on the package. It is poured into a tray or other container for greater ease of use. The first layer of primer is applied, and although the layer should be quite thin, there is no need to skimp on the primer. Processing begins from the corner farthest from the exit from the room. It is not recommended to go back and re-coat something.
Applying primer mixture
Advice! Do not stir (dilute) the entire primer mixture at once if it is released in concentrated or powder form. It is better to prepare a small volume and then make a new dose, rather than simply throwing away the spoiled material. Not all soils are stored for a long time.
Step 4. Use a brush to coat hard-to-reach areas well. It is important not to leave empty uncoated areas.
Priming hard-to-reach places
Step 5. Dry the first coat of primer well before applying the second coat.
The first coat of primer should dry well
Step 6. Exactly the same as the first, apply a second layer of primer and leave until completely dry.
The second layer must also dry completely.
Advice! Excessively loose surfaces require a third layer of primer.
After the mixture has dried, you need to make sure the quality of the work. To do this, run your hand over the treated surface. If the palm remains clean, then the primer does not need to be reapplied, but if it smears, then another layer of the composition is needed.
Video - How to prime floors
Prices for primer for concrete surfaces
primer for concrete
Selection of primer materials based on compatibility with base materials
When working with multiple materials, soil requirements must be taken into account. The technology for working with the product will be different in each case.
- For gypsum plasterboard sheathing, the choice of primer is carefully considered. Drywall must be primed, but not always. To avoid damage to the material, all seams and joints are puttied before applying the primer. This way you don’t have to worry about the integrity of the base. In addition, only a moisture-resistant type of specialized drywall is chosen for the tiles;
- For plywood with a porous surface, the primer is selected with some reservations. It is not considered advisable to lay tiles on plywood. However, plywood is often sheathed with some other material (for example, DSP). But with any approach, plywood must initially be strengthened using a primer composition produced like a liquid concentrate for porous structures;
- For porcelain stoneware, marble, etc. For these groups of materials, the optimal soil composition will be one in which various additives predominate (including sand), which significantly facilitate adhesion. This will make it possible to carry out higher-quality masonry and preserve the result for a long time. In the situation with porcelain stoneware, these recommendations can also be used.
You don't need to be a specialist to apply the mixture to the surface. Everything is quite simple. In addition, you won’t have to wait long for the applied solution to dry. A few hours will be enough for this (from 6 to 12 in different cases).