Before starting surface covering, every person is interested in the question of the further service life of the surface. Of course, everyone wants the coating to be as smooth and beautiful as possible, but at the same time durable. A primer can help with this issue to some extent, as it ensures a high level of adhesion between the material and the base. This is why the question often arises: is it worth priming before laying tiles, or perhaps this process can be skipped? In order to understand this issue, it is necessary to carefully study all the features of the primer, its properties and role in repairs.
What is a primer and why is it needed?
If all the required conditions are met and the surfaces are properly prepared for laying tiles, then the coating will be able to last a much longer period, without changing its operational and consumer properties. The qualitative characteristics of the subfloor determine whether such a strengthening procedure is needed. But experts recommend doing it anyway.
When carrying out priming work, various liquid compositions made on the basis of organic or synthetic resins, natural drying oil and binding polymer compounds are applied to the surface being treated. When dry, such mixtures form a fairly durable film layer on the floor or walls. Primer is considered a mandatory finishing and final stage in preparing the surface for tiles.
Advantages and disadvantages of using under tiles
As a result of applying the primer coating, the following positive aspects are revealed:
- The composition has the property of penetrating deeply into microcracks and pores, binding and fixing the surface well. The base is made less susceptible to static and dynamic influences.
- An important factor is reducing the consumption of tile adhesive, which leads to saving money.
- The likelihood of fungal colonies and mold appearing is reduced, since a good primer contains antifungal and antibacterial components.
- Primer before laying tiles increases the adhesion of the tile adhesive to the base.
- Treatment with primers allows you to cover up dust particles, which ensures good adhesion of the tile cladding to the surface of the walls and floor.
The only disadvantages noted are the need for additional work and the financial costs of purchasing materials.
Carrying out a cement screed
Cement screed technology.
Many types of ready-made self-leveling mixtures have appeared on sale, but their prices are not affordable. The not-so-complicated procedure of mixing cement, sand and water yourself can save a significant amount of money. The best proportion for this connection is obtained at the rate of 1 part cement to 3 parts sand. The concrete base is first cleaned with a coarse metal brush, exposing coarse-grained inclusions. This will help the solution to better adhere to the base. Then beacons are placed along the perimeter of the floor, serving as guidelines for determining the level of the poured mixture.
To insulate walls from wet cement mortar, they are protected from below with damper tape or strips of roofing material 10-15 cm wide. This also serves to compensate for the thermal expansion of concrete when installing a heated floor. Before pouring the solution, the surface is thoroughly moistened with water. A screed thickness of 5 cm will provide good strength, but you should not increase its height, remembering that the concrete mass has considerable weight. The installed beacons are removed after the screed has partially dried and the resulting voids are filled with solution. For heated floors, it is necessary to lay the type of underlay that is more suitable for the selected system and the climatic conditions of the room.
You may be interested in: Warm floors on the balcony and in the kitchen: power calculation
Purpose of primers
Before purchasing a primer, you need to inspect the surface on which the tiles will be laid. The choice of composition is influenced by the base material.
For mineral bases
These include concrete, cinder block, brick, plaster and aerated concrete. Priming of such materials is carried out using deep penetration compounds. Penetrating into the surface, they close all pores and increase the adhesion of the tile adhesive and the base.
For loose and fragile substrates
To work with them, a special strengthening mixture with adhesives is used. Such problematic surfaces are often found in bathrooms, where exposure to moisture can cause the plaster to deteriorate.
For surfaces containing alkali
Alkali is often present in concrete or cement screeds that have been treated with fire retardants. To neutralize their effect on the tiles, an anti-alkaline primer is used.
How long does it take to dry?
The drying speed depends on the composition of the primer, surface material, temperature and humidity in the room. The approximate drying speed is:
- Acrylic - 8-9 hours.
- Alkyd - at least 11 -13 hours.
- Concrete contact – over a day.
The drying speed of the primer mixture largely depends on the ability of the walls to absorb moisture. At the same time, it is impossible to determine externally whether the surface is ready for further work, so it is best to follow the instructions on the packaging.
Beneficial features
Loose surfaces that absorb moisture well should be treated several times
Should I prime the floor before laying tiles or not? This is a question asked by many people who encounter this for the first time.
If you ask advice from specialists, you can get the answer that the action is considered mandatory when performing almost any repair or finishing work.
On loose or porous surfaces, several coats can be applied. Using a primer on a concrete base followed by laying tiles leads to the following results:
- Strengthens the surface and binds it. The liquid penetrates deep into the pores, strengthens the structure, thereby making it more resistant to dynamic and static loads.
The primer will protect the adhesive layer from delamination
- After the base is treated with a primer, the tile adhesive adheres better to the surface.
- With its help, you can ideally prepare the surface for laying tiles. The primer coating effectively covers all remaining dust particles.
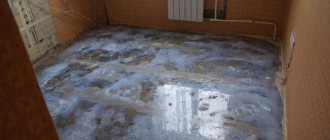
- If you do not pre-treat the surface, the tile adhesive will dry out too quickly, as moisture from the bottom layer will be absorbed into the surface. The result will be delamination of the layer and gradual peeling of the tile.
You can evaluate the impregnation almost immediately after laying the tiles. The floor will not leak and have unpleasant odors typical of mold.
Selecting the type of solution
Now you can think about choosing a solution for laying tiles yourself. Previously, a cement-sand mixture with the addition of PVA or Bustilat adhesives was used for this. You can also use old and proven methods, but why? Stores offer ready-made formulations of two types: in plastic buckets (mastics, ready for use) and in bags (dry mixture that only requires dilution with water). What do professionals use? Almost everyone prefers dry mixes, since with their help it is easier to adjust the thickness of the layer and make changes. Mastic is used only if there is an ideal plasterboard base.
To prime or not
But let’s still figure out whether it is necessary to prime the surface before laying the tiles or not. This question is controversial and incorrect for some experts. However, the answer to it is almost always “ Yes ”.
A primer before laying tiles is simply necessary, especially if tiling is carried out on a porous or crumbling surface. The only case when a primer can be neglected is when facing a dense concrete base. And even in this case, a coat of primer will not hurt.
Let's talk a little about the general properties of all types of primer. In total, there are three advantages that the primer provides:
- First of all, strengthening the surface and increasing adhesion. This effect is achieved by impregnating the pores of the material with the composition, which strengthens the structure. Thus, the base becomes more resistant to various loads, and the possibility of infection is also significantly reduced.
- The amount of materials required for work is also reduced. In particular, we are talking about further cladding. And this, accordingly, allows you to save money.
- By increasing adhesion, the primer can significantly increase the quality of the future coating. This way you can be sure of the durability of the cladding.
Types of compositions
There are several types of ceramic tile floor primers used in residential areas.
They are united by a similar application, but the chemical composition and properties differ significantly from each other.
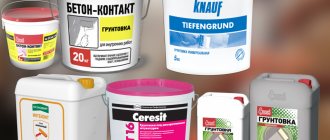
Before choosing a material, it is recommended not to buy products that are low in cost and produced by little-known manufacturers. This will allow you to protect yourself from purchasing counterfeit, low-quality goods.
Acrylic
Acrylic penetrates deeply into the surface and forms a durable film
The composition is designed for high-quality and reliable adhesion of the base surface to tile adhesive. Use will avoid roughness and porous areas.
After drying, the composition turns into a homogeneous film, firmly connected to the material. It has the properties to penetrate deeply into the concrete structure and completely fill all voids.
Many specific mixtures, the composition and technical characteristics of which are regulated by GOST, have protective properties. They perfectly prevent the penetration of dampness and moisture through the concrete floor, thus playing the role of a waterproofer. Depending on the purpose for which the material is used, there are several types of compositions:
- Strengthening - consists mainly of binding elements. It glues the surface perfectly, but is not a deep penetration primer.
- Deep - characterized by the ability to penetrate deeply into the base and well saturate its structure. Popular when finishing surfaces made of concrete or low-quality cement-sand mixture. It is more expensive than a strengthening one, so when choosing, you should weigh the pros and cons of its use.
- Adhesive – creates a special roughness of the base, which improves adhesion to the glue. It is produced according to the German standard and is environmentally friendly and recommended for use in residential premises. For more information on how to prime a floor, watch this video:
In some cases, acrylic primer can penetrate to a depth of 10 cm.
Alkyd
Alkyd mixtures can be used to prime any surface
Alkyd primer for floors under porcelain tiles is a universal impregnating composition.
It is widely used for application on concrete or brick bases, as well as on any other surfaces.
In this case, you can use one of two types of such compositions:
- Perchlorovinyl - intended for processing on concrete, brick, plaster or metal. When dry, it creates a protective film with moisture-repellent properties. In addition, it prevents the growth of fungus, mold and putrefactive bacteria inside the concrete structure.
- Glyphthalic - consists of coloring pigments and filler. Used for any type of work: external or internal. This general purpose primer forms a protective film on the surface with excellent anti-corrosion characteristics. Increases the strength of the base and promotes good adhesion.
When applying alkyd primers, you need to take into account their high toxicity and the possibility of easy fire, so it is recommended to work in a respirator and protective gloves.
Epoxy
Epoxy compounds will ensure the best adhesion of the tiles to the base
It is considered the highest quality and effective composition used for subsequent laying of tiles. Provides maximum adhesion of the coating to the base.
The chemical structure is based on a resin, which is used primarily in the production of epoxy paint.
Due to its great popularity, today we can distinguish a whole range of epoxy primers designed for different purposes:
- standard - is the best option for processing under tiles and creating a self-leveling floor;
- winter – Used for work at ambient temperatures below 0⁰С;
- fast – characterized by fast absorption and drying times.
A primer made on the basis of epoxy components is a leader among analogues, characterized by high quality and an affordable price.
Composition from folk craftsmen
The composition for non-absorbent surfaces is quite expensive. And the point here is that it is usually sold in large containers. It will not be possible to use everything up for a one-time “operation”, and the mixture gradually deteriorates.
And paying for something that is not needed in full is doubly offensive.
Craftsmen proposed an alternative option, which proved to be no worse. They mix a regular adhesive mixture with a penetrating primer. The consistency should be like liquid sour cream, and in this case this homemade primer will be no worse than a special composition for non-penetrating surfaces.
Selection of primer materials based on compatibility with base materials
When working with multiple materials, soil requirements must be taken into account. The technology for working with the product will be different in each case.
- For gypsum plasterboard sheathing, the choice of primer is carefully considered. Drywall must be primed, but not always. To avoid damage to the material, all seams and joints are puttied before applying the primer. This way you don’t have to worry about the integrity of the base. In addition, only a moisture-resistant type of specialized drywall is chosen for the tiles;
- For plywood with a porous surface, the primer is selected with some reservations. It is not considered advisable to lay tiles on plywood. However, plywood is often sheathed with some other material (for example, DSP). But with any approach, plywood must initially be strengthened using a primer composition produced like a liquid concentrate for porous structures;
- For porcelain stoneware, marble, etc. For these groups of materials, the optimal soil composition will be one in which various additives predominate (including sand), which significantly facilitate adhesion. This will make it possible to carry out higher-quality masonry and preserve the result for a long time. In the situation with porcelain stoneware, these recommendations can also be used.
You don't need to be a specialist to apply the mixture to the surface. Everything is quite simple. In addition, you won’t have to wait long for the applied solution to dry. A few hours will be enough for this (from 6 to 12 in different cases).
Using primer
When talking about which primer is best for tiles, it is necessary to take into account all the features of the base. It is depending on it that it is necessary to choose the composition, since in different situations, coatings made of different materials may be incompatible with the primer.
Properly selected soil becomes an important factor. And you shouldn’t try to save money, since cheap material may not justify itself. To check the quality, just look at the packaging. It contains instructions for use. Note that for a good primer one layer is enough, while a regular one should be applied in several layers. Thus, it is better to overpay a little than to receive poor-quality coverage.
Now that we have answered the question of whether the floor is primed before laying tiles, it is worth understanding the process of applying the primer itself. In particular, several cases need to be considered:
- Applying the composition to an absorbent surface.
- Primer for non-absorbent substrates.
In each case, floor priming for laying tiles has its own characteristics that must be taken into account. Let's look at each case separately.
Absorbent surfaces
In this case, before starting work, it is necessary to thoroughly clean the surface of debris and dust, as well as remove the previous cladding and its residues.
In the case of treating walls that have been painted, it is enough to eliminate only the areas that are swollen, which is done with a spatula.
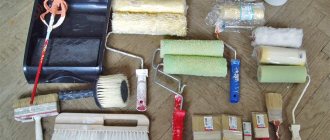
To work we will need the following tools:
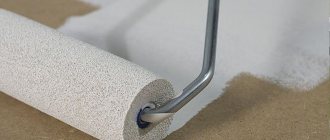
- Roller.
- Brush.
- Primer tray.
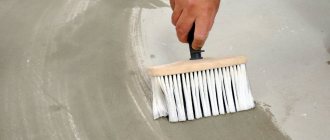
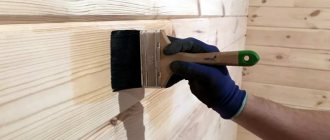
The application itself is carried out as follows:
- The concentrated primer mixture is diluted with water in accordance with the instructions (unless, of course, a ready-made composition is used). After this, the primer is poured in small portions into the consumption tray.
- Take a roller and plunge it into the mixture, then wring it out. The primer itself should be applied to the surface smoothly, with light movements of the roller.
- Next, you need to wait for the solution to dry completely, then provide another layer. Even when using high-quality primer, which allows the application of one layer, it is necessary to provide a second one to improve the quality of the coating.
Finally, all that remains is to wash the container from any remaining mixture, otherwise, after drying, you can throw it away.
For faster application of primer to the floor, it is possible to use sprayers and spray guns.
Non-absorbent substrates
In the case of such a coating, you will need the same tools. But, in this case, a special soil is used, with increased penetration characteristics into the base.
The mixture itself is applied to the surface using a brush. Note that this kind of work is quite simple and does not require any preparation, so you can involve family members in the work.
At the end of the work, all tools and containers must be thoroughly washed.
A variety of this type of soil is used extremely rarely, which is due to the sale in large volumes with the condition of a large remainder of the material.
Types of soil
Now a huge number of different types of primers have appeared on sale, differing in price and quality. However, they can all be divided into certain categories depending on the properties they possess.
Various types and types of primers
First of all, all compositions can be divided into those that are suitable for absorbent surfaces (brick, concrete, plaster, etc.), and those that are used for treating non-absorbent substrates (plastic, metal, paint). Primers intended for use on absorbent surfaces also include deep penetration primers.
Deep penetration acrylic primer
The primer is also divided into special and universal . The latter can be used to treat surfaces both inside and outside buildings, and the former are used to impart certain properties to the surface. Such compositions are not recommended for purchase and use by beginners in the world of construction and finishing works. The main difference between the two types is that they have different degrees of stability and ability to protect the surface of the rough foundation from external factors.
Attention! Each primer can only be used directly for its intended purpose. It is important to follow the instructions on the packaging. Otherwise, the coating will not have the declared properties.
Applying primer to the floor
Also, all soils can be divided into certain categories depending on their composition.
Table. Types of soils.
| View | brief information |
| Alkyd | Allows you to create a reliable and durable layer, penetrating deep into the structure of the rough base. Ideal for applying to the floor before laying tiles. But you shouldn’t apply an alkyd primer to drywall or plaster. |
| Acrylic | The most common type because it is a universal composition. Can be used to treat any surface. |
| Based on gypsum, cement and lime | Suitable for porous plastered surfaces, brick or concrete. Suitable for drywall too. |
Advice! When choosing soil, you should not settle for the cheapest option. It is also not recommended to buy formulations whose instructions for use state that re-application of the product is necessary. It is also not recommended to apply such primer under the tiles.
For porous and loose materials, it is recommended to purchase strengthening types of primers. They can reduce the absorbency of the floor. Adhesive compounds based on acrylic and latex are suitable for tiles.
Deep penetration strengthening primer
Primer of concrete and brick surfaces
Strengthening a weak foundation is achieved using deep penetration soil.
When using tiles as room decor, either on the wall or on the floor, special attention should be paid to priming the surface on which the tiles will subsequently be laid. If there is a room with high humidity (for example, a bathroom), then the primer used for mineral (cinder block, brick, aerated concrete, etc.) bases, on which the tiles will subsequently be laid, must have a special marking “for wet rooms.” Preparing the surface for applying the material includes removing dust and oil (greasy) stains from the base.
A deep penetration primer has proven itself to be effective, penetrating as deeply as possible into the surface, while leaving the treated area porous, which increases the adhesive (attractive) properties of the material with the next layer. Antifungal components are added to deep penetration mixtures, which has a beneficial effect on the microclimate of the room
How to choose a priming material
Before purchasing a primer suitable for treating plywood surfaces, you need to pay attention to the following properties of the primer composition:
- It is necessary that the selected primer is intended specifically for impregnation of plywood and wood.
- The primer must be compatible with the paint.
- It is better if it is soil with special antibacterial additives, then it will be able to protect the surface of the wood from rotting, mold and fungal formations.
- If the surface to be treated is located outdoors and will subsequently be exposed to direct sunlight and precipitation, then pay attention to primers that have water-repellent properties.
- A soil with water-repellent properties will have to be used in any case if all other building materials used during construction have such qualities.
- The same composition as for chipboard is suitable for treating the surface of plywood - the material will increase adhesion to the base and paints.
- When choosing a primer, it is necessary to take into account the degree of humidity in the room.
- It is better to use alkyd or water-acrylic compounds for priming plywood.
- You can use nitrocellulose paints NTs-1227 or NTs-48 as a primer.
Primer application technology
If there are penetrating surfaces, the primer is applied with a roller, allowing a thin layer to be made. The mixture is conveniently applied to non-penetrating surfaces with a brush.
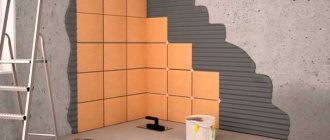
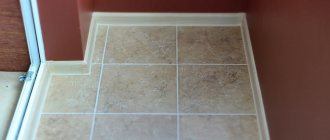
Preparing the surface for tiles
Furniture located in the room must be removed so that it is not damaged during finishing work. The old floor covering must be removed.
Floor preparation is carried out in several stages:
- The floor surface is carefully inspected to ensure that the base is even, so that the tile covering does not break or peel off during use.
- Detected chips, cracks, and pits are carefully sealed with cement mortar or putty. This will help reduce primer consumption.
- Lumps, protrusions, and sagging are removed with a hammer, sandpaper or a grinding machine.
- Garbage is removed. You can use a stiff brush or broom lightly moistened with water; dust can be easily collected with an industrial vacuum cleaner. Then you can walk with a damp cloth and then dry the base well.
- Small notches are made on the concrete floor, 3 centimeters apart from each other, so that the tiles stick better. The tools include an ax or chisel and a hammer. Advice! Dust from the notches is removed with a damp brush.
- Surfaces in rooms with high air humidity are treated with a water-repellent primer in two layers, with the second applied after the first has completely dried.
- The baseboards, jambs and lower sections of the walls are glued with masking tape so that the primer does not get on them.
- Tools are prepared: a wide roller, a brush for applying the mixture in hard-to-reach places and along the walls, a tray for the soil mixture into which it will be convenient to dip the roller.
The process of preparing the mixture
Primers purchased in concentrated or powder form must be diluted with water in the proportion specified by the manufacturer on the packaging. If you violate the technology, the quality of the composition will decrease. There is no need to dilute the entire package of the mixture with water at once; first, it will be enough to prepare a small amount, and then stir more as needed.
Priming procedure
The layer of the mixture should not be too thick so that it does not peel off later.
Main stages:
- Treatment should begin from the corner of the room farthest from the entrance door.
- Use a brush to coat hard-to-reach areas, leaving no empty areas.
- Dry the first layer.
- Start applying the second layer and after finishing work, wait until it dries completely.
- Apply a third coat when the surface is too loose.
Cleaning tiles from primer
As mentioned earlier, applying a primer to the tiles is not necessary, and in some cases it is prohibited. Therefore, it is often necessary to clean the material. Of course, the method for cleaning acrylic primer may vary slightly depending on which tile primer was used, but in general it will look like this:
- If a small amount of soil gets on the material, if it was detected immediately, it can be washed with warm soapy water.
- Wipe the tiles thoroughly, the primer layer should come off, but do not hesitate, since the composition is absorbed quite quickly.
- If this method does not help, and the soil has already been absorbed, you need to soak the tiles, and then try to wash them again.
- If the composition has already set, then plain water will no longer help and for cleaning you will have to use a mixture for cleaning plumbing fixtures or a similar composition of household chemicals. You can also use glass cleaner.
If you do not immediately notice the contamination and the time for cleaning this way has already passed, then you will need specialized tools, for example, a foam cleaner that will help soak the soil, after which it can be cleaned with a scraper.
If you don’t have such a device at hand, you can use any solvent, preferably alcohol-based. This role can be acetone, turpentine, gasoline and many other options.
And the most recent case, when the soil has become so absorbed that no other product helps, is sandpaper or another abrasive. Of course, this option is undesirable, but necessary. Therefore, try not to let the compounds get on the tiles.
How to wash the soil?
And now the work on applying the primer is completed, you can lay the tiles. But what should you do if, during the process of applying the mixture, the coating elements previously laid on the wall became dirty? Fortunately, there is a chance to remove stains from the surface.
The first step is to use a regular wet rag, or rather, soaked in soapy water. With intense friction, the soil may become detached from the tile; the main thing is to remove the stain as quickly as possible. Sometimes this method helps: cover the dirty area with damp rags and leave it like that for several hours. Then again you need to intensively rub the stained surface.
Removing primer stains from the wall with a wet rag
If water does not help, then you will have to use a specialized cleaner for cleaning plumbing equipment. Usually, what can remove dirt on sanitary ware can also remove primer mixture. Windshield cleaners are also good helpers for removing such stains.
If time has been lost and the soil has already dried out thoroughly, then a special polyurethane foam cleaner will help deal with it. The stains are generously moistened with it and then treated with a small spatula or scraper. If there is no such product at home, and there is no desire to spend extra money on buying it, then any solvents are used. This could be acetone, kerosene, etc.
Soudal foam cleaner
Priming the floor before laying tiles is a necessary procedure that should not be neglected. Only if the work was carried out exactly according to the instructions can you expect that the coating will adhere reliably and last for many years. And applying a primer is one of the mandatory points of this instruction.