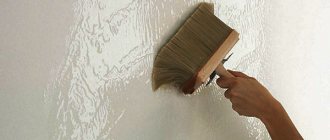
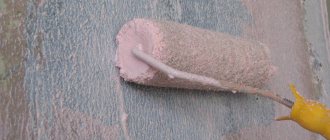
Wall primer to even out the color of the base
White primer for color leveling is a special type of composition that improves the parameters of the original base. This is a liquid that forms a special film after application to the surface. After this, the wallpaper reacts much faster and better to the glue, regardless of its type.
When choosing materials, it is important to take a closer look at the type of surface undergoing further processing. No less attention is paid to wallpaper materials and their quality, humidity level in the room. Only if they are taken into account will a white primer for walls under wallpaper be quite effective.
Why choose white primer color?
In most cases, people are accustomed to thinking that a dark color is required for soil. The first reason for the opposite choice is the spread of wallpaper with light shades. Indeed, in this case, the new materials are not dense and dark enough to cover the previous layer of finishing. The decision is made to avoid problems in the future.
The main types of white primers for wallpaper
The base material, varieties and further surface treatment influence which composition to choose in a particular situation. All types of white primer have their own characteristics, positive and negative sides.
Acrylic
This type of white acrylic primer has become quite popular. Universal compounds penetrate as deeply as possible and help eliminate dust. Old and loose plasters receive additional strengthening thanks to acrylic compounds. Water absorption of walls and ceilings is reduced, and adhesion, on the contrary, improves.
The porosity of the walls determines the consumption, average figures are 100-200 grams per m2.
These primers for white wallpaper contain only water and acrylic polymers. Sometimes they are diluted with antibacterial and antifungal components. An important indicator for selection is the amount of dry residue.
Alkyd
Protects wood from rotting and metals from rust. Can be used on plastic surfaces and substrates with fiberboard, chipboard, fiberglass or regular glass. When applying, you can use any convenient methods, including spraying, rollers or brushes. The pigmented white primer solution can be diluted with white spirit.
Universal
Suitable for application on surfaces of medium to small porosity. Helps even out colors and cover up various stains. At the preparatory stage, it can be applied to various types of surfaces. How long the composition will dry depends on the specific base.
Latex
For treating surfaces with a porous structure. Fills all gaps in the walls, providing reliable adhesion to any materials that are used in the future.
Basic rules for priming walls
So, let’s put together the most important information and add a few important nuances:
The walls are primed twice before wallpapering. The first time - to strengthen the base, as well as the best adhesion of the wall to the putty layer. The putty is primed a second time so that the wallpaper sheet is pressed tightly against the wall and does not peel off. During the initial (rough) surface preparation, a liquid composition with a high percentage of penetration is used. As a rule, this is an acrylic primer or homemade primer. For more detailed work, the wall is coated in several layers, with each new layer applied only after the previous one has completely dried. Liquid solutions for in-depth treatment take a very long time to dry
Therefore, when using them, it is recommended to take all precautions and take into account technical requirements (wear protective glasses/clothing, do not stay for hours on end in the room where the primer is drying).
Alkyd impregnation is ideal for wood surfaces. It perfectly masks protruding chips and other defects that will be hidden for a long time under a layer of primer.
In addition, this composition ideally hides nail heads, as well as other iron elements. The primer for wallpaper should be white, regardless of the color of the wallpaper. Otherwise, colored primers will show through and distort the shade of the wallpaper. In addition, white color perfectly covers dirty spots on the walls.
Prices for wood preservatives
Impregnation for wood
Despite the popularity of white primer, colored primer can also decorate the interior. Moreover, it is quite successfully used as a decorative coating. After drying, the primer layer becomes rough; it perfectly complements the relief of the decorative plaster that is applied on top.
Priming walls is an important part of repairs
Priming a wall is not as difficult as it seems at first glance. It is much more difficult to choose the right primer, allow enough time for each layer to dry, and apply the mixture uniformly over the entire surface of the wall. If possible, choose primer and wallpaper glue from the same manufacturer. This guarantees optimal compatibility of the compositions, which will give excellent results.
Features of using a pigmented primer to even out the color of walls
First you need to calculate how much area the walls occupy without taking into account doors and windows. The resulting amount is multiplied with the number of passes, which is usually 2. Then it is multiplied again by a factor of 1.1. This is necessary to account for inventory. More accurate figures are obtained immediately before making a purchase. The manufacturer himself provides information regarding the costs of materials, this also applies to white soil.
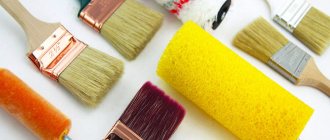
The following list of tools will be needed:
- A brush to treat areas inaccessible to a roller;
- A fur roller with a long handle. The spray gun also simplifies the work if necessary;
- Ladder;
- Cuvette for mixture;
- A basin where the primer is stirred;
- Primer depending on the type of walls.
Even choosing a good white covering primer does not completely protect against annoying mistakes. But it’s easier to avoid them if you follow the advice of professionals.
The main provisions include the following:
- Up to 150 ml of primer is consumed per 1 m2;
- The composition should not smell like glue; this is checked separately upon purchase;
- The compositions are applied in at least two layers, the second - after the first has completely dried;
- The quality of work can be negatively affected by purchasing the cheapest soil. Such repairs cannot be called durable.
There are no general recommendations for drying primers. After all, it is necessary to take into account the characteristics that distinguish specific rooms. The soil must not only dry out, but do it efficiently.
A primer coat is necessary for any repair. Although some people think that the rule only applies to new buildings. Pigment material is also necessary under other conditions.
How to apply correctly
The main thing is to make sure that the walls are absolutely smooth, without crumbling areas or oil marks. When leveling with plaster, you need to wait until the previous layer has completely dried. It is necessary to completely remove or clean old finishing materials. Dust removal is carried out separately.
A wide paint brush or roller is equally suitable for spreading the composition over the surface. The latter is suitable for quickly and evenly covering large areas. It is better to choose tools equipped with long handles. Then painting becomes easier.
Spray guns and various sprayers speed up work and make it easier to obtain uniform layers. Equipment with a compressor is required if the work is performed by professionals.
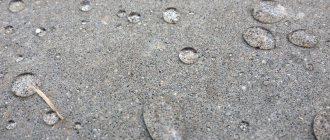
A penetrating primer is poured into the tank. Then spray the entire surface evenly. Concrete - contact is not applied using this method, otherwise the quartz sand becomes sediment. It is recommended to apply adhesive quartz primers manually. The strength and porosity of the base affect the volume of materials when applied to walls.
Stages of wall finishing before wallpapering
Any repair materials with accessories contain instructions for use. It is better to carefully study the document before starting alignment.
The following set of tools is required to facilitate the implementation of the project:
- A drill with a mixer attachment;
- A pair of spatulas with different sizes;
- Roller with brush;
- Bucket;
- Construction tape;
- Stationery knife;
- Film. It helps to level any surface.
It will not be possible to prepare the walls for gluing unless you get rid of the old finishing materials. There are many reasons to use this solution. Among them the following are the most important:
- Germs and dirt collect under old foundations;
- Service life is reduced due to poor adhesion;
- If you immediately apply new wallpaper on top of the old ones, the surface will take a long time to dry;
- Old materials do not hold up well after several years, which is why they need to be primed.
The work is carried out in several stages during initial preparation. The manual method is used when the wallpaper does not stick well to the surface when it peels off. Using a spatula, pry it from above and then pull it down.
Most often, the water method is preferred. It is expected to create several scratches throughout the entire canvas, in different places. Then they take water and treat the surface with it. After this, the material should come off without problems, as any description says.
Under any conditions, the removal of old coatings is simplified by using chemical compounds also on the market. One of the most difficult jobs is removing paint. The chemical method will be the simplest solution to get rid of problems. You just need to purchase the right product and remember to use personal protective equipment. Concrete requires the application of standard rules.
Finally, the walls are leveled when the primer is completely dry. At the same time, dry and smooth walls do not even need to be plastered. It’s another matter when there are plenty of flaws and various defects on the surface. Then it is more difficult to get a good color.
The entire area on which the wallpaper is applied is covered with putty. Then the surface is sanded until it becomes completely smooth. At the final stage, re-priming is carried out. This is a mandatory step that cannot be skipped when applying paint.
Surface treatment according to all the rules is mandatory in any case when there is no preliminary finishing. This is especially true for new buildings, but can be useful in other circumstances. It is necessary to lubricate the surface several times, because the material is completely new. After plastering and priming, preparing the walls will take less time, as will obtaining the desired result. The work is not the easiest, but any home craftsman can do it on his own. It is enough to follow the instructions for the materials and perform the steps sequentially.
Preparatory work
Before priming the surface, a number of measures must be taken:
- From the room in which the work will be carried out, it is necessary to remove everything that could interfere with or be dirty during the work. The furniture should be moved to the center of the room to provide free access to each of the walls, having previously covered it with polyethylene and tape to protect it from contamination. If necessary, the floor covering must also be protected using film or other similar material.
- When identifying areas infected with mold or fungus, it is necessary to carry out their initial removal using a stiff brush, which must then be additionally opened with an antiseptic composition intended for this purpose.
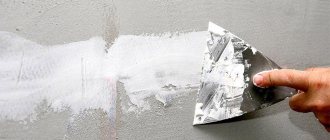
- If there are defects on the surfaces being treated, they must be sealed with putty. The fewer defects there are on the walls, the better the final result will be achieved.
Note! If the putty surface is not opened with a primer, it may crumble, and the consumption of applied paint will be an order of magnitude greater.
The next step is to clean the walls with a brush, broom or vacuum cleaner.
During its implementation, it is important to eliminate the dust present on the surfaces, due to which it will be possible to increase the level of adhesion of the composition. It is advisable to carry out this stage 1-2 hours before the start of the main work, since during preliminary cleaning a few days before, it will re-deposit on the walls. Surfaces must be dry
If there is increased dampness in the room, it must be removed by ventilation. If you need to speed up the process, you can resort to using a heat gun.
The method of applying primer is universal and is not particularly different from that used when using coloring compounds. Before opening it from the surface of the walls, it is necessary to remove the old coating, grind it, and degrease it. The number of primer layers applied is individual, but there should be at least two.
To apply the mixture, you can resort to using a roller, paint brush or spray, in addition to which you need to use a container, which is used for pouring the composition and making the work easier.
Each of the tools is optimally used depending on the surface being processed. It is more convenient to open brick walls with a brush. The roller is more suitable for flat or plasterboard walls.
Note! A spray gun is also a good option for carrying out such work, but it is preferred less often, since after its use it is quite difficult to clean the room.
What else is priming useful for?
After nails, screws, baseboards, and all sorts of defects have been removed, a layer of putty is applied to the wall. Next, the wall is primed. The following are reasons why a surface should be primed:
- Final dust removal, removal of dirt that could not be removed during puttying.
- Leveling the surface.
- Reducing the consumption rate of adhesive, as the soil clogs cracks and defects in the material.
- Improving adhesion (cohesion of dissimilar materials).
- Strengthening the bottom layer so that the material does not peel off.
- The coating acquires water-repellent properties.
- The surface retains the ability to “breathe”.
- Protection against mold and mildew
Previously, walls were covered with newspapers or other paper before applying wallpaper. To some extent, this method replaced the primer. However, only modern soils can ensure high quality of work performed and the entire list of the above advantages of a primed wall.
How to glue wallpaper on concrete. Is it possible or not?
The answer to the question of whether it is possible to glue wallpaper on concrete is unequivocal - after all, it is possible, but only taking into account all the nuances and features. And the base will still have to be prepared - even without plastering and puttying, but certain actions must be performed to ensure a decent result.
Why is it important to properly prepare concrete before wallpapering:
- Any concrete wall assumes the presence of unevenness and curvature, which will not allow wallpaper (especially thin ones) to be glued evenly: it will not be possible to make neat joints.
- Without finishing decorative finishing, concrete has a special structure - quite rough, its microrelief will be noticeable, everything will show through the canvas. Again, thin wallpaper will especially suffer, as it may even tear when applied.
- Concrete has a certain shade - it varies from light gray to completely dark. And if you stick light wallpaper on a concrete wall, it can change color.
- The risk of white spots appearing on the wall is if the layer of glue was unevenly distributed over the surface, which very often happens when paintings are glued directly to concrete.
- There is a high probability of wallpaper peeling off - the fact is that when the glue dries, bubbles may appear on the surface around microscopic cracks and cavities, which deform the finish.
- The possibility of mold appearing is another serious reason to think about it before gluing wallpaper on a concrete wall without prior preparation.
Features of the primer coating
This composition, which is also called prime, performs the task of auxiliary material. Thanks to it, you can successfully cover walls, so it is in demand before the wallpapering procedure. A homogeneous suspension of varying thickness is produced without unpleasant or pungent odors. It may have no color, be white, or have a different shade.
After application to the coating, the mixture dries and a colorless film is created. As for the set of ingredients, the material contains adhesives, organic resins, as well as other additives that are prepared on different bases.
Various additives and fillers are often added to the solution to improve the performance characteristics of the product. The primer can be produced not only in liquid form; often the market offers dry powder, which must be diluted with a certain amount of water.
All data and characteristics are indicated on the packaging, the same applies to the operating instructions, solution consumption, drying time, and expiration date.
Related article: Which plaster is better to plaster brick walls
Types of primer compositions
When choosing soil, it is recommended to proceed from the situation and tasks:
- Acrylic compounds are suitable for most surfaces, except ferrous metals. They are devoid of unpleasant odors and dry in 2-4 hours.
- Alkyd mixtures are best suited for wood. These compositions also have excellent compatibility with tiles. Mixtures are not recommended for treating plastered and gypsum coatings. The drying period is from 10 to 15 hours. Alkyd mixtures are produced either on the basis of zinc chromate or on the basis of zinc phosphate. The latter are applicable only before painting with alkyd paints and varnishes.
- Glypthal primers are used in dry rooms. Most often used when priming metals. They dry out in about a day.
- Perchlorovinyl compounds are a great way to protect metal, but can be used on plaster or concrete. A distinctive feature of perchlorovinyl is its rapid drying (in no more than an hour). It is undesirable to use such soils for interior work due to their toxicity.
- Polyvinyl acetate primers dry within half an hour. However, such compositions are applicable only if the topcoat is polyvinyl acetate paint.
- Polystyrene compounds are used for processing rough coatings made of wood or plaster. They are toxic and therefore not recommended for interior work.
- Phenolic mixtures are applied to wooden and metal products. Drying time is from 10 to 12 hours.
Note! It is permissible to paste wallpaper or apply any other finishing material to a primed surface only after it has completely dried.
Regarding the nature of the treated surface, primers are usually classified as follows:
- Universal white primers are intended for foundations with a low degree of porosity. These compositions include acrylic primer.
- Special primers are used in special cases, for example, for treating surfaces in regularly moistened areas.
- Deep penetration soils are used on loose and particularly porous coatings that need strengthening.
Note! You can use standard wallpaper glue as a primer. This is the most affordable, but not the best option, since in this case there is a possibility of stains appearing on the wall. This impregnating composition can only be used on perfectly flat surfaces.
Primer for OSB
Oriented strand boards absorb moisture well. Therefore, you cannot glue wallpaper on them without first priming the surface. The treated coating will acquire a waterproof film that will prevent the base from swelling when interacting with the glue.
The seams between the panels should be filled with sealant or plaster. Before filling, the seams can be reinforced. In this case, there is no need to fill the gaps.
The best primer for OSB is a white composition. The primer mass is applied in several layers.
Primer for drywall
Deep penetration primers are best suited for processing plasterboard sheets, which significantly improve the adhesive properties of this material. In addition, the primer for drywall must meet the following criteria:
- bind dust deposits;
- not be toxic;
- be resistant to moisture and temperature changes;
- dry quickly.
For plasterboard sheets, only the composition that is intended for indoor use is suitable. External soils are not suitable for drywall.
Stages of wall finishing before wallpapering
High-quality repairs can be done on your own, you just need to follow useful recommendations. You will need to examine the surface of the walls, detect chips and potholes in order to correct the defects. Puttying, sanding and drying helps with this. Then the primer material is selected in accordance with the purpose of the room, as well as the type of wallpaper that will be used for finishing.
Preparatory stage
Before you start wallpapering, you need to not only choose the material, but also clean the walls of the coating that was there before. Surface treatment is carried out using antiseptic compounds. Often the walls are not perfectly smooth, and if they previously had other finishing materials on them, additional defects may appear on the surface.
Applying primer
It is important to follow safety precautions, so you will need to wear safety glasses, gloves, and a head covering. Then you need to study the instructions that are indicated on the container with the primer
Some compositions must be mixed before use; for this, an electric drill or other tool is used. The mixture should cover the entire surface of the wall, being careful not to miss a single area.
To avoid mistakes, a pigmented primer is recommended, which will prevent mistakes. The walls must dry thoroughly before you begin wallpapering. A primer that evens out any wall color will help achieve the desired result, which is why it is in great demand among professionals and ordinary consumers. Follow the recommendations listed, study the types of products, and the repair work will be completed successfully.
See below for a master class on priming a concrete wall.
The main types of white primers for wallpaper
The base material, varieties and further surface treatment influence which composition to choose in a particular situation. All types of white primer have their own characteristics, positive and negative sides.
The base material, varieties and further surface treatment influence which composition to choose in a particular situation.
Acrylic
This type of white acrylic primer has become quite popular. Universal compounds penetrate as deeply as possible and help eliminate dust. Old and loose plasters receive additional strengthening thanks to acrylic compounds. Water absorption of walls and ceilings is reduced, and adhesion, on the contrary, improves.
The porosity of the walls determines the consumption, average figures are 100-200 grams per m2.
These primers for white wallpaper contain only water and acrylic polymers. Sometimes they are diluted with antibacterial and antifungal components. An important indicator for selection is the amount of dry residue.
Universal compounds penetrate as deeply as possible and help eliminate dust.
Alkyd
Protects wood from rotting and metals from rust. Can be used on plastic surfaces and substrates with fiberboard, chipboard, fiberglass or regular glass. When applying, you can use any convenient methods, including spraying, rollers or brushes. The pigmented white primer solution can be diluted with white spirit.
When applying, you can use any convenient methods, including spraying, rollers or brushes.
Universal
Suitable for application on surfaces of medium to small porosity. Helps even out colors and cover up various stains. At the preparatory stage, it can be applied to various types of surfaces. How long the composition will dry depends on the specific base.
At the preparatory stage, it can be applied to various types of surfaces.
Latex
For treating surfaces with a porous structure. Fills all gaps in the walls, providing reliable adhesion to any materials that are used in the future.
Fills all gaps in the walls, providing reliable adhesion to any materials.
How to use it correctly?
When only paper wallpaper existed, to change the interior it was enough to paste new strips of material onto existing ones. This way the concrete wall was insulated. Sometimes newspapers were even pasted on for this purpose. Now there are many new types of wallpaper for every taste and with different properties. And the walls have become more diverse.
When carrying out repairs, old wallpaper is dismantled. It is most convenient to use a hand spray with warm water and a spatula. If used wallpaper does not adhere well to the surface, you can make cuts on it with a sharp knife. Then water will penetrate under them faster.
Non-woven vinyl wallpaper can be removed in two stages. First, the vinyl covering is torn off, and then the remainder is wetted with water. Instead of water, you can use a vinegar solution. There are also special tools that help remove wallpaper.
Surface treatment technology depends on the wall material:
Concrete surface
You need to clean it from dust. The cavities from fallen crushed stone and the joints between the slabs should be filled with putty and cleaned with sandpaper. You can use diluted glue to impregnate concrete.
To improve adhesion, it is preferable to use a universal impregnation; mineral primer for cement mixtures is also suitable. For a high-quality result, the walls are puttied with sandless sand.
Plaster
When the plaster is not new, it must be tapped in order to find out whether it has moved away from the base. In places where there are dull sounds, it breaks off from the base. These places are impregnated with a deep penetration primer. After drying, they are plastered.
If the plaster is old or crumbling, it must be strengthened with a deep penetration primer. Depending on the condition, apply two layers. When the base is strong, proceed in the same way as with a concrete wall.
Drywall
The surface for wallpaper does not need to be treated. But it is still advisable to cover the drywall with a universal primer. It is not advisable to use PVA-based impregnation - the wallpaper will stick tightly to the base and will be very difficult to remove. Drywall seams must be puttied. The result is a surface of uneven color, which can appear through the wallpaper.
Oil paint
The paint is removed using a hair dryer and a spatula. You can get rid of it chemically. To do this, you need to purchase a special product, treat the surface with it and clean it with an iron brush. When using an angle grinder for these purposes, there will be a lot of dust, and the sandpaper will instantly become clogged with sandpaper.
After it dries, putty the mixture to level the walls. One layer of putty is enough for wallpaper. After the putty has dried, it is primed.
If it is not possible to get rid of the paint or use putty, proceed as follows. Before doing anything, the walls must be degreased. Old painted surfaces need to be roughened for better adhesion. To do this, it is treated with sandpaper and impregnated with a universal primer.
Wood and metal
For these bases, an alkyd primer is used. Metal and wood coated with varnish are pre-cleaned with sandpaper. The primer is applied in two layers.
For a high-quality result, internal walls are puttied with dry putties. The method of gluing wallpaper overlapping is a thing of the past; now all wallpaper is glued joint to joint. To do this, create a perfectly flat surface.
Walls made of chipboard, OSB, plasterboard, cement and lime plasters, coated with oil paint or alkyd enamel, are putty. The solution is applied to the walls and ceiling with a thickness of no more than 3-4 mm in several layers. For the first layer, putty with a larger grain size is used. Its task is to level the plane. Top with a final layer of fine grit to give the surface a perfect finish.
For work use two spatulas. One is for applying the mixture to the surface, the other is to dilute the solution and apply it to the first spatula. After applying the solution to the wall and drying it, the surface is sanded with a paint mesh or fine emery cloth attached to the grout. Dust formed during rubbing is brushed off the wall with a broom or brush. It would be ideal to use a vacuum cleaner.
Applying primer to the surface
Priming is performed as follows:
- We dilute the primer composition. For this we need a container (for example, a bucket). The mixture can be diluted in ordinary water. The specific proportions and temperature of the liquid are indicated by the manufacturer on the packaging.
- Stir the mixture thoroughly. An electric drill will be useful for this. You can use wire as a nozzle.
- Apply the mixture to the surface to be treated using a wide brush. The layer should be uniform, there should be no smudges or puddles.
- For a perfectly smooth wall, it is better to use a paint roller rather than a brush. This way the work will go faster.
Why choose white soil color?
Pigmented primer is a special emulsion that is white in color. Pigmented primer is a special emulsion that is white in color. Experts advise using it if you plan to glue non-woven wallpaper. Using the composition, you can not only properly prime the surface being treated, but also give it a white tint.
Types of primer for leveling the color of the base
On sale you can find several different options for pigmented white primer, which is used to even out the color of the base. Each option has its own specific characteristics and can be used in different situations.
Acrylic
The most popular option today is acrylic primer. This demand can be explained not only by a large selection of similar products, but also by low cost, simplicity and ease of use. You can purchase acrylic mixture at almost any hardware store. You can buy either a ready-to-use composition or a concentrated primer, which you will then need to prepare yourself by adding a certain amount of water to it.
Acrylic primer can be applied with any tool that is convenient for you. The composition does not have a strong odor, so it can be used for treating indoor surfaces without any problems. The mixture dries quite quickly. You can start further wallpapering in just 2-3 hours.
Latex
Latex products are considered a relatively new material that has only recently appeared on the construction market. But now the mixture is extremely popular, because it can be used together with a wide variety of materials. A similar composition can be used for processing wood or surfaces that have a high rate of friability. Plaster and drywall are often treated with latex primer.
In order to be able to hang wallpaper, it is necessary to prime the walls with a similar composition in about 40 minutes.
This time will be enough for the mixture to dry completely. A primer with a latex base has a high moisture resistance, so it can be used in rooms where there is high humidity.
Alkyd
Most often, alkyd primer is used to treat materials based on wood. Can also be used to treat metal surfaces. Do not apply alkyd primer to putty or plaster.
It is worth paying attention to the fact that alkyd primer can have a different shade. When gluing wallpaper, preference should be given to light colors or a white shade that will not show through the pasted material.
Prime with PVA glue
Some experts believe that an excellent alternative to primer is a special PVA construction adhesive, which can be used to treat walls before wallpapering. But it is worth remembering that the mixture will not have all the necessary characteristics and will not strengthen the surface or protect it from moisture, mildew and mold. As a last resort, you can use glue, but for this the walls must be smooth and free of any defects, because the mixture will not level them after application.
Universal
Don't forget about the universal composition. This type of primer can be used to treat various surfaces not only indoors, but also outdoors. Using a universal primer, you can increase the service life of the finished repair several times.
The material is sold exclusively in concentrated form, so before use the composition will need to be additionally diluted with a certain amount of water. Each manufacturer indicates the required proportions on the packaging, so preparing the mixture will not take much time.
How to choose
Preference should be given to trusted manufacturers who can offer truly high-quality products. It is also necessary to take into account the characteristics of the composition and select exactly the material that is suitable in a particular individual case.
Choosing future coverage
The most common type of final (finishing) finishing of a room is wallpaper. During their existence, little has changed in the method of carrying out work. Only additional elements of preparatory work appeared and the variety of wallpaper itself expanded.
Wallpaper comes in several types and types.
By moisture resistance:
- ordinary. These are paper and acrylic, they do not like moisture and mechanical stress;
- waterproof - tolerant of water getting on them;
- washable - during operation, you can use non-aggressive detergents in places of heavy contamination and a brush;
- super-washable - basically, these are different types of vinyl wallpaper, moisture-resistant and wear-resistant.
According to the material and requirements for the quality of finishing of the base on which they will be glued:
Paper. They can be multi-layered or single-layered and show all the defects of the walls, so the base must be perfectly flat and uniform. The glue makes them wet and swollen. If the base is puttied with sandless sand and not primed, the wallpaper will pull it along with it and tear it out. An exception may be the overlap method.
Non-woven. They are based on non-woven fiber made from cellulose or synthetic fibers
When choosing wallpaper, you need to pay attention to its density. They come in light, medium and heavy
The quality of the finish may not be ideal; their density may hide minor flaws in the base;
Vinyl. Thanks to the vinyl layer on the base, they can be used in rooms with high humidity. They are durable, fade-resistant, and washable. A relatively flat surface treated with pigmented impregnation is suitable for them;
- For painting. A type of non-woven wallpaper. Due to the fact that this wallpaper is covered with water-based paint, the base must be treated with a primer. If this is not done, the wallpaper will come off when painted;
- Liquid. In fact, this is a subtype of plaster. The price of liquid wallpaper is quite high. To save money, it is advisable to make a smooth and durable surface using sandless plaster and cover it with a primer.
Tips for working with primer
When priming, it is important to avoid mistakes in order to ensure the required quality of work. Below are some useful tips for working with primers:
- There is a common misconception that priming is only necessary in new buildings. This is not true: a layer of primer is needed for absolutely any surface.
- The minimum required number of layers of soil is two. Each subsequent layer of primer (and any finishing material) can be applied after the previous layer has completely dried. Moreover, the soil should not just dry out, but dry out.
- There are no recommendations for accelerating soil drying, other than creating a certain favorable microclimate in the room (humidity, temperature and air circulation).
- You should not buy cheap compounds. It's better to save a little on paint or varnish than to buy a cheap primer. After all, no matter how high-quality the paint and varnish material is, it will begin to peel off if the surface is not primed.
- The primer should not smell like glue. If there is such a smell, most likely it is a counterfeit product.
- The average material consumption per square meter is 150 milliliters.
Study of samples
Let's study the consumer qualities of several soils of the type we are discussing.
VD-AK-0301
Here is a primer for acrylic paint, which provides priming not only of absorbent substrates, but also of old paintwork.
What information about this primer can be gleaned from the description provided by the manufacturer and sellers?
- Compatibility with previously applied coatings of PF, NC and oil paints is guaranteed. The full list is hidden behind the laconic postscript “etc.”
- After drying, the soil forms a uniform film of milky white color.
- Consumption is approximately 200 g/m2.
- Dilution with water is allowed (no more than 7%).
- The soil can withstand freezing down to -40C (no more than a month) or five cycles of freezing and thawing.
- Touch-drying time is no more than two hours. Complete drying of the soil applied in one layer at room temperature takes no more than a day.
Neomid primer for old paint
This composition is more universal: according to the manufacturer, Neomid is a primer for water-based paint and any enamels based on organic solvents.
- The primer includes an aqueous dispersion of acrylates, a polymer binder (unfortunately, its chemical composition is not specified), mineral filler, pigment and additives that improve adhesion.
- Dilution with water is acceptable (up to 10%).
- Drying at room temperature is slightly faster: it only takes an hour.
- Unlike VD-AK-0301, Neomid primer is recommended to be applied in two layers with intermediate drying.
Optilux
And this primer is universal: it is acceptable to use a primer on oil-based paint, PF and NC enamels, various varnishes and concrete bases for any type of paint and varnish coating, putty and wallpaper.
- The primer is based on the same aqueous dispersion of acrylic resins with the addition of mineral filler, pigments and special polymers to increase adhesive properties.
- Consumption - 100-200 grams per square meter, depending on the type of base.
- Drying one layer at room temperature takes no more than an hour.
- The composition can withstand five cycles of freezing and thawing.
- The manufacturer especially emphasizes that its composition does not require pre-grinding of the previously painted surface before application.
- The wholesale price of primer is about 40 rubles per kilogram.
The representativeness of the sample is small, but it makes it possible to make some generalizations:
Purpose of priming walls
The properties of white primer are very wide, so the purposes of applying the mixture to the wall may be different; it is worth considering the main ones:
- Antiseptic components will protect the walls from fungi and flowering.
- A deep penetration primer under wallpaper is included in the surface structure and can fill micropores and cracks.
- A white primer can even out the color of the wall, which is very important for covering walls with light wallpaper.
- The primer does not prevent the walls from breathing, which contributes to a positive microclimate in the room.
- The solution greatly simplifies the gluing process. The wallpaper sticks better and faster.
- The primed type of surface is covered with a film and does not absorb excess wallpaper glue into the wall, which significantly saves its consumption.
Successful examples and options
You can make the primer yourself.
To prepare a deep penetration primer, you will need PVA construction adhesive and water in the proportion of 1 liter of glue to 8 liters of water. Add water to the glue, stirring until smooth.
It is important not to allow a large concentration of glue. Diluted with water it should be absorbed into the base.
If there is a lot of it, a film will form that will peel off.
To create a rough base that improves adhesion to wallpaper, add natural chalk or cement and mix thoroughly. One trowel is enough for 10 liters. Just in case, filter the solution through double-layer gauze. This primer strengthens and protects the surface from moisture and has an antiseptic effect.
To increase the strength of the base and fight fungus, you can prepare a primer using copper sulfate, wood glue and laundry soap. Due to the fact that the primer will be cooked over a fire, aluminum and steel containers cannot be used, because the vitriol will enter into a chemical reaction with them.
Dissolve laundry soap in seven liters of boiling water. It can first be crushed by grating it on a coarse grater to reduce the dissolution time. Wood glue and copper sulfate are added to the boiling solution. Mix thoroughly and cook the primer over low heat for about half an hour.
Stir the solution every five minutes to avoid the appearance of lumps. After thirty minutes, the finished primer is filtered through a sieve. When the solution has cooled, the primer is ready for use. This primer is suitable for strengthening block, brick and plastered walls.
To improve adhesion, you can prepare a universal primer from alum (potassium alum), chalk powder, drying oil and dry paint glue. Mixing thoroughly, the mixture is brought to a homogeneous mass.
The solution cannot be stored for a long time; it will quickly lose its properties, so it is prepared immediately before use. This primer is suitable for any glossy or painted surface, for example, glass, hardboard, metal, tin.
Common priming mistakes
There are a number of mistakes when applying primer that are typical for novice masters:
- Water-based and dispersion paint and varnish compositions (pigmented primers) cannot be used as primer. These paints do not have the properties required by primers.
- If you apply a primer as the first layer, and still use dispersion or water-based paint as the second, stains will probably appear on the surface.
- One coat of primer will not be enough in almost all cases.
Surface priming is a functionally necessary component of finishing work, which in no case should be ignored. All subsequent stages of repair depend on the quality of priming.
Requirements
There are a number of properties that any primer should have. The main characteristic is the depth of penetration of the composition into the surface to be treated. The composition should increase the adhesion of the wallpaper during gluing. Antiseptic qualities are of great importance, since the surface must be protected and the material must be resistant to the appearance of fungus, mold and other representatives of microflora. It is important to carefully study the absorption and drying period, it should be fast.
Before purchasing, you need to decide on the type of primer , and also take into account the characteristics of the room and its operating conditions. Find out in advance what material the wall is made of, since there are different compositions for plaster surfaces, and others for wood and drywall. The efficiency of processing depends on this. It is recommended to consult with a qualified specialist, get his opinion, and take advice.
The composition is selected for a certain type of wallpaper, since they can be traditional and liquid, and for preparatory work it is necessary to select the appropriate version of the finishing material. It is important to study the density of the cladding.
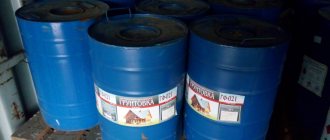
Popular manufacturers
The most popular liquid compositions for preparing walls for finishing are produced by the brands GLIMS, KNAUF and Ceresit. Primers from these manufacturers are considered the most effective.
Products from GLIMS
They dry quite quickly, are perfectly absorbed and protect the coating from mold formation. In addition, building materials from this brand are sold at a very affordable price.
KNAUF
produces more expensive primer with a wide range of applications. True, German quality has recently begun to fail: counterfeits are becoming more and more common. But even despite this, even experienced builders continue to use building materials from KNAUF. The main thing is to know where to buy.
Ceresit
considered one of the most popular brands. The manufacturer produces high-quality primers for a variety of tasks. The quality of mixtures and building materials produced under this brand remains unchanged. But, having decided to buy primer from Ceresit, you need to decide what you need it for. Not all compositions can be applied under light wallpaper and used for painting.
Glyphthalic, phenolic or waterproofing primer
When considering the types of primers, you may prefer glypthal, which is applied to surfaces made of different metals. After application, the product dries quickly within 24 hours, and it can be used to treat walls in dry rooms. Phenolic primer is used as an anti-corrosion coating, which is durable. Application can be carried out on metal or wood surfaces. Drying time is 12 hours. Sometimes there is a need for a waterproofing primer; such a composition is indispensable for surfaces in saunas, bathrooms or other rooms where conditions are characterized by high humidity.
How long does it take for primer to dry before painting?
This is a very important point that affects the quality and speed of repair work. The manufacturer always informs about the drying time of the solution. However, this is an approximate value, and almost always it is not a specific number that is indicated, but a time period during which the composition should be expected to harden. This happens because the speed of hardening of the product is influenced by various factors:
- Humidity and temperature indoors. 60-80% humidity and +15-20 C are considered optimal. In any case, you should not ventilate the room while the soil is drying. This must be done before applying it. If this rule is not followed, there is a high probability of cracks appearing.
- Quality and type of base. Porous and dry surfaces dry noticeably faster. If for some reason it is necessary to speed up the drying process of the primer, the base should be degreased before applying it.
- Composition of the drug. Products with easily volatile solvents and those with added solids harden faster.
- Number and thickness of applied layers. With each subsequent one, the time it takes for the wall to dry increases.
It is impossible to say exactly how long the primer will dry before painting. This must be determined visually. You should wait the time recommended by the manufacturer, and then touch the primer with your hand. If moisture is felt, painting will have to be postponed.
Instagram obshezhitie_slushaet
To ensure a satisfying result, you only need to paint a flat, primed, dry wall.
- Walls
How to paint walls: a guide to paint selection and application techniques
Scope of application
Priming is an important point that will determine how effective the result of interior decoration with wallpaper will be. The primer solution allows you to achieve an ideal wall surface. This mixture, covering various defects, is intended to level the coating. It may have a coloring pigment, so the composition is often used as the main material for finishing ceilings or walls.
The primer penetrates deeply into the structure of the surface, so it fills cracks and micropores, and can bind dust residues, so the cladding will look perfect, and wallpapering will be done at the highest level without problems or complications. Using the mixture, the material on the walls is disinfected, which makes it possible to increase resistance to factors that can be biologically aggressive.
Using a primer, you can achieve good adhesion, which means that, thanks to the composition, the wallpaper glue adheres perfectly to the coating and the wallpaper itself. Thus, the canvases will not peel off either at the joints or in the corners, which is no less important.
The following types of primer materials exist:
- Acrylic primers are made with the addition of polymer binders. This option is best suited for interior surfaces. The material does not have a strong odor, dries quickly, and can also be applied before gluing various types of canvases. Using the mixture, you can greatly facilitate your finishing work. The hygroscopicity of the surface will be improved, the service life of the facing material will be extended, the surface will be protected from damage, and the consumption of the adhesive composition will be minimized.
- Latex is a natural component that is extracted from the sap of rubber. A primer based on this type in synthetic form is widely used during repair work. It is characterized by high strength, resistance to compression and tension, elasticity and water resistance. The primer is a clear liquid that, after drying, creates excellent adhesion.
How to calculate primer consumption
To find out how much primer will be needed for a thorough study of the entire room, you will have to calculate the area of the walls without taking into account windows and doors. The final figure is doubled (two layers of primer), and then multiplied by 1.1 (taking into account unforeseen losses of 10%).
Next, we turn to the table below and calculate the approximate volume of primer that will be required to finish the room.
Table 4. Approximate consumption of different types of primer.
| Primer type | Surface character | Consumption, g/m2 |
| Acrylic thinned | iron; wooden. | 43 |
| Acrylic undiluted | wooden; OSB, chipboard; plywood. | 130 |
| Alkyd | concrete; brick. | 130-155 |
| Acrylic | anything other than wood. | 110 |
| Universal | for any type of surface. | 60-100 |
The figures are approximate; the exact volume of primer consumed can only be clarified when purchasing the composition. It is indicated on the packaging of the mixture in g/m2 or ml/m2.
Flaws
Snow-white aquarium soil, along with its advantages, also has many disadvantages. That is why inexperienced aquarists are not recommended to use material of this color.
- Features of light reflection . The white bottom coating strongly reflects light. Some fish, especially small species, lose their brightness in such lighting. It is advisable to use snow-white material only in aquariums inhabited by large species of fish. For small bright varieties, a dark bottom of the reservoir is more suitable, on which they will look bright and contrasting. Unnatural reflection of light from below can negatively affect fish behavior. Some species may be frightened by such lighting and feel uncomfortable.
- Tendency to pollute . On white soil, organic residues are clearly visible, which gradually accumulate at the bottom. In order for the substrate to retain its original shade, it must be cleaned regularly. Contaminants on white soil are clearly visible even in its lower layers, so such a substrate must be carefully siphoned.
- Color change . Over time, the white soil changes color and turns yellow. The porous material that is most susceptible to this is coral chips. Marble and quartz turn yellow less. The dyed substrate can remain snow-white when used for many years. Yellowed substrate cannot be returned to its original color by simply cleaning the bottom of the aquarium. It has to be taken out, washed thoroughly and bleached with special products.
- Tendency to fouling . Algae are visible much better on a light background than on any dark background. Dealing with fouling is difficult. Algae do not develop only in very low aquarium lighting of less than 0.3 W per 1 liter. But at the same time, most aquarium plants grow poorly. In herbalism, algae can be successfully combated using chemicals. But it is better to use the natural enemies of this greenery - algae eaters.
- Change in water composition . White marble and coral chips can significantly increase water hardness. These materials cannot be used in aquariums where fish or plants require acidic water with low hardness.
Source