Choosing a material for wall decoration is not easy. It must be beautiful, practical, durable and, preferably, inexpensive. Venetian plaster meets almost all of these requirements. It is beautiful - it looks like natural marble, it is practical - the waxed surface can be washed repeatedly, it is durable - if you do not scratch it on purpose, it is not damaged, it can be applied to any surface - smooth, curved. Just the perfect finishing material. But, as usual, there is a “but”. She is expensive. This is the first minus. Second, it’s difficult to apply it with your own hands. Or rather, it’s not difficult to apply; it’s difficult to get a beautiful surface without experience. But you can try or hire a professional. But before concluding an agreement, ask for customer contacts. If you succeed, see the results of the work yourself, or call and ask about your impressions.
Origin story
Decorating a room with Venetian plaster is a very unusual solution.
This method of interior decoration dates back to Ancient Rome. During the construction of marble buildings, small pieces of stone remained, which were used to decorate the walls. The appearance of the coating is indistinguishable from marble.
During the Renaissance, Venetian became widespread due to its water resistance and ability not to collapse under the influence of temperature. These functions turned out to be useful in Venice, where, due to the abundance of canals, there was an urgent question of finding a finishing option whose quality would not depend on humidity.
Plaster made from marble chips solved the problem and acquired the name: Venetian
Features of mosaic chips
In appearance, this variety resembles a fine-grained composite made from any crushed mineral (granite is the most widespread).
This option can be used when renovating a kitchen only if it fits harmoniously into the overall style of the interior. Many experts pay attention to the fact that this option is also suitable for finishing the hallway and corridor.
If we consider external decoration, it is necessary to note the existence of a special type of mosaic, with the help of which only the facades of houses are finished.
Composition of the Venetian
Since antiquity, the composition of the material has not changed much: stone chips are bound with a special substance, then a dye is added to enhance the resemblance to stone. The putty consists of 100% natural materials, is hypoallergenic, and breathable.
Binder
First, slaked lime or acrylic compositions are used to prepare the plaster. The mixture with the latter dries faster. The manufacturing principle is the same: mix with stone dust, add pigment. If the end result resembles marble without joints or seams, then the composition is the same as that sold in stores.
Stone chips
Initially, the coating replaced marble due to its cost. Modern technologies solve more problems. Crumbs are made not only from marble, but also from granite, onyx, quartz and malachite.
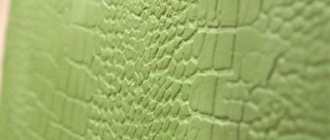
The coarser the grind, the greater the wall roughness effect.
The finer the stone dust particles, the smoother the wall surface will be. Coarse grinding creates the effect of rough, hewn stone.
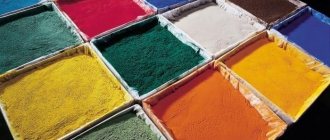
Dye
The pigment enhances the resemblance of plaster to natural stone. Popular tones are natural: white and gray, brown, green. Dyes in the 21st century. remain natural, but help make the shade rich or muted, soft. To create a pearly shine, mother-of-pearl particles are added to the composition.
Features, properties and advantages of Venetian plaster
The Venetian is a symbol of luxury and elegance. But this is not the only thing that makes it the preferred choice for finishing.
Appearance
There are 6 common types of coating, each of which has a unique character.
Veneto
Imitation of polished, smooth marble. The semi-matte finish will add Italian chic to your chosen interior. The composition is easy to use, so it is recommended for those who decide to do the repairs themselves.
Carrara marble
The name comes from a valuable type of marble that is mined in the Apuan Alps. It is distinguished by deep tints of halftones. When a master wants to achieve such an effect on a surface, he applies the plaster in layers of slightly different colors.
Finish with Carrara marble effect.
Trevignano
The next option is to apply layers of plaster in several tones. Here the result is similar to the travertine rock: hollow, light shades. The strokes are applied with movements in different directions, the depth changes. This is how the effect of a play of light is achieved.
Marbello
Polymers that form luminous veins are added to the finished mixture. The result is a refined, velvety surface with glossy edges. The color changes depending on the lighting angle.
Encausto
It imitates not marble, but granite. It has a semi-matte surface with dark veins. Requires regular waxing to increase service life.
Imperiale
The peculiarity of this type of coating is the gold pigment in the mixture. The coating shimmers and shimmers; several dozen shades can be distinguished. Embodies luxury in its classical sense.
Resistance to mechanical stress
Venetian plaster is applied in layers, placing them one on top of the other. When it dries, it is saturated with carbon dioxide and a solid acrylic film is formed on top. Therefore, there will be no scuffs or scratches; you can use it to create a bright accent even in a nursery.
Not afraid of water
The next useful property: Venetian is resistant to moisture and has excellent air permeability. It is often used for finishing in kitchens and bathrooms. It is worth choosing smooth types of coating, because fancy surfaces are more difficult to clean from dirt and dust.
And with additional wax treatment, Venetian plaster can be washed with soap without damaging consequences.
Gives strength to the plastered surface
Thanks to the polymers in the composition, the mixture turns out to be highly plastic. Therefore, you should not be afraid of cracks or chips in the design. Over time it will only become harder.
No seams or joints
The main disadvantage of natural stone is cost. But the difference is not only this: the joints between the slabs, which disrupt the ornament and deteriorate the fastest. The same problem exists when using ceramic tiles. If you need a solid pattern, then using a Venetian will give the best result.
When finishing with Venetian plaster there are no seams or joints.
Color preservation
Due to its UV resistance, the color does not fade or become faded.
Life time
If you carry out the work carefully and carefully, Venetian plaster will last 10-15 years.
Material on the topic: Description of the “wet facade” technology
Popular types of plaster
The high demand for Venetian plaster contributes to the constant expansion of the range. Every manufacturer tries to attract customers with something new and unusual. This is how compositions with gold pigments, coatings with a metallic sheen and bronze veins appeared, shining from the inside and with a velvety-looking surface. The products of such brands as “San Marco”, “Clavel”, “Candis”, “Croston”, “Alpina”, “Optimist Elite” are distinguished by their special variety and quality.
Classic plaster is divided into types depending on the composition, since it is this criterion that determines the external characteristics of the finishing layer. Let's look at the most popular varieties.
| Name | Main characteristics |
Veneto Veneto | Water-soluble composition with the effect of polished marble. Odorless, ready to use, filled with marble flour. The operating temperature range of the coating is from +5 to +35 °C. Drying takes 24 hours, consumption is 0.350-0.5 kg/m2 when applied in three layers |
Encausto | Depending on the application method, it can create the effect of cork and polished marble with terracotta inclusions. Contains limestone filler and aged slaked lime. Drying time – 24 hours, consumption 0.7-0.8 ml/m2 for two-layer application |
Coccio Antico | Composition with the effect of natural stone with colored inclusions. Contains stone flour, lime paste, terracotta granules, inorganic dyes. Does not require dilution with water, has antiseptic properties. Complete drying time is a day, before operational loads – 20 days. Consumption 0.6-0.8/m2 |
Marbella | Waterproof composition with shiny veins, creating the effect of a velvety coating with chopped edges. Complete drying time – 24 hours, consumption per layer – 0.350 g/m2 |
Trevignano | Synthetic composition with a mirror effect. Forms a very decorative coating that is not prone to cracking. Does not require dilution, drying time is 24-36 hours. Material consumption – from 170 to 200 g/m2 per layer |
Imperiale | Lime composition containing gold pigment. Forms a coating with a metallic sheen and fine gold veins. Cannot be diluted. Drying time – 24 hours, mixture consumption – 200 g/m2 per layer |
Tierrafino | Acrylic composition imitating roughly processed marble with gilding and mother-of-pearl shimmer. The coating has an incredibly luxurious look. Complete drying time - from 12 to 24 hours, material consumption 0.6 kg/m2 for the base layer and 0.2 kg/m2 for the finishing layer |
Prices for popular types of plaster
Plaster
Material classification
When there are so many advantages to using Venetian, all that remains is to choose which coating is most suitable.
Embossed
You can prepare and apply it yourself if you study the technology in detail, test your skills on primed cardboard or a small section of the wall.
The relief is obtained due to the presence of large stone granules in the mixture; it is interesting because the same pattern cannot be repeated. This coating makes the room memorable.
Smooth
Due to the variety of highlights and marble transitions, the finish looks deep, despite the lack of relief. And also the sun reflects off the smooth surfaces of the Venetian, making it seem to glow from within. Can be glossy or matte, as desired.
Artistic
With the help of the Venetian, paintings and amazing drawings are created. The finished work is amazing, but requires experience in finishing and careful preparation.
Artistic finishing requires a lot of experience.
Self-production
If you purchase the right amount of stone chips, making it yourself will help you save money. The price of finished material is high. When you have experience in finishing and the ability to learn new skills, making a Venetian on your own is not difficult.
Required materials and tools
To produce the mixture you will need the following ingredients:
- stone or granite chips;
- slaked lime or acrylic composition;
- water;
- laundry soap;
- pigments of the desired shade.
Necessary tools for manufacturing:
- drill with mixer attachment;
- mixing scoop;
- small to medium sized containers for storage and mixing.
Sequencing
The room temperature should be above +10ºC, and the room should be clean and dry. Sequence of work:
- An equal amount of stone chips and binder is poured into the container. The required amount of dye is added there.
- The powder is mixed with a soap solution.
- The mixture is brought to a creamy state and the color of the resulting plaster is checked for consistency. It must be remembered that when drying the shade will be 2 shades lighter.
Acrylic composition will be needed for finishing.
Consumer qualities
The consumer qualities of Venetian plaster are very high. Both polymer and lime “Venetians” have, perhaps, no competitors in terms of durability and decorativeness. They are environmentally friendly, do not have a pronounced odor, and are harmless after final setting. After finishing work, the tool can be easily washed with water without the use of harmful organic solvents.
Polymer plasters are very resistant to cracks, since when fully set on the wall they form a very flexible thin (no more than two millimeters thick) film and adhere tightly to the base. (In construction, this property is called high adhesion to the base.) Plasters of this type fit perfectly on almost any surface: wood, drywall, MDF, brick, concrete, primed metal. During operation, they can withstand temperatures from -50 to +80 °C. It should be noted that Venetian plaster gains its strength gradually over 28 days. At the end of this period, the decorated surface can be washed with soapy water and a brush.
Lime “Venetian” plasters are inferior to polymer plasters in terms of moisture resistance. But they have such important qualities as vapor permeability and resistance to fungus formation, which makes them indispensable in finishing, for example, wine cellars. The lime that is part of this finishing material only gains strength over time and, under the influence of air, is again transformed into limestone of a given shape in the form of a layer of plaster. This coating has completely unique strength and frost resistance. Thus, if the preliminary preparation of the wall is carried out correctly, then the service life of such plaster is hundreds of years.
If the final layer of “Venetian” is planned to be thick, it will still not exceed two millimeters. Therefore, preliminary preparation of the treated surface plays a special role. Often, when drying, the plaster seems to fall into barely noticeable scratches and flaws on the wall, enveloping them and making them visible to the eye. If there are pieces of old paint left on the surface, it will certainly get wet under the layer of applied damp plaster and fall off along with the new coating. And a wavy putty surface simply won’t give the master the opportunity to apply a design.
As a result, the wall must be perfectly leveled, as if for painting, and treated with elastic putty, and then impregnated with deep penetration primer. However, it should be remembered that you cannot use diluted PVA glue, since modern plasters simply will not adhere to it.
Techniques for applying Venetian plaster
Decorative plaster is considered a premium finish not only due to its appearance, but also because of the complexity of its application. If you master this skill, the result will be the most amazing textures.
Classic method
It consists of a brush stroke technique, but made not with a brush, but with a steel trowel. The entire wall is covered with brush strokes. The next ones are superimposed on the first ones, overlapping the previous ones, and so on until the entire surface is processed.
The process is repeated several times to increase the number of layers and create color depth. Then they move on to polishing and finishing.
Working with multiple colors
To create smooth transitions, for example, like Trevignano, you will need more than 1 color. Each color is prepared in a separate container and mixed during application. You can either apply colored layers, achieving a play of halftones, or apply several shades of plaster to the instrument at once.
“Marbled” technique
The type of application is suitable for those who are unfamiliar with the Venetian. It is simpler than the classic method, since you can edit what didn’t work out and shade it with sandpaper. First, using a narrow spatula, apply the shades of the future “marble” to the tool and, without mixing, apply it to the wall. Coloring occurs in wave-like movements, preferably in the same direction chosen in advance, in thin layers. The tones are mixed in the process and create the desired marble effect.
With cracking effect
In order for Venetian plaster to “crack” aesthetically, there is a special technique. Getting started - as in the classical method: primer, thin layers with strokes. Immediately after applying the mixture, heat the Venetian with a hair dryer until cracks appear. After complete drying, polish and apply an impregnating composition. When the impregnation dries, a layer of golden azure or another shimmering shade is placed on top.
The remains are removed by drainage. This is how graceful cracks appear on the coating.
Venetian plaster with cracking effect.
Glossing, waxing and sanding
An important stage of work in the process of creating the marble effect is glossing, or as it is also called ironing. This method is required to add shine to the surface. You need to work with a trowel on a completely dry surface. The essence of the method is to carry a trowel along the wall at an angle and with a certain pressure, as if you are trying to rip off all the protrusions. Often this glossing is performed after applying each layer, although sometimes this procedure is left only at the end due to the complexity of its implementation.
The Venetian trowel must be clean for glossing, however, as during other work. However, if during ironing, debris (grains of sand) gets under the trowel, this will leave scratches on the entire wall. A similar requirement applies to applying wax.
The last layer is also sanded. The very last layer of decorative plaster is sanded using fine sandpaper. This is done in order to create a smooth color transition over the entire surface and hide the boundaries of its transition. This method also makes the coating perfectly smooth. Venetian decorative plaster may lose its color and gloss after sanding, but we will return it.
Working with sandpaper will create a lot of dust. Although it does not fly very far, you will still need to cover all clean surfaces in the room with film. Also, after thoroughly sanding, you need to walk over the treated surface with a damp cloth so that no dust remains on it. The presence of small crumbs on the wall will not allow you to properly cover it with wax.
They are coated with wax for greater moisture resistance and to give the coating a glossy finish. It can be applied either with a sponge or with a trowel (it must be applied to the skin). If it is necessary to give the coating an additional decorative effect, then special powder is added to the wax. Immediately after application, without waiting for it to dry, the wax is polished to a glossy finish. A grinding machine is used for these purposes. If the wax layer was too large, then the glossy effect will not work. That’s why they prefer to apply it with a trowel, because then the layer always comes out thin.
Detailed instructions for applying to walls with your own hands
If working with the material does not seem difficult, then you can not spend money on craftsmen, but do everything yourself. The main thing is to act strictly according to the instructions and not forget anything.
Preparatory activities
First you will need to purchase everything you need for application:
- wide “Japanese” and narrow spatulas for setting the composition;
- Venetian trowel for application;
- sandpaper;
- plaster trowel;
- grinder with a grinding attachment;
Now you can prepare the mixture for application. Venetian plaster itself is white. To give the desired shade you will need pigment.
Tinting
It is better to choose the desired colors according to the fan. They are available from every company and include hundreds of shades. Even if you decide in the store that the desired color has been found, you must check it before adding it to the mixture. To do this, you will need a jar with a small amount of plaster, into which pigment is gradually added, as well as a white sheet of paper. It is good if the test takes place in bright daylight to avoid errors. The base color is adjusted using others close to it.
To create the desired shade, craftsmen use 3-4 colors. After preparation, the mixture is applied to the sheet in small strokes, and changes as it dries are monitored. The mixture is done correctly if the finished shade matches the example from the fan. When this happens, the dyes are mixed in the same proportions in the main container with putty.
Pre-cleaning
The first stage of work is to clean the surface from remnants of previous materials. Dust and oil, wallpaper glue, putty - everything must be completely removed so that a small defect does not spoil further work.
Elimination of the largest flaws
The surface must be smooth, durable, without cracks or chips, in order to support the weight of the material. If the base is prepared poorly, cracks will be visible after finishing. Large irregularities are filled with cement and sand, small ones - with putty.
Surface cleaning
To make the surface smooth after removing imperfections, you will need a side disc sander and sandpaper. Then a special basalt layer is applied to strengthen it.
Primer coating
One layer of primer will not be enough; in order for the surface to become as strong as necessary, 2 of them will be required. Between applications, breaks of 3-4 hours are taken to increase the permeability of the layers. A neutral primer is required, because Venetian is transparent and the underlying coatings will show through it. To achieve the desired effect, another layer of color may be needed.
Direct application of Venetian plaster
After all preparations, you need to wait 4-6 hours for the primer to dry completely. Next, you can apply the mixture using the method that was selected in advance. The first covering layer is applied with a thickness of 1-1.5 mm in multidirectional movements. Drying time for each level is 4-6 hours. Subsequent layers are made even more transparent, less than 1 mm, using the required technique.
Consolidation of work
Any defects are corrected before the Venetian layer dries. Afterwards the surface is polished and leveled at a slight angle. To consolidate the effect and make the work more durable, a layer of special wax is applied.
The contents of the jar are thoroughly mixed, then the same thin layer is applied to the coating. The area should be polished with careful strokes until a shine appears.
The process of applying plaster.
Buying Tips
The principle of purchasing plaster is similar to choosing a painting. You need to start from the work you like, then find out who its author is, and only then discuss the terms of the order with him. You can’t take risks here - buy paints for painting in suitable colors, and then search for an artist who would paint the canvas. The same is the case with the “Venetian”. It would be a big mistake to first purchase a jar of plaster, focusing on a tiny fragment of an advertising booklet, and then start looking for craftsmen who could reproduce this fragment on a wall scale.
The fact is that companies selling ready-made compositions focus primarily on professionals who apply the compositions, and small samples serve only as a navigator for the Venetian or architect. In addition, each type of coating requires a whole set of materials and a specifically designed technology, starting with the selection of primers and ending with the sequence of applying different color shades.
It should also be taken into account that even a large and reputable company may not have a complete list of coatings in its arsenal that will satisfy all the needs of the master. For example, Italian plasters are convenient to place on the ceiling, while French plasters, on the contrary, will give a thinner and more transparent effect on the walls, but will begin to flow off the tool when working with the ceiling.
All the subtleties of materials science cannot be considered in one article, so the only option is to rely on the opinion of a specialist when choosing finishing materials, setting him a specific task.
For help, it is best to contact studios that perform turnkey work and have designers, technologists, and craftsmen on their staff. They usually set a price that can range from 20 to 100 dollars per 1 sq. m. m depending on the complexity of the work and material consumption. Thus, in the event of damage to the plaster by craftsmen, the studio will pay these costs.
The company, as a rule, already has ready-made paintings of coatings measuring 30x30 cm. Many studios have entire collections of such samples, their own proprietary secrets and highlights. It is from them that you can determine the most suitable type of coating, then, after making a small advance, select a shade, textured pattern and make an individual paint job. It is also necessary to discuss with the studio designer how much the wall covering will correspond to the option you like.
The company, as a rule, guarantees the buyer a certain frequency of repetition of a given pattern (for example, 70 or 90%). You yourself will not want a 100% repetition, since when ordering handmade work, you would hardly be pleased to see a replicated square of coloring on the wall. You should not immediately purchase the full range of materials, since the work lasts more than one week, and the compositions, as a rule, are delivered gradually. If the chosen shade turns out to be unsuccessful, there remains the opportunity to slightly (but not radically) recolor the material at minimal cost.
Before starting work, the studio master prepares a reference sample using the technology assigned to him, thus demonstrating his skills. As a rule, large wholesalers have similar divisions in their composition or can recommend them as partners. There, craftsmen will receive free advice on applying plaster or take a paid master class. Its cost ranges from $50 to $300 (the latter price includes not just training, but the sale of proprietary techniques).
Important rules for performing work
The whole process requires care and precision. If you follow the rules, the work will be done efficiently:
- You should try to calculate the amount of dye added to the nearest gram, otherwise the next layers with the new composition will have a slightly different shade.
- The coating process begins from any upper corner and moves down, going a little to the side, so the Venetian will lie evenly.
- The pressure force helps to change the thickness of the layer; everyone chooses the optimal one for themselves.
- To avoid mixing of shades, the tool must be cleaned after each layer.
Recommendations from experts
1. You should always keep your tools clean, especially while working. At the end of the day, they should be soaked overnight in a bucket of clean water.
2. You can easily control the texture of the coating, change the length of strokes, the size of the drawings and the pressure force. The haphazard spaces between decorating contours and patterns look impressive.
3. It is necessary to carefully protect the material from debris and dust at all stages. It must be taken into account that each contaminant particle will stand out noticeably on the finished wall surface.
4. Don't be afraid to experiment with base layer colors.
Share:
Disadvantages of using Venetian plaster
Working with a Venetian has not only advantages. There are complications that it will be useful to know about before starting work.
High price
High prices are due to the cost of materials and the work of professionals. If you prepare the mixture yourself and apply it, you can reduce costs. But high-quality compounds are expensive, and you shouldn’t skimp on them.
Compliance with application technology
The work must be done exactly according to the instructions. Violation of the algorithm will result in the coating not sticking, cracking, or changing color or texture. Detailed videos demonstrating the work are freely available.
It is worth starting the interior decoration of the room after the desired result is achieved on the training surface: thin, light-transmitting layers, noble marble transitions of shades, the selected texture.
High demands on surface quality
Unlike wallpaper or ceiling coverings, Venetian plaster requires lengthy surface preparation. The Venetian will not hide flaws, but will make them obvious. Sometimes you have to make a reinforced mesh in addition to several layers of reinforcing primer and leveling to ensure that the coating lasts a long time.
Reinforced mesh is sometimes required for finishing.
Methods for preparing a mixture for plastering at home
Cooking Venetian can be done at home using the most common materials. The options for making Venetian plaster with your own hands are as follows:
- acquire the necessary components (stone dust, slaked lime, pigments), then mix all the ingredients proportionally;
- the finished composition is independently supplemented with various components to obtain the desired type of design;
- Stir the purchased mixture according to the instructions with water.
You can prepare the solution according to the following recipes:
- mixing 3 parts of sand (clean) with 3 gypsum putty, 1 part of construction gypsum mixture and stirring with water to the desired consistency;
- dilute the primer in water in a ratio of 1:2, adding gypsum putty while stirring until a homogeneous composition is formed, suitable for applying density.
Do-it-yourself Venetian Ready
-made formulations are more expensive, but more practical. Those prepared independently are much cheaper and allow you to create a unique interior, which can be judged from the photo.
Design options for different rooms with photos
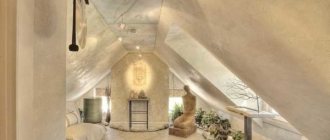
Venetian plaster is used to decorate not only palaces and columns. It would also be appropriate in a modern kitchen.
Venetian is not destroyed by water, so it is often used when decorating bathrooms.
It is not necessary to decorate the entire room. One wall in the living room will become a striking accent around which you can develop a renovation project.
Craftsmen with many years of experience are able to create amazing works of art from ready-made mixtures.
Whatever the idea, decorative plaster will help bring it to life.
Venetian plaster in the bathroom.
Photos of plaster in the interior of apartments
Read about Travertino plaster and take a look at photographs of silk plaster in the interior of rooms.Criteria for choosing a plaster mixture
It is recommended to prepare the mixture yourself if you want to practice the process. The stores have a wide selection of ready-made materials that only need to be given color. Professional tips for choosing a mixture:
- It is necessary to decide what surface the coating will imitate - marble, onyx, quartz, etc.
- Then decide whether the coating will be matte or glossy.
- Next, choose a mixture based on lime or acrylic. The first one is more difficult to apply, but has an interesting texture. The second one is stronger and dries faster.
Date of manufacture
It is recommended to check the expiration date indicated on the packaging. It lasts no more than 12 months in a dry, unopened form; an expired mixture cannot be used.
Marking
In addition to the date, the packaging indicates the conditions of use, composition, and drying time. This information will help in organizing work.
Popular interior decoration products
The choice of plaster is large, but there are the most popular mixtures, whose quality has been confirmed by time and craftsmen.
Ceboart marmorino
Plaster based on slaked lime with the effect of ancient stone. It has a marbled texture with veins. Initially white, can be tinted. Used in rooms with increased operational load.
Ceboart stucco
The mixture is also lime-based, but with a shiny, glossy marble effect. It is economical in consumption and produces a deep black color. Easy to polish. If necessary, it can be additionally coated with a protective material.
The Ceboart stucco mixture is one of the most popular.
Ceboglam
Finish coating based on metallic pigment and wax. Used to add additional shine to the surface. Sold in 4 ready-made versions: silver, gold, red gold, copper. Easy to wash and does not let water through.