Laminate flooring is practical. It has long proven itself on the positive side, so there is no need to prove the appropriateness of its installation. As a rule, it is used as a floor covering. If we compare laminate flooring with parquet and linoleum, then the former definitely wins in terms of efficiency, and the latter in terms of solidity. In addition to standard use, laminate flooring can be used to finish stair steps - this issue remains relevant for owners of houses with two or more floors and owners of apartment premises.
Laminate staircase finishing
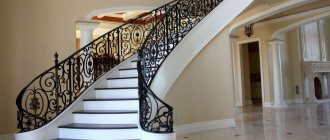
A staircase located inside a living space is a mandatory interior element of multi-storey residential premises. The task arises of finishing the staircase space so that it not only looks aesthetically pleasing, but also withstands any loads and functions for a long time.
There are a great variety of materials that could be used to finish the staircase, but laminate takes the leading position in terms of practicality. In terms of external parameters, it is difficult to distinguish from wood, but in comparison with it it has lower noise levels when moving over the surface. Significant advantages of laminate are its low price, ease of processing and the feasibility of easy replacement of worn parts.
It is possible to decorate the staircase space yourself, focusing on a fairly small budget. To make your idea a reality, you just need to better study the characteristics of the coating and learn how to work with it, as well as handle it correctly during use.
It is quite possible to finish a staircase with laminate yourself, if you take into account the technology and features of the coating
What do we know about laminate flooring?
Laminated coating without embellishment can be called the most cost-effective solution for cladding the staircase space, and this is supported not only by the budget cost. The advantage of finishing is that laminate is practical.
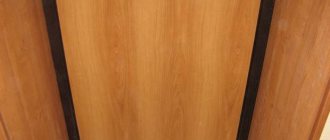
A flight of stairs on which a laminated coating is laid will not be visually different from wood, however, the noise level during operation will be much quieter, and before laying the coating there is no need to additionally impregnate the coating and varnish it.
Laying laminate flooring on a staircase is not a difficult task. You don’t have to specially prepare for it – anyone can do this kind of work. This type of coating lends itself well to restoration: those elements that have undergone severe wear and tear can be easily replaced. And yet, before you purchase this miracle material, you need to study the information about it better.
Laminate has a low price and aesthetic appeal, and its installation is quite simple, so it is a fairly popular material.
Recommendations
Laminate flooring should be laid in compliance with the following simple rules:
- Before installation, the lamellas must lie in the room in a horizontal position for at least a day to cool down or warm up to room temperature.
- Laying laminate flooring is only permitted on dry substrates. If a concrete screed was originally made, then laying the coating is permissible only after it has completely dried.
- Before starting work, the rough foundation must be thoroughly swept so that there are no pebbles or other debris left on it. If you leave them under the laminate, sooner or later the substrate will tear first, and then the coating itself will be damaged.
- To identify differences in the subfloor, you should use a long rule or level - the slightest deflections will be visible in the gaps that appear.
- It is best to lay the planks away from the window so that the seams along the locks are less visible in daylight.
- Compensation gaps 8–10 mm wide should remain between the walls and the laminate. Without them, the laminated coating, during thermal expansion, will rest against the wall surface and rise like a mound in the middle of the room.
- To prevent the slats from moving during installation and closing the gaps along the walls, spacer wedges should be placed. Then they clean up.
- Compensation gaps must also be made in the middle of the room if the coating is more than 10 meters long. Afterwards, these seams must be closed with decorative thresholds made of plastic or metal.
- The substrate and waterproofing should be glued with tape at the junction of their individual strips. At the same time, you cannot nail this sublayer to the rough base with nails or screw it with self-tapping screws. Gaps are not allowed here.
- The first row is laid against the wall with a tenon, for which it is pre-cut so as not to interfere.
If the walls are uneven, then special attention should be paid to placing spacer wedges and laying the first row. The smoother the first slats are laid out, the more reliable the connection of all the remaining slats will be.
If you strictly follow the given step-by-step instructions and recommendations, the laid laminated coating will last for many years. There is nothing particularly difficult about its installation. In order to figure out how to choose the entrance door to an apartment and then install it, you will have to use your head completely. With the floor finish in question, things are not so scary.
Step-by-step instruction
Main features and properties of laminated coating
The laminated coating consists of several layers; in addition, depending on the class, it can be used in places with different traffic levels. A flight of stairs is usually exposed to constant loads - for this reason, in order to finish it, you will need to purchase laminated material of at least class 31.
The basic components of each unit of laminated coating are such layers.
| Layer | Description |
| Protective layer | The class affiliation of a material such as laminate depends on it. Important! When choosing a laminated coating, you do not need to focus on the thickness of the element - the duration of operation does not depend on this factor. How the material will wear out is affected only by the thickness of the very first protective film layer. Each time, initially check the abrasion class with the consulting staff and only then study the other properties of the coating. |
| Decorating layer | It is responsible for the surface relief, color and tint characteristics. The laminated coating can be made to look like wood or natural stone, tile, leather, textile and other materials. As soon as the top layer, which acts as protection, has worn out, the decor will still serve successfully for some time, but you will need to think about replacing individual elements at this stage. |
| Fibreboard panel | A base that simultaneously provides the necessary strength and elastic properties. It is made from small wood particles, pressed together and secured with an adhesive. Important! Unfortunately, laminated coating cannot be classified as an environmentally friendly material, but the division of products into classes regarding this parameter is still provided. Information about this will be provided later in the article. |
| Moisture-repellent stabilizing layer | Thanks to it, the coating element is protected from the effects of wet conditions that can be created, for example, by a concrete base. |
Laminate consists of several layers, and each has its own purpose.
In addition to this, the laminated coating is protected from moisture by a backing material, which is first laid out on the base. If you spill liquid on top of the coating, quite unpleasant things can happen, for example, water penetration into the joint space, the fiberboard will absorb moisture, and even preliminary wax treatment will not help in this case. Ultimately, the laminated element will swell, the locks will diverge, and it is also possible that the laminate will become a “house.”
Based on these data, we can conclude that for high-quality and long-term operation of a laminated coating, factory processing will not be sufficient. It is important to use the material correctly and carefully.
Important! Carelessly wet cleaning and leaving excessive amounts of water on the coating can significantly damage the appearance of the coating and shorten its service life.
How to properly clean laminate flooring so as not to spoil the material
To protect yourself from this kind of trouble, you need to strictly remember the following: wet cleaning should be carried out only with a thoroughly wrung out cloth - this will promote the rapid evaporation of water, and not its absorption into the laminate. If you accidentally knock over a container of water, you need to collect it as quickly as possible - time is of the essence.
Laminate prices
§ 2. POSSIBLE PROBLEMS
When finishing stairs with laminate, many encounter the following problems:
- The first step is usually different from all the others, since on the side it protrudes significantly beyond the bowstring. In this case, it is worth using a template, the dimensions of which will allow you to cut the laminate panels more accurately and competently, so that there is no significant overrun.
- When finishing a straight flight of stairs, determining the shape of the steps is not difficult. If you decide to finish a spiral staircase with laminate, then for each step you will have to make a separate template from cardboard. Of course, such a process is much more painstaking, but it will help eliminate a large number of defects.
- All steps of the stairs must be completely covered with laminate. This is the only way you can achieve the strength of the coating, which is so important for the operation process.
Laminate stairs
Selection rules
Now we should return to the main point. What points should you pay attention to when choosing a laminate?
- The class of the laminate is the most important indicator that influences the service life of the laminate. The higher the class, the longer the coating can last, but its cost in this case also increases.
- The thickness of the elements - there is a range from 6 to 10 mm, there are examples of 12 mm. As this parameter increases, the strength of the element also increases. Installation of such a coating is not difficult, and squeaking is significantly reduced during service.
- Width is of particular importance when it comes to covering the staircase space with a laminated coating. It is no secret that the height and depth of the steps are known in advance, and the convenience of cladding will lie in the correct choice of material, which will avoid cutting the boards. It is better to take care in advance that there are no lock joints in place of the stair tread to avoid their divergence.
When purchasing material, you need to pay attention to the class of the material, its width, thickness, warranty period, etc.
- Safety. Household members who decide to decorate a staircase with laminate should not suffer due to low-quality material. The laminated coating has an environmental classification. If you plan to finish a staircase opening inside a living space, then for these purposes it is optimal to use a laminated coating of class E1 - it meets European standards.
- The warranty period indicated by the manufacturer usually varies from 2 to 6 years. Of course, these are specially reduced numbers. Practical use of laminated coating indicates a 10-year service life, but this is only true if used and maintained correctly. A significant advantage is the manufacturer’s confidence that its products will last longer than similar ones from a competing plant.
- The company engaged in production – here the division is made into China and other countries. No offense to Chinese manufacturers, whose products are also of high quality, but they usually purchase unsatisfactory material that is cheap. It is impossible not to mention Swedish, whose products have proven themselves in the consumer market and give the buyer confidence in purchasing high-quality, practical and aesthetic laminated coating.
When selecting a laminated coating, you should look at the surface texture of the board. “Slippery” types should be excluded to avoid injury to the elderly and children when moving up stairs. You should not buy polished material - it is better to give preference to matte or semi-glossy types.
You should not buy “slippery” types of laminate - it is better to purchase either a semi-matte or semi-gloss look
When using a staircase opening, as a rule, it is not subject to high weight impacts, exposure to water, furniture and other interior items. Based on this, it follows that for stairs it is not necessary to purchase laminated boards with increased strength characteristics. An important point when choosing a laminate for steps is the coating class.
If the stairwell is located in a private residential building where the average number of household members lives, then class 31 is sufficient. The wear resistance of this laminate is low, but quite sufficient for everyday use.
Laminated coating of class 32 has greater strength and service life. The variety of colors and textures is more impressive compared to the 31st class. It is an excellent solution for families with a large number of people and those who do not plan to quickly replace the coating.
If the flight of stairs will undergo constant load of a large number of people, then class 33 or 34 laminate should be considered. Coatings with such characteristics can be used in crowded places: offices, shops, cafes and clubs. Laminate of classes 33 and 34 is distinguished by durability, abrasion resistance, a variety of color and texture solutions, but a significant disadvantage is the high cost.
Which class of laminate is best to purchase for finishing stairs?
If you choose the right size of laminated boards, then when cladding the staircase space you will significantly save time, since you will not have to additionally trim the material. It would be ideal if:
- the width of the element is equal to the width of the tread, taking into account the applied decor from the edge of the step;
- the length of the laminated covering element is equal to or greater than the length of the step.
Important! There is a wide variety of laminate sizes on the consumer market: from 80 to 200 mm in width and from 500 to 1500 mm in length.
To maintain the style, you need to choose a laminated coating for finishing the staircase space, similar in color and texture characteristics to the floor. Such decor will preserve the harmony of the cladding in the living space.
Step-by-step instructions for carrying out work
Let's consider the complete technology of covering stairs with laminate, taking into account the installation of an edge profile.
Method #1. Using a custom profile
1. If there is old covering on the steps, it must be removed. Linoleum, carpet, old paint - everything must be eliminated. Traces of glue and grease are also removed. Remove nails, staples, screws.
If the initial shape of the step suggests the presence of a protrusion (the tread hangs over the riser), then it can be cut off with a jigsaw. Or close the space under the steps by attaching several bars to the vertical plane of the riser, and a sheet of plywood on top of them.
The surface of the concrete staircase is leveled if possible. Potholes and irregularities are filled with cement mortar (if the gaps are large - with concrete). Then, after the solution has dried, the surface is sanded with sanding paper. To remove cement dust, the steps are vacuumed and then wiped with a damp cloth. For tighter adhesion of the glue, a layer of primer is applied to the concrete surface using a roller or a wide brush.
With a wooden staircase that is planned to be covered with laminate, things are different. First, check all supporting elements for creaks, loosening, and subsidence. If something from this list occurs, they go through the parts of the structure - remove them (in some cases, replace them with new ones) and fasten them again, more tightly. Gaps, cracks, and depressions are filled with wood putty.
2. Measure the length and width of the steps (treads and risers), transfer these dimensions to the laminate board. Cut out the blanks (with a grinder, jigsaw, etc.) along the marked lines. All received panels are numbered so as not to confuse in the future which stage this or that workpiece is intended for.
3. Start attaching the laminate from the top step. Thus, during the installation process, the worker will move down without stepping on the newly laid lamellas (accordingly, without moving them until the glue has completely dried).
First, glue is applied to the riser (the vertical part of the step), a laminate board is placed on the surface, and pressed tightly to fix it. There should be a small distance between the surface of the next step and the attached riser board, equal to the thickness of the laminate used. This gap is necessary so that the underlying tread board (the horizontal part of the step) can be pushed under the riser board. The gap is created by installing support pads under the vertical riser board (for example, bars or special spacers).
4. Glue is applied to the back side of the metal guide profile. The profile is laid on top of the step, on its edge, and pressed against the surface. In this case, an adhesive connection is not enough. Therefore, the top profile bar is additionally secured to the tread with screws. They are screwed in every 15 cm.
5. Apply glue to the tread and distribute it evenly over the surface with a notched trowel.
6. Lay a laminate board horizontally on top of the tread. If this is the first tread, running flush with the floor, the step lamella is connected to the rest of the laminated flooring in the traditional way - lock to lock. Subsequent tread boards are pushed under the overlying vertical riser boards.
7. A rubber insert is installed into the edge profile elements. The method of this installation will depend on the type of laminated profile chosen. In some cases, a rubber insert is placed on the tenon of the tread board. In other cases, the rubber insert is installed in the groove of the laminated profile itself.
8. All grooves of the laminated edge profile are filled with glue. Place the profile on a metal guide and rubber insert. The part must firmly “fall into place” so that there are no gaps left between it and the transition metal profile.
9. All stages of finishing work are repeated for each subsequent stage. That is, each step is sheathed sequentially, gradually moving towards the base of the stairs. The finishing sequence can be changed by performing each type of work sequentially. First, all the riser slats are secured, then all the metal profiles, then the tread boards and laminated edge profiles.
10. It is not recommended to walk on newly fixed slats for at least 24 hours until the glue has completely dried. It should be remembered that the main fastening of laminate covering elements on stairs is adhesive, which requires time to gain strength.
Method #2. Using L-shaped thresholds
This option is simpler, although the result of the cladding may be somewhat worse (in terms of decorative effect and strength).
1. Prepare the surfaces of the stairs (removing the old coating, cleaning, removing dust, and, if necessary, leveling and strengthening the elements).
2. Measure the length and width of each step and transfer the dimensions to the laminate boards. Cut out the blanks and number them.
3. Apply glue to the riser and spread it with a notched trowel. Glue the laminated board to the surface. The dimensions of the board should be such that the bottom edge does not reach the underlying step. That is, it is necessary to form a gap equal to the thickness of the laminate used.
4. Apply glue to the horizontal plane of the tread and spread it evenly with a notched trowel to a thin film. Press the prepared lamella onto the step.
5. The selected threshold is fixed at the edge of the step. The metal threshold is secured with screws, which are screwed into special mounting holes. Plastic thresholds are fixed using an adhesive connection (Liquid Nails glue is especially popular). Wooden moldings have universal fastening and can be mounted in any way.
6. The same work is performed for all lower levels.
7. After finishing the covering, you can walk on the stairs only after 24 hours. If the edge profiles are held solely by an adhesive joint, it is advisable to increase the curing period to two days. In this case, you can be sure that the cladding elements are properly secured.
How to prepare a surface for cladding
The wooden or concrete staircase space is pre-prepared before covering it with laminate. The laminated coating can be easily installed on:
- leveled surfaces;
- flat without strong altitude differences;
- stepped surface without protruding elements (nails, reinforcement, etc.).
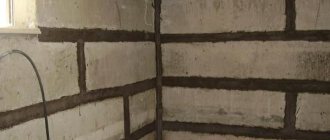
Before covering the stairs with laminate, you need to properly prepare the surface - eliminate differences and protruding elements
Preparatory stages.
- Inspection of the integrity and appearance of the surface for cladding.
- Elimination of interfering parts and protruding connecting parts.
- Freeing all treads from interfering parts.
It is necessary to use a level to measure all surfaces of the steps and grind if necessary. If depressions and depressions are found on the surface, they must be sealed using special material. After complete drying, you can begin laying out the laminated coating.
It is imperative to lay a waterproofing layer before laying the laminate flooring. If the staircase will be faced with concrete, then this stage is important, and it is strongly not recommended to skip it.
Before laying the material, you need to measure the dimensions of the steps
Types of edge profile (molding)
In addition to the laminate, the most important element of the staircase trim is the edge profile or molding. This is the name given to the overlay convex strip that is used to decorate the edge corner of the step. What is the function of molding? Everything is very simple. When finishing the stairs, two laminate strips laid on the tread and riser are joined together. An unaesthetic corner is formed, exposing the cross-section of two lamellas. To cover this joint and at the same time strengthen the strength of the laminate, edge profiles are used. They are placed on top of the joint and secured with glue or self-tapping screws.
Ordinary metal L-shaped metal thresholds are often used as an edge profile. They are also called staircases. These thresholds can be made of aluminum, steel, brass. Paintings like gold, bronze, steel or wood are popular.
Metal moldings have more than just a decorative effect. They protect the edges of the steps from wear. In addition, the surface of such a profile is often corrugated and this gives the surface of the steps an additional anti-slip effect.
Plastic thresholds - have the form of corners of different shades. You can easily match the color to your existing laminate flooring. Plastic thresholds ideally protect the edges of steps, form an even angle, and hide unevenness. They differ from other stair thresholds at a low price. They are attached primarily with glue, so when installing plastic thresholds, special attention should be paid to choosing high-quality, durable glue.
Wooden sills are another option. Such thresholds go well with laminate flooring and have a long shelf life (in addition, they can be easily repaired - sanded, puttyed, painted). The disadvantage of wooden moldings is their high price. Fastening is done either with glue or with self-tapping screws (bolts).
In addition to the usual corner thresholds, there are also special laminated profiles attached to the steps using metal guides. For example, similar Incizo profiles from Quick Step (Belgium) are widely known. To install such a profile, a special L-shaped aluminum strip is used, available in several standard sizes (the height of the strip from Quick Step is 7, 8 and 9.5 cm).
To install this type of edge profile, a metal guide strip is attached to the surface of the step using screws. And then, a laminated profile is inserted into its grooves (with glue). In this way, the fixation of the profile is as strong as possible, while it is possible to do without metal fastening elements visible on the surface.
What you will need to complete the cladding
To cover the staircase space with laminated material, you need to have the necessary tools. In stores you can purchase a ready-made kit for laying out laminate flooring, it includes:
- hammer;
- fine-toothed saw (electric or manual);
- ruler, square and any measuring accessories;
- pencil for marking;
- drilling tool with a set of drilling attachments;
- bracket and block for tapping laminated boards to eliminate cracks.
In order to qualitatively and reliably connect the coating elements to the surface, you will need an adhesive composition and self-tapping screws.
Before laying out the laminate, the underlay material is first laid, which is marked and cut in accordance with dimensional requirements.
Before the laminate is laid, you need to place a substrate, which is necessary for sound insulation and protection of the laminated coating itself.
Thresholds, profiled material and corners are used for decorative finishing of joints between panels. This information will be presented in more detail later in the article.
It makes sense to mark and cut the laminated coating and backing material in advance.
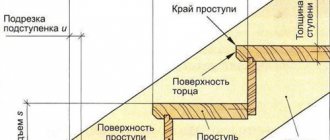
Cutting
This is an important point that, with the right approach, will help to significantly save material. The fact is that the sizes of the treads and risers (the vertical sections connecting the lower and upper treads) are quite different and do not correspond to the sizes of the laminate panels.
Therefore, cutting the material should be done in such a way that there is as little unused scrap as possible.
It is necessary to calculate the width of both elements and use the panels as efficiently as possible. If the width does not allow for adequate savings, you can try an option in which the risers are designed not with horizontal, but with short vertical stripes.
This method makes it possible to almost completely use the panels, the size of the scraps is minimal. The only drawback of this method is the presence of multiple joints, which some users find unsightly.
However, this design technique is quite common; the appearance of the staircase practically does not suffer from it.
How to prepare material for cladding
Before finishing the staircase space, it is necessary to prepare the laminated coating. Laminated elements are cut taking into account the dimensions of risers and treads and taking into account the finishing materials, thresholds and profile units used.
Tread is a horizontally located element of a step.
Risers are a vertically located element of a step.
Important! Laminate material should be trimmed in such a way as to reduce waste as much as possible.
You should try to trim the material to a minimum - this will save money, and entire parts of the laminate look more beautiful
If, when performing width cladding, it is not possible to avoid excess waste, there is the option of laying the covering on the risers from vertical shortened material. This technique makes it possible to use almost entire laminate elements. The only disadvantage of this method is the increased number of butt joints; it will take more time to cut the material. Due to the economical consumption of material, such tactics are common when facing stairs.
Which laminate is suitable for finishing stairs?
The steps of the stairs experience heavy loads during operation. Therefore, household material with a thin protective layer is not used for stairs. Laminate classes recommended by experts for covering stairs are 31, 32, 33, 34. These are commercial laminates intended for surfaces with heavy loads. The first number in the marking (3) means that the laminate belongs to the commercial class. The second number (1,2,3,4) determines the thickness of the protective top layer.
The second characteristic important for finishing stairs is the width of the laminated slats. Ideally, one laminate board in width should cover the entire plane of the tread or riser. Otherwise, if the step is wider, for finishing you will have to use several slats and connect them with locks. The surface finished in this way is less durable than a completely monolithic one. If the stairs have flights (platforms), lock connections cannot be avoided. In these areas, the laminate is laid in the usual way, that is, lock to lock.
Important points when using backing material
If you decide to finish the staircase space, you should know that laying the underlay is required first. It is necessary to reduce the noise level when walking, i.e. works as a damper.
Basic functions of the backing material:
- good elasticity;
- high-quality depreciation;
- ability to eliminate noise.
Raw materials most often used for the substrate:
- cork (roll or sheet format);
- coniferous;
- expanded polystyrene;
- polyethylene foam.
Cork raw materials are environmentally friendly, are easy to use, and have the ability to restore their original shape. The only disadvantage is the high cost.
Coniferous backing material is considered an expensive option; it is made from natural raw materials and has good strength characteristics.
The most economical options are considered to be substrates made of polystyrene foam and polyethylene foam; in addition, they have the ability to absorb noise and isolate the coating from moisture that can be released by the base.
To prepare the staircase space for finishing, all of the above types of substrates are suitable.
Substrates made of polystyrene foam and polyethylene foam are considered cheaper, but cork and coniferous substrates are considered more expensive.
The thickness of the underlay material will depend on the condition of the steps. If it leaves much to be desired, then you will have to use a thick substrate:
- 2-3 mm if the treads are leveled and have no defects;
- 4-5 mm if the surface is uneven.
It is necessary to take into account the fact that laying out the underlay material helps to increase the height and reduce the width of the steps. The difference with the original parameters will be small, but if the cladding tactics are not adjusted, gaps may appear.
The use of counterfeit material is not necessary if two conditions are met:
- the laminated coating has sufficient noise-absorbing properties;
- cladding will be carried out using adhesive or liquid nails.
If the surface of the stairs has uneven surfaces, you need to take a slightly thicker underlay - 4-5 mm
Prices for laminate underlayment
Fastening technique
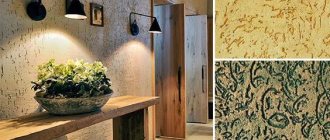
The technology for covering concrete walls in the hallway and toilet is quite simple, easy to do with your own hands, but has several features. There are two methods of fastening.
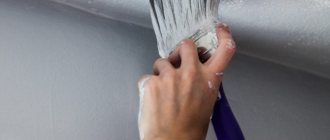
- The first option requires the presence of an ideal flat surface, which rarely happens. The walls need additional preparation so that unevenness does not turn out to be unpleasant moments later. Laminate flooring is glued to concrete either with liquid nails or with special glue. Then they press it against the wall, and for better strength they coat the clutch lock with glue. This method is suitable for decorating internal wooden partitions.
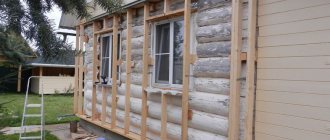
- The second option involves laying it on a lathing made of wooden or metal slats. This installation is not afraid of small uneven walls, plus you can additionally insulate and soundproof the room. Many manufacturers on the market, focusing on the popularity of the technology, produce special fastening systems for sheathing.
Let's sum it up
Now you know that laying laminate flooring on a staircase opening is a feasible task for anyone. Nevertheless, to avoid the occurrence of some errors, it is worth taking the issue seriously. Take time to familiarize yourself with the stages of work, the features of a particular material, and study all the intricacies of installation.
Before covering the stairs with laminate, you should first remove the old covering
A staircase is a design that has its own characteristics that should be taken into account. Depending on these subtleties, the duration of the work and the amount of material used will depend.
Experts recommend removing worn-out coverings when it comes to lining an old stairwell. Rush in this matter is unacceptable; there is a high risk of damage.
A thorough and serious approach to business is the key to successful repairs.
Laying
It is customary to start covering the roof with your own hands from the top, so that, gradually lowering, you can avoid walking on the freshly laid material. This rule does not always apply, for example, when facing the stairs leading from the basement or basement, it is more reasonable to do the opposite.
Procedure:
- A strip of backing is cut to fit the tread. Fixed with an adhesive layer or with a stapler.
- A strip of laminate for the top step is cut. Usually the width of the tread is greater than the width of the panel, so you need to immediately prepare both parts for joining .
- A layer of glue is applied to the surface of the laid substrate and spread over it with a notched trowel. The laminate strip is laid on it, precisely aligned along the edges and pressed down with something heavy (for example, a board with a weight on top).
- A strip of laminate for the riser is measured and cut. It is glued into place in a similar way, but without a backing, since in this case there is no point in it . It is fixed using self-tapping screws along the edges, clamps or other devices that are at hand.
- In a similar way, the material is installed at all subsequent stages.
NOTE!
The glue used for installation must have a short setting time, otherwise the entire work will be constantly slowed down due to the need to wait until the adhesive layer dries.