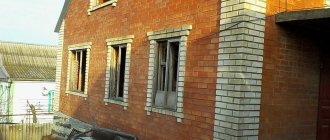
Method of finishing basement walls
For any country house, the basement is its foundation. The correct operation of the premises affects the condition of the foundation of the house, the existing ceiling between the basement and living quarters.
The area that can be used in a variety of ways also has an impact, which determines the decoration of the basement walls. The article will tell you the features of basements and their finishing.
To make the basement comfortable
Not only the comfortable operation of the basement floor, but also the house as a whole depends on how correctly the foundation part of the building is equipped.
Firstly: the basement walls bear the load from the weight of the building and everything that is in it - therefore, their safety factor should not be in doubt.
Secondly: improperly performed waterproofing, or the lack thereof, often provokes a capillary effect of moisture absorption by the walls of the house, which can become damp all the way to the roof. Our instructions are for those who are not familiar with construction technologies, but really want to build a house with their own hands.
Technological nuances of wall construction
When it comes to the basement under a building, the concepts of “basement walls” and “foundation” are inseparable. Many consider the reinforced concrete foundation to be the strip on which the basement walls rest.
This is, of course, true, but there are house designs where there is no tape as such, and it is the basement walls that are the foundation.
Note! To fill the foundation and walls of the foundation, heavy concrete of at least M-200 must be used. Its composition is as follows: for 1 kg of M-300 cement, there are 2.8 kg of sand, and 4.8 kg of crushed stone. Water is added depending on the amount of cement: per 1 kg - 0.55 liters.
And only after this, after waiting the allotted time, you can begin arranging the foundation walls. Their height, depending on the purpose of the basement, can vary between 2-2.8 m.
Storage protection features
Creating the right conditions for storing food is the only goal of “cellar work”. The main enemy of vegetables is low temperature, at which the “roots and tops” freeze, losing their taste and almost all useful substances. It is optimal to store food at temperatures from +1 to +5°.
The second threat to vegetables, fruits and canned food is high humidity. And in this case, it is important not only to make high-quality waterproofing, but also to equip the most efficient ventilation system. However, it is done during the construction stage of the building.
In large basements, where other rooms are located in addition to the cellar, it is best to use its forced variety. If the room is used only for storing food, then natural supply and exhaust ventilation will be sufficient for normal air exchange and maintaining the required level of humidity (85-90%).
To resolve all issues, several factors must be taken into account. These include:
If we talk about a cellar built under a garage, then in this case an additional factor must be taken into account - the fire hazard of the upper room. Therefore, when choosing a potential insulation material, it is necessary to find out in advance about the degree of its flammability.
Insulation and finishing of basement walls
The decision whether to build a house with a basement, and how deep to deepen it, should be made depending on the quality of the soil on the site, as well as the level of groundwater.
You should think about how to decorate the walls in the basement, and how best to insulate it, based on the purposes for which it is generally intended.
As for waterproofing, its technology does not change in any case, be it a warm basement or a cold one:
Then there is only one way out - to attach the basement to the wall of the house. But, to be honest, in this case it is easier to purchase and install a plastic cellar. It will not provide much savings, but it can be installed very quickly. It is incredibly convenient to use, since everything is included in the kit - from the hatch to the shelving.
Victor Martovich
Source
We finish the cellar inside - protection from water and mold
Poor-quality cellar finishing can ruin even a spacious underground room and turn it into a cold and damp place with an unpleasant odor. Vegetables in such cellars are poorly stored due to high humidity; in winter, the crop can freeze and in spring suffer from groundwater rising on the floor. However, this situation can be corrected if the issue of finishing the cellar inside is approached with due attention. To do this, you need to be patient and have some free time. If you wish, you can even make a special design for the room.
Key points in finishing the basement of a private house
An underground room, on the one hand, is easier to insulate, since the soil temperature varies within much smaller limits than the air temperature. On the other hand, it is more difficult to arrange ventilation here. If the basement is turned into a living room, the air exchange must be very intense; this can only be done by installing forced ventilation.
There are other important points that need to be taken into account when decorating the exterior and interior.
Processing the outside of the cellar walls
The basement under a private house is large. If you intend to use it not only as a warehouse, it is better to take this point into account during construction.
Another important point is the nature of the soil. The cellar can only be built on solid soils. On heaving mobile soils, the cottage is placed on piles, which in principle eliminates the need for an underground floor. In the worst case, a monolithic foundation is built, which again excludes the ground floor.
In order to further use the basement for various purposes, the following work is performed.
For a basement floor with a high ceiling and a large area, a concrete screed is a better option. But if the cellar is used as a living space, it is necessary to carry out the whole range of work: arrangement of a drainage cushion, insulation, waterproofing, pouring a concrete screed and finishing flooring.
Engineering systems in the basement
The basement is equipped with all types of communications.
The number and configuration of engineering systems depends on the purpose of the room.
A few design tricks
Here are a few more tricks you can use to finish your basement:
- To visually increase the height of the ceiling, use vertical patterns on the wallpaper. The ceiling itself can be made multi-level using glossy tension structures.
- For low ceilings, use non-bulky, low furniture. Thus, the feeling of isolation will disappear, and the person will feel comfortable.
- If the basement of the house has a small area, you can expand the space with the help of mirrors.
Make your basement cozy!
Site consultant, builder-installer with 8 years of experience. He started his career as an installer-finisher, and currently works as a foreman in a company engaged in suburban construction.
Room decoration
Internal basement waterproofing
The interior decoration of the cellar includes a practical part and a design part.
Waterproofing and insulation
It is not always possible to achieve good waterproofing by installing only external waterproofing and a drainage system. But in order not to reduce the internal area of the basement, it is preferable to use coating and roll materials.
Insulation is carried out from the inside if it is not possible to perform thermal insulation from the outside. The scheme is traditional: they construct a sheathing, lay insulation in the cavity, cover it with a waterproofing material, preferably with a foil-coated outside, and finish it off.
The floor and ceiling must be insulated regardless of the nature of the external work. To insulate the floor, you can use bulk materials, such as expanded clay or plastic chips - this reduces the cost of construction. The ceiling is insulated using sheet materials: penoplex, polystyrene foam.
If a sauna or bathhouse is installed in the basement, the insulation and waterproofing work is much more complex and extensive.
Decorative finishing
PVC panels are easy to install
You can decorate the walls in a country cellar using a variety of materials. The choice determines the purpose, interior style, and financial capabilities.
Wall cladding must be combined with ceiling and floor finishing.
Color design of the room
It is preferable to paint the walls in light colors
The design of a basement or semi-basement in a private house is determined by the style and color scheme. The latter must be selected not only taking into account the stylistic requirements, but also the characteristics of the underground room.
The ground floor is precisely those rooms in the design of which preference is given to natural shades of stone, brick, and wood. This is due to the lack of natural light.
Lighting
The best option is white daylight
The level of illumination in the basement depends on the purpose. For storage rooms, 8 W per 1 m² will be sufficient. In a gym or spa, 10–15 is enough. But for a living room or playroom, at least 20 W per m² is required. However, these recommended values must be immediately multiplied by a correction factor.
The absence of windows creates an extremely depressing impression. To compensate, it is necessary to increase the lighting level and select the right light sources:
When decorating, you can also use lighting. However, it only plays a decorative role.
Source
Lighting
The wiring in the basement must be well insulated, as high humidity can play a cruel joke on the owners. If we are talking about a pantry or cellar, then even ordinary light bulbs will not fit here. It is necessary to choose special ones with a high level of moisture protection. This also applies to sockets: their design includes special caps that prevent liquid from getting inside. In residential basements, the lack of windows will have to be compensated for by numerous lighting fixtures, which are located at different levels. If your ceiling has several “steps,” then the point light sources built into them will become an interior element of the room, emphasizing its style. A chandelier or several equidistant from each other must be hung at the top if there are two (or more) combined platforms in the room. Sconces are attached to the walls, lamps are placed on tables, and floor lamps are placed on the floor.
A fireplace will bring a special flavor to the basement room. Its installation will be expensive, since due to the nature of the room you will have to hire a professional. The average person will not be able to cope with the task with his own hands. It is difficult to consider a fireplace as a source of light, but it is definitely a “source” of warmth and comfort in the atmosphere of the room.
What is a basement
Basements can be used for a variety of purposes.
When equipping a room with heating devices, here you can:
However, potatoes, root vegetables and fruits cannot be stored in dry and heated basements. For these purposes, rooms with an earthen floor and natural humidity that corresponds to the humidity of the earth are better suited.
Advice: A basement can be used as housing only if it is possible to keep its walls and floors dry. Otherwise, a damp room may cause deterioration in the health of the people living here.
When walls are made of concrete, their high thermal conductivity does not allow creating the desired microclimate, which requires insulation. Creating a ventilated structure for insulation helps improve the situation.
The ceiling can become a cold bridge, which is undesirable and will cause heat loss in the room. To do this, it needs thermal insulation.
We take care of thermal insulation
Having ensured high-quality waterproofing of the cellar, we move on to thermal insulation. What is it for? Thermal insulation allows you to maintain the desired temperature in the cellar, regardless of the weather conditions outside. This is important when storing and preserving vegetables, since high temperatures will promote crop germination, and too low temperatures will promote freezing.
To insulate the floor, you can use expanded clay or foam chips.
So, a plastic film is laid on the floor, and wooden or metal logs are installed. Thermal insulation material is tightly placed into the resulting cells.
Insulation of the cellar floor using expanded clay.
When laying thermal insulation material, it is unacceptable to leave voids. The entire space should be evenly filled with material. Then the surface is leveled and filled with concrete mixture. To increase the reliability of the floor, additional reinforcement is carried out. To do this, use a metal or fiberglass mesh.
After the concrete mixture has hardened, we begin finishing the floor. For this you can use various coatings and materials. It is not only the insulation of the floor that needs to be taken care of. The walls of the room also require attention.
For walls, heat insulators in the form of slabs or mineral wool are used. Installing insulating material is easy. The same insulation technology is applied to any material. The slabs are laid on the prepared walls and secured with special fasteners.
Don't forget, insulation is important (especially for food cellars).
What insulation is suitable for basement walls?
Basement walls must be insulated from the inside and outside. The correct choice of insulation is half the success when finishing the walls of such a room.
When purchasing material, it is necessary that it meets certain requirements:
These requirements are met:
Disadvantage: it burns easily, and when heated, it emits an unpleasant odor.
A serious drawback of the material is its high cost. And to apply it you will need special equipment and a master who performs such operations efficiently.
Advice: When working with glass wool, special attention should be paid to protecting the respiratory tract and eyes from small glass fibers getting into them. You should not use the material for external basement insulation.
After purchasing the material, it is necessary to prepare for the thermal insulation of the walls. For this:
How to insulate basement walls from the inside
Insulating the basement from the inside makes it possible to increase the thermal insulation of the entire house. But this technology is not very common due to the presence of dampness in the room, which, if there is thermal insulation inside the basement, can lead to condensation and additional exposure to fumes from it on the material.
The insulation may lose its positive properties and become deformed.
The process of internal basement insulation consists of two stages:
The most popular methods for carrying out the process:
Tip: To prevent the formation of condensation and excess moisture, ventilation holes should be provided in the base with a pitch of approximately five millimeters, which will ensure the circulation of air masses and at the same time remove fumes to the street.
The simplest and most common way to insulate a basement from the inside is to use polystyrene foam.
How to insulate the outside of basement walls
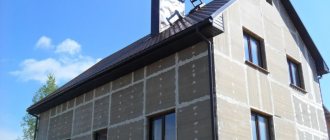
External basement insulation may be more important than internal insulation. In this case, the walls are protected from the direct influence of negative atmospheric phenomena, which does not allow cold from the street into the room.
When insulating a basement externally with polystyrene foam, the procedure for carrying out the work is as follows:
Advice: Insulation of the basement walls from the outside should be carried out at the construction stage, which will be much more convenient.
When externally insulating a building with rolled materials, such as: glass insulation; bitumen roofing felt required:
Subtleties when insulating basement walls
High-quality finishing of the basement walls creates favorable conditions for its operation.
Victor Martovich
Source
Preparatory work
Like the rest of the house, the cellar requires care and attention from the owners. The first thing you need to take care of is protecting the room from moisture. To do this you will have to resort to waterproofing. This way you will get rid of excess water inside the cellar and forget about mold forever.
A quick guide to waterproofing:
At the final stage, finishing is carried out (which we will talk about later) or, if necessary, insulation.
When finishing the cellar, use moisture-resistant materials. This will provide additional protection and a comfortable indoor microclimate.
How to finish the walls in the basement. Finishing the walls
Even if the basement has high-quality waterproofing and heating, it is better to use moisture-resistant materials. For example, drywall with water-repellent properties. If plastering is intended, then give preference to cement mortar instead of gypsum mixture. It is better to decorate the walls with water-repellent paint.
Textured (Venetian) plaster will make the walls elegant.
However, it is possible to decorate the walls with plastic or polymer panels, brickwork, “flexible stone”, and OSB boards. Finishing with natural wood looks luxurious and environmentally friendly.
Decorating the basement: color scheme
Interior designers confidently say that light colors should be used for the interior of basement rooms. Because they help to visually enlarge the room. The interior can be complemented with bright decorative elements, reproductions of paintings, and figurines. All this will help hide the gloomy atmosphere of the basement.
However, a little dark won’t hurt if you decide to highlight a certain interior object. For example, on the fireplace.
But you should absolutely not use dark colors on the ceiling. Because it will put pressure, act depressingly.
Lighting
Most often, the basement is designed in such a way that there are no windows at all. Or they are very small and located high under the ceiling. And they cannot provide sufficient lighting. Therefore, you need to add more light. But it is better to make a multi-level lighting plan. Ceiling lights will provide bright lighting in the basement.
After that, pay attention to zone lighting. This can be a combination of wall sconces, table lamps, floor lamps.
An excellent solution would be to install a light panel that imitates a window. The illusion of a large window is created. The feeling of enclosed space disappears.
Small design tricks
With the right approach, the basement of a private house can be turned into a cozy and useful room. Go for it, and you will succeed.
Thermal insulation of the cellar
Since our frosty winters are not the exception, but the rule, thermal insulation measures are the next necessary step. It is this protection that will ensure the optimal temperature in the room, which will not be affected by weather conditions.
Two materials often act as its insulation: expanded clay or foam chips. It is preferable to use the first, “obedient” one.
The presence of a mesh is not necessary, but it will be an additional guarantee of the reliability of the finishing coating.
Walls
To insulate them, slab materials are often used - mineral wool or polystyrene foam. Other contenders are foil thermal insulation and polyurethane foam. Thermal insulation boards are fixed either with special glue or with umbrella dowels with large caps. They are also called disc-shaped, or “parachutes”.
When insulating, corners, as well as areas adjacent to doors, floors and ceilings require maximum attention. On the finished insulated surface, a reinforcing polymer mesh is secured with “parachutes”, onto which plaster is applied. Other options for “hiding” thermal insulation material are wood, chipboards.
Ceiling, hatch
As a rule, the ceiling is treated in the same way as the walls. For example, many owners insulate it with foam plastic, which they simply put on glue. The thermal insulation is then reinforced with mesh, plastered, and then the preferred finishing coating is selected.
The hatch is another element regarding the insulation of which questions may arise. In this case, the owners solve the problem “to be or not to be” on their own. However, in most cases, a precise fit of the hatch (without gaps) and “framing” it with rubber seals is sufficient.
How to decorate the walls in the bathroom other than tiles. Bathtub wall paint
Paints intended for wet rooms have special formulas in their composition that protect the painted surface from moisture penetration and the development of various types of mold and fungi. Most often these are silver ions. They are available in a very wide range of colors, so you can perfectly match the color to your interior or furniture. Suitable properties, low price and ease of application to the wall make the paint a unique solution.
Paint the bathroom instead of tile? A smart decision, since bathroom paint protects the walls of the room from moisture and provides long-lasting colors. A bathroom without tiles is an increasingly popular solution. You can decorate surfaces with stickers, wall murals or even panels.
Tips and tricks
Current bathroom trends recommend minimal use of tiles, that is, only in the wet area. Is a bathroom without tiles practical? How to decorate the walls in the bathroom? You can paint the room, but be sure to choose special substances that are resistant to moisture. It’s worth making this decision when we don’t have a shower, when you want to create a special room design, for example, a Provençal, romantic bathroom in a rustic style, or you simply don’t want to invest heavily in plumbing.
How to protect bathroom walls from moisture when painting?
To paint the bathroom, use special paints that do not let moisture in and allow the wall to breathe. If the room is large, move the bathtub away from the wall as this will protect the plaster from splashing. If the plumbing fixtures must be next to a wall, you can use a large format wall mural or attach a mirror surface to the tile. This decoration of bathroom walls gives the interior style and a pleasant warmth that is always liked. A bathroom without tiles will have an interesting and cozy character, and the color of the walls in the room will undoubtedly be easier to change next season than investing in new tiles.
Paint or lime?
The choice of paint depends on the wall and floor covering. If you used concrete, apply a moisture-resistant base before painting. Without it, the paint will not last long, as moisture will cause it to peel off. In addition, there are materials with a water-resistant structure, for example, various emulsions. They have a wide range of colors and are quite durable. After applying the emulsion, you can choose the paint of the required color, depending on the design of the cellar, and treat the walls again.
Painting concrete with water-based paint.
When choosing paint, pay attention to its expiration date. Regular paint will last no more than one year. Due to the special microclimate in the cellar, enamel paint can “slide” off concrete surfaces after a couple of weeks. This is due to increased humidity in the room. Paints with a service life of more than five years are suitable for wet concrete; such paints belong to the group of silicate paints. They do not emit toxic substances and do not absorb moisture (water simply drains from them).
Whitewashing the ceiling with slaked lime.
Slaked lime is often used to finish the cellar. It is suitable for whitewashing in rooms with low humidity and good ventilation. Lime has antifungal properties, so if you're concerned about mold, it's a great solution for giving your cellar a makeover. Lime has long been known as an excellent means of combating pathogens. Another advantage of lime whitewash is its low cost. The same cannot be said about expensive paints, which are capable of releasing moisture from concrete, but do not allow it to penetrate into it. Such paints are made on the basis of liquid glass.
Paints based on liquid glass are mainly used in industrial enterprises and have a long service life. This coating is not afraid of strong moisture and temperature changes, so if you can afford such paint, you will forget about finishing the cellar for more than 15 years.
Also, an excellent competitor to lime whitewash is acrylic paint. It can be used to treat any surface. This type of finishing is also not cheap. However, the effectiveness of this method justifies the expense. With this paint you can update the design of the cellar and give it a more noble look. A wide range of colors will allow you to turn the most unusual ideas into reality.
How to decorate the walls of a dacha inside inexpensively. Interior decoration of a country house: the best options
Where to begin?
Most owners of country houses try to make them as comfortable, cozy and hospitable as possible. The atmosphere in the home should be calm and pleasant. The listed factors largely depend on the choice of suitable finishing materials. More recently, in houses, the walls were first plastered, then painted or wallpapered. Today, the market for construction and finishing materials offers many more products that can radically change the appearance of the environment, making it more harmonious and attractive.
Before you start covering the wall bases, you need to figure out what type they are and what they are made of. Only knowing these parameters can you choose the optimal finish.
When designing different foundations in a country house, a number of other features should be taken into account.
Front of future work
The cellar needs interior decoration not only to make it look as attractive as possible. High levels of humidity are often the first problem discovered in a room. This happens for several reasons:
Constant dampness and flooding are typical troubles that owners of houses with basements face. To successfully overcome problems and create an optimal microclimate for stored products, owners will need to provide the premises with high-quality protection. This work consists of 2 stages. This:
Another cosmetic renovation is another reason why people are interested in how to line the inside of the cellar. In most cases, during such work, the surfaces are plastered, and then the walls and ceiling are painted or whitewashed. Since cellars rarely have a large area, the task is simplified. You just need to get acquainted with all the features of the technology and find everything you need for work.
How to decorate the walls in the toilet besides tiles and plastic. Tile
This finishing method can be considered classic. Ceramic tiles have a number of advantages: moisture resistance, ease of cleaning, long service life, durability, reliability, aesthetics, hygiene, and the ability to choose various combinations in wall design. The disadvantages of such a coating include a rather labor-intensive installation process, higher costs for materials and the need for smooth walls.
If you need to first level the walls, then the order of laying the tiles is as follows:
Finishing a toilet with mosaics is also quite labor-intensive, but it allows you to achieve very different effects - in combination with regular-sized tiles, or on their own. Mosaics can be used to create entire artistic canvases, which will give the toilet uniqueness and exclusivity. It is sold in rolls and comes in different shapes - square, round, triangular. Before working with mosaics, you also need to prepare the walls accordingly.
Decorating the toilet with mosaics
Now the so-called 3D tiles have come into fashion - a special combination of tiles and carbon film, on which a three-dimensional image effect is obtained. This solution helps to visually expand the space, although it is not a budget solution.
Tiling involves using its elements strictly for their intended purpose. You cannot use floor tiles for wall decoration - they are too heavy and may fall off at the most inopportune moment. It is also not recommended to lay wall tiles on the floor - they are thin and fragile for such a purpose, and also slippery, which can be fraught with falls and injuries at the slightest increase in humidity.
You can choose tiles with standard strength, since at home they are not subject to such heavy loads as in public places.
Waterproofing
Any underground room needs high-quality protection from moisture. Cellars are usually built from ordinary concrete, so they are filled in the spring. This moisture flows along the walls in summer and autumn, and in winter it invariably freezes, expands and causes cracks to form in the walls. If you do not provide high-quality waterproofing, you may soon encounter serious problems. Among the potential troubles:
The last threat is the most difficult to deal with, so it is better to prevent this “living nuisance” in time. It is recommended to protect cellar walls from moisture using one of four means. In this list:
Working with all waterproofing materials will not create any difficulties.
Application of bitumen mastic
First of all, preparations are carried out in the cellar: the walls are plastered, a concrete screed is poured. If these stages have already been completed, then proceed directly to applying the mastic. The work is done with a roller. The material is spread in several layers, the thickness of all should be at least 2 mm. I recommend sprinkling the drying surface with sand.
Working with penetrating waterproofing
Before the operation, the walls are cleaned. Then, for better adhesion, the concrete surfaces are treated with a wire brush. Dust is removed. Penetrating waterproofing (water repellent) is applied with a brush or the same roller. After completing the procedure, the surfaces are regularly moistened with water for several days.
Using liquid rubber
First, the surfaces are leveled and cleaned of dust. Then the walls, ceiling and floor are treated with a primer, preferably in several layers, with a pause for each to dry. Liquid rubber is mixed using a drill attachment. Apply the waterproofing with a brush, carefully “rubberizing” all the irregularities.
Cellar protection with roofing felt
In this case, it is not the classic material that is used, but its fused version (Stekloizol). But he is not alone, as he acts as a “duet” with penetrating waterproofing. The craftsman will need a blowtorch for the job.
If the last operation seems too complicated, then it is possible to use simpler methods. For example, roofing felt is often glued to bitumen mastic. Another option is self-adhesive material. To fix it, the master just needs to remove the protective layer.
