Painting the ceiling surface is appropriate in any room. But when choosing a coloring composition, you need to take into account the characteristics of the ongoing processes and the purpose of the room. The paint for the ceiling in the bathroom must have certain properties so that the coating is resistant to high humidity, damage by microorganisms and has high aesthetic characteristics. It is equally important to apply the coloring composition correctly and carefully prepare the base. Then the result will not only please you, but will also last for many years. We will tell you how to paint the ceiling in the bathroom, as well as how to do it correctly.
What kind of paint should you definitely not use?
Below we will look at which paint is better to choose, but now we’ll talk about which one you definitely shouldn’t take.
Under no circumstances use oil paint or enamel, as they do not breathe and form a single film. Water does not seep through them, but micro-droplets collect on the surface, and this means only one thing - “fungus” or simply peeling of the paint itself is not far off. Literally bubbles.
Also, don't skimp on the paint's water-resistant properties. It doesn't cost much more, but it will last much longer. That's all there is to avoid when purchasing.
Choosing the Right Paint
There are not many types of paints. Let's look at them so that you go to the store already prepared.
Water-based paints are the most common and inexpensive option. It fits perfectly and has no smell at all.
In bathrooms they use waterproof emulsion, since the usual one is afraid of moisture and deteriorates very quickly in such conditions. The paint is easy to apply, very easy to mix with dye, but it has a significant disadvantage - it cannot be washed.
By and large, it is in the bathroom that there is rarely a need to wash the ceiling. It is always enough to walk over it with a dry, clean cloth. This is not a kitchen, where food splashes can stain the surface at any moment.
Acrylic paints are a better option. You can wash it, but not every day, of course, and not with metal sponges. The paint also applies well, it is more dense, therefore, it perfectly covers small cracks and unevenness in the putty.
Just small ones, don’t expect it to cover a poorly prepared ceiling. It has a chemical smell, unlike a simple water-based emulsion. But it fades quickly.
Very often acrylic waterproof paints contain anti-fungal additives. It is very rare if this is not the case, but still, be sure to ask the seller about this point.
Latex paints - for some reason they are always separated into a separate row, however, they are the same acrylic paint. It’s just even more dense and elastic. Otherwise, it has the same properties as a regular one, except that you can wash it a little more often (but still, without fanaticism).
Silicate or silicone paints - these paints are so dense that they can hide a crack two millimeters thick. In general, the option is, of course, very tempting, but since this paint is very expensive, and a two-millimeter crack is not so disturbing to life, it is better to get by with something more affordable.
If for this price it would equal the ceiling instead of putty, then we could take it. And so... There is no point.
In general, from all of the above it turns out that the best option today is acrylic paint.
We figured out what paint to buy. Now let’s touch on the question of how exactly to paint the bathroom ceiling.
Features of the bathroom
When deciding what to paint the ceiling in the bathroom with, you need to take into account the features of this room and the processes occurring in it:
- First of all, there is high humidity in the bathroom, so condensation often collects on the ceiling surface. Because of this, the best paint for bathroom ceilings is one that is resistant to high humidity and water.
- In addition to high humidity, frequent temperature changes are observed in this room. So, during a bath it increases, and at night it decreases significantly. In this regard, painting the ceiling in the bathroom should be done using compounds that are resistant to elevated temperatures and temperature changes.
- Don’t forget about surface care methods. When deciding what to paint the ceiling in the bathroom with, give preference to paints that form a coating that is resistant to moisture and friction. This way you can wash the ceiling with detergents using water, a sponge or a brush.
- It is equally important to take into account the environmental friendliness of the material and its harmlessness. Bathroom ceiling paint should not contain toxic components that are released during drying or heating.
- In a room with high humidity, various surfaces are often infected by microorganisms that thrive in such conditions. Therefore, when deciding how to paint the ceiling in the bathroom, give preference to compositions that contain antiseptic components and protect against damage to the coating by fungi and bacteria.
Which is better to paint: smooth or textured?
Surely you know that there are now special, shaped rollers on sale that allow you to apply paint not in a smooth way, but in a shaped way: in dots, stripes, etc.
This is all, of course, very beautiful, but do not forget that a bath is a bath, and floods and other troubles happen in it much more often than in other rooms.
Let’s say if your upstairs neighbors flood you, just a little, an ugly stain will form on the ceiling.
If the coating is ordinary, it costs you nothing to tint this piece, but a curly coating is not so easy. The same goes for a small spot of “fungus”.
It’s not a fact that after many years you will still have the same roller, it’s not a fact that it won’t dry out (even if you find it) and you won’t have to go buy another one... In general, it’s a complete headache, but the effect, to be honest, is almost none.
An even, smooth ceiling always looks more elegant than a textured one.
Tools
- A roller with a long handle is needed to apply the base coat of paint. Bathrooms don't often have high ceilings, so if you have a long enough handle, you won't need a ladder. The pile on the rollers should be of medium length. Use a small roller to work from a scaffold or ladder.
- A paint brush will be needed to paint certain areas on the ceiling where it is not very convenient to work with a roller.
- It is inconvenient to take the paint straight from the can, as small debris may get into it. To prevent this from happening, the composition is cast into a special tray . There should be a place to remove excess from the roller.
One container is used for paint; the relief surface is needed to remove excess from the roller.
- Clean rags are used to remove drops and sagging from the ceiling surface.
- A spatula is required to apply putty.
It is recommended to use glasses while working to prevent paint from the ceiling from getting into your eyes. Any headgear is used to protect hair.
What color should I paint the bathroom ceiling?
If you have a small bathroom, which is often the case in typical apartments, it is better to stick to a regular white color.
Firstly, it visually increases the space and even the height seems a little larger.
And secondly, from a purely practical point of view, repainting and tinting it in this case is easier. It is not always possible to select the exact color tone (in the case of flooding), therefore, you will have to “roll” the entire ceiling.
What to choose: matte or glossy paint?
Acrylic paints come with a matte or glossy effect. The second ones are a little more expensive, but they look more elegant.
The gloss there is not so sparkling as to have enormous reflective abilities, therefore, there is not much difference in the choice.
Let's say the same glossy stretch ceiling will cause great discomfort in the bathroom, since it has the ability to display glare from lighting fixtures. Lying in the bathroom, you often look up and the glare from the spots unpleasantly “hurts” your eyes.
In the case of paint, such inconveniences will not arise, since it shines, but does not have a mirror effect.
But there is a minus here: every grain of sand and unevenness is visible on the gloss. Agree, it is very rare when the ceiling is prepared so well that there is not a single smallest bulge.
But the matte surface is more “velvety”, therefore, the ceiling will look perfect, even if there are small errors on it. Moreover, as you remember, acrylic paint lays down in a rather dense layer.
Expert advice
Now you know what paint to paint the ceiling in the bathroom. Advice from professionals will help you avoid mistakes and minor defects:
- It is advisable to paint the surface without long breaks in work so that the paint layer does not dry out. Otherwise, streaks may appear.
- If you need to hide minor defects in the base, use matte paint. Glossy compositions require careful leveling of the base, because they highlight even small irregularities.
- Compositions based on the same components adhere well to each other, so when choosing a primer and paint, give preference to mixtures based on similar substances.
- To notice unpainted areas, take periodic breaks from working and inspect the ceiling from different angles.
When the paint coating dries, ensure the temperature and humidity conditions in the room specified by the manufacturer on the paint packaging. Otherwise, the drying time may increase and the surface will be of poor quality.
Which company is better to choose?
We do not recommend that you save much on paint. It is always better to give preference to brands that have been proven for decades.
By the way, even if they are more expensive, it is not so significant that this factor turns out to be decisive.
Paints from German manufacturers have proven themselves to be the best.
The coating lasts for at least 5-7 years, while more inexpensive options begin to deteriorate after 3-4 years (if not earlier). So consider that it is actually cheaper. It’s trite, but the miser pays twice.
Also remember that taking paints from markets is extremely dangerous. In construction markets there are conditions for storing them, but in cold and hot weather there are no conditions, therefore, there even the freshest paint can be spoiled and “lay down” unevenly on the surface.
In principle, weather factors will not affect the quality of the water emulsion, but acrylic may well “delaminate.”
How to prepare the ceiling before painting?
The theory is over, let's now move on to the practical part. Before painting the ceiling, it needs to be leveled and prepared, everyone knows this.
But, in order for the coating to last long enough, you need to do antifungal prevention of the concrete surface. Moreover, it doesn’t matter what kind of paint you use: with anti-mold additives or not.
You still need to do this, but here you look at the degree of “severity”. If your bathroom is well ventilated (which is very rare), then you can get by with ordinary copper sulfate, which must first be used to treat the ceiling.
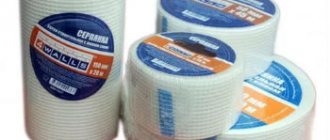
If mold in your room tends to “settle”, then it is better to resort to more effective and “long-lasting agents”, for example, special antifungal plasters and putties.
Preparation for finishing
Before renewing the surface coating, you need to prepare it well, since the final result depends on their condition. Also make sure you have all the necessary tools.
Required Tools
- Roller
- Brushes
- putty
- Putty knife
- Protective mask and goggles
Preparation
First, you need to remove all the furniture from the bathroom and remove existing decorative elements from the walls. This applies to all holders, towel hooks, curtains, rugs and other small items. Then the walls and ceiling must be freed of all old coatings. If you want to get rid of old tiles, then feel free to tear them off the walls. Next you will need to level the surface, making it perfectly flat using plaster.
Unsplash
If the walls have been painted, the coating can be removed with a scraper or sharp spatula. The resulting cracks must be filled with moisture-resistant putty. If there are wooden surfaces in the room, they must be sanded and dirt removed. This way the new layer will stick better.
Don't forget to remove mold and mildew if present. A chlorine solution or a special mixture, which can be bought at any hardware store, can effectively cope with this. We recommend carrying out this procedure a few days before painting so that the surfaces have time to dry. And to get rid of grease stains, it is better to use a detergent designed specifically for these stains.
After leveling and removing the old coating, all surfaces must be washed to get rid of dust and small chips.
Cover all plumbing fixtures with thick polyethylene. It is better to wrap the toilet and washbasin with shockproof material so as not to break these fragile products during repairs. We recommend removing switches and sockets. Cover those areas that you do not plan to treat with dyes with masking tape. Your premises is ready for use.
- Ceiling
How to paint a ceiling correctly: the whole process from preparing the base to finishing
Which putty should I choose for leveling?
If your bathroom is small, then overpaying the craftsmen for leveling the surface is simply a shame. These two or three squares don’t cost anything to do on your own.
Here you don’t need any special mesh or skills, since there are no inter-tile gaps or any differences in the bathrooms.
The main thing here is good building material and a spatula. It is advisable to use silicone-based putty; it applies just perfectly, has a pure white color, and the result is an eggshell effect.
This is very important, since with such a base the defects in the painting will not be very noticeable. And you will need fewer layers (often just one layer of acrylic paint is enough).
Painting technology
It's time to tell you how to paint the ceiling in the bathroom with your own hands. To obtain the desired result and durability of the coating, it is recommended to properly prepare the base and adhere to the technology for painting the ceiling surface.
What will you need?
If you are going to paint the ceiling in the bathroom yourself, you will need the following for the job:
- ladder;
- protective clothing;
- plastic film to cover the floor;
- masking tape;
- a roller with a long handle or a spray gun;
- brush for working in hard-to-reach places;
- grout mesh;
- trays for primer and paint;
- putty;
- dye;
- primer;
- set of spatulas;
- kitchen sponge, rags or brush;
- water container.
Surface preparation
First you need to properly prepare the base surface. To do this, do the following:
- We need to get rid of the old finish. If whitewash remains on the ceiling, wash it off with soapy water. Moisture-resistant paint is removed with special solvents. If foam plastic tiles were used as finishing, then they are cleaned off with a spatula along with any remaining adhesive.
- Now let's start leveling the base. To fill large holes and cracks, we use cement mortar. We eliminate small cracks and irregularities with a putty mixture. We pay special attention to the junction of the wall and ceiling surfaces. To obtain an even mate, you can use a perforated corner.
- After the putty has dried, sand the base with a trowel mesh.
- We treat the surface with a deeply penetrating primer twice (each layer dries separately).
Applying paint
After preparing the base, the ceiling in the bathroom is painted. We carry out the work in this order:
- First you need to protect the trim near the ceiling from accidental staining. To do this, cover the walls next to the ceiling surface or baseboards with masking tape. We cover the floor in the room and plumbing with plastic film.
- Using a brush, we paint hard-to-reach places, for example, behind water risers, as well as the junction of the ceiling and walls.
- Then we carry out the work with a roller or spray gun. Using the selected tool, we mow down the main plane of the ceiling. Moreover, if there is a window in the bathroom, then the direction of movement of the roller should be perpendicular to the window opening.
- We wait the time indicated by the manufacturer on the container with the mixture for the surface to completely dry. Please note that if the room is cold or very humid, the drying time will increase.
- Paint the second layer. In this case, we change the direction of movement with the roller to the opposite (along the window opening).