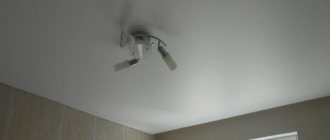
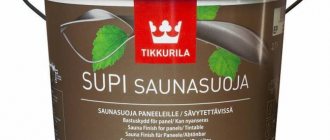
One of the simplest and most inexpensive ways to cover a ceiling is whitewashing or snowball painting. It does not require any specific skills and therefore is popular when whitewashing ceilings without the help of specialists. When painting, whitewash is used for the ceiling. One of the companies that produces high-quality paint for reasonable money is (“Sniezka”). It is produced by the Polish Paint and Varnish Factory, which in just a few years has made its way into the first ranks of paint production in Poland.
Before painting the ceiling with Snezhka paint, you need to whitewash the ceiling.
“Snezhka” is one of the best paint and varnish products
Paint selection
Before you start painting the ceiling, you should choose a paint, taking into account the characteristics of the room being repaired. For example, for a bathroom you will need waterproof paint, which cannot be used when decorating living rooms.
During the manufacturing process, the base of the paint is drying oil, resin or varnish, water or emulsion. No less important is the presence of a binder, a coloring pigment, in the composition. When working with acrylic, latex (what is latex paint), silicone and silicate products, water evaporates, which ensures the formation of an even, continuous layer.
The advantage of acrylic paints is considered to be resistance to contamination, but due to poor vapor permeability, it is not recommended to use them on ceilings in rooms with high humidity. The creation of a durable surface is guaranteed after two layers of application, which reduces material consumption.
Silicate paint for snowball ceilings is capable of transmitting moisture well, but for a better effect, pre-treatment of the ceiling with a silicate primer is required. This paint is not an elastic product, but it does prevent the formation of mold.
The only disadvantage of using silicone compounds is their high cost, but they are excellent for mixing with silicate and latex paint, which significantly improves the quality of the surface. They are distinguished by impeccable vapor permeability and serve as an antiseptic.
Experts recommend purchasing paint based on its consumption per 1 square meter. m., which will save you from purchasing more material.
Painting process
The last stage of painting is finishing it with a roller.
- The paint is poured into a specially prepared tray. If the whitewash is too thick, then it needs to be diluted a little and stirred thoroughly.
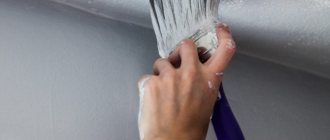
- Then it is recommended to paint the perimeter of the ceiling 2 times with a brush. This is necessary so that when painting with a roller you do not touch the walls and paint hard-to-reach places.
- Next, you need to dip the roller in the paint bath and squeeze lightly. It is best to apply the paint in 2-3 thinner layers. This type of painting will last longer.
It is best to start painting from the window, gradually moving deeper into the room. The first layer is applied across the sun's rays onto the surface, and the second - along. To avoid streaks on the ceiling, apply the paint in a W-shaped motion. To remove excess paint from the ceiling, you need to walk over the surface with a roller that has no paint left on it.
To avoid the formation of unsightly stripes on the ceiling, do not treat the surface after painting with a dry roller. The paint on the roller should always be evenly distributed. To do this, the roller is often dipped into the bath, and then carefully rolled out along the side of the bath. This allows you to remove excess paint from the surface of the roller. To ensure that the paint evenly covers the entire surface, it is best to paint the last layer with an unused roller.
If the windows of the room in which the ceiling is painted face the sunny side, then it is recommended to shade them. It is necessary to ensure that there are no drafts in the room. Under no circumstances should you speed up the drying process of the ceiling using any heating devices . This may cause the paint to lift from the surface.
Description of “Snowball” paints
The Polish company supplies different types of paint. Concrete, plastered, plaster, cardboard and wooden ceilings painted with snow are of excellent quality, and a special series of hypoallergenic Disney products are offered for the renovation of a children's room.
The Snowflake paint is different:
- wear resistance;
- durability;
- strength;
- formation of excellent adhesion;
- good hiding power;
- vapor permeability;
- environmental friendliness.
Using absolutely safe means, whitewashing of snowball ceilings is carried out in hospitals, clinics, schools, kindergartens, where increased demands are placed on all finishing materials. The composition of the Snezhka Eco paint includes several special components that help improve environmental friendliness.
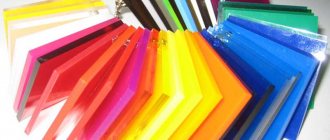
The base color of the water-based solution is white, to which to create the desired shade it is enough to add a color of a certain shade. But the market also offers color options.
Using paint to whitewash the ceiling guarantees a coating that is not only visually beautiful, but also easy to handle during use. This ceiling does not require special care, is practical and quite functional.
How to paint with water-based paint correctly
The correct technology for painting any surface with water-based paints includes the mandatory use of a primer.
Without applying a primer mixture, the paint absorbs too quickly into the surface to be painted.
Which subsequently leads to the dye beginning to crack and crumble under the influence of external factors.
In order to get an ideal ceiling covering after renovation, you should choose the right type of paint and adhere to basic painting technologies.
To properly apply water-based paint, work should begin with the corner joints of the ceiling and walls.
More about the cost of water-based paint for the ceiling.
Read about photo wallpaper on the ceiling at the link. History of creation, views, photo gallery.
You can find out how to make a ceiling in a wooden house here. About the design of the ceiling, components and materials for steam, waterproofing and insulation.
To do this, use a paint brush to paint the joints along the entire perimeter of the ceiling structure.
A strip three to four centimeters wide will allow you to create a uniform layer in those places where it is difficult to penetrate with a roller.
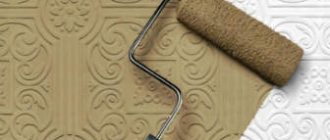
The main surface of the ceiling is painted with a roller.
This is a fairly effective tool for painting large areas.
A wide roller with long, soft bristles should be used to fill the plastered porous structure of the ceiling structure as much as possible.
The paint should be applied quickly, in several layers, in different directions of painting.
Each new layer is applied only after the previous one has naturally dried.
You should choose water-based paint depending on the purpose of the premises in which repairs are being made.
There are several types of coloring compounds:
- acrylic – stain-resistant, moisture-resistant, vapor-tight;
- silicone – wear-resistant, quick-drying;
- silicate – weather-resistant, durable, antiseptic.
Among the many manufacturers of paint and varnish products, the most popular are products from Polish production.
Stages of painting the ceiling
Preparatory work
This section will be of interest to both beginners who do not know how to properly paint a snowball ceiling, and experienced craftsmen.
For repair work you will need a set of tools:
- a new fur roller with a long handle (if you have a limited budget, a foam roller will do);
- container for paint - selected based on the size of the roller;
- small brush;
- paint, the amount of which must be calculated in advance.
Using a spray gun will significantly simplify and speed up the work, but it may leave streaks and the paint will lie in uneven layers.
Selection of tools and materials for painting work
To carry out high-quality finishing of the ceiling covering, the main tool is a roller - a cylindrical attachment rotating around its axis.
Paint is applied to it and rolled over the surface to be treated, forming a thin and even layer.
A wide roller allows you to cover a large area of the surface to be painted, which significantly affects the speed of painting work.
Stretch ceiling cut, what to do
In addition, the following tools are needed to paint the ceiling:
- stepladder or long handle for a roller;
- plastic tray for applying paint and squeezing the roller;
- a small brush for painting hard-to-reach areas;
- special masking tape to protect walls.
Initially, lime-based mineral paints were used to paint the ceiling surface.
However, this finish has a significant drawback - the fragility of the coating.
The most common painting material is water-based emulsion paint.
Water-based paint is an aqueous mixture of polymers, the use of which has many advantages.
Applied to a porous base, it forms an extremely stable and effective layer.
Excess moisture is partially absorbed into the base and evaporates.
This creates a thin polymer film that is durable and breathable.
This paint has a uniform matte structure, and the use of organic dyes allows you to create a wide color palette.
Ceiling treatment
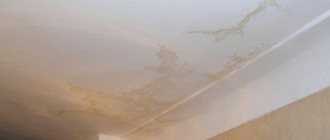
It is quite difficult to hide existing defects in the ceiling under whitewashing, so it should be carefully prepared for applying a new layer of paint.
So, before painting you should perform a number of actions:
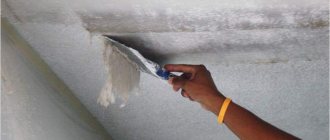
- completely remove layers of old coating;
- if there are cracks and irregularities, plaster them;
- then, as with any ceiling repair, a special processing technology follows: puttying, plastering, priming;
- in the case of a new ceiling, the previous stages are excluded - it will be enough to wipe it, removing dust and dirt;
- rinse the surface thoroughly and let it dry;
- For better paint application, the ceiling must be primed.
Before painting the ceiling with a snowball, it is recommended to shake the can well and stir the paint in it. Ready-made formulations are supplied to the market, but in some cases they can be thickened.
The ability to add any color to white water-based paint significantly increases the options for finishing the ceiling, which can be designed to match the rest of the interior elements.
Painting the ceiling, step-by-step video instructions:
How to properly paint a ceiling with a roller
The ceiling prepared for painting is a large, flat space with a microporous structure.
In order to obtain a uniform matte or glossy surface after painting, it is preferable to use a paint roller.
Sometimes a sprayer or spray gun is used for these purposes.
However, these finishing methods are quite messy and do not guarantee an even color.
In order to really properly paint the ceiling with a roller, preparatory work should be done.
To avoid staining surfaces that are not to be painted, they should be protected with paper or polyethylene.
Thin areas are sealed with masking tape.
To obtain a perfectly even layer, the paint must be applied to a previously dust-free and primed ceiling.
All work on decorating ceiling structures should be carried out during the daytime in natural light.
Surface preparation
In order to prepare the ceiling for painting, you should remove the old finish and carefully level the layers, removing them with a steel spatula.
After this, the surface is carefully primed with a penetrating primer using a large brush or roller.
If there are deep depressions, they are blotted with a brush.
If there are fungal infections on the surface, it should be treated with special antiseptics, otherwise after painting the problem will reappear and dark spots will form on the ceiling.
After the soil has dried, the defects are smoothed out using finishing putty.
Then the hardened treated areas are sanded with a special mesh - first coarse and then fine-mesh, after which they are re-treated with a primer, which will improve the adhesion of the plaster to the concrete surface.
After the primer layer has been absorbed, you can begin painting the ceiling.
How long does it take for Snow Emulsion to dry?
The speed of its drying depends on the rate of water evaporation; the more humid the air and the lower the temperature when painting, the longer it will take to dry. On average from 12 to 24 hours.
Interesting materials:
When is the exam 2022 in Russian? When are the exams after grade 9 Belarus 2022? When is this what pronoun? When is this a defining pronoun? When did Finland declare war on the USSR? When is the reserve fund formed? When do they guess from what date? When did they tell fortunes in Rus'? When did the Gauls attack Rome? When can geraniums be taken outside?
How do you tint façade paint?
You can use tinting machines (most often they use enamels and varnishes) or use the catalogs of the manufacturer of pigment liquids. During the work process, you can use dispensers to add the desired tone to the paint, and to obtain high-quality cladding, you can use drills to stir the paint composition.
Interesting materials:
How to split a PDF file online? How to edit files in the cloud? How to edit a text file in Linux? How to solve the problem with DLL files? How to send a file to WhatsApp from your computer? How to open hidden files using Total Commander? How to scan multiple documents into one file? How to scan to PDF into one file Brother? How to transfer files from computer to computer? How to copy a file from a disk to a flash drive?
A variety of water-based coatings
Now there are different types of such paints on the market. To ensure that your trip to the store brings only pleasure and results, first prepare thoroughly theoretically. Then be sure that everything will work out for you.
- Latex (very famous for its versatility: it effectively protects walls from minor damage, and can be washed after contamination.)
- Acrylic (it contains pigments and acrylic resin, or polymethylacrylate as it is called; it is the most expensive and of the highest quality in terms of price, and makes the walls especially moisture-resistant, elastic and reliable.)
- Silicate (the main elements of its composition are alkali, liquid glass and pigments; unfortunately, it has one drawback, it does not repel moisture from the wall; when using silicate paint, it is better to wear special clothing.)
- Silicone (formed by the skillful combination of silicone resin and water.)
- Polyvinyl acetate (PVA adhesives are added to its composition; the price is cheaper than others, nevertheless it is the most durable and resistant.)
As they say, there is no comrade according to taste! Your choice depends on your preferences and the goal you have set for yourself.
How much does it cost to paint walls per 1 sq. m?
What is the price for painting walls?
| Name of works | Price | Unit measurements |
| Wall painting price per m2 | ||
| Wall painting 1 layer/2 layers/3 layers | from 90/170/250 rub. | m 2 |
| Wallpaper painting | 170 rub. | m 2 |
| wall putty for painting | 300 rub | m 2 |
On a note
- With gloss and semi-gloss paints the result is more unpredictable. With them, more often than with matte paint, obvious stains remain.
- On a snow-white ceiling, any nuances are much more noticeable than on a cream or beige one. If you doubt your capabilities, lightly tint the paint.
- Know that the larger the surface, the higher the likelihood of getting a questionable result. Therefore, do not be surprised if in a small bedroom the ceiling turns out like in the picture, but in a large living room you cannot look at it without tears.
- Paint quality matters! You can save money on wall paint, but you need to buy the best for the ceiling! After all, he is much more picky.
- Don't strive for absolute perfection. Painted surfaces are almost never flawless. The main thing is that in bright light, stripes, stains, smudges and stains are not noticeable.