/Accessories and decor/Decoration/
Do-it-yourself plate painting is a creative activity that is accessible to both experienced and novice decorators. After all, the technique is very easy to master, does not require the purchase of expensive materials, waste of time and effort, so you do not have to be afraid of losing interest in the process. And hand-painting on glass and ceramics can become your permanent hobby, a method of relaxation, or even a hand-made business on Internet sites like the Crafts Fair or Etsy.
In this material we will look at the following methods and techniques for painting plates with your own hands, which are suitable for beginners:
- Spot painting of plates;
- Painting using stencils and templates;
- Artistic hand painted plate;
- Stained glass painting.
Point-to-point technique
Artistic painting of dishes with dots is an entire art of compositional decoration of a specially organized space with paints. The pictorial surface differs in structure and shape. A special technique for creating a point-to-point pattern is to apply drops of paint along the contour of the plate. Thanks to the scattering of dots, an ornament is obtained that looks like a mosaic of beads or rhinestones.
To get started you will need: a plate, paints, a pointed stick or non-functioning felt-tip pen, degreasing liquid (for example, acetone), stencils, a well-lit work area.
The main stages of painting on plates are as follows:
- Treat the work surface with an alcohol-containing substance and dry.
- Draw a picture. On a glass plate, the sketch can be fixed on the reverse side, applied randomly to an opaque surface or using stencils.
- Sprinkle the sketch ornament with dots and frame it.
- Correct mistakes with cotton pads pre-moistened with alcohol.
Original painted plates can take a place not only in the kitchen, but also in a specially designated place as an exclusive handmade item. They can also serve as an original gift. The main thing is to approach the painting process with full responsibility and inspiration.
Degreasing the plate
Selecting a drawing
Transfer the drawing with paint or marker
It’s better to start painting from the middle
Select the appropriate colors and continue working
Ready
Ideas for drawing with children
Creating a painted plate can serve as an excellent occasion for joint creativity with your child. The simplest, yet most effective and fun method is finger painting.
For example, you can depict a tree in this way. After degreasing the surface, you need to paint the trunk and branches of the tree with acrylic paint using a brush. Then coat the sponge with green (or any other) paint. Next, you need to touch the sponge with your fingertips and leave an imprint on the plate - each such imprint will represent a leaf.
A simple (child-friendly) and fairly quick way to decorate a plate is to apply a geometric pattern. To work, you will need masking tape, which must be glued to the surface, creating a simple geometric pattern (for example, a zigzag line).
Next, you just need to paint the entire surface of the plate with one color. Where the tape was glued, the surface will not be painted. After the paint has dried a little, the tape can be carefully removed.
Selection of materials
Before you begin applying a dotted pattern to a plate, you need to analyze all the nuances of the upcoming work and carefully select materials. Do-it-yourself artistic painting of dishes requires a special approach. The choice of paint for painting and the need for additional surface treatment directly depend on the material used to make the plate.
Dishes
In most cases, glass or ceramic surfaces are chosen for painting plates with your own hands. This is due to the fact that such dishes can be used as the main background without additional manipulations. Plain or transparent surfaces are excellent for applying patterns. They will require minimal effort - washing and degreasing. Also, if necessary, you can easily change the background on the dishes. For this you will need:
- Apply a thin layer of primer (special primer).
- Wait until it dries, then use acrylic paint of the tone you like (it is advisable to paint in two stages with intermediate drying).
- To consolidate the result, it is recommended to coat the finished product with varnish twice.
Artistic dot painting on plates with a clay base is carried out in several stages. First of all, you need to prepare the surface so that the pattern lasts for a long time. Then they select a special contour paint, produced in tubes with an elongated nose.
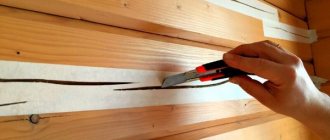
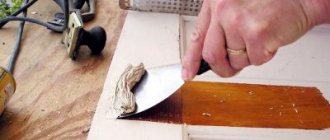
The technique for working with wood products depends on their background. If you are completely satisfied with the color of raw, untreated wood, you can paint the plates directly on the natural surface. If you want to adjust the shade of the base, it is recommended to use wood stain. It will not only give the surface the necessary tone, but will also emphasize its natural relief and texture. If you plan to use the plate in everyday life and not as a decorative item, it is better to secure the ornament with a special furniture varnish at the end of the work.
Ceramic plate
Clay
Glass
Wooden plate
Paints
Artistic dot painting of plates involves the use of various types of paints during the work process. It is preferable to opt for moisture-resistant and light-sensitive varieties, which will significantly increase the service life of the product.
It is recommended to paint metal plates with enamel paints, and contour analogues are suitable for ceramic utensils and pottery. Options with an oil composition, gouache, and watercolor are optimal for painting glass and ceramics. You should choose based on the consistency of the coloring matter - the density of the paint should resemble low-fat sour cream.
The basis of the composition of the coloring matter can be:
- water – washes off at any time;
- organic - removal occurs only with a solvent.
Painting of saucers that will come into contact with food is carried out with special baked paints. The drawings are fired in a kiln at 800 degrees. At home, craftswomen use acrylic compositions that harden without firing for two weeks.
By type of paint they are divided into:
- overglaze, applied to glazed dishes before firing;
- underglaze, used after firing to achieve an additional effect - shine and gloss.
It is worth giving preference to a small number of colors; 1-4 shades are enough to work.
For application and fixation
For painting you will need additional materials: cotton pads and swabs, napkins, pins, tape, paper and scissors. Using discs and a degreasing liquid, the top layer of the plate is processed and cleaned. Further, after creating the ornament and its complete drying, it is recommended to apply water-soluble, odorless acrylic varnish twice to secure the painting. The layers must be very thin so that unsightly streaks and sagging between the points do not form. Approximately 2 hours should pass after each application of varnish. For painting with dots, it is better to give preference to original patterns or floral arrangements.
As a result of squeezing out dots on the nose of the tube, excess paint may form, which can spoil the ornament with an unnecessary blot. Excess should be removed in time with a napkin.
Before you start painting with a new color, it is advisable to put a few dots on a rough sheet of paper. Using a pin, you can clear a clogged tube spout - this is especially true for paints containing glitter.
It is important to prepare a stencil (template) for applying the pattern. You can draw it yourself on paper, then cut it out and attach it to the surface with tape. Drawings can be borrowed from the Internet or magazines. Ready-made stencils are sold in the store. The more lines in the ornament, the better, since the entire pattern is covered with dots.
Necessary materials
Choose the right stencils
For fixing, use acrylic varnish
Painting a plate using a stencil
The stencil method is suitable for beginner artists and children, as it does not require special drawing skills. The template is printed, holes or shapes are cut out with a stationery knife. In art stores you can buy ready-made self-adhesive stencils.
The following tools and materials are required for the creative process:
- Acrylic paints for glass and ceramics.
- Synthetic brushes.
- Alcohol or degreaser.
- Cotton pads.
- Scotch.
- Stencils.
Screen painting of ceramic dishes with acrylic paints is performed as follows:
- Wipe the surface to be treated with a brush or sponge with an abrasive cleaner or alcohol to remove dirt.
- Wipe and dry the dish.
- Some craftsmen recommend sanding the product using steel wool or sandpaper to remove the glossy finish. After this, be sure to wash off the dust formed during processing from the plate with a rag.
- Secure the finished template to the surface with tape.
- Using a brush or sponge, apply the coloring material to the stencil with a pattern, painting over empty spaces, drawing small details and contours.
- Remove the tape and stencil before the paint dries, leaving only the image.
- Dry the product. To speed up drying, you can use a hairdryer.
- The ceramic product is calcined in the oven.
The good thing about stencil painting is that one image can be copied several times. In this way you can create many identical plates.
Drawing process
Simplicity is the main advantage of dot painting on plates. If you follow the basic rules, you can get high-quality painting on saucers and any other utensils. To get more information and practice, you can attend a special master class.
The sequence of actions when painting should be as follows:
- Surface preparation - it is important that dust and other contaminants are removed from the product intended for applying a dot pattern. The surface must also be degreased with an alcohol-containing solution.
- Creating a background - using paints (acrylic, stained glass, gouache, etc.) you can give the surface the desired shade.
- Blanks - work out a pre-conceived sketch or prepare special stencils (ready-made diagrams) for drawing.
- Marking - draw the outline of the ornament.
- Creating a painting in compliance with the rules of sequence. First, large dots are drawn, then, after drying the large elements, they begin to apply them to the smaller components of the picture.
- To complete the pattern, draw the smallest details that are located close to each other.
- If baked paints were used in the process, the plate must be placed in the oven at 150-170 degrees and kept there for the amount of time specified in the instructions.
- After the paints have dried, the product is coated with acrylic varnish.
Another way of painting is to initially apply dots in the central part of the plate, and then gradually move towards its edges.
You can correct the result at any time: a dry dot can be easily removed with a cotton swab, a dried dot can be easily removed with a sharp object.
Preparing the plate
Select the desired sketch
Markings must be done starting from the middle
Drawing straight lines
Then we draw the rest of the shapes from the sketch
You need to start from the middle of the plate
We continue working from the center to the edges (in circles)
You can make beautiful strokes with a toothpick
Ready
Historical reference
At least 6 thousand years ago, patterns and ornaments appeared on ceramic products. Most likely, the decoration of dishes originated earlier, but it was precisely this period of history that archaeologists were able to clearly record. Plates, mugs, and various utensils were decorated with magic circles, interesting lines, and mysterious patterns. Images of people, animals and plants can also be seen on objects found during excavations.
Neolithic pottery
The painting was thematic: if, for example, a ceramic dish was intended for fruit, the ancient craftsman would depict fruit on it. It must be said that in ancient times plates were used only for serving dishes; there were no personal plates - food was placed directly on a loaf of bread. But the dishes on which the main course was laid out had to be impressive.
It is believed that thanks to the painting of plates, fine art in general actively developed. The plots became more complex, the details were honed, the craftsmen looked for new color possibilities and thought out skillful patterns and ornamental decor.
Subject of drawings
It is very important to perfectly design the pattern for dot painting. Using different styles will give a plain saucer a distinct theme. Oriental-style ornaments are very popular: dragons, mythical animals, birds, Turkish cucumber, world tree. They will create a special atmosphere in the interior of the house.
The motive of the drawing may vary in content. Geometric patterns are well suited for painting plates. The dots can be located at different intervals, differ in size, and color combination. Symmetry and proportionality are the main criteria when drawing a picture. Various abstract forms, fragments of architecture, weapons, floral arrangements, and elements that imitate animals also look stylish.
In a floral arrangement, even a simple design from a single plant pleases the eye with its natural beauty. More complex patterns contain more artistic elements. The correct combination of colors is the key to successful work. Yellow and orange, red and orange, blue and purple, gold and brown, white and pink, blue and green are harmoniously combined.
Eastern images differ in different countries. Thus, in India, flower garlands, animals, and birds are common, and in China - dragons, peaches, peonies, and butterflies.
Decor element
Decorating a room with decorative wall plates came into fashion a very long time ago, around the 17th–18th centuries. At that time, rare, collectible plates were especially valued, which became more and more expensive over the years. They were bought at a high price, they were proud of them, it was customary to display them, demonstrating their wealth and superiority. Those who were especially inventive copied the exhibits they liked, ordering paintings from highly qualified artists. And those who did not have much capital, but also gravitated towards beauty, were content with little, decorating their homes with hand-painted plates.
Tips for beginners
The point-to-point technique refers to a type of creativity that requires accuracy when performing work. The final result and presentability of the finished product will depend on this. All types of tableware painting must be carried out in compliance with certain rules. Expert advice:
- To correctly place a point on a sketch, the contour should be positioned vertically; do not move it to the side. Upon completion in the same position, it should be moved away from the surface to be decorated.
- If you want to change the background, it is recommended to use acrylic primer, which will give the effect of a cloudy white tint.
- While working, you should not switch to another shade until all actions with one color are completed.
- It is better to varnish the surface of the painting; this will make the product brighter and more interesting.
- Symmetry should be observed: to do this, a series of actions are performed sequentially, moving from a simple element to a more complex ornament.
- Be sure to dry the finished parts of the work step by step. This will avoid paint spreading (especially when painting on clay and ceramics), and will also extend the life of the finished product.
The drawing process is not as complicated as it might seem at first glance. If you are interested in the dot technique, you should be patient - accuracy, consistency of logical actions and creative inspiration will help you create a real masterpiece.
Acrylic primer is perfect for creating a plate background
You shouldn’t switch from one color to another while working.
You need to start with simple elements
How to learn to paint plates and ceramic dishes?
- Modern art uses different techniques that anyone can master. But for this you will need perseverance, patience, imagination, time to improve your skills, as well as correctly selected materials and tools. You can paint dishes made from wood, porcelain, glass or ceramics. The main thing is that the original drawings are completely absent from it.
- Before we conduct master classes for you on mastering various techniques, remember that you should not eat food from dishes painted with your own hands, since the materials for painting can harm your health, and the paints can blur somewhat. In industrial production, special ovens are used for firing dishes, where the temperature reaches 800°C, which avoids such unpleasant moments.
Photo
Types of painting
There are several basic techniques for applying patterns that craftsmen have been using for many years:
- Tiffany. Thanks to this technique, you can apply designs on dishes with a three-dimensional effect.
- Khokhloma. This type of pattern application is familiar to almost everyone. The colors predominate in the designs are black, red and gold.
- Spot. Drawings are made using dots.
- Gzhel. The patterns are made in the form of lines, drops, nets and flowers. The colors are predominantly blue and white.
- Inscriptions. Letters, phrases, phrases and the like are applied.
- Geometric figures.
- All kinds of landscapes, still lifes.
Location rules
The decoration is applied according to certain patterns:
- Rhythm - alternating patterns or parts thereof in strict order, can be in ascending or descending order. It is characterized by the repetition of patterns, their inclination, certain turns, the space between patterns or motifs;
- Repetition - characteristic patterns alternate repeatedly at regular intervals. Creates a feeling of calm, completeness, harmonious completion of the composition;
- Alternation - drawings and their parts are arranged at equal intervals along the length, width or in a checkerboard pattern. Gives variety to the dishes and enlivens them. It differs in rhythms - identical drawings or pictures alternate in a contrasting order, change in position (vertical or horizontal), change in color, size, and elements overlap.
- Symmetry - identical patterns or parts are applied on opposite sides of the central point, different compositions are applied on opposite sides of the axis. All details of the pattern are applied in proportion to each other, maintaining the proportions of the motif;
- Asymmetrical - the picture is usually located in the center (plate, tray), and alternating parts of the ornament are applied around it;
- Inversion - various elements and parts of the pattern are located on different sides of the center or axis, or are applied in the reverse order.
The ornament on the dishes is usually located:
- Along the edge of the product.
- From the center or axis, with a gradual increase in the composition.
- Center and edge.
Luminous brooches and boxes. Fedoskino lacquer miniature
Luminous brooches and boxes. Fedoskino lacquer miniature
Luminous brooches and boxes. Fedoskino lacquer miniature
Luminous brooches and boxes. Fedoskino lacquer miniature
The history of Fedoskino lacquer miniatures dates back to the 18th century. Merchant Pyotr Korobov founded a factory in the village of Danilkovo near Moscow (near the village of Fedoskino) in 1795. Here visors for military caps were made from papier-mâché. When the European fashion for snuff boxes came to the country, the factory began producing snuff boxes and boxes.
Soon the assortment expanded - powder compacts, brooches and tea boxes appeared. At first they were decorated with printed engravings, and later they began to be painted with oil paints and varnished. While working, artists added metal powder to the paints - this is how the colors became “luminous”. The traditional motifs of Fedoskino miniatures were the Russian troika, landscapes, fairy tales and scenes from folk life: festivities, dances and tea parties.
The elegant miniature products were guaranteed for 100 years: when dried, papier-mâché became harder than wood, and the shining colors did not fade for years. The secret was that the varnish for the miniatures was kept in the sun. The master coated each product with this “calcined” composition up to 30 times.