When performing renovations in an apartment, you should never neglect the preparatory work. Preparing the surface for a suspended ceiling will guarantee the quality and long service life of the canvas. Thanks to competently carried out work, the canvas will not sag in the future, condensation and other defects will not appear. Before installing a stretch ceiling, be sure to carry out work on the electrical wiring, install doors and windows, treat the base and level the walls. Let's consider all stages of preparation in detail.
Advantages of suspended ceilings
Many apartment owners give their preference to suspended ceilings, abandoning more traditional materials, since such structures have a number of advantages:
- They do not develop cracks like whitewashed or painted ceilings. This primarily applies to new buildings that are subject to shrinkage.
- Stretch ceilings are highly durable. One square meter of PVC stretch ceiling holds up to 200 liters of water. To remove moisture, simply drain it and clean the canvas.
- Provides complete fire safety.
- They do not turn yellow even after a long time.
- Thanks to the variety of design options, they allow you to implement absolutely any design project.
Cleaning the ceiling surface
Removing the old layer of whitewash is necessary in case of peeling and to prevent the formation of mold. A high-quality lime-whitened ceiling does not need to be washed away - lime itself is an excellent antiseptic used in the fight against fungus. But the chalk coating does not prevent the growth of “vegetation”. It is also better to remove wallpaper glued to the ceiling - they provide a good breeding ground for the development of mold. There are 3 ways to clean whitewash from the ceiling.
Blurring the ceiling is done with a wet rag or sponge and is used to remove a thin layer of whitewash. The process is labor-intensive and requires time and patience. Pre-wetting the ceiling with a spray bottle will help speed up the process somewhat. Regularly changing the water and rinsing the cloth frequently will also improve productivity. The blurring is completed when the concrete structure clearly appears on the ceiling.
Removing whitewash with a spatula also begins with moistening the surface using a sprayer or paint roller. The water should wet the whitewash all the way to the ceiling without causing the chalk to become soggy. Therefore, the thick whitewash layer is wetted in several passes, and then allowed to shake lightly.
Ideally, the chalk should easily come off the ceiling, but not stick to the spatula. It is more convenient to scrape off whitewash with a narrow spatula with a blade width of 5-8 cm - and the surface is cleaned more evenly, and the hand will get less tired. By holding a bowl in the work area with your free hand, you can minimize the time spent on subsequent cleaning of the room.
The use of chemical compounds allows you to prepare the ceiling as efficiently as possible. This section includes a simple soap solution: dissolve 3-4 tablespoons of crushed laundry soap in a bucket of hot water, and then add 5 tablespoons of baking soda. As an option: replace soap with several caps of shampoo, and soda with table vinegar.
Working with ready-made chemical cleaning compositions for cleaning construction contaminants takes a minimum of time and effort. The ALFA-20 concentrate used by cleaning companies is designed to remove lime and cement contaminants. Recommended as an excellent means for soaking lime white that is poorly permeable to moisture. For chalk surfaces, Probel diluted with water in a ratio of 1/10 or more is suitable.
Specialized concentrates Metylan and Quelyd Dissoucol are used both for removing thick chalky deposits and for removing wallpaper. The composition easily penetrates chalk, dissolves pastes, universal and vinyl wallpaper adhesives. A 250 ml bottle of liquid is enough to prepare 1-1.5 buckets of solution. All of the listed compositions are absolutely safe and can be used in rooms with poor ventilation.
Advice! If the composition of the whitewash is unknown, just run your finger across the surface of the ceiling. Chalk whites leave a white mark on the skin. Slaked lime, after drying, looks like chalk, but does not stick at all. Oil paints and whitewashes based on an adhesive binder are also not easy to handle, but have a glossy surface.
How to prepare a room
First you need to take care of creating a comfortable space for work and protecting some elements.
- Before starting work, remove unnecessary items from the room: furniture, equipment, paintings. The more free the room is, the faster the installation of the ceiling will take place, and the canvas is guaranteed not to be damaged.
- Furniture that cannot be removed is moved to the middle of the room and covered with protective film. If you plan to install a built-in wardrobe, it is better to do this before installing the stretch ceiling. A strip is placed on the cabinet onto which the canvas will be attached.
- Plastic window elements near the installation sites must be covered with masking tape. When installing a stretch ceiling, the air near it heats up to 60 degrees, which can damage the plastic material.
USEFUL INFORMATION: Ceiling frame from a profile for plasterboard: diagrams and installation
Preparatory work with floors
Once you've completed the lower part of the room, start preparing the upper part. The base ceiling can be in almost perfect condition or, conversely, be in a deplorable, neglected state. Let's consider step by step how to properly prepare a base ceiling for a future suspended ceiling if its condition raises questions?
The floor slab is cleaned of a layer of old paint, whitewash or a layer of plaster. Pay special attention to areas where the paint has peeled off and blistered. At the same time, inspect the joints and seams in the ceilings. If there are significant defects, eliminate them by covering them with putty. Seal large defects, cavities and cracks with cement mortar or plaster. If possible, use a mounting paint mesh to strengthen the solution.
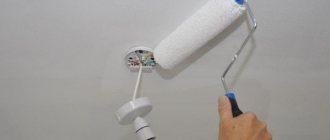
Having eliminated the defects, proceed to priming the base ceiling. The surface must be primed in any case. This will allow you to avoid the future appearance of fungus and mold in the upper part of the room.
Upon completion of the elimination of large defects, the entire ceiling surface can be puttied, giving it a uniform appearance. At this stage, you should take care of the air ducts and ventilation systems. All hoods must be located below the expected level of the future ceiling. Why? The thing is that during the operation of the room, the movement of air through the ventilation ducts can lead to retraction or swelling of the stretched fabric.
Preparing the base for a stretch ceiling
The good thing about a stretch ceiling is that labor-intensive and costly work on processing the floor slab, which can have serious defects and irregularities, is minimized.
There is no need for a rough ceiling before installing the tension fabric:
- level;
- paint;
- whiten;
- putty.
What needs to be done to properly prepare the foundation? All necessary activities can be divided into three stages:
- Inspect the joints between the ceiling and the walls and eliminate any irregularities that may interfere with the installation of the canvas.
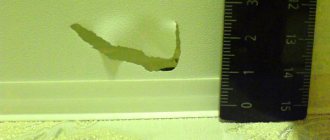
- Elimination of base defects that may subsequently lead to damage or sagging of your new ceiling. It is necessary to clean the rough surface from crumbling plaster or paint, check all unreliable areas: in those places where the plaster does not hold well, there is a high probability that sooner or later during the operation of the stretch ceiling it will fall off, damaging the canvas.
Particular attention should be paid to the seams between the slabs (rusts): they need to be widened, removing the remaining cement mortar from them, and sealed. Of course, a suspended ceiling will hide unsightly seams, but heat can escape through the cracks between the floor slabs and moisture can seep in if we are talking about an apartment on the top floor, so sealing and reinforcing the rustications is still necessary.
- Surface priming (required). The primer will strengthen the base material, reduce the risk of defects and fungus, and will not allow dust to accumulate between the two canvases.
A suspended ceiling will save the apartment from flooding from the top floor. Although moisture can be easily removed, the untreated slab will become a breeding ground for mold as it dries.
Installation of additional sound insulation
Sometimes during work it may be necessary to lay a layer of insulation. In this case, when installing suspended ceilings, surface preparation may become a little more complicated.
Professional builders advise using mineral or basalt wool, cut into slabs. The sheets are installed directly on horizontal floor slabs using special dowels. In this case, the polyvinyl chloride material acts as a vapor barrier.
If a vapor-permeable linen or satin coating is used to create a tensile structure, then additional vapor barrier is necessary.
It should be noted that, despite the apparent ease of the preparatory process, you should not do all the work yourself. The lack of certain knowledge and experience can negatively affect the quality of the work performed, and even cause breakdowns and emergency situations.
and How to independently calculate the dimensions of a stretch ceiling
Preparing the electrical wiring
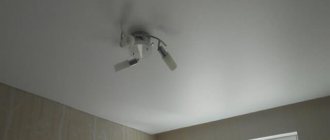
Before installing a stretch ceiling, the choice of lamps for the room is determined. All lighting elements must be purchased in advance, because the installation of wiring and fixtures for lamps must be done before installing the canvas.
USEFUL INFORMATION: Installing a gypsum board ceiling: which plasterboard is best to use for the ceiling
It will no longer be possible to change the location of the lamps on a suspended ceiling, since the holes cut for them will be extremely difficult to disguise, and to install the lighting fixture in a new place, you will inevitably have to remove the canvas and then attach it again.
When thinking about lighting, take into account the following rules:
- For a tension structure, you need to choose incandescent lamps with a power of no higher than 60 W, since the material can be damaged by overheating. The best option would be energy-saving or LED lamps.
- It is important to correctly measure the distance from the lamp to the rough ceiling in order to calculate the height of the tension fabric.
- After preparing the base, you need to mark the locations of the light sources and connect the wiring to them.
- To avoid danger, before installation, it is imperative to check the serviceability of the electrical wiring.
You also need to decide on the placement of ventilation and other systems that will be hidden after repair work. In the future, to access communications, it will be necessary to dismantle the canvas in several places.
Electrical work
An important stage in the preparatory work in the case of suspended suspended structures is the electrical part. This will be a determining factor for the subsequent operation of the ceiling surface and safety.
Worth noting right away! For linen ceilings, LED or halogen lamps with a power not exceeding 35W are ideal. The power limit of the lamps is 60 W, otherwise the film or fabric may overheat and become deformed.
At this stage, it is necessary not only to decide on the location of the lamps, but also to prepare places for their subsequent installation. Do not forget that the electrical wiring and connection points must be checked in advance for functionality.
The final stage of the electrical part is the installation of mounting platforms for chandeliers and spotlights. It is necessary to build as many ready-made platforms as there are planned lamps.
For reference: lamps that have a square base require the installation of a square base. In the case of a chandelier, this option is suitable, whereas with multiple lamps of this type, equipping mounting platforms of a similar shape will take a lot of time.
Each lamp has its own technological features that must be taken into account during installation. For the chandelier, you can use various fasteners, a hook or mounting strips.
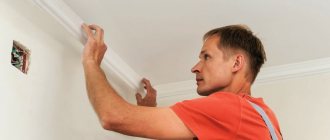
Preparing the walls
If the room has not yet been renovated, then you need to first prepare the walls. For this purpose, old paint and wallpaper are removed from surfaces and the surface is leveled. If you prepare the walls after installing the stretch ceiling, dirt and dust will settle on it during processing. In addition, the risk of damage to the canvas increases. It is better to wallpaper the walls after repairs, so that when attaching the profile to the walls, the wallpaper does not get dirty and does not move away from the walls under the influence of hot air from the heat gun.
- To apply regular wallpaper, you can simply remove the old finish. If you plan to apply liquid wallpaper or plaster, then it is necessary to completely clean the surface down to the brick or concrete. At the same time, remove the screws and nails.
- All irregularities on the walls are eliminated. Large cracks are treated with plaster and several layers of plaster. Shallow cracks are sealed with a solution of cement and gypsum taken in a ratio of 1:3. Then sickle tape is glued to this area and putty is applied.
- Having eliminated the defects, they begin to putty the walls. This procedure is carried out in one direction, moving horizontally or vertically. To cover cracks, the spatula is held at an angle to the wall of at least 30 degrees. The greater the angle to the wall, the smaller the layer thickness should be. The solution is periodically stirred with a spatula, which will prevent the mass from thickening. When the first layer has dried, it is cleaned using an abrasive grater, and after a day - with fine-grained sandpaper.
- Then the surface is primed, which helps to harden it and remove dust.
USEFUL INFORMATION: Methods of attaching drywall to the ceiling: 3 methods, cost
The plasterboard structures into which the tension fabric will be installed require adjustment. On the inside of such structures, a horizontal profile is installed, which will be 2–3 centimeters higher than the stretch ceiling.
Vacancy of premises
The optimal conditions for any ceiling decoration are a completely free space in the room, which makes it possible to reach any area of the ceiling without interference. In this case, installation work will proceed very quickly. Therefore, it is recommended to start the procedure on how to prepare a room for suspended ceilings by removing furniture, household appliances, decorative items and indoor plants. The same applies to all wall cabinets, shelves and paintings. If problems arise with removing particularly large pieces of furniture, it is recommended to group them in the center of the room, covering them with plastic wrap.
It is advisable to install a sliding wardrobe in the process of preparing the room for a suspended ceiling, equipping its surface with a special fixing strip for the canvas. As for delicate floor coverings, it is advisable to install them after installing the ceiling system. If the room already has expensive laminate or parquet, thick cardboard is laid on top of it. This will protect the varnished surface from damage by the legs of a stepladder or goat.
How to apply markings
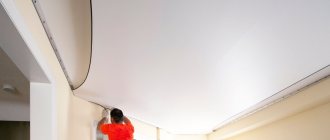
The tension fabric is attached to a plastic or aluminum profile, which is fixed with self-tapping dowels on the walls or primary ceiling. Therefore, the last stage of surface preparation will be marking. To carry it out, you need to determine the level at which the lowest point of the structure will be located. The minimum distance from the suspended ceiling to the base one is 6 cm.
In the case of multi-level ceilings, markings are needed for each level with strict adherence to the geometry of the room. In this case, the distance from the rough surface will vary depending on the shape and number of layers of the structure.
Installation of tension structures does not require complex and time-consuming preparation of the base ceiling. They can be installed without problems even on uneven surfaces with defects that will be masked after repair. But in order for your suspended ceiling to last a long time, minimal preparatory work is still necessary.
Marking ceilings
Marking the ceiling
Once the number of levels of the ceiling structure is known, the necessary lighting sources have been selected and the height at which the PVC film will be installed has been determined, we begin to apply markings on the horizontal surface.
To create markup you need:
- using a water or laser level, marks are made in the corners of the room;
- by combining the indicated marks, we get the main strip running along the perimeter;
- along the entire length, the gap from the rough ceiling to the drawn strip is measured and the lowest mark is determined;
- having departed from this mark the planned span, determine the point of the upper stage of the future structure;
- by adding the height of the second “step” you can get the mark of another tier;
- then the distance from the marked points to the drawn line is measured, the result is transferred to the corners;
- All marks are connected and two straight lines are obtained, located strictly parallel to the main one.
The location of the lamps is transferred to the already prepared ceiling from a previously drawn up drawing or the position of the hanging chandelier is determined.
Curvilinear lines and circles are drawn in a certain way:
- a hole is drilled in the very center, into which a special dowel is driven and a screw is screwed in;
- In accordance with the radius of the circle, the wire is cut, small loops are made at opposite ends;
- one loop is put on the screw, a pencil is inserted into the other and the required circle is drawn with smooth movements.
To create smooth or curved lines, you can take a thin elastic strip of the desired size. The rail is set according to the applied control marks and outlined with a pencil.
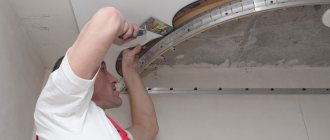
Ceiling surface treatment
Before you start installing the tension structure, you need to prepare the ceiling for the covering.
Stages of preparing the base for the tension covering:
- The surface is thoroughly cleaned of plaster, putty, grease and other contaminants.
- If the house is new, then it is recommended to glue all the joints that exist between the concrete floor panels using a bandage and applying PVA glue to it.
- Treat small cracks with sealant, and large cracks with construction foam.
- If mold or mildew is found on the base ceiling, they should be cleaned. After which, you need to treat the surface with an antiseptic.
- It is necessary to apply a primer in two layers to the surface of the ceiling.