Here is a diagram of the device itself for whitewashing using a vacuum cleaner
Screw in the vacuum cleaner hose and attach the nozzle (it is usually included in the kit and looks like this:
Well, of course, this is in domestically produced vacuum cleaners.
For foreigners everything is much cooler:
Let me immediately note that not any vacuum cleaner is suitable for this job.
You need a vacuum cleaner that works on blowing; most modern models of vacuum cleaners work only on “suction”.
I whitewashed the walls and ceilings at my dacha with an old Soviet vacuum cleaner; when whitewashing the ceiling I used chalk whitewash and limestone walls.
Next, the vacuum cleaner needs a special spray nozzle, you can buy it ready-made, or you can make it yourself, this is what it looks like
On one side there is a nozzle, on the other there is a pipe for connecting the vacuum cleaner hose.
Previously, jars (glass) were used as containers for whitewashing.
We put the nozzle on the vacuum cleaner hose; it is important that this entire structure is completely sealed.
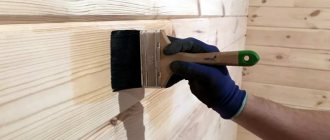
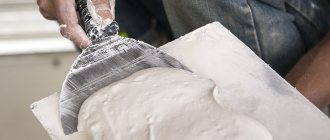
But first, we prepare the surface for whitewashing.
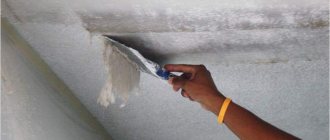
We moisten the surface with a sponge, after the whitewash has absorbed moisture and swelled, remove it with a spatula.
Next, check the surface for its evenness and level it if necessary.
If only putty is enough, then first a primer with drying, then putty with drying and a primer for whitewashing.
If the surface is flat, then we still prime it for whitewashing and let it dry.
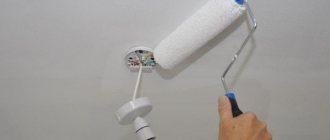
Next, a solution (chalk, lime) for whitewashing is poured into the nozzle container, turn on the vacuum cleaner for blowing (connect the vacuum cleaner hose to the hole from which the air comes out).
At what distance to keep the sprayer from the surface depends on the power of the vacuum cleaner and the consistency of the whitewash solution.
The whitewash layer should be uniform, the approximate distance from the sprayer to the surface is half a meter (it can be a little more or less, this is calculated experimentally).
I whitewashed in two layers with drying, that is, the next layer was applied to the surface after the previous one had dried.
And from personal experience, so that the spray nozzle does not become clogged with whitewash, I advise you to strain (filter) the whitewash solution, for example, through gauze.
Do not use a solution that is too thick.
Source
Features of using a vacuum cleaner as a sprayer
In order to apply whitewash or water-based paint to the ceiling by spraying, you need a special device called a spray gun or spray gun. Its operating principle is based on the fact that air, pumped by a third-party device, comes out under pressure from the spray nozzle and draws out paint particles that settle in a thin layer on the surface of the ceiling.
The spray gun can be either an independent element equipped with an air blower, or it can be made in the form of an attachment that fits onto a third-party device, such as a compressor, vacuum cleaner or hand sprayer. However, using some models of vacuum cleaners as a spray gun will not be possible if:
Using a hand sprayer
If the required model of vacuum cleaner is not at hand, and a special electric sprayer turns out to be expensive or there is simply nowhere to buy it, you can also use a mechanical model. The principle of operation will be the same, but a second person will act as the unit pumping up the required pressure.
Very often, mechanical modifications of this device are equipped with a long rod on which the nozzle is installed. It is also called “fishing rod”.
Types of vacuum cleaner attachments used for whitewashing
Professional sprayers that are used to apply whitewash can have different designs and features. In hardware stores you can find a fairly wide range of spray guns, which differ in the method of air supply, operating principle, location of the paint tank, and also in the amount of operating pressure. However, in the absence of a powerful compressor, a special attachment for the vacuum cleaner is used, which you can either buy or make yourself.
Three main types of attachments are most often used for applying whitewash:
Features of whitewashing the ceiling using a vacuum cleaner
If you have a vacuum cleaner of a suitable model and find a special attachment, you can assemble a homemade spray gun and start whitewashing. It is important that all parts of the sprayer, especially if a homemade device is used, are tightly connected to each other. When applying the solution, the sprayer must be kept at a distance of 50 - 80 cm from the ceiling, perpendicular to its surface.
The optimal distance is selected experimentally and depends on the density of the solution and the pressure of the injected air.
A pressure of 3 - 4 atmospheres is considered close to ideal with an average density of the solution. If the whitewash is thick enough, then the pressure should be increased, and for a solution that is too thin, on the contrary, reduced. The distance to the surface to be treated should not exceed 1 meter to avoid excessive dispersion of the solution, and should not be less than 0.5 meter to prevent the formation of drips.
Applying the solution to the ceiling using a sprayer, as shown in the video, is carried out in an even thin layer in small areas. To achieve the best result, it is recommended to apply several layers of whitewash, with each subsequent layer being sprayed onto a dry surface.
Source
Benefits of whitewashing
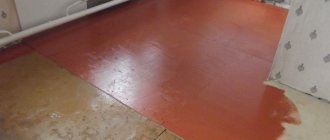
After applying lime or chalk mortar, pores are formed on the ceiling through which the surface breathes. In addition, the whitewash itself absorbs water vapor. If the solution was prepared exactly according to the recipe, then you can be sure that the ceiling will last at least three years without repair. Usually, when finishing a ceiling with this material, they achieve a durable film that is very resistant to abrasion.
But, as mentioned above, it is necessary to comply with all technological stages of this process. Therefore, the frequently asked question - how to whiten a ceiling with a vacuum cleaner - remains relevant today.
Surface preparation
Before whitewashing the ceiling surface with a vacuum cleaner, you must first prepare it. It’s worth saying right away that this process is the dirtiest and most labor-intensive (see How to clean whitewash from a ceiling: effective options). First, you need to remove everything that is possible from the room, and what could not be removed needs to be covered with polyethylene.
Note: whitewash is easier to wash off than limewash
In order to remove the old layer of whitewash you will need a spatula (scraper) and a bucket of warm water . You need to immediately add citric acid or vinegar to it. You should not treat the entire area of the ceiling at once, as it will dry out quite quickly, which will significantly complicate the work.
When carrying out work, do not forget about protective measures - wear a respirator
After the whitewash has absorbed moisture, you need to carefully remove it with a spatula. In order not to pollute the floor too much, you can hold in one hand a small container (for example, a glass), into which you will need to put the removed pieces of whitewash (see How to whitewash a ceiling with water-based paint efficiently and economically). This measure will significantly reduce the level of contamination, which will eliminate the need for general cleaning.
You need to prime no less carefully than whitewash.
Small whitewash residues should be removed with a wet sponge . A completely cleaned surface must be treated with an antifungal solution (this will prevent the formation of mold and mildew). At the end, the ceiling must be treated with a primer, allowed to dry for 24 hours, and only then begin whitewashing.
How to whitewash ceilings
Before whitewashing the ceiling, the surface must be prepared. Clean from grease, dirt and dust with warm water and soapy water. Clean the old layer of ceiling covering with a sponge or brush. If the surface is too dirty, you will have to remove all the whitewash. Do this carefully so as not to damage the plaster. Clean the surface in small areas, pre-wetting it. For cleaning, use a spatula and dustpan or a special tray so as not to contaminate the floor and furniture. Remove any remaining dirt with a wet sponge.
Then seal the cracks and seams with putty and sickle. Smooth with sandpaper. In rooms with high humidity, it is necessary to treat the surface with an antifungal solution. It is also good to use a special primer designed for lime or chalk. After applying the primer, it must dry for 24 hours.
How to whitewash a ceiling correctly: you need to start whitewashing from the wall, carefully walking around the perimeter of all the walls. You need to whitewash the ceiling in several layers. The first layer is applied parallel to the window. The second is perpendicular to the first layer. Each layer must overlap the previous one. It is necessary to avoid the formation of drops or bubbles - this will cause stains or stains to form in their place. During the work process, you need to mix the chalk and lime solution from time to time. This is necessary so that the paint is of the same thickness and the layers do not differ from each other. We apply the final layer of whitewash towards the light, that is, towards the window opening.
Article on the topic: How to watch TV through a Rostelecom computer for free
Preparation of the solution
While the ceiling is drying, you can begin to study the whitewash solution. In this article we will look at three different preparation options (see How to wash whitewash from the ceiling: surface preparation).
Option one - economy
The first option can be classified as economical. To prepare such a solution you will need:
Despite the fact that the chalk paste is initially gray, the future ceiling will still become crystal white
For example: from 3 kg of chalk you need to get 5 liters of whitewash solution, which is enough to process 10 square meters. m. surface.
You will need to achieve approximately this consistency
Option two - lime
Now let's look at a simpler, but at the same time more expensive option - a lime solution. This material has become popular due to its bactericidal properties, as well as its ability to hide small cracks.
Calculations will be as follows: for whitewashing 10 sq. m of ceiling should be diluted in warm water with 1.7 to lime and about 40 g of blue. It is very important to achieve the correct consistency; to check it you need to do the following:
Option three - alternative
Water-based paint allows you to give the ceiling a glossy tint, which looks very attractive
If a person does not want to spend his time preparing solutions, but is willing to pay a more impressive amount, there is an alternative option for him. In particular, water-based paint can be used for whitewashing. Thanks to its properties, it will give the ceiling a more beautiful appearance, but the preparatory work must be carried out more carefully, since this paint is not able to hide minor surface irregularities.
What material is best to use for whitewashing?
Whitewashing the ceiling surface is done with only two solutions. One of them is based on chalk, while the other is made from lime. We can say about the first material that it has bactericidal properties, while the second is capable of imparting deep whiteness to the surface.
In the event that the previous coating was created using lime whitewash, then the new finish should be done in the same way. Don't put chalk on it.
To prepare a chalk solution you will need the following components:
- five liters of water;
- thirty grams of wood glue;
- twenty grams of blue;
- three kilograms of chalk (it must be well sifted).
Do-it-yourself whitewashing: instructions
After the solution is prepared, you can begin whitewashing. Before using a vacuum cleaner to whiten the ceiling surface, it must be prepared. A special nozzle is used to spray the solution. If we are talking about a “Soviet” type vacuum cleaner, then it must be included in the kit, otherwise it will need to be purchased at the store.
Spray gun operation diagram
The nozzle is a plastic cover that fits onto the end of the vacuum cleaner. It has two tubes: one reaches the bottom of the container with whitewash, and the second is a sprayer. Standard nozzles are designed for a half-liter jar and have a short tube; if the container is larger, you can purchase a more impressive nozzle.
Important: the nozzles have an additional hole that stops the sprayer from working at any time.
During whitewashing, a large amount of substance is sprayed, so we must not forget about a protective suit
That's all that could be said about whitewashing the ceiling with a vacuum cleaner. We hope that our article was useful to the reader. If you still have any questions, you can watch the training video at the end of this article, which can answer all your questions, because as they say, it is better to see once than to hear a hundred times.
Source
Nozzle for a vacuum cleaner from the USSR. Do you remember what it is for?
The Soviet Union gave us many interesting things, this is one of them. But I don’t understand why many people don’t remember her? When buying a vacuum cleaner, it is either thrown away, or it lies around unused, but does not find proper use.
Soviet vacuum cleaners were mostly equipped with a large number of attachments, some of which even helped with washing.
By the way, we also had one like this, it lay idle for a long time, but one fine day I saw my father mixing something with chemicals. I took this nozzle, a half-liter jar, poured something into it, it was already bad, but I remember, the main thing is I know what he did then. He whitewashed the walls.
So this part of the vacuum cleaner is needed for: whitewashing, disinfection, air humidification, just painting, you can spray dry substances, and I also read in one of the instructions that you can use it to destroy moths and other insects.
The nozzle itself is referred to as a spray gun. The hose is connected to the nozzle, on the other hand, to the blowout hole of the vacuum cleaner, the main thing is that it is sealed, voila, everything is ready to go.
There is a hole at the top with which you can adjust the power of the supplied flow with your finger.
Agree, in principle the idea is not bad, but in life it was not implemented very often. Few people wanted to dirty the vacuum cleaner. Therefore, when my father whitewashed, he always used an old vacuum cleaner.
Well, the whitewashing itself, in principle, left much to be desired; in order to achieve a good result it was necessary to whitewash several times.
Features of using a vacuum cleaner as a sprayer
In order to apply whitewash or water-based paint to the ceiling by spraying, you need a special device called a spray gun or spray gun. Its operating principle is based on the fact that air, pumped by a third-party device, comes out under pressure from the spray nozzle and draws out paint particles that settle in a thin layer on the surface of the ceiling.
The spray gun can be either an independent element equipped with an air blower, or it can be made in the form of an attachment that fits onto a third-party device, such as a compressor, vacuum cleaner or hand sprayer. However, using some models of vacuum cleaners as a spray gun will not be possible if:
How to whitewash a ceiling correctly?
To carry out this process, a brush, roller, or sprayer and vacuum cleaner are used.
Working with a brush is not so easy, so for those who do not have sufficient experience, it is better to give their preference to a roller. The well-mixed mixture is applied to the ceiling in two layers. It is recommended to apply whitewash perpendicular to the wall on which the window is located and along the entire room.
However, if you use a sprayer and a vacuum cleaner during the finishing process, you will be able to achieve a uniform coating.
Let's take a closer look at what a sprayer for ceiling whitewash is. It looks like a polyethylene lid that covers a glass jar with a liquid solution.
Two holes must be made in the lid to allow the tube to pass through them. It is connected to a hose from a vacuum cleaner, and at the end there is a special nozzle. Air comes out of the device under pressure, and as it passes past the tube, it sucks in the solution contained in the jar with associated pressure. Subsequently, it is supplied through a tube to the nozzle.
The second hole in the lid is needed to regulate the flow of whitewash from the can. By closing it, the supply of material decreases, while at the same time, if you open it, it increases.
It will be possible to whitewash the ceiling with a vacuum cleaner at the highest level only when all the nuances are met:
- spraying chalk or lime is done in a circular motion;
- it is necessary to maintain a minimum distance of seventy centimeters from the nozzle to the ceiling surface, but it should not exceed one hundred centimeters;
- The best option is to apply whitewash in three or four layers, since this allows you to hide small defects on the surface.
With all this, it is important to pay attention to safety precautions.
After applying this finishing material to the ceiling, pores form on the surface, allowing it to “breathe”. Plus, the coating itself can absorb vapors. Whitewash prepared strictly according to the recipe can last at least three years.
Types of vacuum cleaner attachments used for whitewashing
Professional sprayers that are used to apply whitewash can have different designs and features. In hardware stores you can find a fairly wide range of spray guns, which differ in the method of air supply, operating principle, location of the paint tank, and also in the amount of operating pressure. However, in the absence of a powerful compressor, a special attachment for the vacuum cleaner is used, which you can either buy or make yourself.
Three main types of attachments are most often used for applying whitewash:
Whitewashing with a vacuum cleaner - teach. How does this happen?
Whitewashing with a vacuum cleaner - teach. How does this happen?
Here is a diagram of the device itself for whitewashing using a vacuum cleaner
Screw in the vacuum cleaner hose and attach the nozzle (it is usually included in the kit and looks like this:
Well, of course, this is in domestically produced vacuum cleaners.
For foreigners everything is much cooler:
Let me immediately note that not any vacuum cleaner is suitable for this job.
You need a vacuum cleaner that works on blowing; most modern models of vacuum cleaners work only on “suction”.
I whitewashed the walls and ceilings at my dacha with an old Soviet vacuum cleaner; when whitewashing the ceiling I used chalk whitewash and limestone walls.
Next, the vacuum cleaner needs a special spray nozzle, you can buy it ready-made, or you can make it yourself, this is what it looks like
On one side there is a nozzle, on the other there is a pipe for connecting the vacuum cleaner hose.
Previously, jars (glass) were used as containers for whitewashing.
We put the nozzle on the vacuum cleaner hose; it is important that this entire structure is completely sealed.
But first, we prepare the surface for whitewashing.
If the surfaces were previously whitewashed, then completely wash off the old whitewash (you need a sponge, water and a spatula).
We moisten the surface with a sponge, after the whitewash has absorbed moisture and swelled, remove it with a spatula.
Next, check the surface for its evenness and level it if necessary.
If only putty is enough, then first a primer with drying, then putty with drying and a primer for whitewashing.
If the surface is flat, then we still prime it for whitewashing and let it dry.
Next, a solution (chalk, lime) for whitewashing is poured into the nozzle container, turn on the vacuum cleaner for blowing (connect the vacuum cleaner hose to the hole from which the air comes out).
At what distance to keep the sprayer from the surface depends on the power of the vacuum cleaner and the consistency of the whitewash solution.
The whitewash layer should be uniform, the approximate distance from the sprayer to the surface is half a meter (it can be a little more or less, this is calculated experimentally).
I whitewashed in two layers with drying, that is, the next layer was applied to the surface after the previous one had dried.
And from personal experience, so that the spray nozzle does not become clogged with whitewash, I advise you to strain (filter) the whitewash solution, for example, through gauze.
Do not use a solution that is too thick.
Source
Types and selection of devices
When choosing a spray gun for painting walls and ceilings, the price of which starts at $30, you should know what types of units there are. There are different types of sprayers for household and industrial use. Manual, electric and pneumatic devices are available for sale.
The latter are professional and not suitable for domestic use, so you should pay attention to:
Electric sprayers can be air or membrane. Air can be used for compositions with low viscosity, but the consumption of the compositions increases. But electric membrane spray guns do not form sagging and do not leave unpainted areas, but are used only with low-viscosity paints and varnishes.
To ensure successful spray painting of the ceiling, you should pay attention to the following parameters:
Features of whitewashing the ceiling using a vacuum cleaner
If you have a vacuum cleaner of a suitable model and find a special attachment, you can assemble a homemade spray gun and start whitewashing. It is important that all parts of the sprayer, especially if a homemade device is used, are tightly connected to each other. When applying the solution, the sprayer must be kept at a distance of 50 - 80 cm from the ceiling, perpendicular to its surface.
The optimal distance is selected experimentally and depends on the density of the solution and the pressure of the injected air.
A pressure of 3 - 4 atmospheres is considered close to ideal with an average density of the solution. If the whitewash is thick enough, then the pressure should be increased, and for a solution that is too thin, on the contrary, reduced. The distance to the surface to be treated should not exceed 1 meter to avoid excessive dispersion of the solution, and should not be less than 0.5 meter to prevent the formation of drips.
Applying the solution to the ceiling using a sprayer, as shown in the video, is carried out in an even thin layer in small areas. To achieve the best result, it is recommended to apply several layers of whitewash, with each subsequent layer being sprayed onto a dry surface.
You will need an old, Soviet-style vacuum cleaner, to the outlet of which you can attach a hose. The fact is that previously all ceilings were whitewashed using a vacuum cleaner, so all the outlet holes from which air blows were equipped with threads for attaching a hose. Modern vacuum cleaners do not have exhaust pipes, since they usually have filtration systems at the outlet, which prevents the free movement of air.
Next, take the required vacuum cleaner, attach the hose to the side where the air blows, attach a spray can with paint or whitewash, and point it at the ceiling.
Painting the ceiling with water-based emulsion... what could be simpler?! Take a roller and paint! But are you satisfied with everything in the end? In order for you to be satisfied with the result, you need to know how to whitewash a ceiling with water-based paint correctly. To do everything right, let's look together at the most common defects of painted ceilings and try to avoid them.
Do you already know how to paint a ceiling with water-based paint?
—>My site —>
There is a rational solution - an electric paint sprayer. It is used for quickly applying liquid compounds to wood, metal and other surfaces. This tool looks like a pistol, with a handle, trigger and paint container. There is a fluid supply adjustment screw on the body.
Working with the paint sprayer is very simple: just pour liquid into the tank, screw it to the body, connect the cord to the outlet and press the button. The general principle of operation is that the built-in motor creates pressure, due to which paint from the container is supplied to the nozzle and comes out of it as a paint mist. The composition is sprayed evenly; you only need to direct the stream at any object. So in a matter of minutes you can do work that previously took an hour.
So that you can understand how this device is used, we will give examples of the most popular customer questions and answer them.
What can you do with a spray gun?
- Paint various surfaces: walls, fences, radiators, furniture, roof.
- Apply anti-corrosion agents to the car body;
- Coat wooden products with varnish or stain;
- Treat plants with insect repellents;
- Spray disinfectant liquids;
- Apply stencil designs to walls or interior items;
- Whitewash the ceiling;
- Carry out preparatory work to clean the walls from old wallpaper or paint, applying an aqueous composition or solvent to them.
Article on the topic: What is the difference between a coffee machine and a capsule-type coffee maker
What are the advantages over traditional coloring agents?
To make sure that the spray gun is a truly profitable purchase, we will compare it with a regular paint brush. To do this, we highlight several comparison parameters:
- Application quality. When painting with a brush, smudges, stains form, and fallen fibers stick. When working with a sprayer, the most even and precise application of paint on any surface, even a textured one, is achieved.
- Dyeing speed. Electric sprayers have a capacity of up to 0.5 l/min. Therefore, on average, in 10 – 12 minutes you can paint up to 5 square meters. meters of surface. Working time is reduced significantly!
- Expenditure of effort. Since the painting process takes less time with a spray gun, you won’t have to get tired, as well as put in extra effort when applying paint - just direct the jet to the area being treated. This tool is very lightweight, so even women can work with it.
- Economical. The composition does not stay well on the brush, and not all of it is transferred to the surface, so it is used uneconomically. While the spraying process distributes the dye evenly, a small mist is formed, so paint loss is negligible.
Undoubtedly, a paint brush is cheap, and you don’t mind throwing it away after one or two uses. But you can buy paint sprayers that will be used for many years! And he will recoup the money spent with efficient and high-quality work
Are all spray guns the same?
Electric sprayers vary in purpose . If you are going to paint vertical surfaces, for example, walls, fences, doors, then purchase a tool with a lower tank. If the liquid container is located on top, such a device is recommended for applying compositions to the floor or ceiling. For universal use, we can recommend a spray gun with a curved feed tube, for example, Bosch PFS 55. Let's say you need to varnish a wooden table. By turning the tube 90 degrees, you can evenly apply the liquid to both the table legs and the lid. It is very convenient to use for such purposes sprayers with a flexible nozzle, with which you can paint both horizontal and vertical surfaces, for example, Caliber Master EKRP-200/0.7M.
In addition, it is worth paying attention to the volume of the paint tank . The more spacious it is, the longer it is possible to work without refueling. If you are going to paint small objects, for example, a stool, bench, radiator, window frame, then there is no point in purchasing a tool with a large tank. A container of 0.5 - 0.7 liters will be sufficient. For large-scale painting work, there are more productive spray guns with tanks of 0.8 - 1 liter - painting walls, whitewashing ceilings, applying stain to wooden floors, varnishing long fences.
What to look for when purchasing?
The description for each spray gun model contains technical characteristics that should be taken into account when choosing.
The larger the nozzle diameter , the more viscous substances can be sprayed using a spray gun. Each spray gun has its own permissible viscosity of substances for which it can be used (for example, 30 DIN/sec). If the composition is too thick, it will be impossible to spray. Power - the higher it is, the longer the spray gun can operate without interruptions to cool the engine. Productivity determines how much liquid a tool can apply to a surface per unit of time. The more it can spray in a minute, the faster the object can be painted.
What do you need for successful painting?
So that you can start working right away, we recommend purchasing additional accessories along with the tool. When spraying paints and other liquids, small particles of the substance settle in the air. Therefore, while working, be sure to use protective equipment: glasses, gloves and a respirator . They will help prevent harmful vapors from entering the respiratory tract, on the skin of the hands and in the eyes. If you are going to use the spray gun both at home and in the country, then for convenient storage and transportation you will need a plastic box . You can put the tool, all consumables and extension cord in it. The entire painting kit will be in one place, and nothing will get lost.
How to achieve the best result?
Let's take a simple example: we are going to get rid of boring wallpaper and paint the walls. White will be the main color, and green we will apply the design through a stencil. So what steps need to be taken?
First of all, you need to clean the surface. To remove old wallpaper, use a spray gun, applying water or a special solution to the wall. When the wallpaper gets wet, remove it with a spatula. The wall should be smooth, all bumps should be leveled. It is better to apply paint on a smooth surface, so sand it down.
Safe work rules. Since we will be painting indoors, it is necessary to ensure a supply of fresh air so that the paint fumes can evaporate. It is necessary to work in protective equipment to eliminate the possibility of poisoning. It is better to cover all nearby objects with film.
Preparation of a solution of the required consistency. Painting. To ensure that the composition lies evenly on the surface, it is recommended to hold the tool vertically and at a distance of 5-15 cm from the wall. Choose one painting direction: either up/down or left/right. After applying the base coat, you need to let the paint dry. Only then can you start making a drawing through a stencil.
Caring for the spray gun. After finishing a job or when changing from one color to another, cleaning must be done. To do this, pour solvent into the tank and spray it to get rid of the paint that has stagnated in the nozzle and supply tube. A similar cleaning operation must be carried out each time coloring is completed. If you keep your tool clean, it will last longer.
Interior decoration, painting work of any complexity - all this is possible with spray guns, which you can buy from us now. The website VseInstruments.ru presents a wide range of electric paint sprayers, and you are sure to find a suitable model. Don't forget to purchase supplies to get started right away. Our managers will provide assistance in choosing and are ready to answer any questions.
/ No
The main stage of painting
To carry out any construction or repair work, it is necessary to use a certain tool. It is recommended to carry out paintwork using:
There are a number of additional materials and tools that can make the painter’s work easier, but they are not mandatory or irreplaceable. When working with paint, even a very careful person cannot be completely protected from paint products getting on the painter’s skin and clothes.
Therefore, it is recommended to use old clothes that completely cover the body; it is advisable to wear light construction gloves on your hands, and protect your eyes with special glasses. To clean tools, clothing and skin after completion of work, you will need to use various special products. It is recommended to purchase them in advance in the store and keep them on hand, since a roller or brush that is not washed in a timely manner will make it difficult to dry quickly and restore it to working condition.
The process of painting a ceiling, as many people think, is simple: you take a roller, dip it in paint, and roll it across the ceiling. But this is not entirely true: there are a number of nuances that affect the final appearance of the painted ceiling. By using the same materials but working completely differently, you can end up with two completely different ceilings.
In the profession of a painter, there are various special concepts, for example, such as the direction of the light flux. The wrong choice of direction for painting the ceiling can lead to excellent visibility of marks from a roller or brush, which will have a very negative impact on the overall appearance of the finished surface.
First of all, you should go around the perimeter of the ceiling with a paint brush - a strip of 5 cm will be more than enough. This will prevent you from damaging the junction of the wall and the ceiling during further work with the roller.
How to whitewash the ceiling (walls) with a vacuum cleaner or sprayer
One of the fastest and most effective ways to whitewash is to use a vacuum cleaner, which is found in almost every home.
For proper whitewashing, you need a vacuum cleaner itself, which must be “able” to blow air, not blow it in (not all models have this function), and among the attachments it must come with a special polyethylene lid with a set of tubes.
How to whitewash a ceiling (walls) with a vacuum cleaner or sprayer. This lid needs to be placed on a liter or one and a half liter jar, and all this must be connected to the blowout hole in the vacuum cleaner. Air under pressure will flow through the hose, enter the sprayer, drawing the mixture from the can, exiting through the tube and spraying the solution over the surface.
The supply of solution is regulated using another hole, which is closed with a finger.
In order for the whitewash to lay evenly, you need to make smooth circular movements. The spray nozzle should be approximately 80-100 cm from the surface. You can repeat the procedure several more times to achieve optimal results.
Follow basic safety rules when whitewashing the ceiling (walls) with your own hands
When whitewashing a ceiling or walls, you need to wear protective clothing and use safety measures: a bandage on your face, safety glasses on your eyes, and rubber gloves on your hands.
If you want your ceilings to please you with their cleanliness and whiteness for many years, you can safely start whitewashing the walls and ceilings with your own hands, using these instructions!
Similar news
More information on the topic: https://moydomik.net
Defects in painted ceilings
Stains and stains
They can darken not only the surface of the ceiling, but also the beauty of any interior. The reason for the appearance of stains is a violation of the painting technology. And the point is not even that you chose domestically produced paint rather than foreign - there is not much difference, the main thing is not to buy an outright fake. It probably depends more on the roller. As practice shows, you can whiten a ceiling without streaks using a roller with long threads (usually yellow). In this case, it is better not to use velor - it absorbs little paint, work with its use is very slow, and foam rubber leaves bubbles.
Stripes
If you didn’t know how to whitewash a ceiling with a roller, but decided to do it anyway, get ready to face streaks of paint. They are formed due to a slight rolling of paint with a roller. To avoid this, you need to roll the roller over the painted surface when there is practically no paint on it.
Instructions for painting the ceiling using a roller
Preparation stage
First you need to prepare the base of the ceiling. On the leveled ceiling, fill all cracks and apply primer. It is not advisable to apply new paint to old paint, but if you only want to change the color, and the old paint does not come off the base and is applied in one layer, you can take a risk. If everything is not so smooth, you will have painstaking work to remove the old layer of paint or whitewash. You cannot apply water-based paint to old whitewash - everything will peel off quickly. The whitewash needs to be washed off at a minimum.
So, the ceiling is prepared for painting, all things are taken out of the room - you can begin work. If you want to quickly whitewash the ceiling and then paint the walls, start with the ceiling, since you may accidentally stain the room. If the repair is not so global, it is enough to cover the furniture and floor with oilcloth or film.
Now it's time to prepare the necessary tools and paint.
Preparing the Paint
The paint must be diluted in accordance with the instructions; often the required thickness is indicated there. Manufacturers usually recommend adding 10% water. If nothing is said about water, then you just need to mix the paint using an electronic drill with a mixer attachment. If you want a colored solution, add a little water-based dye and mix well.
By adding dye, you get bright water-based paint
Forward with a roller and a song!
Video on how to whitewash a ceiling with a brush and roller
Preparing a solution for whitewashing the ceiling with chalk
The solution for chalk whitening is prepared as follows: 5 liters. add 30 grams of water. wood glue, 15 g. blue (to give the solution whiteness) and 3 kg of chalk. The prepared solution is enough for 10 sq.m.
You can check the consistency of the solution using a knife. If the solution flows freely down the knife, it means that the solution has insufficient viscosity. Then you need to add more chalk there, but gradually, in small portions, so that the solution does not turn out to be too thick.
Preparing a solution for whitewashing the ceiling with lime
The solution for lime whitening is prepared as follows: stir 2-3 kg of lime in one liter of water, add 100 grams. salt, 200 gr. aluminum alum. Mix thoroughly and then dilute with warm water (up to 10 l.). If you want to change the shade, you can add 200-500 ml of dye.
When whitewashing with lime, the surfaces must be moistened, then the lime lays down evenly, without leaving streaks.
Preparatory work
Examine the ceiling. If you notice traces of black mold, be sure to wash the affected surface with a chlorine-containing product (“Belizna”, etc.) or use special compounds to destroy fungus in building structures. In rooms with frequently damp ceilings, it is best to use an antifungal primer.
You can only paint a properly prepared surface - without bulges and depressions, without the old layer of finish peeling off. If we are talking about a new building, the base ceiling is cleaned with a spatula from traces of mortar and adhering debris and primed with a deep penetration compound. Wait for the primer to dry before applying a base coat of putty to fill all cracks and depressions. When treating wide cracks and seams, synthetic reinforcing mesh may be needed. The dried surface should be rubbed with grain sandpaper, primed and a finishing layer of putty should be applied - it is sanded with a float and primed for painting. You can read here how to properly putty the ceiling before painting or watch the video:
The ceiling with the existing finish is also prepared according to this principle. Completely remove decorative ceiling tiles or wallpaper along with the adhesive layer. Check the painted surface for strength, clean off flaking areas, sand the surface with a float and prime twice. It is recommended to completely remove old plaster or a thick layer of putty and prepare the base from scratch.
On a ceiling leveled with plasterboard sheets, thoroughly putty and clean all joints and fastening points. Before painting, do not forget to prime the work surface.
Before preparing and painting the ceiling, make sure you have a safe and comfortable work area. A stepladder is not the best solution if there is no assistant ready to hold it during the work. If possible, use a construction “goat” of a suitable height, which can be put together in 20 minutes; in an apartment with ceilings up to 3 meters high, this function can be performed by an ordinary table if it is strong and stable.
If there are elements on the ceiling or adjacent wall areas that cannot be painted, carefully cover them with masking tape.
Stages of applying whitewash to the ceiling
Any repair or construction process begins with the preparation of the working area. It includes removing the old coating from the surface, be it the previous whitewash or some other finishing material. If we are talking about the first option, then you can get rid of it with water. Simply apply it to the lime or chalk coating and after a while remove it using a rag and a spatula.
It is worth paying attention to the fact that it is much easier to get rid of chalky whitewash, unlike a composition that contains lime.
After the previous coating has been completely removed from the ceiling, you need to examine the surface for any flaws or defects. If they exist, they must be disposed of. For this purpose, the surface must be treated with a deep penetration primer solution. In this way, you will not only ensure the required degree of adhesion, but also, in addition, strengthen the top layer of the concrete floor.
After the ceiling has been processed, you can begin to repair existing defects. This is done using putty, which contains cement in its base.
It is important to know that in the process of removing the previous finish you will in any case damage the joints of the concrete slabs. What to do in such a situation? One solution to this issue is the usual priming of the joints and its subsequent putty. Another method is to cover the required areas with sickle tape and only after that apply putty.
If there is a need to level the entire ceiling, then be sure to do this. For this, it is best to use a putty solution. After it has dried, sand the surface with sandpaper. Only after completing the above steps can you proceed to the primer.
The main thing is to ensure that each layer laid on a plane is sufficiently dry, regardless of whether it is a primer or putty.
Working in the bathroom
Whitewashing the ceiling in the bathroom with water-based paint is a different story and a number of additional difficulties due to high humidity. First you need to choose the right paint intended for painting in such rooms. It is better to paint with a roller rather than a brush and apply paint only to the prepared surface.
When painting a bathroom ceiling, the main thing is to properly prepare the surface and choose a good roller
If the ceiling was previously painted with oil paint, there is no need to rip it off, just clean it until matte, then wash it with water. If you are satisfied with the appearance of the ceiling, you don’t have to do anything with it, just start painting, otherwise you will have to fill up the unevenness with moisture-resistant putty, prime everything and only then paint.
How to apply the composition
The recommended number of layers is three. Each new one is applied only after the previous one has dried.
Do not paint over a fresh coat of paint or primer. Otherwise, the mixture will lie poorly and may peel off quite quickly. This will lead to a complete redesign.
To create the first and third layers, the optimal time is considered to be morning and evening hours, when there is good daylight in the room and direct rays of the sun do not dazzle. Although this recommendation does not have to be followed exactly. The most important thing here is that all errors in the application of the composition are visible, and the angle at which the light falls is as close as possible to constant for the room being repaired.
One of the most important stages of interior finishing work in any room is high-quality ceiling finishing.
One solution: call a specialized team from a construction company that provides services of this kind. Modern technologies make it possible to apply dozens of different finishing options to the ceiling, but not every owner of an apartment or private house can afford to pay for such work. Therefore, the independent process of repairing the ceiling remains popular today, especially among people with small family income.
Until recently, the main materials used to repair the ceiling surface were chalk and lime mortar. But the development of modern technologies does not stand still, so today’s construction market can offer consumers dozens of simple and high-quality solutions. Solving problems using the old-fashioned method is fading into the background and is being used less and less, given the complexity of the preparatory work and the impossibility of maintaining an ideal condition for a long period of time.
One of the most popular ways to give the ceiling a fresh and beautiful appearance is the process of applying water-based paint. One of the main advantages of this technology is the ability to easily maintain the condition of the surface or quickly carry out restoration work.
Thanks to its unique formula, which includes polymers and pigments, water-based paint releases and evaporates excess moisture during the drying process, forming a durable and beautiful coating that is resistant to washing off and destruction. The environmental friendliness of the product has been tested in various ways and scientifically proven experimentally.
In this article you can read about different ceiling finishing options.
Characteristics of chalk whitewash
The composition of the solution directly affects the resulting quality of repair; therefore, in order to get the best result, with little experience it is better to purchase the most ready-made options. We are talking about chalk whitewash in the form of a paste.
Chalk whitewash is inexpensive, and it is easy to dissolve, so as a result, it will be easier for a beginner to get a rich white color from this composition; it will look great on the ceiling of the house. But if you don’t want to get a classic coating, then you can always use color to get other coating options.
This property allows you to diversify interior design options. Harmlessness to human health makes the product suitable for finishing any room. In addition to the ceiling, this material can be used to decorate various surfaces, for example, a stove or trees.
Harmlessness to human health makes the product suitable for finishing any room.
Advantages and disadvantages
Before deciding whether to choose chalk whitewash for finishing the ceiling, you need to understand its positive and negative qualities. The advantages include the following:
- The work is not difficult to do, even a beginner can handle it, which will save money on the services of professionals;
- White color visually lengthens the room;
- Environmental friendliness;
- Repairs will not take much time;
- There is no need to purchase many tools;
- Acceptable price.
Negative properties include:
- Inferior in external qualities to other types of modern finishing materials;
- It will be necessary to take care in advance to protect the objects in the room, remove them from it, or cover them with film;
- The work requires compliance with safety measures. The composition may enter the respiratory tract.
White color visually lengthens the room.
Lime-chalk whitewash compositions
Unlike lime whitewash, which does not have a pure white color, chalk is added to lime. The proportions of chalk to lime may vary, with options ranging from 0.25/1 to 1/1. At breeding 1.5 kg. chalk with 2 kg. lime with water produces a mixture with excellent coverage and non-smearing. It is possible to supplement the composition with glue and soap for better coverage.
Unlike lime whitewash, which does not have a pure white color, chalk is added to lime.
Preparing tools
You will need few tools for the job, but you still need to make sure that they are at hand. Then the process will go faster, and you won’t have to be distracted by searching for them. Required:
- Spatula to remove old finish;
- Ladder;
- Brush, roller or spray gun;
- Oilcloth;
- Capacity.
To make the painting process easier, it is better to choose a roller with an extended handle.
You will need few tools for the job, but you still need to make sure that they are at hand.
Preparing the room and ceiling
To get a high-quality result that will please the eye of the apartment owner, you must first take care of removing the old coating. After all, the old finish can appear through the new color, and also after a certain time and begin to crumble, damaging the new whitewash. And then the repair will have to be done again.
Repair work should begin with cleaning the space; you will need to do the following:
- If possible, furniture and other interior details are removed;
- Chandeliers are removed from the ceiling;
- The remaining items, as well as the floor, need to be covered with film or paper, the main thing is to secure them securely (you can use tape);
- To carry out the work, they bring a ladder, or the master can stand on the table.
Preparatory work for the ceiling consists of performing the following steps:
- Cleaning old whitewash.
- To eliminate areas with mold and mildew, if any, special solutions are used for this.
- It is necessary to remove the peeling pieces of the previous coating.
- To obtain an even coating, putty is applied.
- When the surface is dry, it should be sanded with sandpaper.
- Application of deep penetrating primer.
- After these manipulations, you need to wait 24 hours for the ceiling to dry.
To get a high-quality result that will please the eye of the apartment owner, you must first take care of removing the old coating.
How to prepare: in what proportions and how to properly dilute the chalk solution
How to dilute chalk for whitewashing a ceiling, the proportions necessary to obtain the best result include the following components and their quantities:
- Chalk - kilogram;
- Water – two liters;
- Blue for whitewashing - five grams;
- Laundry soap 72 percent - fifteen grams;
- Wallpaper adhesive solution - ten grams.
The cooking process itself consists of:
- Chalk must be thoroughly diluted in water, making sure that there are no lumps left in the mixture.
- Then this mixture is diluted by adding pre-diluted blue, laundry soap and glue.
Blue is used to create a protective layer from the harmful effects of sunlight, and also makes the solution snow-white. Violating the amount of it in the composition will lead to coloring of the composition, it will be colored.
If there is a desire to obtain other shades, then for this they resort to the use of special colors.
Blue is used to create a protective layer from the harmful effects of sunlight, and also makes the solution snow-white.
How to whitewash yourself with a brush or roller, spray gun or vacuum cleaner
For work, you can use standard tools such as a brush or roller, or to simplify the process, use a spray gun, which will also reduce the consumption of the composition. General operating principles:
- You should mentally divide the ceiling into meter by meter squares.
- The solution is stirred before staining so that the chalky part does not settle.
- Two layers are made, the second needs to be painted after the first has dried.
- When a brush or roller is selected, the action begins from the window. The 2nd layer is made perpendicular to the 1st to avoid streaks.
The spray gun will allow you to whitewash quickly, while getting an even and matte finish. You need to have a vacuum cleaner with a blowing mode. Stages:
- The finished solution is mixed and poured into a 1 liter jar.
- Place a spray nozzle on the jar.
- A hose from a vacuum cleaner is put on the sprayer; the supply is adjusted through the second hole on the lid.
- The movements are made in a circular manner, moving smoothly.
The spray gun should be at a distance of 70-100 centimeters from the ceiling surface.
The spray gun will allow you to whitewash quickly, while getting an even and matte finish.
How to quickly remove old coating
The first step is to understand what kind of finishing was done previously. Limestone whitewash appears in spots on chalk. To understand what kind of material was used, you need to touch the ceiling; if the coating stains the skin, chalk was used; if not, lime whitewash was used. Methods for eliminating previous coverage:
- Removing whitewash with a spatula and a brush with iron rods; after the process, the ceiling is washed with a cleaning agent and water;
- If the coating is thin, you can wash it off immediately with water and a cleaning agent;
- Concrete can sometimes be difficult to remove the previous finish. In this case, the surface is first wetted; a sprayer is suitable for this. The wetted whitewash will be easier to remove with a spatula, and then the surface is washed again;
- In very difficult cases, a special chemical agent is purchased. It is applied with a sponge or a spray bottle, and after a certain time the ceiling is washed. The waiting period is specified in the instructions for the product.
Next, putty and primer are applied.
The wetted whitewash will be easier to remove with a spatula, and then the surface is washed again.
Applying the first layer
How to whitewash the ceiling with chalk? Staining is done twice. The application of the product occurs in stages, mentally designating the zones, painting, starting work from the window, moving towards the exit from the room.
Start working from the window, moving towards the exit from the room.
Re-dyeing
Move on to the 2nd layer after the first has dried. When a roller or brush is chosen for painting, it is better to apply it perpendicular to the previous one. Then the stains will not appear.
When working, you should not rush; if you have little experience, then acting quickly will make it difficult to avoid divorces.
When a roller or brush is chosen for painting, it is better to apply it perpendicular to the previous one.
Safety precautions
Before work, it is necessary to wear protective clothing, goggles, a respirator and gloves, otherwise health problems cannot be avoided. After all, small fractions of chalk can get into the respiratory tract, and the eyes can also be easily damaged. The reliability of the device on which the master will stand must also be checked before work.
What else can you do to whiten?
In addition to a roller and brush, you can use other equipment for whitewashing. And if you don’t know how to whitewash a ceiling with a vacuum cleaner, it’s time to learn, because it’s a quick and practical way. The only downside is that it is unlikely that you will be able to whitewash the ceiling yourself; you need an assistant - one maintains the pressure in the device, the other whitens it.
As in the previous case, the first stage is surface preparation. To get rid of a layer of old whitewash, you need a spatula and a bucket of warm water with vinegar/citric acid added. It is better to soften and remove old whitewash in stages, dumping it on the laid floor or in a bucket that is in your other hand. Small parts of whitewash can be easily removed with a damp sponge.
Whitewashing with a vacuum cleaner
Don’t forget to cover the treated surface with a special antifungal agent, then with a primer, after which you can start whitening using a vacuum cleaner:
What is the best way to whitewash a ceiling?
Currently, two main types of environmentally friendly materials are used for whitewashing ceilings and walls - chalk and lime.
Whitewashing the ceiling with lime
Lime has the advantage that it has bactericidal properties and also has the ability to tighten cracks, as if closing them.
Whitewashing the ceiling with chalk
At the same time, lime can cause allergic reactions in some people; in this case, of course, it is better to use chalk, which gives an excellent white color when whitewashing (although lime is no worse).
Please note that if the ceiling was previously whitewashed with lime, it is recommended to use it in the future to avoid unsightly streaks and stains.