One of the important stages of building a house is finishing the facade. Various methods are used for this. The most common option is plastering, which is suitable for any surface, be it wood, brick, concrete or other material. External plastering of walls ensures:
- protection from the negative influence of the external environment;
- thermal insulation;
- moisture protection;
- air exchange;
- aesthetics.
Plastering a facade is not a very complicated process, the main thing is to follow all technological rules. An important stage in this case is preparing the surface for plastering; how well it is done depends on the final result.
For new buildings, preparing brick surfaces for plastering involves cleaning them from dust, dirt and other stains. If possible, remove the bumps and sagging on the wall. If we are talking about something that was previously plastered, then it is necessary to remove the old damaged finish.
You can detect such areas using a hammer or a wooden block with which you tap the wall. In places where a dull sound is heard, remove the old plaster. This is done using a chisel and a hammer or a hammer drill.
The next stage of preparing the brick surface is jointing. This stage is skipped if the bricklaying was done in a waste area or if we are talking about repairing the finish. Next, the walls are primed, which involves treating the walls with a special compound that ensures good adhesion of the plaster.
An important stage in preparation for plastering is the reinforcement of the walls. This is done using a chain-link mesh. According to accepted building codes, the installation of reinforcing mesh is required if the thickness of the mantle is more than three centimeters.
But experts recommend doing this anyway. The mesh, providing good adhesion between the brick wall and the plaster, eliminates the appearance of cracks on the facade. Reinforcement is necessary when preparing the surface of the basement part of the facade, since, as a rule, it is made of concrete.
At this point, the preparation of the surface to be plastered can be considered complete. But before applying the plaster, vertical beacons are installed from guide profiles, along which the surface is leveled during the application of the plaster layer. Beacons can be steel or plastic.
In order to avoid cracks in the plaster, internal and external corners are also installed on window and door openings. Plastering is carried out after the primer has completely dried. This is done exclusively in dry weather, since rain can completely wash away the damp plaster.
Preparing the surface for plastering walls made of foam blocks, reinforced concrete slabs and other materials
Surfaces for plastering, made of foam blocks and reinforced concrete slabs, include the same steps as when preparing a brickwork facade, only the stage of jointing is excluded, since when using these materials there are fewer seams, and therefore less hooking points.
Jointing is not required for a façade constructed from (SIP panels) using Canadian technology. A primer is immediately applied to them, which gives the smooth surfaces a slight roughness (for good adhesion to the plaster mixture). After it dries, fill the plaster mesh. To apply the finishing layer, various tools or special equipment are used.
When are notches necessary?
Additional measures for better adhesion of the plaster mortar to the walls are required if the wall panel material is made of brick, aerated concrete, foam concrete, and the wall is completely smooth.
If work is carried out on wooden walls, notches become insufficient. In this situation, additional equipment is required with reinforcing mesh or thin wooden planks, called “shingles”. If these measures are not taken, the plaster will not adhere to the surface and will fall off.
Preparing the surface for plastering a wooden house
Work on plastering the facade of wooden structures is carried out only after complete shrinkage of the structure. And this period ranges from one to two years. Preparation of wooden surfaces includes a sufficient amount of work, implying:
- Alignment of walls. Elimination of unevenness is carried out by chipping or stuffing wood.
- Processing smooth areas to give them a slight roughness.
- Sealing gaps between timber or boards.
- Cleaning the façade surface from various contaminants.
- Antiseptic treatment to protect wood from the negative effects of biological factors.
- Facade reinforcement. This procedure is done by upholstering the facade with shingles or chain-link mesh. When using shingles, lay them in two perpendicular rows, thus forming square cells. Attach shingles to wooden walls using nails.
Plastering directly onto a wooden surface is carried out in several layers. The first of them is a rough, liquid layer. Its thickness should not be 0.5 cm. The second, primer layer, is applied after the previous layer has completely set, after about 1–2 days, depending on the air temperature. The thickness of the second layer should be about 2 cm. The finishing finish (covering) with a thickness of 50 mm is applied a few days (2–7) after the plastered surface has completely dried.
When performing work, it is important to pay attention to the thickness of the plaster. The finish should not be very thin, otherwise gaps or cracks may form on the surface. The texture of the plastered facade can be smooth, grooved or completely rough.
Improve grip
If the walls are brick, you need to unstitch the seams. The depressions can reach up to one centimeter. But this is only with regards to porous bricks. If the brick is smooth, it is necessary to make notches.
Important! Notches are needed for good adhesion of the plaster mixture to the wall.
To ensure that the plaster does not fall off during use, notches are made 5-10 centimeters long and up to half a centimeter deep. On rough surfaces such as cinder block or shell rock, notches are not needed.
Wooden walls
With such walls things are different. For them, reinforcement is made before plastering. Or they fill slats from thin wood. This kind of lath used to be called shingles.
Stone walls
If the wall is stone or concrete, and reinforcement is not used, in this case it is necessary to make notches. They are made with a regular hammer.
It is better, of course, to use a reinforcing mesh; it is easily screwed to the wall using self-tapping screws. The adhesion of the plaster will be very good, and the need for notches will disappear.
What types of plaster are used?
Manufacturers of building materials offer a large selection of mixtures for plastering facades. They differ in composition, characteristics, texture and other indicators. The texture of the material depends on the granularity of the components included in the mixture. The components of the mixture include quartz sand, marble chips, glass dust, dye granules, wood fibers, etc.
Depending on the composition, the following types of mixtures for plastering facades are distinguished:
- Mineral mixture. This is the most common and cheapest type of plaster, most often used for brick and concrete surfaces. However, in terms of stability, mineral plaster is inferior to other types; in addition, it has a very narrow range of colors. To obtain the desired shade, the surface must be additionally painted.
- Silicate mixture. It is distinguished by the presence of liquid glass in its composition. The cost of the material is relatively high, but the durability justifies the price. Suitable for brickwork and insulated surfaces.
Acrylic mixture. It is elastic, the material dries quickly, so plastering work needs to be done very quickly. It is vapor permeable and moisture resistant. Easily washed off from any dirt. Suitable for walls made of any material, including those with insulation.
Manufacturers also offer silicone plaster. This is the most expensive mixture, suitable for any surface. It is elastic and dries very quickly. It is distinguished by its durability, the only drawback is low vapor permeability. The choice of material for plastering the facade depends on the purpose of the building, size and many other factors.
This article will discuss how various surfaces are prepared for plastering. To begin with, let's highlight the main surfaces that are very often found in the practice of construction and repair work.
List of surfaces to prepare for plastering:
- Preparation of wooden surfaces.
- Preparation of brick surfaces.
- Preparation of stone-like surfaces.
- Preparation of concrete surfaces.
- Preparing the metal surface.
Compositions of solutions
Continuous leveling
of concrete surfaces indoors
is carried out
using cement-lime
mortar or using
plasticized polymer-cement mortar
based on a dry mixture or ready-made synthetic mixtures of factory production.
To increase the mobility of solutions
plasticizers are introduced into their composition
.
In rooms with air humidity no more than 60%,
for
plastering concrete surfaces
:
READ ALSO: Preparing walls for wallpapering Recommended compositions of plaster solutions
for concrete surfaces
are given in Table 1.
Preparation of wooden surfaces
Such preparation requires additional materials, and this method is a little outdated. But sometimes it can still be found on construction sites.
- Stuffing plaster shingles onto the surface;
- Attaching a metal mesh to the surface to be plastered.
Stuffing plaster shingles is done as follows. Thin wooden planks are taken and laid on the surface in two layers. The first layer of shingles consists of curved wooden planks; you can actually use different ones, but with a thickness of no less than 3mm and no more than 5mm. The second layer of shingles should be stuffed at an angle, and consist of even planks, the thickness of such planks should be the same as that of the planks of the first layer, a deviation in thickness of ± 2 mm is possible.
The metal mesh is attached to a wooden surface using nails. The metal mesh to be fixed must have cells with a size of 10*10mm. But one more point needs to be taken into account. When attaching a metal mesh, the thickness of the plaster should be no more than 40mm.
If the thickness of the plaster needs to be made greater, then it is necessary to add roughness. This is done using nails that are driven 100mm apart from each other and 20mm deep. After this, wire is wound around the nails, resulting in a kind of mesh.
Preparation of brick surfaces
This type of surface is not as difficult and tedious to prepare as compared to wood. If the wall has just been laid out and has a laid out waste material, then all that remains is to clean it from dust and make notches if necessary.
In the case when the seams between the bricks are completely filled with mortar, the mortar in the seams must be cut out to a depth of at least 1 cm. After cutting, clean first with a metal brush, and then you can clean it from dust as usual, and if necessary, make cuts. This completes the process of preparing brick surfaces.
Preparation of stone-like surfaces
Stone-like surfaces generally have sufficient roughness. They are prepared quite simply - dust and dirt are cleaned using simple brushes, metal brushes; if necessary, if there is not sufficient roughness, notches must be made.
Preparation of concrete surfaces
Concrete surfaces that have only recently been made and installed must be thoroughly cleaned of dust and contamination. It is necessary to make notches using a hammer and chisel (trojan). After the notches are ready, you need to clean them from dust and dirt again and begin plastering work.
In cases where the walls have an old finish or have been in use for a very long time, it is necessary to clean them more thoroughly. If the wall had a painted finish, the old paint must be removed before plastering.
When examined without magnification, the surface should be free of visible oil, grease and dirt, as well as loose scale, rust, paint and foreign particles (mill scale, rust or paint coating is considered weak if it can be removed by lifting with a blunt putty knife ).
Sa 2 - Thorough blast cleaning
When examined without magnification, the surface should be free of visible oil, grease and dirt, as well as most mill scale, rust, paint and foreign particles. Any remaining contaminants should adhere firmly.
Sa 2 1/2 - Very thorough blast cleaning
When examined without magnification, the surface should be free of visible oil, grease and dirt, as well as mill scale, rust, paint and foreign particles. Any remaining traces of contamination should only appear as light staining in the form of spots or streaks.
Sa 3 - Blast cleaning to visually clean steel
When examined without magnification, the surface should be free of visible oil, grease and dirt, as well as mill scale, rust, paint and foreign particles. It should have a uniform metallic color.
In other words:
- degree of cleaning Sa 2 - 76% of clean surface;
- degree of cleaning Sa 2 ½ - 96% clean surface;
- cleaning degree Sa 3 - 99% clean surface.
Removing dust, abrasive residues, etc.
Although paint sticks well to dust, dust does not stick to steel surfaces.
This leads to poor adhesion of the coating and, thus, to its sensitivity to mechanical stress and peeling, and therefore to early corrosion.
Therefore, insufficiently cleaned areas must be cleaned again using clean compressed air.
Removal of water-soluble salts
To ensure that steel sheets are free of salt, they must be stored under cover or cleaned with fresh water before the material is taken into production.
If salts are found on the surface, they must be removed with water. We recommend washing with a high-pressure fresh water hose or a water hose while using stiff brushes.
For excessive pitting, hosing down should be done during or after cleaning the pits. Wet or dry sandblasting followed by high pressure hosing and dry cleaning again is recommended.
Water-soluble anti-spatter must be removed with water. Other types must be removed by solvent cleaning.
Roughness value
Three factors are important for an abrasive-cleaned profile: height, shape, density. When the profile exceeds the permissible level, peaks appear above the surface of the coating, leading to its destruction. Too low a height, round shape and low density will prevent proper adhesion of the applied coating. The result will be poor adhesion, which will cause increased sensitivity to mechanical stress on the coating and its destruction to steel, which will lead to early corrosion. A profile that is too high can cause the tops of the profile to protrude through the coating, resulting in early pitting. The profile cannot be too sharp or too dense. How to fix? Areas of surface showing too low height, round profile or too low density should be sanded again using a coarse abrasive.
Final quality control of surface preparation should be carried out immediately before plastering or painting. In general, most paint schemes require the following grades of metal surface condition to be achieved.
Expert recommendations
The only advice that experts give is: don’t take a job if you’re not confident in your abilities. The instructions given by the plaster manufacturer are so detailed that even a child can figure it out. But the application process is quite labor-intensive and complex. This means that not everyone can do it on their own.
Therefore, it is better to resort to the services of a professional team to get high-quality and reliable results. The second question is that choosing people who understand this matter is also difficult. It is better to contact a company that has been offering its services on the construction market for a long time and has good feedback.
Metal surface preparation
In most cases, when preparing surfaces made of non-ferrous metals and aluminum alloys, GOST 9.402 is followed. When painting fresh galvanized steel with the zinc coating intact, degreasing alone is usually sufficient. It is more labor-intensive to prepare the surface of old galvanized steel, where additional white deposits on the old zinc coating and rust from carbon steel that forms in places where the zinc coating is damaged must be removed with mechanical tools.
Required Tools
To efficiently solve all the tasks, you need to purchase the following devices:
- Putty knife. It is useful for applying stone-like plaster, as well as for faster removal of old finishing material.
- Steel brush. Helps remove large dirt from the wall before plastering.
- Scraper. Relevant in situations where there is a need to remove problem areas of the old finish.
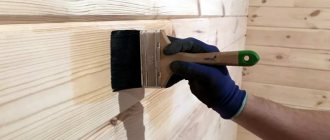
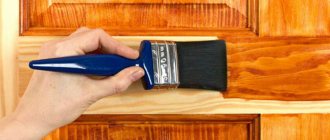
- Paint brush. Used for applying primer.
- Hammer. Ideal for tapping old plaster and knocking down finishes.
- Construction guides or beacons. Without these devices it is difficult to create a perfectly even coating.
- A small container for preparing a working solution.
- Construction mixer. This unit is designed for mixing the mixture. If you don't have a mixer, you can use the attachment of an electric drill.
- Trowel. The ideal tool for mixing, applying and then leveling the solution.
- Small grater. Used by craftsmen to give the surface an aesthetically attractive appearance.
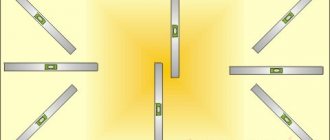
- Rule. The tool is designed to check the evenness of the base and the alignment of corners.
- Half-grater. A universal device for applying and then rubbing plaster.
Important! To make it convenient to apply the solution, you should use a small shield made of wood or metal.
Basic set
Preparation of brick surfaces and concrete
The surface should not have protruding reinforcement, cavities, sagging, or chipped ribs. Embedded products must be rigidly fixed in concrete; The aprons of the embedded products are installed flush with the protected surface. Places where the floor adjoins columns, equipment foundations, walls, and other vertical elements must be sealed. The supports of the metal structures are concreted.
Concrete and brick surfaces that have previously been exposed to acidic aggressive environments must first be washed with clean water, neutralized with an alkaline solution or a 4-5% solution of soda ash, washed and dried again.
Before applying most paints and, in particular, epoxy compounds, the surface must be thoroughly dried; The moisture content of concrete surfaces in the surface layer of 20 mm should not exceed 4%. As a rule, this occurs after it is kept at 20°C for 28-30 days after pouring concrete.
Preparation of the concrete surface before painting with any paints and varnishes must be thoroughly cleaned of mastics for formwork, loose layers of screed, efflorescence and cement laitance and other contaminants, degreased, puttyed if necessary, cleaned and thoroughly dust-free. In critical cases, it is useful to carry out water jet and hydroabrasive cleaning of concrete followed by drying the surface. Before painting brickwork, it is necessary to sandblast the brick to remove old paint and dirt.
The presence of oil, grease, mastic and other contaminants can be determined as follows: draw chalk lines through the suspected stain of contamination, pressing the chalk with medium force. If a line in some place has less intensity than in neighboring areas (before and after the supposed stain), this means that this area needs to be degreased.
In any type of repair work, theoretical skills are important, and preparing walls for plaster is no exception.
In this article we will tell you how to prepare concrete, brick and wooden walls for finishing, we will tell you about ways to level the surface, and we will teach you how to use plaster mesh and wooden shingles for these purposes.
Compositions of solutions
Continuous leveling
of concrete surfaces indoors
is carried out
using cement-lime
mortar or using
plasticized polymer-cement mortar
based on a dry mixture or ready-made synthetic mixtures of factory production.
To increase the mobility of solutions
plasticizers are introduced into their composition
.
In rooms with air humidity no more than 60%,
for
plastering concrete surfaces
:
READ ALSO: Docke - reliable siding and the right choice Recommended compositions of plaster mortars
for concrete surfaces
are shown in Table 1.
Sequence of work
Surface preparation is carried out after completion:
- laying pipes for hidden wiring of heating, water supply, and sewage systems;
- laying hidden electrical wiring;
- installation of window and door frames, built-in furniture;
- installation of fasteners for various devices.
Preparing walls for plastering includes a whole range of work.
1. Elimination of uneven walls
.
Walls should be checked for verticality and depressions. Elimination of unevenness by applying a thick layer of solution, and it will also take more time to apply the mixture in several layers.
The building codes indicate the following permissible deviations of the finished surface for various types of plaster.
- for a simple mixture, deviation from the vertical is no more than 1.5 cm per room height or no more than 3 mm per 1 m with a plaster layer thickness of no more than 1.2 cm;
- for improved plaster, deviation from the vertical is no more than 10 mm per room height or no more than 2 mm per 1 m of surface.
- the thickness of the improved plaster should be no more than 1.5 cm;
- for high-quality, deviation from the vertical is no more than 5 mm per room height or 1 mm per 1 m of surface with a plaster marking thickness of no more than 2 cm.
Uneven walls can be eliminated using wire mesh with a cell size of 10x10 mm.
On brickwork, such a mesh is secured with nails, which are driven into the seams of the brickwork.
On the concrete surface, the mesh is fixed at the points where the reinforcement is released. To prevent rust, the mesh is treated with cement laitance.
Small depressions and cracks are sealed with mortar, work is carried out at least three days before the start of leveling the walls with plaster.
2. Cleaning walls from soot, stains, dust and various contaminants
.
These defects can significantly reduce the adhesion strength of the solution to the surface.
Stone, brick and concrete surfaces are cleaned with a 3% hydrochloric acid solution. After cleaning, the surface is washed with clean water.
You can get rid of oil stains on walls and ceilings using oily clay. It is applied in a thick layer to the affected areas, the surface is dried and cleaned of clay that has absorbed fat. If necessary, the procedure is repeated several times.
However, this method does not always provide a 100% guarantee that over time the oil will not begin to seep out again. Therefore, experts recommend cutting out greasy stains completely and filling the resulting depression with a solution.
The surface is cleaned of dust, dirt and solution residues using a steel brush, which is pressed tightly to the surface and moved in different directions.
3. Work to improve the adhesion of the solution to the surface
.
- The seams of the brickwork are unstitched, making indentations of up to 1 cm in them to create voids between the bricks. It should be noted that this procedure is only effective for walls made of bricks on a porous base. If the brick is smooth, to obtain roughness, notches are made on the wall using a hammer and chisel.
Preparing wooden walls
Plaster will not adhere to smooth wooden walls and ceilings.
Therefore, before applying plaster, wooden surfaces are covered with:
- reinforced mesh;
- wooden shingles;
- reed mat.
Shreds are chopped, torn slats obtained from pieces of round pine wood. The length of the slats is usually 1-2 m. The shingles are hammered onto the surface with nails, one slatted at a time, or ready-made panels.
In the photo there is rubbish (price - from 200 rubles)
According to the method of making shingles, there are:
- chopped (1.5-2 cm wide);
- sawn (2.5-3 cm wide);
By method of use:
- prostyle (lower);
- day off (top);
Forgivable shingles consist of curved, narrow and thin slats. Its width is at least 3 mm. The shingles are stuffed at an angle of 45º relative to the floor plane and with a batten pitch of about 45x45 mm for walls, for ceilings - 40x40 mm. It is only lightly nailed to secure it. Nail length 2.5-4 cm, diameter 1.6-2 mm.
On top of the outer (lower) shingles, the output (upper) shingles are stuffed at the same angle so that the surface is visible between the layers. These voids will be filled with mortar and hold the main layer of plaster.
Important! Before nailing, it is better to moisten the slats with water, this way there is less chance that they will split. For the same reason, nails should be driven in a staggered pattern with a slight offset from the center.
The exit shingles consist of thicker and even slats 1.5-2 cm wide. Slats of a smaller width will split when nailed, and a larger one will swell greatly from moisture and warp, which will lead to tears in the plaster.
The output shingle is nailed at both ends of the slats, driving in nails at an angle of 45º and pointing the tip towards the end of the shingle, thereby tensioning it. Further fastening of the shingles with intermediate nails is carried out through two strips on the walls and through one on the ceiling.
Important! You cannot connect the ends of the slats exactly end-to-end, as when they swell they can tear the plaster. It will be enough to leave a distance of 2-3 mm.
Preparing joints between dissimilar surfaces
Brick, concrete, stone or metal have different densities and the drying speed of the plaster on them is different. To avoid the appearance of cracks at corners and other places where different surfaces meet, it is recommended to reinforce these areas with stainless metal mesh. The diameter of the wire mesh is 1.5-2 mm, the mesh size is 30x30 mm, the width of the mesh strip is at least 20 cm.
The mesh is laid on the corner and nailed:
- to a wooden surface - on nails or screws;
- to a concrete and brick base - on dowels;
- to metal - with metal screws or by welding.
Following actions
After work to improve adhesion, the walls must be saturated with moisture. The best solution is to use a special penetrating primer. This should be done so that the surface is saturated with moisture and does not subsequently “take” it away from the plaster mortar. Special primer solutions provide an additional adhesive layer on the wall panel, which improves its adhesion to the plaster.
Carrying out notching work requires precautions: use safety glasses and gloves, and, if necessary, a mask to protect the respiratory system.
Thus, notches on the walls before plastering are a necessary element of the wall finishing process. They help better adhesion of the wall surface with the plaster mortar and ensure the durability and strength of the plastering.
Surface reinforcement with mesh or wire
If the layer thickness is expected to be more than 4 cm, then metal mesh or wire is used to reinforce the wooden surface.
Instructions for doing the work yourself:
Stainless steel mesh with cells from 10x10 mm to 40x40 mm is cut into pieces of the required size and fixed to the walls and ceiling with nails, while pulling it tightly. Nails 80-100 mm long are placed in a checkerboard pattern in 10 cm increments. The upper part of the nail is bent, pressing the mesh.
Wiring the nails provides better roughness than pre-made woven mesh. The nails are driven into the base in a checkerboard pattern at a distance of 1 m. It should be taken into account that the heads of the nails will be recessed into the future layer by about 2 cm.
Copper or stainless steel wire with a diameter of 1-2 mm is wrapped several times around the nail head and, pulling well, the net is weaved.
Following actions
After work to improve adhesion, the walls must be saturated with moisture. The best solution is to use a special penetrating primer. This should be done so that the surface is saturated with moisture and does not subsequently “take” it away from the plaster mortar. Special primer solutions provide an additional adhesive layer on the wall panel, which improves its adhesion to the plaster.
Carrying out notching work requires precautions: use safety glasses and gloves, and, if necessary, a mask to protect the respiratory system.
Thus, notches on the walls before plastering are a necessary element of the wall finishing process. They help better adhesion of the wall surface with the plaster mortar and ensure the durability and strength of the plastering.
Preparing the old layer
Preparing old plaster for renovation
Preparing the surface for renovation:
- Tap the old surface with a wooden mallet to identify poorly adhering areas and clean these areas from the plaster to the base.
- Clean off any old paint from the surface.
- Remove white marks.
- Clean all cracks, chips, scratches throughout the entire depth, use water for this.
- Cut out efflorescence, grease stains and traces of mold along with the old plaster.
- Cover the broken areas with the solution from which the mixture is made. If the layer of old plaster is more than 3 cm, first spray with a thin layer of liquid mortar, and then apply primer. After the solution has dried, renew the entire surface.
When are notches necessary?
Additional measures for better adhesion of the plaster mortar to the walls are required if the wall panel material is made of brick, aerated concrete, foam concrete, and the wall is completely smooth.
If work is carried out on wooden walls, notches become insufficient. In this situation, additional equipment is required with reinforcing mesh or thin wooden planks, called “shingles”. If these measures are not taken, the plaster will not adhere to the surface and will fall off.
Bottom line
Without a carefully prepared surface, it is impossible to obtain high-quality plaster; therefore, this stage of work should be given no less attention than the plastering process itself or the choice of materials. All we have to do is offer you a useful and interesting video in this article.
The main task of preparing the surface for plastering and cladding is to clean it from dust and dirt and give it roughness to ensure good adhesion of the mortar, glue or mastic to the base.
Preparation of brick surfaces
. The preparation of brick surfaces is carried out in the following sequence.
1. Clean the surface from dust and dirt with metal brushes.
2. Vertical deviations of more than 10 mm are eliminated with a leveling layer of mortar without subsequent grouting, after wetting the surface.
3. Protrusions larger than 10 mm are cut down with a plaster hammer, scarpel or chisel.
4. Concavities larger than 10 mm are covered with a solution, after wetting the surface.
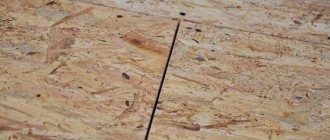
5. Streaks of hardened mortar are knocked off with a scarpel and a hammer.
6. Seams of brickwork that are not laid in a waste area (Fig. 1) are knocked out with a chisel and hammer to a depth of at least 10 mm, and cleaned with metal brushes.
7. The remaining dust is removed from the wall with brushes.
8. Before plastering, wet the surface well.
Figure 1. Seams of brickwork: a - in the waste area; b - not in the wasteland
Preparation of concrete surfaces
. The preparation of concrete surfaces is carried out in the following sequence.
1. Clean the surface from dust, dirt and solution drips with metal brushes, scrapers, etc.
2. Identify and eliminate deviations:
Walls with deviations from the vertical of more than 10 mm are corrected with a leveling layer of cement mortar applied to a metal mesh attached to the structure, without subsequent grouting;
Convexities larger than 10 mm are cut down with a chisel and hammer, jackhammer or hammer drill;
Depressions larger than 10 mm are covered with cement mortar;
3. Give the surface roughness:
Notches are applied: if it is necessary to prepare a small surface area, then notches (grooves on the surface resulting from the impact of a chisel or bush hammer) are applied with a chisel and a hammer or bush hammer in a checkerboard pattern, to a depth of 3...4 mm, if the surface area is large, then notches applied with a jackhammer or perforator, also in a checkerboard pattern;
The roughness on the surface can be produced by sandblasting;
Fix the metal mesh on the surface: the metal mesh on the concrete surface is secured with dowels in a checkerboard pattern. The mesh should be stretched tightly to avoid solution spillage. After fixing, the mesh is coated with a solution without grouting.
(Fig. 2) is used for very large volumes of work, when it is necessary to prepare large surface areas. Dry sifted sand is poured into loading hopper 1. Then, through cylinder 2, under pressure through the conical part 3, it enters pipe 4, and from there into a rubber hose, at the end of which there is a nozzle with two tubes. A sand supply hose is connected to one of the tubes, and a compressed air hose from the compressor is connected to the other. The compressed air picks up sand particles and forcefully throws them out of the nozzle. Sand reaches the surface at high speed, hits it and knocks out the top, thin, smooth layer of concrete, cleans the surface and gives it roughness. The use of a sandblasting machine significantly increases the cost of finishing work.
Figure 2. Sandblasting machine: 1 - loading hopper; 2 - cylinder; 3 - conical part; 4 – pipe
Preparation of wooden surfaces
. Preparing a wooden surface is much more difficult, since wood swells when exposed to moisture, and when dry, warps and cracks. Nowadays, wooden surfaces are rare. When finishing them, it is more expedient to use the method of covering the walls with plasterboard sheets on wooden blocks or metal profiles. This method eliminates the technological moistening of building structures and their mandatory subsequent drying, reduces the labor intensity of preparing wooden surfaces, and ensures high quality of subsequent finishing.
It is much more difficult and not of such high quality to prepare a wooden surface for plaster by filling it with shingles, and for cladding - using a metal mesh.
Plaster and wood surfaces have the worst bond strength. In order to strengthen these connections, shingles are filled onto wooden surfaces to create roughness (Fig. 3). To prevent the surfaces from warping, the boards are first split and wedges are driven into the splits. To reduce the thermal conductivity and sound conductivity of wooden surfaces, matting, burlap or felt are stuffed onto them before filling the shingles. These materials are impregnated with an antiseptic.
Figure 3. Stuffed shingles: 1 - loose; 2 - day off
The width of the shingles is 20...30 mm, thickness - 4...5 mm, length - 1000... 2500 mm. There should be no rot, mold, or short shingles in the shingles.
They start nailing the shingles from the bottom of the walls. First, the rows of protile (1) shingles are nailed (the bottom rows nailed directly to the wooden surface). Rows of shingles are nailed at an angle of 45° to the floor. Then the rows of output 2 shingles are nailed (the top rows of shingles nailed onto the sheets). The rows of front and exit shingles are located at an angle of 90° to each other and at a distance of approximately 45 mm from each other.
When preparing wooden surfaces for cladding, an air gap is created between the wood and the cladding, which protects the cladding from the influence of volumetric changes in the wood (Fig. 4).
Main stages
The master must follow some recommendations in order to ultimately achieve maximum adhesion of the prepared solution to the base. The durability of the plastered wall, as well as the aesthetic appeal of the final finish, depends on the quality of preparation. The structure must be perfectly level at any angle.
The specificity of the work depends on what material the structure is built from. You must be prepared for the fact that you will have to check the plane of the wall with a special level. Beacons must be installed before applying plaster. All equipment and mixtures should be prepared in advance.
Preparation process
What is it for?
The multi-stage preparatory process is designed to solve several problems. Here are some of them:
- increasing base adhesion;
- leveling the wall;
- avoiding the appearance of mold on new plaster;
- increasing the aesthetic qualities of the layer;
- suppression of the separation of individual sections;
- protection against the appearance of rust traces on the plaster.
The last defect manifests itself when beacons are not used quite correctly. Ideally, they should be removed after the layer has dried.
Wall repair
Every centimeter of surface should be inspected for defects. They may have cracks of different diameters, chips, or damage to masonry joints. Problem areas must be eliminated. Loose bricks in the masonry must be removed, and all the cement on top and sides must be carefully beaten off. Re-fixation is carried out using polyurethane foam or cement-sand mortar.
Small cracks should be expanded, and large cracks should be reinforced with self-tapping screws. At the next stage, treatment is carried out with multifunctional “cement laitance”. During standard priming, the edges of the cracks are fixed, which prevents their further destruction and also ensures adhesion. At the final stage, a repair solution is applied.
Creating a perfectly level base