If you need to make an even inscription or decorate it while maintaining symmetry, you cannot do without a template. It’s easy to make it yourself: just put the desired design on a sheet of paper or other material, cut it out and that’s it - the simple layout is ready.
Small templates are easy to make even for an inexperienced designer. Usually one layer is enough. Large ones, depicting portraits or compositions, require additional layers. It is impossible to make a complex template without jumpers, so you need to think about their location to make working with such a template easier.
Stencil sample
A multi-layer sample is useful for applying a detailed design containing several colors. Its production is more durable, since you need to think through all the elements and layers of the future design.
To make complex, beautiful layouts yourself, you need to learn several rules for creating them and applying images.
Types of stencils
The point of using the tool is to repeat the pattern. To do this, internal segments are cut out from the sheet with the image. When the template is painted, a pattern appears on the surface.
You will need the following materials:
- Sketch of the image;
- The basis of the template;
- Carbon paper, tape, pencil;
- Sharpened scalpel;
- Solid stand.
The sketch is created or downloaded from a search engine. The motifs of the image are varied:
- figurines,
- Flowers,
- Fantasy direction.
Tip: It is necessary to enlarge the sketch, clearly indicate small elements, widen the spaces between the slots so that the paint does not leak onto the surface.
A tutorial for creating a disposable paper stencil
- The image is fixed to the base.
- Transfer the drawing using carbon paper, tracing paper, or trace it with a marker.
- For water resistance, glue paper or cardboard with tape.
- Cut out the stencil with a sharp knife, starting with the central small parts.
- Remove irregularities with nail scissors and tweezers.
Tip: When cutting, hold your hand behind the knife and move the sheet, similar to the movement of fabric when sewing on a sewing machine.
How to make a stencil at home
Preparatory stage
The first step is to choose or come up with a sketch. You can develop it yourself or print a ready-made template from the Internet. A large sketch is made on a printer in parts, which are then glued together with tape.
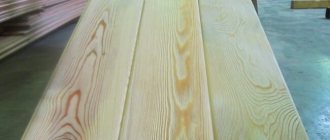
The second important step in preparing for work is to select the material for cutting the sample. It is rational to make a plain template from paper or cardboard. It is more practical to make a reusable one from plastic.
In order to make your own stencils, you need to prepare:
- sketch of the drawing (with clearly drawn elements),
- material for cutting out design elements (paper, film, cardboard, plastic),
- soft pencil and thin marker,
- scissors,
- sharp knife,
- roll of tape,
- paper clips,
- a substrate made of smooth material (so as not to spoil the tabletop).
Making a stencil
Usually, single-layer stencils are made at home to decorate smooth surfaces. With this simple technique you can refresh the interior of a room, kitchen or bathroom. You can decorate not only the walls, but also the floor or ceiling with ornaments.
The technology of work can be mastered using the example of how to make a stencil for walls.
A guide to making a single-layer paper stencil.
- First of all, it is necessary to clearly mark the lines of the drawing on the sketch. It is important that the gaps between future slots on the template (walkways) are wide enough. Otherwise, the paint may bleed through and ruin the pattern.
- The image must be carefully transferred to the template base. It is convenient to use carbon paper or tracing paper. To prevent the sheets from shifting when copying a design, the parts must be secured with paper clips or tape.
- The transferred drawing must be carefully examined so that all the lines are clearly visible on the base. If necessary, highlight the elements of the drawing more clearly to facilitate further work.
- Carefully cut out the stencil. Remove all errors and burrs, carefully cut out all sharp corners, otherwise they will negatively affect the final result.
- The easiest way to make a stencil for walls is from paper or cardboard. For strength, it is recommended to cover it with cling film or tape. Then the paint will not be absorbed into the paper, and the bridges (lintels) will not be deformed during operation.
Using this algorithm of actions, you can make templates for decorating a room, applying patterns to textiles and various objects.
When planning to reuse the template, it is better to make it from strong cardboard (covered with tape) or plastic.
Making a plastic stencil with your own hands
The material you can choose is acetate plastic or Mylar. Both types are sold in sheets or rolls. Sometimes they have an adhesive backing. It is better to give preference to a material with a matte surface, as it is more convenient to draw on. You can also take old X-rays.
- A marker is best for drawing a design on a plastic base. The lines should be clear and thin enough so that the design is not distorted when cutting out the template.
- Success in making a stencil will be ensured by a smooth surface and a comfortable, sharp knife. The work is done carefully; it is more convenient to attach the edges of the plastic with tape (or glue) to the base for cutting. This will make working with plastic easier.
- After cutting, it is more convenient to remove small elements of the design with sharp corners using tweezers.
- The edges of all slots should be lightly sanded with fine sandpaper. They must be smooth, otherwise the applied pattern will look blurry.
- After sanding, the plastic template must be cleaned of dust and traces of glue.
- A plastic stencil can be used many times; it is stronger than a cardboard one and can be easily cleaned of adhered paint.
A multilayer stencil is made in exactly the same way, but one for each color.
How to make a flip flop stencil
This technology of drawing a portrait belongs to a fashionable trend in art. Using it, anyone can create a portrait with their own hands, without knowing how to draw.
For work, several shades of paint and a special film are used.
- The picture is retouched using a photo editor to obtain a clear image without glare.
- The image is transferred to a special film with an adhesive backing.
- Stretch the canvas onto a frame, apply primer to it and let it dry.
- Paste a film with an image and color it.
- After the coating has dried, the film is removed.
The portrait remains on the fabric; in this case, the role of the template is played by the film.
It is very difficult to do such work with your own hands without a special film. The film can be purchased at art stores or ordered from a printing house.
The finished film must be secured to a flat surface (for example, on a wall) using tape. Then paint with paints. You can paint with acrylic paint or aerosol paint from a spray can.
The result is a unique portrait made using the most modern technologies.
A hand-made stencil will help give the interior individuality and implement any creative solutions. It’s not difficult to make it yourself, and the result will delight the craftsman and pleasantly surprise the guests.
Reusable template
Plastic sheets or rolls are suitable for creating tools. You can even use plastic office folders.
The algorithm differs little from making a cardboard template.
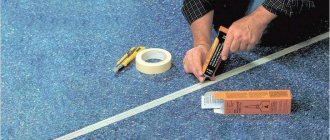
Example: How to make a stencil from a plastic stationery folder.
Place the sketch in a folder and attach it to the plastic. Trace along the contour with a marker on both sides. Cut the folder along the fold and seal each half with tape. Place it on a flat piece of wood and cut out both images.
To work successfully you need:
- Use a smooth surface and a sharpened stationery knife;
- Secure the edges of the template before cutting;
- Remove sharp burrs after trimming;
- Sand the slots with zero sandpaper.
The resulting creative tool is used many times.
Selecting a design to apply to the stencil
Drawings are chosen at the request of the room owner. Interior features are taken into account. You can always find images on online resources, and from there the drawing is printed. It is possible to create a large image by creating different parts on different sheets of cardboard. And then it will be possible to recreate a large single drawing on the wall.
It is possible to create a large image by creating different parts on different sheets of cardboard.
Template differences
Most often, stamps are used to apply a single-color element. Choose a gap between similar patterns. The stencil is attached and the entire pattern is painted over.
- The multi-colored ornament requires patience. The overlay of several stamps with different shades or one complex template covered with several paints is used.
- The volumetric stencil is made of thick plastic, since it is not paint that is applied to it, but putty, up to a height of 1-3 mm.
- Anti-stencil - parts of the design cut out from the middle of the template are used. The segments are glued to the surface and the surrounding background is painted over.
Features of wall decor with stencils
Stencils for wall decoration have a number of advantages. Main useful characteristics:
- Relatively low cost in the store, the ability to make it yourself.
- Versatile, can be used several times.
- Large selection of drawings. Fantasy has no boundaries.
Stencils for painting walls are designed to transform space and update the interior. With their help, you can highlight an area, hide defects, and create an interesting accent.
You should not immediately apply a complex ornament. Despite the apparent simplicity of the process, certain skills and experience are required. Experts recommend that beginning craftsmen practice on other surfaces, controlling the application technique and taking into account the characteristics of the coloring composition. It is necessary to minimize the flow of paint over the edges of the layout.
Stencils for painting walls are designed to transform space and update the interior.
Main types of wall templates:
- Color preferences: plain (one color) and combined (several shades).
- Size: small and large.
- Quantity of use: single and multiple, reuse possible.
- Shape: thin and voluminous, due to a layer of putty.
- Contents: flexible (self-adhesive) and hard, made of dense material.
The “Anti-stencil” option is aimed at painting the surrounding area of the layout, and not its interior. Halo effect.
You don’t have to buy stencils on the wall for cutting in a store; you can make it yourself. To do this, you will need plastic film, self-adhesive paper, cardboard, etc.
You don’t have to buy stencils on the wall for cutting in a store; you can make it yourself.
Using finishes in holiday decor
The templates are suitable for decorating gifts: boxes, photo frames, portraits. Stencils are a great way to decorate your home and office for the New Year. The child will be interested in images of Father Frost, the Snow Maiden, snowflakes painted on windows, and Christmas tree decorations.
Tip: Children cut out the design together with adults, using protected tools.
Looking at photos of New Year's stencils made by yourself, you are amazed at the author's imagination.
Type of stencil for different premises
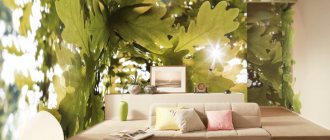
The patterns are universal and suitable for any room. These are landscape and natural motifs. There are a large number of them on sale; how the pattern will look is also affected by the paint color you choose.
There are also themed options that suit a specific type of room. This is a marine theme, children's drawings.
The patterns are universal and suitable for any room.
Festive stained glass windows
Decorating window glass is an interesting and easy activity that children love. There are many colorful drawings on the Internet for making New Year's templates.
1 method Stencil drawing
The prepared cardboard template is slightly moistened, fixed to the window with tape, and then the pattern is covered with gouache or watercolor. After the paint has dried, additional layers can be applied.
Tip: The template is attached to a clean, grease-free surface and carefully removed after painting.
The distance from the edge of the stencil to the pattern should be sufficient to prevent paint from bleeding. The dried picture is corrected with a brush.
Print a ready-made stencil or draw it yourself, whichever is better
Decorating any room, be it a living room, a nursery or an office, can be done without much effort or expense. The main thing is to choose a template for a picture on the wall (tree, flower, butterfly, etc.) that will reflect the inner world of the inhabitants of the house and fit well with the overall interior.
It is convenient to use printouts on the wall. They significantly reduce the cost of time resources and allow you to select the desired ornament. A variety of options will allow you to choose a pattern for any room.
However, if you have artistic skills and design experience, you can draw the pattern yourself. Otherwise, you shouldn’t take risks, as you can rush and ruin the integrity of the composition.
They significantly reduce the cost of time resources and allow you to select the desired ornament.
Interior decoration
Applying designs to wallpaper or plaster not only transforms a room.
Ornaments can visually reduce or expand a room. Using patterns you can hide construction errors and save on repairs.
Necessary materials
- Reusable plastic stencil.
- Special glue, masking tape.
- Acrylic paints.
- Sponge, brush or roller.
The wall is washed, dried, and degreased. Make markings with a pencil so as not to skew the image.
Thinking through the style
Drawings of different themes, randomly located, do not look good on one wall. A stencil is selected that matches the purpose of the room. Painting with flowers and monograms will add a sensual touch to the bedroom. For the living room, it is advisable to choose oriental motifs or city landscapes, trees, bird figures.
Selecting pattern geometry
An ornament that is too small is difficult to paint over. Its individual parts merge and look like spots. A large pattern can get boring and irritate with its primitiveness. Stencils for decoration with a harmonious pattern and a large number of lines and jumpers are welcome.
Joint creativity brings adults and children together, brings joy, and helps implement interesting design ideas.
Making a stencil using the program
Many people use photography as a stencil. But you can’t do this by hand, and this is where computer programs come to the rescue. The most famous programs in which you can make a stencil are Photoshop and MS Word.
When working in Photoshop, you need to adjust the levels of the photo so that the main parts become dark. Next, apply the applique effect, remove adjacent pixels using the “Magic Wand” and delete the unnecessary layer.
Or you can open the desired picture, remove unnecessary details and background. Using the “Filter/Sketch/Postpaper” menu, create a ready-made template.
And in MS Word, everyone knows such a function as “Add Text”, where you can select different fonts and create text of different sizes.
Photos of homemade stencils
0
Surface preparation and stencil attachment
Before you start decorating the surface, it must be prepared so that no problems arise during the painting process. The walls should be as clean as after painting. They should be free of greasy stains and dust.
After wet cleaning, you need to let them dry thoroughly. If the wall is dusty, you need to go through it with a vacuum cleaner.
In addition, you need to pay attention to the ceiling so that there is no dust or cobwebs on it, which could settle on the fresh paint.
It is inconvenient to hold large and combined stencils with your hands, so they need to be fixed with something. Masking tape or special glue that is applied to the back of the stencil is perfect for this. It does not damage the surface and comes off easily.
Painting tape also has the same property (just don’t confuse it with ordinary stationery tape - it is completely unsuitable for plastered surfaces).