The process of applying paint is carried out in a non-contact (air) way, i.e. using compressed air energy. When drawing a picture or making an inscription on a selected object, the artist evenly sprays (sometimes splashes) the substance without touching the coating.
Aerial painting (the Russian version of the name of the art) is used in body, nail, and street art. This method is used to retouch photographs, paint laptops, mobile devices, and cases. Original drawings are made on entrance doors and walls in residential premises to improve the interior, increase space, as well as on furniture and plumbing fixtures.
Types of airbrushing with photos
There are 3 types of decorative car tuning:
- Volume. To obtain a bas-relief on the body, three-dimensional elements are used, for example, sculptural plasticine.
- Pseudo-airbrush. A vinyl film with a similar picture is glued onto the image applied to the car.
- Luminescent. Painting is done using reflective paint.
Volumetric tuning uses sculptural plasticine.
In addition, artists distinguish the following types of airbrushing:
- According to paint application technology:
- monochrome;
- multicolor.
- By number of parts:
- laconic;
- stylized.
- By difficulty of execution:
- stencil;
- free hand, or “free hand”;
- combined.
A new trend among young drivers is car graffiti. The technique is similar to traditional spray paint, but the style and theme are borrowed from the extreme-oriented subculture.
Monochrome
The image is applied in one color. To obtain several shades that differ in brightness and contrast, the main dye is diluted with white. The background is the color of the vehicle.
The image is often painted in monochrome color.
The painting method is suitable for beginners who want to update a car or motorcycle on their own, with their own hands.
Minimalism
Transport can be illustrated in a concise style. This is done to express some philosophical idea. On city roads and highways you can often see cars with ancient hieroglyphs, Slavic swastikas, magic runes, and patriotic symbols printed on them.
In color
The technology involves the use of 2, 3 or more colors from the color palette, as well as mixing paints to obtain the desired tone. When creating an art project, any desired color will be suitable as the main background.
Stylized (stencils)
The most common method of applying paint is screen printing. This is the best way that vehicle owners who want to somehow emphasize their own individuality at low financial costs can use. Ready-made patterns allow you to repeat the same pattern element many times without distortion.
Stencils are a common method of painting cars.
Using stencils, you can apply a beautiful geometric pattern, a techno-style image, butterflies, or flowers to the hood or door of a car.
Free artistic
True fine art in free hand style. The work is labor-intensive and expensive, because it can be done by an experienced artist - a master airbrush artist. A complex fantasy illustration uses a large number of layers and different details. The drawing is applied without the use of templates or preliminary markings.
History of airbrushing - development from the beginning to the present day
The very first drawings created using a device that releases dye onto the surface under pressure were found in caves in Argentina. It has been estimated that these airbrushed pieces are over 9,300 years old. Images were drawn like this: ancient people filled a hollow object (for example, a bone) with pigment and blew it against the wall, thus creating the desired picture. The oldest airbrushing is considered to be the outlines of the hands of artists who lived before our era - they applied paint to the wall, to which they applied a brush.
The first airbrush apparatus was invented in 1876 - the device was created by industrial specialist Francis Edgar Stanley. Jeweler Abner Peeler worked on improving the paint spraying device. The latter used the airbrush in 1879 as a hand-held compressor for applying watercolors and other paints for a variety of artistic purposes. In 1882, he sold the patent for the development of the device to Liberty Walkup.
It was Abner Peeler who registered the spraying technology - this happened back in 1878. The jeweler created the first airbrush from several tubes of a self-made compact air compressor and a reservoir. Abner got tired of working by hand and decided to invent a tool to easily and simply draw landscapes of his native places.
The rights to the airbrush were purchased by Liberty Walkup. The company acquired the patent in 1884 and began advertising the new method of drawing. Even then, the process received its current name - “aerography”. The quality of the drawings made with an airbrush in the hands of a competent master was very similar to real photographs of those times.
Airbrushing became widely popular at the beginning of the twentieth century, when the tool for artists and other creators became as fashionable, and most importantly, useful and convenient as a smartphone for a modern businessman. Spray paint was used to create advertisements, posters and even illustrations for magazines. Most of the images that needed to be accurate and high quality were painted using airbrush.
The first airbrush drawings in the automotive field were purely technical - racing car numbers on their bodies. Then sports models began to be decorated with sponsor logos and images of received awards. Further, “sports airbrushing” began to include various kinds of symbols, patterns, pictures of natural phenomena and animals. Over time, car racing became more and more popular and car bodies were completely covered with sponsorship logos - square centimeters of surface turned into expensive advertising platforms.
The history of the airbrush did not stop outside the automotive sphere: in 1882, a congress of photographers was held, where the device was publicly shown as a means for retouching, and in 1884, a double-action sprayer was created - the supply of both paint and air was regulated. Further, the Illinois School of Art was created, where since 1888 they taught mainly the art of airbrush, and the Airbrush journal, which was published since 1891 and contained tips on working with a spray gun. In 1893, dentist Charles Burdick improved the device so that it could apply multiple layers of dye without changing the background color. Otolaryngologist Alan de Vilvis added to the design - the airbrush “learned” to spray medications, anesthetics and even perfume.
Types of airbrushes
The devices differ in the mixing principle and control mechanism. They come in 2 types: single and double action. In the first case, air is supplied, controlled by one trigger; in the second, paint and varnish material (paint and varnish material) and air are supplied.
Internal and external mixing
Compressed air and paint can be mixed both inside and outside the housing.
The internal mixing airbrush is easy to maintain.
Devices with external mixing are convenient and easy to maintain, but produce a coarse spray, so they are suitable for work that does not require an even layer, fine lines.
Instruments with internal mixing have a more complex design. They ensure uniform application of the dye to the surface.
Gravitational
The tank is located at the top of the structure. This allows the coloring liquid to flow under the influence of gravity and enter the mixer. In most devices of this type, the paint container has a small volume, sufficient for carrying out small jobs. In some models, the reservoir is missing or is an integral part of the structure that cannot be removed or replaced.
Siphon
In the siphon type, the reservoir is located on the side or bottom of the airbrush.
Distinctive properties:
- large capacity container for paints and varnishes;
- the ability to wash and replace one color with another.
The tool is capable of painting bulky surfaces and working with different colors at the same time.
In a siphon airbrush, the container is located at the bottom.
Hybrid
Hybrid type - a combination of siphon and gravity options. Paint containers are placed on top and bottom of the body. There is a switch between them.
Some manufacturers' products have the ability to use 2 tanks at the same time.
Flow-through and lockable
Models differ in the type of starting control.
Flow guns do not have a system for adjusting the amount of air flow. The paint-air mixture is supplied after the operator presses the trigger.
In lockable devices, air escapes to the outside when the trigger is turned on with adjustment of the amount of consumables. The products are more functional and provide the user with comfort and convenience during use.
Compressor apparatus
Another important element included in the airbrush kit is the compressor. Most craftsmen pay special attention to the presence of a receiver in the compression apparatus, a special container at the bottom of the device where air accumulates. This design has a positive effect on the life of the device, because when the receiver space is filled with air, the device turns off and the cooling process occurs.
The following air supply options are available:
- Using small cans. This method is very convenient for small amounts of work and in cases where there is no source of electricity nearby. The downside of this option is the high cost of the cans, so using them regularly is not very profitable. But many craftsmen use them to apply a test pattern.
- Via an electric compressor. One of the most profitable ways to supply compressed air, because... It works from an electrical outlet, making it very ergonomic. There are two types of such electric compressors for airbrushing: piston and membrane.
The compressor is an important element for airbrushing
— A piston compressor supplies air to the tank using a special piston. Such a compressor is often used to simultaneously service several airbrushes.
— Diaphragm compressors are available in two configurations: with and without a tank. A tankless compressor is the most budget option. In it, air is supplied directly to the hose of the device. But this type of air supply can lead to pulsations, due to which the airbrush paint is supplied unevenly and, accordingly, the image quality deteriorates.
- Using compressed air cylinders. This option is great for small amounts of work. It does not require a power supply, is silent and does not require an additional filter. There are cylinders of different sizes on sale, which makes it easy to choose the best option.
When purchasing an airbrush with a compressor, remember that it is important to choose the right device that matches the type of airbrush and follow the operating instructions. Otherwise, the compressor will overheat and spoil the image.
Paints used for airbrushing
Paint is the main material used in artistic painting of surfaces. The quality of the picture and the final result depend on the correctly selected dye.
Finely dispersed compositions are suitable for working with an airbrush.
Acrylic
The main advantages of acrylic paint:
- Water based production.
- No toxic substances in the composition.
- Wide range of colors.
- Fast hardening.
- Formation of a thin plastic layer that protects the painted surface from negative external influences.
- Excellent solubility in water.
- High adhesive properties.
Acrylic is made on a water basis.
In modern painting, water-dispersion mixture is a common material. However, acrylic has a drawback: after applying the composition to the base, it instantly sets, after which it is not possible to change the mistake when drawing.
Nitroenamel
The paint has a number of advantages, so it is suitable for professional painting of cars, motorcycles, and water transport. Nitroenamel dries faster than acrylic, is capable of forming thin, even, non-spreading lines and contours, and creating a translucent fill that adds a three-dimensional effect to the picture.
But there are also negative points:
- high toxicity of the material;
- the created images are less contrasting and pronounced;
- low hiding power;
- When working with 2 colors, it is difficult to create a clear decorative tone; if gray shades appear, you will need a light substrate.
Not all airbrushes can work with nitro enamel. This nuance should be taken into account when purchasing a device for applying paint to a car.
Primer for paint
The quality of the pattern depends on the correct primer - a base layer that is applied to a plastic or metal coating to level the surface and improve adhesion.
Adhesive
Main functions of the solution:
- Increased adhesive properties.
- Corrosion protection.
- Preventing the formation of fungus, mold, and premature destruction.
- Increasing the strength characteristics of the coating.
- Reducing the degree of moisture absorption.
Adhesive primer dries quickly and protects against corrosion.
The advantage of the soil is that it dries quickly. The material adheres well to metal or plastic.
Disadvantages include shedding of the hardened mixture when applied incorrectly to the base and falling off of the primer when covering a contaminated, uncleaned area with it.
Epoxy
The main tasks that soil can perform:
- Formation of a protective thick base layer.
- Uniform filling of pores and micro-irregularities.
- Prevention of corrosion.
- Protection against chips and scratches.
- Ensuring the durability of the coloring composition.
Epoxy primer is highly toxic, so work must be carried out, observing personal safety measures, in a ventilated room.
The solution requires careful pre-treatment of the base on which primer and paint will be applied.
The use of acidic compounds with a pickling effect is not recommended.
Filler
The purpose of the soil is to level out unevenness. The composition is 2-component: a mixture of acrylic with urethane, increases resistance to rust, dries quickly, has excellent hiding power, and can be tinted. The material is applied to the epoxy layer or cleaned surface.
Leveling out unevenness is the main purpose of soil.
The only drawback of the primer is its density. The composition must be well atomized, and therefore have appropriate fluidity. Experts recommend purchasing the material in aerosol cans, which is expensive for large projects.
The filler cannot be combined with acidic agents.
Tricks
Airbrushing is characterized by some blurriness. If the drawing requires particularly detailed precision, this is achieved by drawing with oil paint and a thin brush. The disadvantage of oil is that it takes a long time to dry - up to two weeks or 4-5 days in a drying chamber at a temperature of 60 ° C.
A mixture of solvent (No. 646) and drops of vegetable oil added to the paint will help speed up the process. This technique will ensure quick drying within a day or two.
Important! When painting with oils, you should avoid using white; they dry longer than all other colors. Black colors dry the fastest.
- Infrared radiation and a drying chamber (with temperatures up to 60 °C), as well as low indoor humidity, help speed up the drying of alkyd enamels;
- Cool temperatures and high humidity slow down drying;
- if the painting work was carried out in a heated garage and was left to dry without heating, then at a temperature of +12 to +14 °C polymerization will not occur and the paint will remain sticky after a few days;
- The drying chamber can be equipped by making a small room and upholstering it from the inside with foil or tin. Heating occurs with an oil radiator;
- thickened toner can be “revitalized” with acetone;
- Some effects are possible using varnish to which a drop of toner has been added. Illuminated varnish looks beautiful on “night” scenes;
- interesting solutions are obtained from varnish and metallic;
- It is very difficult to obtain a high-quality extensive surface with chrome effect paint;
- The chameleon paint looks almost transparent. It should be applied to “your” color. If chameleon pink is applied to white, the result will be a barely noticeable shade. In this case, on a pink or red background the effect will be very noticeable.
Painting your car with auto enamel from a can is a bad idea. If only because the pressure can be anything, including very low. Considering that it is not adjustable, the result will be wasted money or large drops of paint on the element.
Solvent selection
Thinners are necessary to obtain the required viscosity of paintwork materials and to wash the spray bottle when changing color.
Acrylic dissolves well in distilled or filtered water.
Urethane compounds should be diluted with the technical fluid recommended by the manufacturer. This will ensure high quality coating and help avoid problems when applying paint and varnish to the surface.
The consistency of the dye should be similar to milk. For nitro enamels, solvent 646 is suitable, for alkyd paints - thinners 645, 650.
Applying varnish
Properly diluted varnish is the key to success, but the problem is that you will not find the exact recipe. To bring the varnish to the optimal consistency, you should gradually change the pressure, adding solvent at this point. Before applying varnish to an image, be sure to test it on a test surface. If it lays down unevenly, it means the composition is too thick or you mixed it at too high a pressure. The varnish must be applied to the surface perpendicularly.
Necessary materials and tools for applying airbrushing
Work should be carried out in a garage or workshop with a natural or artificial ventilation system and good lighting. You can rent a small room with an installed hood.
For tuning you will need to prepare an airbrush.
For tuning you will need to prepare the following tools and materials:
- Airbrush.
- Compressor as a source of compressed air.
- Hose (may be included in the kit for the compressor, otherwise it is purchased separately).
- Paint (quantity and color scheme depend on the chosen subject and location of the illustration).
- Solvent.
- Degreaser.
- Varnish.
- Raw materials for polishing.
- Sketch.
As personal protective equipment you will need:
- gloves;
- bandana or other headdress;
- glasses;
- respirator.
Additionally, filters for the sprayer, tubes, markers, erasers, templates, rags, and newspapers for laying on the floor may be useful.
Preparation
Before you start airbrushing a car, you need to learn how to work with the tool, make a sketch of the model, and create a stencil.
Before airbrushing, you need to make a sketch.
Airbrush training
Art schools and special centers in large cities often invite people to take paid courses. At the seminars, students receive basic knowledge about the technical capabilities and design features of airbrush equipment. In practical classes, they practice basic skills on paper, try to apply shadows, convey warm and cold tones when drawing color pictures.
You can take the training online for free. On thematic forums and on YouTube, art studio specialists and self-taught amateurs post many educational videos and master classes about artistic painting of cars or motorcycles.
Sketch
The sketch is selected depending on the person’s mood, his field of activity, character, and hobby. The composition should emphasize the individual style of the vehicle owner and be harmoniously combined with the color and style of the car.
Often vehicle owners choose thematic tuning, for example:
- football fans in their cars post a realistic photo of their idol or team;
- avid card players;
- bikers on motorcycles or helmets paint skulls or zombies with scarlet blood on a black background with white paint;
- owners of boats, jet skis, and boats depict a shark, a pike, a ship floating in the ocean, or a storm on their vehicles.
Adobe Photoshop is a program for creating sketches.
Illustrations are taken from magazines, books, brochures. The sketches are cut out, made into a template, or used as a visual aid for free-form painting. You can use the Internet. The drawing is downloaded to a computer or smartphone, saved, and printed.
Professionals use Adobe Photoshop. In a graphics editor, other layers with the necessary pictures are superimposed on the layer with the photo of the car. During design development, the geometry of the body is taken into account, the composition is viewed in the dynamic and static state of the car, and a 3D model is created. The obtained result is saved.
Sketches are also made in the Corel Draw application.
Creating a stencil
You can make templates for painting a car yourself:
- The printed sketch is applied to thick paper, thin cardboard, or an x-ray, but it is better to take adhesive film. It is tightly attached to the surface and protects the base from paint.
- Trace the contours.
- Cut out the resulting product.
- Reinforce with an additional layer of cardboard or plastic.
A specialized store sells ready-made templates.
Pressure regulator
Regulators are designed to control the pressure under which airbrush paint is supplied.
They can be installed:
- on the compressor;
- on the hose;
- on the body of the airbrush.
The regulator allows you to increase or decrease the pressure depending on the pattern being performed. If a compressed air cylinder is used as a compressor, then a metal pressure regulator is used.
Regulators are designed to control pressure
Instructions for applying airbrush to a car or motorcycle
You can begin the creative process immediately after preparing all the necessary tools and materials for airbrushing.
You can begin the process immediately after preparing the tools.
To ensure uniform coverage, it is necessary to dismantle door handles, headlights, mirrors, and rubber seals. The part of the car that will not be painted is covered with a covering material.
Cleaning and priming
The metal base is cleaned of dust, dirt, oil stains using detergent, allowed to dry, and rust is removed. In addition, you should get rid of defects - cracks, chips, scratches, otherwise they will appear in the drawing within 2-3 months after applying the paintwork.
If the base layer is varnished, it is sanded by machine or by hand. The surface is treated with an Ultrafine sponge, abrasive or wet sandpaper. The process is carried out carefully so as not to damage the paint on the car. You can use a special matting paste, then remove it with a rubber squeegee.
The next stage is degreasing with alcohol or an alkaline solution.
After the manipulations, a white primer is applied.
The simplest method, acceptable for small jobs, is to buy a ready-made mixture, packaged in aerosol cans, and apply it to the cleaned surface.
For a large-scale project, material is purchased from banks. Priming is carried out with an airbrush, having previously prepared a solution so that small particles do not clog the tool nozzle.
Securing the stencil
The template is applied to the treated surface, the accuracy of the measurements is checked, and secured with masking tape. It is advisable to support it with your hand, because during operation it is blown out by air from the sprayer.
The stencil is applied to the surface and secured.
If the stencil is thin, you can spray it with water from a spray bottle, apply it to the area to be painted, and straighten it, squeezing out the water with a napkin.
Airbrush application
First, they make the background, draw the elements separately, and complete the detailing of the composition.
After fixing the stencil, draw a slightly visible outline of the design by blowing it with thinly diluted paint. Start creating the background. The area outside the applied outlines is painted with a thick composition, forming a substrate.
Remove the template and check that all places are printed.
They begin to work with a light tone, gradually moving to a darker one.
The base layer is applied in 1–2 stages. Then wait until the paint dries. The drying time depends on the type of material and can reach from 2 to 12 hours.
Each subsequent layer is applied to an area smaller than the previous area. A uniform coating is obtained by smoothly moving the airbrush, and spraying begins outside the area to be painted and ends by moving the gun to the side. Otherwise, a stain will remain.
The duration of paint drying depends on the material.
Applying varnish to the drawing
The completed airbrush is secured with varnish of the correct consistency. To do this, adjust the pressure and add a diluent. Before applying varnish, you must try the resulting solution on a test surface. If the substance drains, it is too liquid; if it forms clumps, it is thick or the problem is high pressure in the supply.
Additional tips for applying airbrush to a car or motorcycle
Tips to help avoid mistakes:
- First, conduct an experiment on cardboard, the surface of an old refrigerator or stove.
- Direct the spray of paint perpendicular to the surface being treated. Apply the material to horizontal planes at an angle of 45°.
- Do not spray the substance for a long time in one place. The hand must move.
- The closer the nozzle is to the metal or plastic coating, the thicker the line and the richer the color.
- Eliminate smudges after the paint has dried. Remove the hardened drop using a fine-grit sanding sheet P400. If you try to wipe it off with a dry cloth immediately as it drains, you will be left with a stain that will be difficult to get rid of.
- When using paints of different shades, prepare several containers for mixing. This will save time on replacing cartridges.
The choice of topic must be approached carefully. Each image carries an information-caste message. You should not paint your own vehicle in the colors of special-purpose vehicles belonging to government agencies: the Ministry of Emergency Situations, police, ambulance, gas service. The picture must comply with generally accepted moral standards.
The closer the nozzle is to the metal coating, the richer the color.
Is there a difference when applying a design to other objects and surfaces?
The main differences in painting of different products lie in the design features and technical and operational characteristics of the gun purchased and the type of paint used.
For painting small details, including nails, a device in the form of a fountain pen with a tank of up to 2 ml with a top feed is suitable. It is easy and convenient to use.
To paint wooden or plastic objects, use a device with a medium-diameter nozzle (no more than 0.4 mm) with a standard tank.
To paint concrete and brick walls indoors, choose a spray gun with a bottom feed, a 0.6 mm nozzle and a mixture reservoir with a capacity of 20–100 ml.
The choice of dye depends on the base:
- acrylic with adhesive additives is suitable for nails;
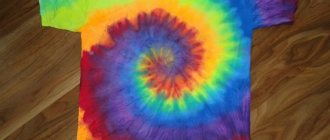
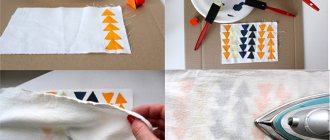
- for cotton, batik, silk - acrylic/aniline paints, fixed with an iron/steam bath;
- for paper, plaster – gouache;
- for concrete, brick surfaces - oil or latex paints;
- for metal – nitro enamel;
- for glass, plastic – stained glass mixtures;
- for canvas, wood – tempera compositions.
For painting, choose a spray gun with a bottom feed.
In addition, some surfaces can be painted with paints, while others cannot. This is due to the chemical composition of the coating.
How to care for airbrush
Airbrushing on a vehicle does not require special care. However, when operating the illustrated vehicles and motorcycles, the following precautions must be observed:
- Do not wash the vehicle during the first week after applying the decor.
- When washing, do not use abrasive materials or rough brushes to wipe the surface from dirt, which can leave scratches on the decor.
- Do not place heavy objects with sharp edges on the hood with a pattern.
- Protect the coating from contact with gasoline, engine oil, etc.
If the picture is damaged, you can correct the defect with a gentle cleaning agent. Scratches are removed by polishing.
Accessories
Airbrush accessories are designed to greatly simplify the artist’s work.
Holder for airbrush and compressor
Attached to the desktop surface, this accessory helps secure the device and thereby protects it from falling. Typically, the holders have several standard positions and a ring for the pressure regulator.
Tablet
This metal, varnished plate is similar in structure to a car hood. It is intended for training in drawing and checking the quality of paint, which can subsequently be easily removed with a solvent.
Airbrush paints
There is no need to skimp on the quality of airbrush paints. Therefore, it is better to purchase car enamels from well-known brands. Using untested dyes can lead to color mismatches, wrinkles in the design, and sometimes even damage to the airbrush.
How to remove airbrushing
The removal process depends on the type of surface and the chemical composition of the paint.
With car
It is difficult to get rid of airbrushing on a car, so experts recommend using temporary pictures. If the drawing is varnished, the image is painted over.
Removing airbrushing from a car is difficult.
From the tree
You can remove paint from a wooden surface using a universal or specialized remover. The first is capable of dissolving paints based on water and organic solvents, the second removes textured and oil-based paints. For small elements, a liquid consistency is suitable, for a vertical surface - a jelly-like paste.
From fabric
To remove water-based paint, simply wash the fabric in warm water and detergent.
Effective reagents:
- White Spirit;
- ammonia;
- vodka;
- refined gasoline;
- acetone.
When using products, take into account their aggressiveness towards the fabric surface.
For example, acetone destroys silk fibers, ammonia has a negative effect on wool.
To remove airbrushing from fabric, you need to wash it.
Our offers
Airbrush
Airbrushing is the main direction of our activity. We will perform airbrushing of any complexity on almost any surface.
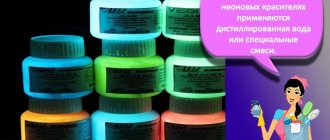
| Exclusive painting We offer exclusive painting with exotic paints and varnishes with various effects: chameleons, glitter, glow-in-the-dark paints, etc. |
Airbrush photo gallery
Don't think about where to order airbrushing. Contact us and we will decorate your car efficiently and inexpensively!
Airbrush cost
The cost of printing a car, motorcycle or bicycle in art workshops depends on:
- difficulty of execution;
- places of application;
- coverage area;
- volume of work;
- order fulfillment time;
- type of paint.
It is easier for the master to draw using preliminary markings and ready-made templates. Free hand painting requires professionalism and practical skills. The author spends a lot of time and effort on the creative process.
Complex techniques with many small elements are valued over stencil designs or straight lines.
For comparison:
- a printed print on the entire car costs at least 150 thousand rubles;
- individual design – from 200 thousand rubles;
- small abstraction – from 20 thousand rubles;
- image of an animal or bird – from 10 thousand rubles.
The cost of airbrushing depends on the complexity of the execution.
Decorating the hood is more difficult than the sides of the car, spare wheels, and rims.
Painting a wheel using patterns can cost the car owner 8–10 thousand rubles, a print on the door can cost from 15 thousand.
To stand out among motorcyclists, bikers often order artists to airbrush their motorcycle helmets. Prices depend on the condition of the surface and the selection of themes. The cost of the work is 5–25 thousand rubles.
Is it possible to remove or change airbrushing?
Changing or adding airbrushing is carried out according to the same scheme as applying a new design - the element is completely prepared and cleaned. The cost of the work does not differ from the cost of the initial application of airbrushing.
Removing a pattern is similar to painting a car - the body is completely stripped and repainted. Restoring a damaged design costs significantly more than applying a new one.
Airbrushing is an expensive car decoration. Absolutely legal and has virtually no restrictions on the choice of plot. However, to get maximum pleasure from contemplating the modified appearance of your own car, it is better to entrust such a creative process to a specialist.
How to make your own airbrush paint
Professionals always buy basic colors: white, yellow, red, black and blue. They can be mixed and get the desired shades.
Combining the basic tones gives the following results:
- red/yellow – orange;
- red/blue – purple;
- yellow/blue – green;
- yellow/red/blue – brown.
When white is added to the base color, lighter shades are obtained:
- red and white – pink;
- blue with white - blue.
Professionals buy only basic colors.
Combining colors with each other gives different combinations.
Making a compressor for an airbrush
The compressor consists of subassemblies:
- receiver;
- air pump;
- beds;
- technical equipment.
A fire extinguisher, a hydraulic accumulator or a propane or oxygen cylinder with a capacity of at least 20 liters is suitable as a receiver.
Instead of an air pump, you can use the engine of an old refrigerator, hair dryer or vacuum cleaner.
Instrumentation is required to monitor paint flow and air supply. For a homemade design, take a pressure gauge, reducer, and pressure switch.
Rubber or plastic hoses will connect the main parts and individual elements to each other.
The bed is the base on which the unit rests. At home, you can use a metal frame and equip it with wheels to move from one place to another.
In addition to basic mechanisms, the master will need:
- plumbing gaskets;
- liquid sealant.
Algorithm for assembling the compressor:
- Clean the refrigerator engine and other components of the future unit from rust, dirt, and traces of corrosion.
- Replace used oil.
- Remove the shut-off valve from the cylinder.
- Drill a hole with a diameter of 15 mm in the cover, cut a thread for an M15 cross.
- Connect one outlet to an additional container, attach a safety valve to the other.
- Make a second M15 crosspiece on the side: connect a pressure gauge and a ball valve, through which the oxygen reducer and pressure switch will be mounted.
- Insert a flexible hose to the outlet of the gearbox to connect to the gun.
- Secure the unit to the frame.
The process of making a compressor for an airbrush with your own hands is complex and labor-intensive.
Our expert
Vladimir
Paintwork specialist
Ask a Question
I am a specialist in the field of production and application of paint and varnish products. I know everything about paints and polymer protective coatings. I can help you choose the right coloring material and am ready to answer your questions.
Gearbox
It is another important device included in the basic airbrush kit. Performs several functions at once: air pressure regulation, pressure measurement (pressure gauge), moisture separation. In addition, it serves as an adapter from the hose to the airbrush connector. Thanks to its versatility, it replaces a whole set of auxiliary tools.
Gearbox
Examples of beautiful airbrushes
Examples of work performed by different art studios are presented below.
By car
Drawings made using this technique will allow the car to stand out from the flow of vehicles, attract attention and even, to some extent, protect against theft, because painted vehicles are highly recognizable:
Airbrushing on a car, done by professionals, looks bright.
Any car owner can do airbrushing on his car.
Airbrushing on a car looks realistic.
On a motorcycle
Professional airbrushing makes the motorcycle unique:
Airbrushing is one of the best ways of exclusive tuning.
Modern airbrushing is an opportunity to radically change the appearance of your bike.
A motorcycle with airbrushing can be called an attractive vehicle.
