Gouache with PVA as a replacement for oil and acrylic
Acrylic is expensive, oil is expensive, and it also takes a long time to dry. What if you just want to try painting something on canvas? Just one picture for which you don’t want to spend “mad thousands” on paints that will then just lie idle? Or you are just learning, or drawing with children, or just drawing for yourself. In any of these cases, the gouache + PVA glue duo comes to the rescue.
My ceramist friends taught me this technique, and I used this mixture for a long time both for painting on canvas and for painting figurines - yes, it can be used for anything. By the way, they say that boxes with traditional ornaments are painted with the same mixture.
After mixing with PVA, gouache becomes more durable, fits well on canvas or other surface, does not crumble, and also holds volume. And all this - for many years (the title picture was drawn 6 years ago, and still no changes).
At the same time, if the work doesn’t work out or you’re tired of it, open the tap with hot water and in one minute everything is washed off almost without a trace. And the canvas does not disappear, but goes back to work.
What you will need:
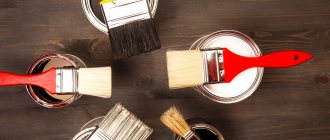
- PVA glue
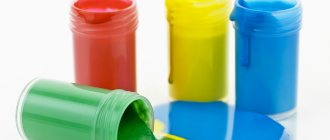
- the most common gouache - 9 or 12 colors
- stacks or some sticks for mixing paints
- what you will draw on
- brushes (I use flat ones, like for oil)
- paper or rag for wiping brushes and stacks
- palette
- inspiration
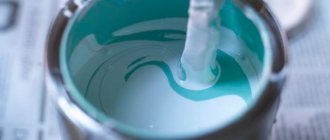
We pour PVA glue into the palette cell at a rate of approximately 1 to 1 with paint, or 1 to 2 - look at the volume, the thickness of the paint, it is better to first experiment with different proportions.
Mix with paint. If you need to get a new shade, then first mix this shade, and then pour in PVA, because until it dries, it creates the illusion of a lighter color.
You will get such a voluminous mixture - that’s it, put it on a brush and paint.
You can rub it over the canvas in a thin layer, or you can lay it in volume.
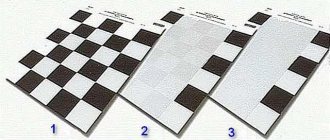
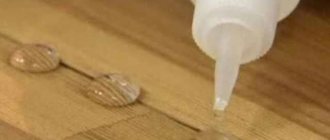
After drying: the first strip on the left is gouache without PVA, in the middle there is voluminous gouache with PVA, on the right, the lightest gouache with PVA is crushed (see how much better the gouache + PVA mixture looks? And the one without glue is already ready to fall off)
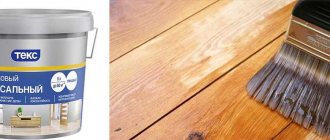
To fix the finished picture, you can cover it with an additional layer of PVA or varnish (but if you use varnish, you won’t be able to wash off this picture with water).
And more tips: *PVA glue is actually a treasure. With its help, you can make something like plastic out of salt dough if you add it to water *Gouache and PVA give a durable layer, they are used to paint boxes. Also, for a durable layer, you can use gouache + egg composition (yolk + pigment), you get egg tempera, icons are painted with this composition. *If you add flour to PVA+gouache, you get three-dimensional contours that are super durable and easy to use *You can paint with a mixture of gouache+PVA and glass
Today we continue to answer the most popular questions regarding acrylic paints. In the first part of this article we have already discussed many interesting issues.
Is it possible to paint with acrylic paints on fabric?
Any acrylic will adhere to fabric or leather, but we recommend using special ones: they create a flexible coating that will not begin to crack when the material is bent) and contain a heat-setting resin, thanks to which the paint layer will acquire special strength after exposure to temperature (ironing or drying hairdryer).
Acrylic paints are distinguished by their bright colors, flexible paint coating and high resistance to aggressive conditions. In this regard, if you correctly apply the design to the fabric, you don’t have to worry about it. Acrylic will not peel off, wrinkle or crumble. This paint easily tolerates temperature changes, mechanical stress and is not susceptible to moisture.
Stretcher
A stretcher is a wooden frame (rectangular, square or other shape) onto which the fabric is stretched. In this case, the surface is “springy” and holds its shape well. There are such variations:
- “modular” - grooves are provided for adjustment;
- “deaf” - re-tightened when sagging.
Tip: when stretching, the threads of the canvas should run parallel to the edges of the stretcher. If the fabric is slanted or diagonal, the fabric will soon sag or go in “waves”.
Is it possible to paint on nails with acrylic paint?
Acrylic paints are widely in demand due to their advantages over other pigments.
Acrylic is so versatile that it can be used on almost any surface, including nail plates. Paints applied as a manicure or pedicure provide bright and rich shades. Good solubility with water during work, ease of mixing to obtain all kinds of tones and quick drying have made acrylic popular in the nail service. In addition, acrylic paints, unlike other water-based pigments, do not dissolve after hardening, which makes it possible to apply additional elements to the drawing. The acrylic design is sun resistant and allows your nails to breathe. Gouache with PVA as a replacement for oil and acrylic
Acrylic is expensive, oil is expensive, and it also takes a long time to dry. What if you just want to try painting something on canvas? Just one picture for which you don’t want to spend “mad thousands” on paints that will then just lie idle? Or you are just learning, or drawing with children, or just drawing for yourself. In any of these cases, the gouache + PVA glue duo comes to the rescue.
My ceramist friends taught me this technique, and I used this mixture for a long time both for painting on canvas and for painting figurines - yes, it can be used for anything. By the way, they say that boxes with traditional ornaments are painted with the same mixture.
After mixing with PVA, gouache becomes more durable, fits well on canvas or other surface, does not crumble, and also holds volume. And all this - for many years (the title picture was drawn 6 years ago, and still no changes).
At the same time, if the work doesn’t work out or you’re tired of it, open the tap with hot water and in one minute everything is washed off almost without a trace. And the canvas does not disappear, but goes back to work.
What you will need:
- PVA glue
- the most common gouache - 9 or 12 colors
- stacks or some sticks for mixing paints
- what you will draw on
- brushes (I use flat ones, like for oil)
- paper or rag for wiping brushes and stacks
- palette
- inspiration
We pour PVA glue into the palette cell at a rate of approximately 1 to 1 with paint, or 1 to 2 - look at the volume, the thickness of the paint, it is better to first experiment with different proportions.
Mix with paint. If you need to get a new shade, then first mix this shade, and then pour in PVA, because until it dries, it creates the illusion of a lighter color.
You will get such a voluminous mixture - that’s it, put it on a brush and paint.
You can rub it over the canvas in a thin layer, or you can lay it in volume.
After drying: the first strip on the left is gouache without PVA, in the middle there is voluminous gouache with PVA, on the right, the lightest gouache with PVA is crushed (see how much better the gouache + PVA mixture looks? And the one without glue is already ready to fall off)
To fix the finished picture, you can cover it with an additional layer of PVA or varnish (but if you use varnish, you won’t be able to wash off this picture with water).
And more tips: *PVA glue is actually a treasure. With its help, you can make something like plastic out of salt dough if you add it to water *Gouache and PVA give a durable layer, they are used to paint boxes. Also, for a durable layer, you can use gouache + egg composition (yolk + pigment), you get egg tempera, icons are painted with this composition. *If you add flour to PVA+gouache, you get three-dimensional contours that are super durable and easy to use *You can paint with a mixture of gouache+PVA and glass
Both experienced and novice artists care about painting their masterpieces. However, if the former have long ago decided on the choice of optimal paints, then the latter may be somewhat confused. On the one hand, I would like to give preference to bright, thick gouache. However, on the other side of the scale are acrylic paints, which today are extremely popular among creative people. What are the advantages and disadvantages of these materials? Let's try to figure out the difference between gouache and acrylic paint.
What you need for drawing
Making your own paint is not difficult at all. First of all, you need inspiration and desire. And everything else is the most ordinary things:
- palette or board for diluting paints,
- canvas or other material for drawing,
- PVA glue,
- the simplest set of gouache (6 or 12 colors are enough),
- brushes (preferably flat),
- a napkin for wiping brushes.
Definitions
Gouache
– a type of water-soluble adhesive-based paints with a dense matte texture. The product has a rich history, because it was used in medieval Europe. However, the term arose only in the 18th century in France. During the Middle Ages, gouache in combination with watercolor was used to create book miniatures. Renaissance artists used the material to complete sketches and other preparatory work. The heyday of technology occurred at the end of the 19th – beginning of the 20th century. Domestic artists painted theatrical costumes and posters with gouache, created sketches of scenery and large easel works. By the way, the word gouache is translated from French as “water paint”. It is made from adhesive pigments mixed with white. The latter give the paint a spectacular matte velvety finish. Despite the fact that gouache is an independent technique, it is extremely rarely used by professional artists. Many artists consider it suitable only for creating children's drawings and designing posters.
Gouache
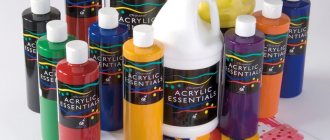
Acrylic paint
– water-dispersed paint made on the basis of polyacrylates and their copolymers.
It is used both in painting and in construction when carrying out external and internal work. It acts as a worthy alternative to oil paints. It can be applied to paper or planes in liquid (with the addition of water) or paste form. The last option is the most popular among professional artists. Acrylic does not crack, lays down as an even film, is slightly shiny and does not require fixing. Sometimes the paintings he painted resemble works done with watercolors or oil paints. However, in most cases, acrylic has a unique color rendition that is unattainable in other areas of fine art. Largely due to this, he enjoys wide popularity among contemporary artists. Acrylic paints
Blonde curls
Everyone knows that it is impossible to bleach hair without dye if it is dark or black. But it is possible to lighten light strands, giving them additional shine. Even light brown hair color can be made blonde. But this will be a long and labor-intensive process: the honey mask is not only applied for a long time, but also spreads in sticky smudges.
To prepare such a mask, you must first wash your hair well with shampoo, then rinse with water with the addition of soda (take 1 teaspoon of soda for 1 liter of water). Then we apply honey to the moistened strands, without insulating them, just tie a scarf on the head. This hair mask lasts for at least 10 hours.
with all known chamomile decoctions after each shampoo. For blondes, to make their hair shine, it is enough to prepare a decoction based on the proportion: 2 tablespoons of dried chamomile flowers per 1 liter of water. Those with dark hair need to make the decoction stronger: 6 tablespoons of chamomile for the same liter.
Naturally, after such cosmetic procedures, brunettes will not turn into blondes, but after a certain period of time, the hair will acquire a golden-reddish hue. Regular hair care is important here - and the result will not take long to arrive.
Tags: hair care, hair coloring, natural products, beauty treatments, hair mask, hair coloring
Comparison
The first difference lies in the composition of the products we are interested in. Gouache is made with the addition of white. In this regard, the paint after drying becomes significantly lighter and becomes matte. In general, the composition of gouache is similar to watercolor. Whereas water-dispersed acrylic has a structure similar to oil paints. It dries very quickly, which cannot be said about gouache. As long as the paint remains wet, it can be washed off with water without much difficulty. Acrylic is highly resistant, it does not fade in the sun, and does not spread when applying a new layer. With gouache everything is exactly the opposite. But it is much thicker and denser than acrylic paint. Due to the high content of coloring pigments, gouache is characterized by a very saturated color, and the pattern it creates is opaque. Acrylic paints lie on the surface much smoother, as if forming an invisible film on it. After drying they darken a little. Gouache gives a thicker and uneven layer. The transitions from one shade to another are quite abrupt.
Another significant difference between gouache and acrylic paint is the area of use of materials. As a rule, the first is used for drawing on paper of any thickness, and less often for painting fabrics. Acrylic is characterized by a wide range of applications. It is indispensable for painting ceilings, walls and other surfaces on a wooden or metal base. Creating drawings, painting on glass, decorating ceramic products, applying images to fabric and leather, airbrushing - the list of possibilities of acrylic paints is very extensive. This explains the relatively high cost of the material. If gouache is sold exclusively in sets with a certain number of jars in a box, then acrylic paints are often sold individually. They are bottled in a wide variety of bottles, be it miniature tubes of 20 ml or large bottles with the capacity of a standard glass.
Let's summarize what is the difference between gouache and acrylic paint.
| Gouache | Acrylic paint |
| Water-soluble paint made with the addition of white | Water-dispersed paint based on polyacrylates |
| The composition is similar to watercolor | The structure is identical to oil paints |
| Lightens after drying | It gets darker as it dries |
| Dries within a few hours | Dries in 10-15 minutes |
| Dissolves when exposed to water | Does not spread when applying a new layer |
| Not very durable and prone to fading | The stability is very high |
| Has a dense, thick and opaque texture | More fluid, lighter and transparent |
| Characterized by a very rich shade | The colors are much paler |
| Lays down in a thick, uneven layer | Lays down perfectly evenly, as if forming an invisible film on the surface |
| Transitions between shades are sharp | Transitions are smooth and imperceptible |
| Used for painting on fabric and paper | Has a wide range of applications |
| Affordable cost | The price is much higher |
| Sold in sets | Sold both in sets and individually |
| Fits in standard jars with a lid | Available in jars, tubes and bottles of various sizes |
Acrylic paints for decoupage: features of choice
Acrylic paints allow you to perform decoupage on any surface. Decoupage is a technique that can turn any unnecessary thing into a real work of art. However, to work with it, in addition to napkins and printouts, you need to purchase a huge variety of additional materials, one of which is acrylic paints. They are available in a wide selection on the shelves of handicraft and stationery stores. Their cost is often quite high. However, knowing some secrets, you can save a little.
Acrylic varnishes and paints for decoupage
The key to successful decoupage is a set of paints of beautiful and bright colors. They are sold in art and stationery stores. They cost a little more than, for example, watercolor or gouache. But acrylic paints have properties that make them ideal for decoupage.
Advantages of acrylic paints:
- Suitable for any surfaces;
- They have a bright and durable color;
- Shades of acrylic paints can be mixed together using a solvent;
- When dry, they form a dense waterproof film;
- Undried paint can be easily washed off with water.
Acrylic varnishes and paints can be purchased at any store that sells craft supplies
Thanks to these features, water-based acrylic can decorate any product designed using the decoupage technique. Acrylic varnish is best suited for such paints, which can also be used on any surface. A special acrylic primer is sold for primer, but it can easily be replaced with white paint with a similar composition.
Cotton
For educational work and those new to painting, it is recommended to use cotton canvas. Today it is the most common, although it appeared relatively recently - in the last century. It is convenient to paint on it with acrylic paints using any technique, because the layers are applied without difficulty. The main advantages are a flat and smooth surface, affordability
However, sagging and moisture accumulation are possible. Various types of mechanical actions also have a significant effect.
Set of acrylic paints for decoupage: what to replace
Decoupage paints are quite expensive, but knowing a few tricks, you can save a lot on them.
For paints for decoupage, it is better to go not to a specialized store, but to a hardware store. There the price for substances similar in composition will be much lower.
To prime the surface of a wooden product, you can use not a special primer, such as Olki, but white construction paint for interior work. It does not have a pronounced unpleasant odor and lays on the surface of the product in an even thin layer, after which it dries quite quickly. This paint is sold in cans ranging from 400 grams to 5 kilograms, but since the primer is used most often, during active work this volume will not last long.
An alternative to acrylic paints can be found at a hardware store.
It’s cheaper to buy a can of white paint to prime a product, for several craftswomen at once. Afterwards, the composition can be divided by pouring into separate sealed containers.
You can also save a little on colored paint by replacing some shades with pigments. Such dyes are sold in construction and art stores; they need to be mixed in small quantities with white paint, so you get a delicate bed tone. Of course, if you need very bright colors, you will have to buy a set of special acrylic paints, but if used correctly it will last you a long time.
Red and chestnut color
Henna . Thanks to henna, dark curls will acquire a reddish-chestnut hue, while light strands will become bright red. You can get a more muted chestnut tone by adding basma - dry indigo leaves.
Henna, half-forgotten in our time, is lavsonia leaves ground into a powdery mass. This natural dye perfectly hides gray hair, hair becomes shiny, elastic, fluffy, and acquires a persistent, delicate aroma of apples (provided that the henna is of high quality).
If the desired shade is darker, then henna is mixed with basma powder. Mixing is carried out in a porcelain bowl, pouring boiling water over the resulting mass and diluting it to a paste. To get a brown tint, you need to take one tablespoon of freshly ground coffee or black tea leaves per 100 ml of boiled water.
The resulting mixture is very quickly applied to the strands before it cools down. Then cover the hair with plastic wrap and wrap it in a warm towel. You need to keep henna for 3-4 hours. It is difficult to wash off the product from your hair - dye particles are better removed under running water. Use a thick plastic comb to prevent the henna from falling off like dandruff.
Rhubarb root. You can dye your hair without using dye with something grown in the garden, without resorting to overseas plants (after all, for example, henna and basma powder were brought to us from Iran, India, Pakistan).
Rhubarb shoots in early spring Photo: DepositphotosTo do this, you need to pour chopped rhubarb root (200 g) with white wine (400-500 ml) and simmer over low heat, a third of the contents should evaporate. Cool the resulting product and add 0.5 teaspoon of soda to it. Apply the mixture to your hair and leave for about half an hour. Then rinse thoroughly.
Blonde hair is guaranteed to turn red. However, rhubarb decoction will not change dark hair much.
Basma . With the help of basma, it is possible to dye your hair black or a dark shade of chestnut. Used in the same way as henna.
Onion peels give a reddish-chestnut and golden tint for blondes (the predominance of reddish color), making curls more shiny and silky. If we want to dye black or dark hair in this way, it will become brighter and acquire a rich color.
It’s not difficult to prepare paint from onion peels: pour the peels into a pan and fill the contents with water a couple of fingers above. Boil over low heat for about 20 minutes. Then the resulting decoction should be allowed to brew in a warm place. Apply the product to your hair while warm. We keep it for 1.5 hours.
Walnut leaves are an excellent remedy when you want to hide gray hair and dye your hair the color of chestnut. You need to pour water over the leaves so as to cover the entire surface, bring to a boil, cook for 10 minutes and leave to infuse.
Clean, slightly dried hair should be treated with the resulting decoction, strained through cheesecloth. Then wrap your head in film and insulate it with a towel for several hours. In order for the shade to last longer, it is worth rinsing your hair with this product every time you wash your hair.
Photo: DepositphotosAcrylic varnish for decoupage: properties and characteristics
The varnish layer protects the product from the harmful effects of the environment and gives it a finished appearance. Acrylic clear varnishes come in matte and glossy finishes; they have a lot of positive qualities.
To make acrylic paint matte or glossy, just dilute it with a drop of varnish.
The compositions are most often used in decoupage for the finishing coating of crafts.
After decoupage of any object, it is recommended to cover its surface with a thin layer of acrylic varnish
Positive properties of acrylic varnish:
- Acrylic compounds are non-toxic and non-flammable;
- They do not have a pronounced pungent odor;
- Durable and elastic;
- Do not turn yellow after drying;
- They have high moisture resistance.
Despite all its advantages, acrylic varnish also has one drawback - its drying speed directly depends on the humidity of the room. Often, an item coated with such a composition can be used only 2-3 days after drying.
Linen
The old masters chose a linen base for their masterpieces. According to many, there is no better canvas for acrylic paint. It has been called a “noble” material for decades. The yarn from its stems is quite durable. In addition, it is assigned a high wear rate (a significant level of protection against deformation).
Despite its status as the most durable in painting, you need to be very careful when buying linen. Sometimes on the shelves of unscrupulous sellers you come across goods with a non-uniform “knobby” texture, strange stripes, spots or excessive smoothness. Most likely, primary processing waste was used as raw material here. Such defects are very noticeable on the finished product.
And in order for the work to retain its freshness longer, it is worth choosing a piece of long fiber (there the thickness of the thread is much smoother).
Compared to others, linen is not saturated with moisture and does not sag as much over time. And in general, it is less exposed to external factors. The disadvantage is its relatively large weight (which may be important, for example, when shipping or organizing exhibitions).
How can I replace acrylic varnish for decoupage?
Special varnishes for decoupage, like paints, are sold in small containers and are quite expensive. Therefore, you can go to a hardware store to buy them.
Other types of varnishes may have a low price, but are not able to give a composition made using the decoupage technique the same decorative effect as acrylic
What varnishes can replace acrylic varnish for decoupage?
- Parquet varnish will successfully replace a specialized acrylic finishing composition. After drying, it becomes colorless and very durable. Although it has a pungent chemical odor, it costs several times less than its decoupage counterpart, and its properties are practically in no way inferior to it.
- Yacht varnishes can also successfully replace acrylic products, but after drying they acquire an amber tint, so their use is justified for items that need to have an antique effect. Such products, like parquet varnishes, have high moisture and sun protection properties. Yacht compositions look especially good on wooden furniture.
Of course, construction varnishes will not be able to impart decorative effects to the product, but they are quite suitable for a protective finishing coating.
How to make homemade wood varnish
Before you make paint from foam and solvent, you need to prepare the necessary ingredients and tools. You will need a container for mixing the solution, a wooden stick and gauze for straining.
Naturally, polystyrene foam itself is necessary, and the means by which to dissolve the foam to obtain paint can be chosen from acetone, xylene, orthoxylene, butyl acetate, the use of gasoline is allowed.
Xylene and orthoxylene are the best choice for creating a varnish solution; foam material dissolves better in them. The choice of gasoline helps to obtain an adhesive composition, as a coating composition will not work.
Acetone and polystyrene foam are most often used on concrete floors. For 70-100 ml of xylene, take approximately 0.3 cm of foam material. To save money, you can add half of the xylene, the rest can be replaced with gasoline or acetone. The following steps are performed when preparing varnish:
- The solvent is poured into the container.
- Expanded polystyrene is crushed and added to the liquid; with a stick, it should be completely immersed in the solvent.
- The dissolution process will begin immediately, bubbles will appear.
- The amount of polystyrene foam can be increased, bringing the solution to a creamy state. A good composition should flow into the sticks, but should not drip.
- Close the container with the solution and wait 20-60 minutes; the liquid should be colorless.
- Then the varnish is poured into another clean container through gauze.
Another advantage of the varnish is that the first setting occurs in five minutes, complete drying takes 60 minutes. To add color to the varnish, you can add dye.
The composition created according to this recipe is suitable for the following purposes:
- Applying a varnish layer to wooden products;
- Cover the concrete floor with polystyrene foam and acetone and polystyrene foam in the form of a solution to increase moisture resistance;
- Application to any painted objects.
When working with any thinners, there should be no open sources of fire nearby; there should be good ventilation in the room; it is better to work outside. When preparing and applying the layer, wear gloves and a respirator.
Xylene and orthoxylene are the best choice for creating a varnish solution; foam material dissolves better in them.
Decoupage with acrylic paints: master class
To better understand the principle of working with acrylic paints and varnish, you need to review all the stages of their use. To do this, we will analyze the process of decoupage of a wooden board.
Using acrylic paints you can decoupage a plate, box, glass or other item
Master class on decoupage of a wooden board:
- Clean the workpiece with sandpaper:
- Apply a special primer or white construction paint for interior work to the front side of the workpiece;
- Paint the product in the main color using pastel acrylic paint;
- Paste a fragment of a napkin or decoupage card;
- Now you need to shade the edge of the image using acrylic paint;
- Complete the missing elements;
- Cover the product with 2-3 layers of varnish, sanding the previous one before applying a new layer.
At all stages, before applying a new layer of one composition or another, the previous layer must be allowed to dry completely; only if this condition is met can maximum accuracy of the product be achieved.
A few words about priming
Ideal application of any paint is ensured by careful priming of the canvas. Specialized stores usually offer the following soil options:
- oil;
- acrylic;
- water-dispersed.
The first is intended exclusively for oil painting. And for acrylic paints you need a canvas of the last two types (universal). However, professionals prefer three-layer acrylic primer.
Priming is not essential but will greatly improve the uniformity of the application. An artist with skill and experience can prime the canvas himself.
When choosing a canvas, it is equally important to assess the size of the future masterpiece. The density of the base is selected from the working area. Experts recommend buying 220 g/m2 (suitable for most cases) or 280 g/m2 (if the picture is large).
You can read more about choosing the canvas size on Natalia Yurshina’s blog - https://nyblog.ru/kak-vybrat-holst-dlya-maslyanoy-zhivopisi/.
Glazing: decoupage with acrylic paints
In decoupage, such a wonderful technique as glazing is widely known. However, not every novice craftswoman knows what this technique is.
Glazing is the painting of a product in translucent layers followed by sanding to obtain an interesting color transition.
Glazing is recommended for those people who have been doing decoupage for a long time.
To make it easier to understand the principle of operation of this method, let's look at a detailed master class on creating a box with this effect.
Master class “Glassing”:
- Sand the wooden piece thoroughly.
- Mix a small amount of paint of matching colors with water in separate containers. The paint must be diluted to a translucent state. The classic color combination is blue, pink, purple, lilac.
- Apply the first layer of paint, for example lilac, to the outer and inner surfaces of the workpiece. Let it dry for 2 hours, and then sand it along the grain.
- Now we apply a purple layer, let it dry and, too, sand it. We repeat these steps with all the prepared shades.
- For the last layer, you can use metallic acrylic enamel. After drying, it also needs to be sanded.
- Glue a napkin motif onto the product;
- We cover the wooden box with several layers of varnish.
In this way you can achieve a subtle color transition or a rainbow effect.