High-quality vehicle optics are of great importance for ensuring driving comfort and safety. Not surprising, because its task is to light the way. Show timely and clearly all kinds of obstacles, bumps and other road defects, as well as make the car visible when driving on a night highway to avoid traffic accidents. It is necessary to constantly monitor the condition of your car's optics; the safety of both vehicle passengers and third parties depends on it. Over time, the light emitted by the headlight may begin to fade, the light spot will blur and become weaker. In such cases, you will need to restore the headlight reflector.
Reasons for deterioration
Deterioration in lighting quality can be caused by various factors:
- deterioration of the headlight glass;
- reducing the brightness of the light bulb installed in the optics;
- damage or reduction in quality of the reflective surface.
Each problem is solved in its own way. The glass can be polished, a new light bulb can be inserted, but more problems, as a rule, arise with headlight reflectors. Despite the fact that they are just mirror surfaces, actually restoring headlight reflectors is quite problematic.
Optics assembly
Once the painting is complete and the surface has dried, begin assembling the optics system. You will need:
- install the diffuser, reflector and light bulb in their places;
- To secure the headlight glass, cover it with sealant (after removing the glass, before painting, it is important to wash the surface to remove any remaining sealant). Apply the material around the perimeter in those places where the glass comes into contact with the surface of the car. It is important not to interrupt the strip of material. However, do not overdo it with the thickness of the strip - if it exceeds 3 mm, the sealant will simply spread inside the headlight, and it can only be removed by performing the operation again;
- After gluing the glass, secure it with tape. The process of polymerization of the substance takes a long time - about 24 hours at room temperature.
Author: Baranov Vitaly Petrovich
Education: secondary specialized. Specialty: car mechanic. Professional diagnostics, repair, maintenance of passenger cars of foreign production 2000-2015. Extensive experience working with Japanese and German cars.
Analysis of methods for restoring reflectors
Of course, the easiest way to get rid of the problem with a damaged headlight reflector is to buy a new part. However, this method cannot be considered economical. Contacting services and service stations offering the appropriate services can also help solve the problem, however, as with the purchase, the price of restoring headlight reflectors may seem quite high. Actually, it is the price that is the main motivating factor to try to restore or at least slightly improve the condition of headlight reflectors with your own hands.
Analysis of forums, blogs and various thematic resources indicates that, through trial and error, the online community of car enthusiasts finds both suitable and not the best ways to reincarnate the head optics of your car. To help users avoid mistakes, we note the methods. Which did not lead to the desired results.
Nuance to the chrome-farby warehouse
The main advantage of chrome-farby over other types lies in the fact that it contains metal powder (in the range of colors it can be aluminum, brass, bronze, etc.). The remaining manifestations of light-powered authorities. Alkyd, acrylic, resin, and nitrocellulose compounds may play a role in the binding of fusible bases. The stench allows you to distribute the powder evenly. Barvniki do not vikorize additionally; when hanging, the base becomes clear. The ideal bag result is achieved by always having the varnish in stock. He will force the spit ball.
Failed experiments
A special coloring composition called “Liquid Chrome”. The mixture is used to restore reflective surfaces. And, perhaps, it would be an ideal choice if it were necessary to restore headlight reflectors, if not for one significant BUT. Experiments have shown that the coloring composition is not able to withstand elevated temperatures. The coating began to deteriorate at a temperature of 60 degrees. Obviously, this option is not particularly suitable for the enclosed area around an incandescent lamp, since the increased temperature there is always when the lamp is on. Of course, the coating will not deteriorate the first time you turn on the headlights (or even the tenth), but if a durable solution is needed, then this product is not suitable.- Heat-resistant paint. From the point of view of practicality at elevated temperatures, this option, of course, would be much better suited, if not for one BUT. Its purpose is decorative, maximum protective, but not reflective. That is, even silver paint (the shade closest to the reflective surface) did not show the best results in reflecting light rays. The reflected rays are highly scattered and dim.
- Foil with glue. The foil itself has a good indicator of light reflection. Its glossy metal surface reflects rays well. Moreover, if you use high-quality glue, for example, epoxy resin, then the structure should theoretically be strong and durable. However, the large surface area that the adhesive must cover can result in a long drying time. Glue, by the way, can completely damage the reflector. In addition, there is a possibility that. that when pasting the foil will be significantly wrinkled and the reflective effect will be much worse than desired.
Working methods for restoring a headlight reflector
We present two very effective methods that can really restore a damaged reflector surface. They are quite similar. The difference is rather in the material used, however, because of this, the method of pasting is different.
Metallized tape
You can buy foil tape in almost any construction supermarket. It has a glossy metallic surface. By the way, unlike conventional foil, it wrinkles much less, although creases may still remain.
The adhesive base of the described tape is quite strong and durable. Restored headlights using this material are able to adequately perform their functions for years.
Because foil tape, like other representatives of similar products. Made in the form of a tape in a roll, working with it is quite easy and convenient. You can cut fragments of any length and width. To carefully apply the layer, it is recommended to use a plastic spatula with a slightly rounded end. By smoothly smoothing the glued strip, you can avoid unnecessary creases and folds of the material. If there are still a few wrinkled places. They will not significantly affect the quality of the reflection.
Restoring reflectors in this way does not take much time. It is very important to clean and degrease the surface before starting work.
Mirror film oracal
As an alternative material for restoring the reflective surface of headlights, you can use a special Oracal film No. 351. It is very similar to a chrome surface in appearance. At the same time, it is quite flexible and elastic. Which is very convenient when working with it and gluing uneven surfaces.
The only difficulty is creating a high-quality stencil template. It will be useful for accurately cutting out the required shape of the film, which will accurately fit on a curved surface. The template can be created in two ways:
- the problem can be solved quickly and easily with a piece of paper;
- for those who like a perfect hit, you can make a stencil using papier-mâché, which is cut after drying.
Having cut out the necessary shapes, the parts are carefully glued, carefully smoothed with plastic spatulas and trimmed with a stationery knife.
Of course, there are other ways to restore the reflective surface of a headlight. The ones proposed above are simple but very effective methods of dealing with the problem that do not require special equipment, devices, knowledge and skills. Any car enthusiast who has ever used tape can do them.
Subscribe to topic
Notification by e-mail about replies to a topic during your absence from the forum.
Subscribe to this forum
Notification by e-mail about new topics on the forum during your absence from the forum.
Download/Print theme
Download the theme in various formats or view a printable version of the theme.
Chrome-plated items attract attention with their shine and high cost. And this is not surprising. Various parts, elements and accessories with their shiny surface give the interior of rooms, cars and other objects a special chic. This is why chrome paint is still widely used today in the design of any surface!
The history of chrome plating
A mirror emulsion, which is applied in compliance with a whole set of rules and conditions, creates a specific coating that completely imitates perfectly polished metal. This effect is created due to the fact that the special paints contain the smallest particles of the metal itself, as well as a unique varnish. It is thanks to this composition that when applied, a thin layer is formed, which forms a very smooth and shiny surface on almost any object. The range of applications of this new product is increasing every year, and the popularity of this invention is only increasing.
Composition and characteristics of the emulsion
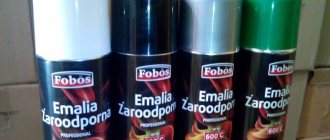
As noted earlier, today there are two main types of chrome paints. Single-component paints are available in spray cans. Chrome paint in cans has become widespread among ordinary amateurs when they need to paint a small product that does not require a perfect mirror shine.
The second type is intended for professional painting. Here the formulations are produced in cans and include two components.
Let's consider the option of the composition in cans. Chrome mirror paint for metal is just one of the types of paint available in spray cans. The range of such paints itself is quite wide. Manufacturers offer a variety of chrome effect paint colors.
The most widespread are special formulations with aluminum powder. The can in this case contains microscopic particles of aluminum. Such emulsions contain nitrocellulose base varnishes. The varnish plays the role of a reliable fixative, giving durability to the dried paint. To create a mirror effect, the composition includes special components that help create a reflective property and uniform distribution of aluminum powder on the surface to be painted.
Advantages and disadvantages of spray cans
Compared to two-component paints intended for professional use, chrome paint in cans has a number of advantages. The main advantages of spray cans:
- The most important advantage is that it is completely ready for use. Just shake it for one minute and you can spray it on the required surface;
- Plastic, glass, wood lend themselves well to painting;
- To use this type of dyes, you do not need additional equipment - a compressor, spray gun and other tools. This makes it possible to use it in almost any conditions and significantly reduces the cost of the process, making it possible to process hard-to-reach surfaces;
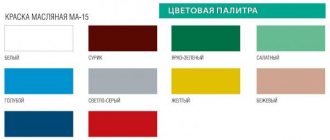
- There is a wide variety of chrome colors in cans;
- Positive aspects also include ease of storage and easy removal if necessary.
Summarizing all that has been said, we can say that chrome effect paint in cans is a wonderful option for use for amateur purposes.
Of course, using such a compact paint format is very convenient. But with all the advantages of this type of dyes , it is necessary to talk about their disadvantages . The main disadvantages of spray cans:
Preparatory stage
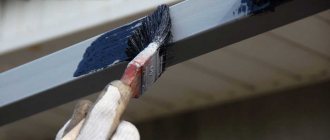
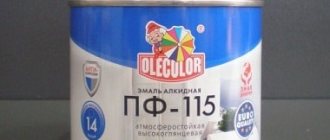
Often the mask that holds the reflector is painted (acrylic or alkyd paint is used for it). However, to add shine to the reflector, it would be more appropriate to use chrome paint.
When choosing it, you need to pay attention to the temperature of use (indicated on the can, ideally up to 100 degrees), since the reflector will heat up to considerable temperatures when the headlights are on.
Before painting the reflector, you need to disassemble your optics. The easiest way to do this is with a hair dryer. As you know, glass is attached to a sealant, and it, in turn, loses its properties when heated. To easily remove the glass without damaging it, heat the sealant to a temperature of 75 degrees for several minutes. After this, you can quickly remove the glass.
We heat the factory sealant with a construction hairdryer
Recommendations for using paints
Each type of emulsion provides a certain range of areas where they are recommended to be used. So it is with chrome types of dyes . There are a number of recommendations for using this type of emulsion:
- The best results are obtained from formulations from well-known global manufacturers. It is better to refuse cheap options from unknown brands;
- Applying the composition requires certain skills. Before painting the product, it is necessary to conduct training;
- Training is also necessary to prevent smudges, this very significantly reduces the visual appeal of the final look;
- It is not recommended to use this type of dye on flexible plastic;
- If you intend to further coat the painted product with varnish, then you must first select the appropriate varnish. Otherwise, the paint coating may be damaged, which will lead to the need to repeat the painting process.
Following these recommendations will reduce work time and also save money.
Painting various surfaces
The principles of using chrome paint in cans are common to all surfaces, but it is worth considering some features when painting metal and other surfaces:
Painting metal surfaces . These emulsions are mainly used for this type of surface:
- Before painting, the surface must be thoroughly cleaned;
- Anti-corrosion treatment and degreasing are required;
- Damaged areas are puttied, sanded and then polished. After this, the surface is cleaned again;
- If necessary, primer is applied;
- If primer was applied, then after it has completely dried, polishing is carried out;
- Before spraying, shake the paint can thoroughly for at least one minute;
- The paint is applied in a thin layer. To fully achieve the chrome plating effect, at least three layers may be needed;
- Once completely dry, polishing may be required.
Treatment of plastic surfaces:
- Before painting, the plastic must be thoroughly polished;
- It is necessary to apply primer. Otherwise, the painting may not last long;
- It is recommended to slightly warm the surface before application;
- After drying, polishing is required.
The process of painting various surfaces
Following dyeing technology will help you achieve a smooth, silver-colored surface with a mirror-like sheen. The wear resistance of the painted coating also depends on this.
Preparation
Preparation for painting includes cleaning, degreasing, and priming the surface.
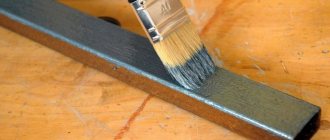
Thorough cleaning is the key to success. Any speck of dust after applying the mirror coating will be clearly visible. Before painting, the metal surface is cleaned with a metal brush, washed, dried, and rust is removed. Then the surface is degreased with a solvent and a layer of primer is applied.
Coloring
Once the primer has dried, it is covered with a layer of background paint, which will show through the chrome composition.
When the dye has dried, the surface can be sanded, but carefully. Then clean, dry and begin applying chrome paints. One coat of paint may not be enough to achieve an even mirror effect. Therefore, it is possible to apply up to 3 layers, each of which is sprayed after the previous one has completely dried from a distance of no more than 10 cm. If desired, the last layer can be polished after drying. Finally, a layer of varnish is applied.
Possible problems
Problems arise when dyeing technology is violated. So, if the paintwork was applied in too thick a layer, after drying, streaks and unevenness will be noticeable. When sprayed onto an untreated surface from a long distance, the dye from the can will dry faster than it will penetrate into the structure of the material being painted. As a result, the paint will begin to peel off quickly and easily.
In general, anyone can spray chrome dye from a can.
But if this is your first experience, it is better to practice on an unnecessary object first.
Review of popular manufacturers
Chrome paint has gained quite a lot of popularity. And this popularity is growing every day. Therefore, we will focus on the most popular cans:
- RUSH Power, a fairly inexpensive paint with a price of no more than three hundred rubles. It has a good sprayer and can give the desired effect with just one coat of paint. However, this type of paint is not suitable for use in auto detailing; this can is more suitable for applying graffiti.
- Bosny CHROME is also a budget option that can be used for painting small metal parts. To achieve a more lasting effect, the use of varnish is recommended.
- Chrome Effect is the most popular paint among car enthusiasts today. Not the cheapest option. However, this manufacturer gives the most worthy appearance of the final product, which is most similar to real chrome plating.
The wide range of types of chrome paint that exist today, as well as a huge range of colors, allow even an ordinary person to apply chrome paint without special training.
The correct technology for applying chrome-farby to various surfaces and materials
The procedure begins with skimming and priming. A ball of background paint is applied to the surface so that it can be seen through the chrome deposit. Before polishing the lining, proceed after completely drying the background ball. Next, cut out the chrome. If necessary, perform this manipulation several times. In this case, apply a new layer to the skin after the previous one. How to finish the varnish.
Nuances of preparing various surfaces:
- The metal must be lightly coated with a product such as anti-silicone, then rinsed and dried.
- Apply a moisture-proof stain to the wood before the primer.
- Smooth plastic should be treated with degreasing agent so as not to damage the polymers.
At the place where the mirror preparation is installed, it is not necessary to use a saw. It sticks to the freshly coated surface, causing it to lose its shine.
