Main types of sealants
Headlight sealant is available in different forms and with different base substances. The technical characteristics depend on the type of composition. To understand which sealant to use to glue headlights, you need to study each one.
Headlight sealant is available in different forms and with different base substances.
Silicone
The silicone type of composition can be used as a sealant for gluing the glass of front and rear headlights. Suitable for working with glass sunroofs and other car parts. The product has a good level of adhesion, resistance to vibration and high temperatures. However, it is not resistant to chemicals.
Used on plastic and metal surfaces.
The product has a good level of adhesion, resistance to vibration and high temperatures.
Polyurethane
The difference from the previous type is exposure to aggressive substances. Resistant to mold, mild acids and alkalis. The liquid consistency is well distributed over the base, creating a barrier against the penetration of external elements into the headlight.
Polyurethane sealant for headlights does not shrink, but does not perform well during vibrations due to poor elasticity. A long service life is ensured, which can reach 25 years.
Resistant to mold, mild acids and alkalis.
Anaerobic
The setting starts when the parts are connected, this simplifies the process of applying the composition. It is resistant to mechanical loads, vibrations, high temperatures, aggressive and chemical substances.
Resistance to mechanical loads, vibrations, and high temperatures is demonstrated.
Heat resistant
Thermal sealants for headlights are produced in two components. Before use, the substances from the tubes are mixed together. The purpose of the compositions is for connecting halogen lamps, where heating reaches +300 degrees. There are species that can withstand up to +400 degrees. Withstands chemicals. The layer dries in 8-12 hours.
Withstands chemicals.
Butyl
Butyl headlight sealant comes in thick strips. They are resistant to chemical elements, aggressive environments, and vibrations. Durability is 7-10 years.
The tape material is distributed over the surface, then the glass is pressed. A plus is the lack of need to wear PPE when working, due to its harmlessness.
They are resistant to chemical elements, aggressive environments, and vibrations.
Repairing chips and cracks in plastic headlights
To repair a headlight made of plexiglass or polycarbonate, you need to prepare the appropriate material from which the damaged optics were made.
It is impossible to combine materials of different quality; it will be impossible to weld them properly.
Plexiglas with a thickness of 6 mm is selected for the headlights, and 4-5 mm for the rear lights.
The procedure for restoring a headlight that has a crack, chip or scratch:
- first you need to prepare the glass (clean off dust, wash and dry the chipped area);
- then prepare a gun for the adhesive composition;
- carefully fill all cracks with glue;
- dry the repair area of damaged headlights with an ultraviolet lamp;
- Apply hardener to the surface and allow it to harden well;
- sand the area of damaged plastic material;
- polish the glass until it shines.
Repair with dichloroethane
To eliminate defects, we can use dichloroethane (molecular glue). This multi-component substance helps to firmly connect headlight fragments; this mixture can fill all cracks and scratches. The procedure for repairing a headlight is described above. Please note that the glue is preheated using a soldering iron.
It is worth considering that dichloroethane is a toxic mixture; when working, one cannot ignore the risk of the substance getting on the skin; when gluing pieces of headlight glass, you must wear gloves and protect your eyes with goggles.
Repair with epoxy glue
The chipped area can be filled with epoxy. To use epoxy resin, you need to prepare a bandage in advance.
Epoxy is a two-component mixture consisting of a resin and a hardener. The components are mixed according to the instructions, a viscous consistency is obtained.
Before gluing plastic headlights, it is necessary to remove dirt, sand the joints, degrease and dry. Then the fragments of headlight glass need to be spread out and joined together, after applying epoxy glue to the joints. Afterwards, gauze or fiberglass is used: a second layer of epoxy is applied to the material, and excess glue is removed. The surfaces of the headlights are well dried.
Soldering damaged headlights
Soldering is another way to restore headlights with your own hands if the glass is cracked. All fragments of the damaged plastic case can be connected using a technical hair dryer. If parts are lost, you must first make patterns and cut them out of the material from which the body itself is made, for example, ABC plastic. We heat all the parts with a hairdryer and install them in their place.
Criteria for selecting sealant for headlights
The choice of which sealant to use for headlights is made taking into account the color scheme, operating temperature, degree of adhesion, and resistance to vibration. Ease of use is also an important criterion. Often the products set quickly, so you need to have time to spread the liquid composition over the surface in a thin layer.
An important criterion is ease of use.
Bonding level
Headlight adhesive must have a high level of adhesion to the base in order to withstand the loads exerted on the part. When choosing, pay attention to the type of material where the glass will be glued and the working conditions.
Headlight adhesive must have a high level of adhesion to the base in order to withstand the loads exerted on the part.
Anti-vibration properties
The car is constantly moving, so all elements are constantly exposed to varying degrees of vibration. Sealants for headlights are resistant to such loads, but you should pay special attention to the characteristics.
Sealants for headlights are resistant to such loads.
Ease of removal
To get a beautiful result without difficulty, it is required that excess particles can be easily removed from various materials on which they may fall during work.
To get a beautiful result without difficulty, it is required that excess particles can be easily removed from different materials.
Temperature resistance
This parameter is important because high temperatures occur during repair and operation. The level of resistance depends on the substance used in the base of the product.
This parameter is important because high temperatures occur during repair and operation.
Transparency
A transparent composition is required if you are going to repair the headlight locally. If it is installed on a base, then it will be possible to use black or tape types of products.
A transparent composition is required if you are going to repair the headlight locally.
Packaging volume
Packaging volumes vary; to choose the best option, take into account the volume and its cost. Shelf life and average consumption levels are also important.
Packaging volumes vary; to choose the best option, take into account the volume and its cost.
Cost and quality
Professionals say that the optimal choice would be to choose products that fall into the middle and expensive price range. Cheap options perform poorly during operation, missing external factors, or are not transparent enough. As a result, the headlights become dim.
Professionals say that the optimal choice would be to choose products that are in the middle and expensive price range.
Types of materials for gluing
To glue the headlight, glue is most often used. The following basic substances are used to glue car headlights:
- Terostat - 8600 2K;
- Terostat - 8599, 8597, 8596
- Terodicht - Black;
- Terodicht - Elastik;
- Permatex;
- Abro;
- Body.
Adhesive sealant for glasses and headlights PERMATEX 65 AR Silicone Glass Sealer
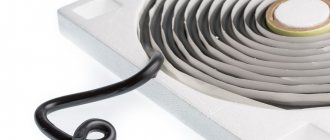
The second way to glue cracks in car headlights is with butyl tape. According to the manufacturers, it has enough advantages:
- ensures durability and reliability of fasteners;
- resistant to significant temperature changes;
- quickly sets to the surface;
- seals glass.
Butyl tape for gluing car optics
There are 2 types of sealed glue:
- one-component. Sold in a tube and initially ready for use, presented as a liquid mass;
- two-component. Presented in the form of a paste or dry mixture. As a rule, it is sold together with a solvent. Before gluing, it is diluted to the desired consistency before use.
One-component adhesive for car optics
Popular headlight sealants
They decide on which sealant to install the headlight glass, taking into account the popularity of the compositions, among other things. There are a huge number of sealants for this purpose on the construction market, but it will be easier for a beginner to choose among the variety of options based on consumer reviews. There are five popular and high-quality products:
- ABRO WS 904;
- Dow Corning 7091;
- DoneDeal DD6870;
- 3M PU 590;
- Emfimastic PB.
It will be easier for a beginner to choose among a variety of options based on consumer reviews.
Sealing car headlights
The procedure is designed to reduce the penetration of moisture and precipitation into the vehicle's lighting elements. The presence of moisture in the headlights is indicated by the intense formation of water vapor condensation on their surface.
Ignoring the problem for a long time can lead to reduced lighting efficiency, loss of headlights and even the colonization of fungi and bacteria, which can reduce visibility while driving.
The quality of sealing is influenced by factors such as the type of glass and the type of surface being bonded. The following nuances are also of great importance:
- Proper preparation for the procedure of replacing car glass;
- Thorough cleaning of bonded surfaces;
- Selected type of gluing system;
- Selection of high-quality sealants;
- Recommendations from manufacturers of individual products and accessories.
Sometimes properly cleaning the surface of the headlight can be problematic, especially if it has been used for a long time or has already been glued. To deal with such stains, you can use cleaning and degreasers, preferably with proven effectiveness.
Instructions for use
In order for the repair to be of high quality, it is necessary to adhere to the rules of work. The gluing technology consists of the following steps:
- Remains of the old coating are removed;
- The surface is degreased and applied if a primer solution is included in the package;
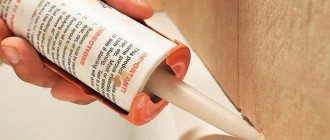
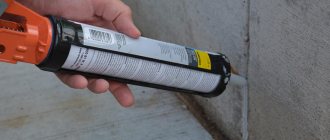
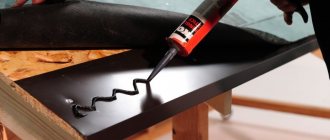
- The liquid product is applied through a special tip or gun. The tape version requires heating and stretching along the base;
- The headlight is attached to the desired area;
- The element is compressed until the solidification process is completed.
In order for the repair to be of high quality, it is necessary to adhere to the rules of work.
How to use the composition correctly
Even the highest quality option will not provide adequate reliability if the work technology has been violated. Therefore, you need to follow a few simple tips in order to achieve a good result:
- The remnants of the old composition, if present, are sure to hit. This is done mechanically using a degreaser or other product.
- The surface to be bonded should be thoroughly cleaned of dust and dirt and degreased.
If they are smooth, sanding may be necessary to improve adhesion. Before gluing, the surface must be cleaned and degreased. - The instructions for using the sealant must be carefully studied before starting work. Follow the manufacturer's recommendations to eliminate any problems and get the desired result.
- After gluing, the parts must be secured using clamps or other devices so that the parts do not move during the polymerization of the sealant. It is imperative to follow the manufacturer's recommended drying time.
To speed up the hardening of the composition, you can use a hair dryer or any other heat source.
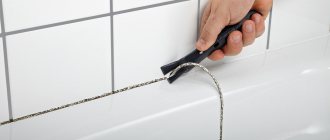
How to Remove Car Headlight Sealant
There are many options for how to remove excess sealant from the surface. The choice is made taking into account the working conditions. The techniques that can be used will be described below.
The choice is made taking into account the working conditions.
Using a hair dryer
Using a hair dryer, the layer heats up and eventually loses its durability. But the use of high temperatures is not allowed when working with a plastic base.
Using a hair dryer, the layer heats up and eventually loses its durability.
Using a knife or screwdriver
Working with sharp tools is simple, but if a layer is removed from parts that are visible and should be without flaws, then it is better not to resort to the method. Otherwise, you may leave scratches on the surface.
Working with sharp tools is simple, but if a layer is removed from parts that are visible and should be without flaws, then it is better not to resort to the method.
Use of solvent
Thinners can be used after heating and scraping work. Or applied in a separate way. Acetone or automotive thinner is suitable for removal. The layer is soaked in the product for 5-15 minutes, after which the sealant is removed.
Thinners can be used after heating and scraping work.
Using a body degreaser
This product does a good job of softening the sealant layer; when the composition has worked, the residue is removed using a rag and non-sharp tools.
This product does a good job of softening the sealant layer.
White spirit, solvent, nefras
These types of thinners can cope with removing the old layer of sealants. Also used as degreasers before new work.
They can cope with removing the old layer of sealing agents.
Using alcohol
The alcohol base is only suitable for working with pre-scraped layers when the joint has already lost its strength. Or alcohol is used to clean the headlights.
The alcohol base is only suitable for working with pre-scraped layers when the joint has already lost its strength.
Stages of work
Conductive glue 4 homemade recipes. Conductive glue
To seal the glass you will need:
- prepare the glue itself. To do this, dilute it and, if necessary, heat it to the melting temperature indicated on the package;
- clean, dry and degrease the surface;
- To seal a crack, heat its edges, where the mixture will be applied next. This is done due to the fact that many types of glue can only be glued to hot (warm) surfaces;
- lubricate the surface and glue it without any effort;
- fix the crack on the tail light. For this purpose, fiberglass and wire are suitable, which must be secured with a frame on the damaged surface to prevent the development of cracks;
- allow the composition to dry (drying time is indicated on the packaging), then remove excess material.
Sealing glass on a car headlight
Alternative ways to glue a car headlight are as follows:
- If you want to glue imperfections on car glass the old fashioned way, you don’t have to buy glue, but get by using a soldering iron. It is suitable if your headlight is made of plastic, as it can melt its edges and glue them back together without the use of foreign substances.
- You can also glue a damaged tail light using plastic tablets. You just need to heat one tablet and then spread it on the damaged glass. After hardening, the surface is treated with a fine-grained abrasive (sandpaper, abrasive clay) to eliminate excess material.
- Sealant can seal cracks of different sizes well. The algorithm of actions here is similar to working with glue. You can choose a “native” sealant (the one used by the manufacturer of your car model) or buy a high-quality analogue. The main rule is to strictly follow the instructions, especially in terms of diluting and heating the composition.
- You can glue the cracks with a special cloth. It is laid at the crack site and filled with acetone. Acetone begins to dissolve the components of the fabric, transforming them into an adhesive composition. Car enthusiasts note the fast drying time of this mixture - approximately 1-1.5 hours.
Using plastic tablets we seal the rear light
If none of the above methods work for you, or you have not yet purchased sealant, you can temporarily seal the surface with tape. Pre-treat the surface as you would with glue and glue the crack. Scotch tape, depending on the quality of the work and the material itself, can glue a crack for a period of from several days to several months.
Mistakes when choosing and using sealants
To get a long-lasting result, a beginner needs to take into account common mistakes in choosing a sealant and its use. The following points are highlighted:
- Incorrect selection of product in terms of transparency and resistance to high temperatures;
- Working with an unprepared base;
- Weak compression force when anaerobic adhesives are used;
- Applying the product in a layer that is too thick;
- The sealant is applied to the old layer.
Incorrect selection of product in terms of transparency and resistance to high temperatures.
Useful tips
When working in a garage where the heating is poor, it is better to warm up the sealant and base. Working with halogen headlights is difficult, so in this case it is better to resort to the services of specialists. The remaining adhesive is removed from the outer surface after the layer has hardened.
When working in a garage where the heating is poor, it is better to warm up the sealant and base.
Headlight glass sealant will help make repairs that are durable and unnoticeable. But when working, you should follow the technology; it is also important to choose the appropriate option, taking into account all the features of the material and operating conditions.
Using auto sealants (instructions)
Caulks can be used to seal weather strips around windows and headlights, and cracks in metal frames can be repaired with a special metal adhesive. This is all thanks to the processes of adhesion and adhesion.
The easiest repair you can make is to fix the headlight in its proper place. First make sure both contact surfaces are clean, then apply sealant to one surface.
Hold the surface for a few seconds until it settles. Press the headlight firmly into place to completely fill any gaps.
- You can buy sealant not only for fixing headlights, but also for attaching metal to glass or glass to glass.
- More and more cars are equipped with mirrors glued to the windshield.
- It all depends on the manufacturer and on what kind of loads he uses for his sealant.
Therefore, carefully read the detailed instructions for headlight sealants on the manufacturers’ websites.
