Stretch ceilings have earned popularity because they allow you to quickly obtain a flat surface. Conventional installation methods involve fastening to durable, preferably solid walls. The plasterboard sheet is fragile and cannot withstand the resulting load. But there are technologies that allow you to securely attach the tension fabric to the gypsum board. Let's consider each method in detail.
Specifics of fixing suspended ceilings on a plasterboard base
It is important to understand that we are talking about designs that have completely different characteristics, so simple solutions will not work here. This is especially clearly seen during the installation of both systems: completely different technological approaches are used for this. Gypsum board is a composite material that resembles a pie: two outer layers surround a mineral gypsum layer on both sides. To install such a slab, preliminary installation of a wall supporting frame is carried out. For its manufacture, a galvanized metal profile is used, onto which sheets of plasterboard are attached.
The popularity of such finishing of individual dwellings is explained by the following points:
- The ability to relatively quickly obtain a perfectly flat surface for further finishing. This makes it possible to eliminate unevenness and construction defects without labor-intensive plaster, which takes a lot of time to dry.
- Almost any type of finish can be applied over plasterboard on a wall or ceiling. This gives wide scope for personal creativity in implementing original design solutions.
- The ease of implementation allows any novice master to cope with this task. The main thing is to strictly follow the recommendations for installing drywall instructions.
As practice shows, fastening a stretch ceiling to plasterboard is used in two situations:
- When a residential apartment or room in a new house does not have any interior decoration. This usually results in very clumsy walls and ceilings. To make repairs as quickly as possible, it is easier to install plasterboard sheathing over nearby surfaces. After this, you can immediately begin finishing the room, including attaching the stretch ceiling to the plasterboard wall.
- Some room design projects feature multi-level ceiling systems with decorative lighting. This involves installing a metal profile frame around the perimeter of the room, which is subsequently covered with plasterboard boards. In this case, tension fabrics are often used as the upper base base, for fixation of which a clamping profile is used. It is mounted on top of a special plasterboard box installed along all the walls.
In some cases, intermediate plasterboard partitions are used in reinforced concrete or brick buildings. As a result, three walls are stronger than the fourth. In such a situation, when attaching a suspended ceiling profile to a concrete and brick wall, ordinary dowels are used. A plasterboard wall will require a special approach.
Progress of installation work
The instructions begin with a very important stage - choosing the appropriate type of plinth, which will determine some of the features of its fastening.
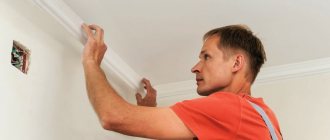
Stage No. 1: choosing a baguette
Photo of polyurethane fillet
First of all, you should decide on the material of the baguette:
Wooden ceiling plinth fits perfectly into a classic interior
Tip: It is recommended to use polyurethane or plastic fillets in the kitchen and bathroom, as only they can effectively withstand the humid environment of these rooms.
In addition to the material, decide on the profile of the baguette:
| Profile | Description |
| Flat | It has two sides: front and back. Fixed only to the wall below the ceiling level. |
| Classical | It has three sides: front and two back. It is installed at the junction of the wall and ceiling, creating a smooth transition from one plane to another. |
Tip: for rooms with high ceilings, it is recommended to select wide skirting boards, which will look very organic in a spacious room, but for rooms with low ceilings, narrow fillets are better suited, visually increasing the space.
A classic wide baguette looks great in a spacious room
Features of suspended ceiling systems
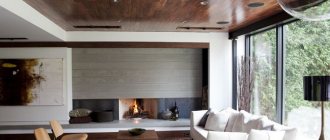
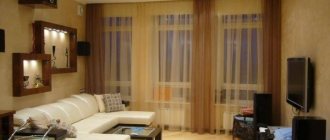
The main advantage of fabric and vinyl stretch ceilings is the ability to quickly obtain a perfectly flat ceiling surface. In this case, the initial state of the rough foundation is practically unimportant, because the decorative canvas completely covers all the flaws. The resulting surface has no visible cracks, gaps or joints. Additional finishing is not required here due to the high aesthetic characteristics of the material. Although the prices for such systems are quite high, this does not prevent the growing popularity of suspended ceilings as a finishing touch for apartments.
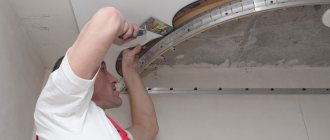
The tension structure contains a metal or plastic mounting profile, which is used to equip the entire perimeter of the walls in the room. They try to install it as close as possible to the concrete ceiling. The method of fixing the canvas and the specifics of the design are the main criteria for the classification of load-bearing profiles. They come in harpoon, cam, wedge and glazing bead types. In general, installation of any type has many similarities.
Installation of a suspended ceiling system is carried out as follows:
- Horizontal markings are applied along the perimeter of the walls, which will serve as a guide when installing the supporting profile. For convenience, it is recommended to use a laser level. If it is not available, a regular construction hydraulic level will do.
- When installing the supporting profile, it is necessary to achieve strict horizontality. There should be no smooth bends in straight sections, not to mention sharp breaks in connecting sections.
- To reliably fix the profile to a solid load-bearing wall, it is recommended to use expanding plastic dowels and 4.5x60 mm self-tapping screws. The optimal fastening step is 15-20 cm.
- Before installation, the film panel is delicately unrolled and hung by the corners on the profile strip, using temporary hooks for this. If the sagging of the material is too low, temporary clamps that look like large clothespins are suitable for additional fastening.
- A special feature of PVC films is their heat-shrink characteristics. As a result, before tensioning, they need to be heated over the entire area to a temperature of +50-60 degrees. For this, an electric or gas heat gun is usually used.
- Fabric coverings are installed without preheating: the procedure starts immediately after installation of the profile frame.
- Having informed the vinyl film of the desired temperature, the fastening procedures begin. The starting point for fixing the canvas to the supporting profile is the central part of the short side of the room.
- After fixing two opposite corners on the short wall, proceed to laying it in the profile along the long side.
- Upon completion of installation of the panel inside the entire length of the profile structure, the surface may contain small folds. This is not a defect: as the material cools, such defects will gradually disappear due to the elasticity of the film.
- Upon completion of the installation of the canvas, the grooves of the supporting profile along the entire length are equipped with plastic overlays that resemble a decorative plinth in appearance. This allows you to mask the gaps between the walls and the locking structures of the tension fabric. As a result, the room acquires a finished appearance.
Fabric ceilings do not have heat-shrink characteristics, which allows the use of a glazing bead supporting profile when installing them. As a result, the degree of tension of the tension fabric can be adjusted as it is installed. Fabric stretch fabric will require an order of magnitude greater effort during installation when compared with PVC film.
Tools and materials
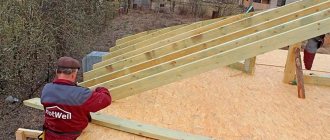
Installation of a suspended ceiling on plasterboard walls involves two completely different technological operations. The first step is to arrange the supporting frame and attach plasterboard sheets to it. Next, the supporting profile is installed, followed by tensioning of the decorative ceiling material. When deciding on tools and materials for work, it is important to take into account the specific needs of both technologies.
List of necessary tools and materials:
- Electric hammer drill and set of 6-12 mm drills. It will be used to make holes in concrete walls and ceilings. If brick was used to build the house, you can use a powerful impact drill instead of a hammer drill. The main thing is to use special pobedit drills.
- Screwdriver. The most convenient are cordless models, with which you can quickly tighten screws. In the process of work, a lot of such operations will be needed.
- Gas or electric heat gun. With its help, the stretch PVC film is heated. When choosing a suitable option, you should take into account the significant costs of electricity when operating electrical equipment. To operate a gas gun you will need a cylinder of liquefied natural gas.
- Stepladder or construction sawhorse. Any ceiling finishing has to be done at a height, which requires a solid foundation under your feet. Alternatively, you can use a sturdy table of the desired height.
- Set of hand tools. It consists of a hammer, a shaped screwdriver, a flat-head screwdriver, a set of metal spatulas, a sharp construction knife, pliers, an end plane and a hacksaw.
- Measuring devices - a metal ruler 1 m long, a tape measure 5 m long, a building level and a large square.
- Plasterboard boards equipped with the required number of metal profiles. The supporting frame will be made from them.
- Fastening elements. This refers to crabs, screws, clamps, etc.
- Stretch ceiling set. It includes a decorative canvas, supporting profiles made of steel or plastic, plastic decorative plugs, and special rings for laying communications.
When deciding on the supporting profile and locking mechanism, it is best to take advice from the company’s specialists in the sale of components for suspended ceiling systems. Before this, you need to thoroughly measure the room and make a preliminary drawing of the location of the ceiling structure. Having this information in hand, company representatives will help you select the desired modification of the profile and fastening mechanism, taking into account the specifics of the room.
How to make a frame for a figured box
To create a figured caisson, you will need the same materials and tools as for a regular box. Only the manufacturing technology will change. The front part of such a box has a bent plane, so it becomes necessary to make the metal profile, which is often not suitable for this, curved.
Manufacturers produce a special type of metal profile that bends easily, but it is practically impossible to find it in the public domain.
You'll have to take care of this matter yourself. There is a simple way - cutting the side shelves to the very base. The profile visually resembles a strip with petals, which bends easily. If there is a need to bend the profile so that the shelves are inside, then the cuts are made triangular. At the same time, the free space between the petals will not allow them to creep onto one another when bent.
The cuts are made at the distance necessary for proper bending. The steeper the bend, the smaller the distance between the sections.
Recommendations from experts! Regardless of the steepness of the bend, the distance between the notches should be identical.
Combined two-level system
The use of plasterboard sheets is not limited to just leveling curved bases. With their help, original design structures that have the most intricate shapes are often built. These systems include multi-level suspended ceilings with built-in lighting or backlit lighting. As an example of installing suspended ceilings on plasterboard walls, you can consider installing a simple two-level structure based on a rectangular box around the perimeter of the room.
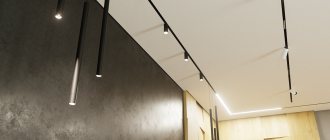
Plasterboard box with hidden lighting
The box can be equipped with a hidden suspension along the perimeter. For this purpose, a closed or open niche is made by extending the transverse guides from the profile to the curb. An LED strip will be mounted in the niche. The installation of a stretch ceiling involves a sequence of actions: first, a plasterboard ceiling is made, then its finishing is done.
Scheme of the design of a plasterboard box with hidden lighting
In this case, the height of the box will be reduced by 3 cm, taking into account the transition between the structure and the suspended ceiling. The system is attached to the vertical plane of the structure. To enhance its rigidity, two layers of material are used. If the area of the room exceeds 40 sq.m., then the vertical structures are reinforced with wooden slats.
Using embedded elements
In the case of using single-level tension systems, the areas adjacent to the plasterboard walls have an angle of 90 degrees. A beginner may find this option easier to implement. In fact, this is far from true, given the lower rigidity and lower load-bearing capacity of plasterboard compared to reinforced concrete or brick walls. The tension of the canvas is accompanied by the application of great effort, which can cause understandable doubts about the strength of the fastening of the stretch ceiling to the plasterboard box.
However, such options are often and successfully implemented when decorating residential and office premises. To make such a design reliable, special technologies are used. One of them is the use of mortgages for suspended ceilings in plasterboard.
Operating procedure:
- The first stage of installation is carried out in strict accordance with generally accepted building codes.
- Upon completion of the arrangement of the frame structure, special embedded elements are installed in its upper area. They will ensure the possibility of reliable installation of a stretch ceiling on plasterboard walls.
- If finishing is carried out in a small residential area, a galvanized metal profile for plasterboard is used to make mortgages. If the room area is large, then it is recommended to use wooden blocks with a cross-section of 60 mm or more.
- The installation height of the embedded element is determined in such a way as to achieve positioning of the lower edge at the same level with the decorative surface of the tension structure.
- When using horizontal posts made of a metal profile to make a mortgage platform, it is necessary to fix the jumper at two points on the vertical profile.
- The use of a wooden mortgage requires that each of the lintels must be fixed to the main wall at two points. Expansion dowels and plumbing screws are used as fasteners here.
- Upon completion of the installation of the suspended ceiling inserts in plasterboard along the tops of all walls, they proceed to sheathing the frame and subsequent finishing activities.
- When the finishing is completed, load-bearing profiles (friezes) are installed at the required level to fix the tension fabric. It is most convenient to fasten the profiles with wood or metal screws 6x60 mm.
To evenly distribute the pulling force over the entire area of the embedded element, the fastening screws are screwed in at a distance of no more than 100-150 mm. In all corner areas of the room and at the joints of the supporting profile, self-tapping screws are installed within 20 mm from the end of the profile.
Mounting options
Let's not waste time and start considering specific solutions. Each of them has its pros and cons and can be used in certain conditions. Do not listen to anyone's advice until you are familiar with all the options for carrying out the work. Often advisors have no idea that the job can be done much easier.
Method 1 - special strengthening of the base
This option is suitable for those who have not yet made a ceiling, or at least built a frame, but have not yet covered it with gypsum board. Its essence lies in the fact that in the place where the cornice will be attached, the surface is reinforced from the inside using any suitable element.
Most often, one of two solutions is used:
- You can fasten a wooden block with a thickness of 30 mm or more along the structure. It is fixed to the wall, ceiling or secured through hangers, it doesn’t matter, the main thing is that you get a solid base for the entire length of the window. Subsequently, you can easily fasten the cornice - the drywall is simply screwed on with a wood screw and the fasteners are firmly fixed in the reinforcing element, this is easy and at the same time reliable;
This option allows for fastening with conventional wood screws.
- The second option is to reinforce the surface with a drywall profile; for this you just need to add a separate element that will be located along the line of the cornice. Everything is quite easy and quick, the main thing is to place the element in the required place. In the future, the cornice is fastened using metal screws.
You can not attach the additional element to the frame, but fix it on hangers
When the walls are already sewn up
It happens that the desire to decorate the premises with suspended ceilings comes to the owners of the house after the installation of plasterboard walls. In this case, attaching a stretch ceiling to a wall will require a special approach.
Description of the technology of how suspended ceilings are attached to plasterboard:
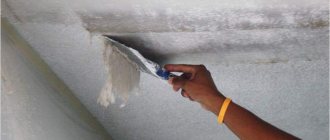
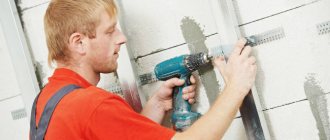
- It all starts with checking the strength of the plasterboard boards on the rough base. First of all, this concerns the upper area of the wall, along the entire length of the room. You need to act carefully, given the fragility of the panels.
- During the inspection, it is necessary to pay attention not only to the reliability of fixation of the plasterboard sheets, but also to the correct installation of the supporting frame. When examining the structure, they notice all the kinks, loose fit, rattling, the presence of cracks, mechanical damage and delamination of the drywall. All detected defects are eliminated.
- As practice shows, the degree of resistance to dynamic loads of standard self-tapping screws immersed in drywall is quite low. Therefore, it is recommended to fasten the supporting profile only with expanding anchors made of steel or plastic. In this regard, MOLA 5x13 expansion anchors, in combination with M5 profile screws, have proven themselves very well. Another good option is OLA 8x13 expanding plastic anchors, equipped with 3.5x60 mm profile screws. Such fixation is usually used in cases where the frame is sheathed with single-layer plasterboard boards with a thickness of 12.5 mm or more.
- When installing a strip for a stretch ceiling, it is better to use frequent installation of expansion anchors: the recommended screwing step is 10 cm.
- To make the fastening as reliable as possible, when planting the anchors, you need to try to get into each vertical post of the supporting structure.
- To determine the exact location of the vertical profile behind the plasterboard sheathing, they often use a portable metal detector or a special function on their smartphone. A good option for finding a stand is a powerful permanent magnet.
- Another way to install suspended ceilings on plasterboard is to replace the wall profile with a ceiling load-bearing profile. They usually use an identical clamping mechanism. In this case, the fixation occurs not to the wall panels, but directly to the main ceiling.
- The rough ceiling sometimes contains significant differences and curvatures. In such a situation, the profile strip is fixed using a spacer wooden spacer. To make it, use a thick, narrow board or wooden beam. This method is also suitable in situations where they want to lower ceilings that are too high as much as possible in order to make the room more comfortable.
It is important not to forget that installing a tension fabric cloth takes an order of magnitude more effort. It follows from this that all of the above methods of attaching a baguette to drywall can only be used in relation to decorative PVC films. To ensure reliable fastening of the baguette for suspended ceilings to the plasterboard, the frame sheathing is carried out only with sheets with a thickness of 12.5 mm or more.
The easiest way to attach a stretch ceiling to plasterboard
In cases where the work is carried out by beginners, you can use the simplest option of installing a stretch ceiling on a plasterboard ceiling. As you know, the gap between the rough and decorative surfaces of the ceiling system cannot be less than 35 mm. If the architecture of the room does not have any abnormal deviations, then when installing a load-bearing profile on plasterboard sheathing, it is quite possible to place all the fastening screws in a metal ceiling guide. This durable and reliable element copes well with the role of an embedded lining during the installation of plasterboard under a suspended ceiling.