The creative thought of the designer has long forced us to take a fresh look at the usual standards of arrangement and decoration of living space. No one is surprised by the decorative brickwork in the apartment or the fireplace decorated with rubble. The time has come for the arrival of boards, beams and wooden slats and even unedged material into the interior of apartments and houses, which, according to the old canons, was used most often for finishing dachas, temporary buildings, garden houses, gazebos and even garage roofs. The wood from the floor migrated to the walls and ceiling.
Features of the use of wood in ceiling construction
To finish the floor using ceiling boards, you need to know what types of wood can be used for this purpose, as well as familiarize yourself with the technologies for implementing such a project.
Before you start finishing the ceiling with edged or unedged boards, you should consider several important points:
- The cost of products made from different types of wood differs. Therefore, you should not be surprised that the costs of decorating the ceiling surface may ultimately turn out to be different. In addition, the final cost depends on the use of different parts. As for the availability of products, lining for ceilings is the best choice, since at an affordable price it has a different profile and therefore the ceiling made of boards looks different.
- All wood is sensitive to sudden changes in air temperature and humidity. For example, as a result of changes in humidity levels, cracks appear on wood products. When the temperature changes, the lumber begins to dry out, which leads to the appearance of cracks and cracks in them. In addition, changes in the degree of humidity can provoke a corrosion process on the boards for the ceiling of the house. To avoid unwanted problems with the wooden products used, they are necessarily treated with special impregnations to prevent the appearance of mold, mildew, cracks and other things.
- Everyone knows that wood burns well, so you need to take care to comply with fire safety rules. To reduce the likelihood of fire, any areas on the ceiling where the plank ceiling will come into contact with electrical wiring or heated surfaces should be insulated by attaching a metal sheet. The wires are laid in a special corrugated hose.
- It should be remembered that before attaching the boards to the ceiling, it is imperative to install the sheathing. As a result of its creation, the height of the room decreases. If the room is already low, then this circumstance should be taken into account.
- Even when a ceiling is built from edged boards and laid end-to-end, cracks will still appear, so they will need to be sealed periodically. The only way to avoid this is to use a technology called “tenon and groove”. As a result of using this method, the joints of the boards always have an attractive and neat appearance.
Preparation for work
At the first stage, you need to take care of the availability of tools, namely:
- square;
- screwdriver;
- hacksaws;
- cord;
- pencil;
- with a hammer.
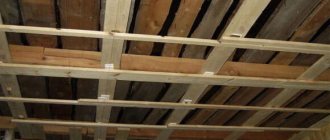
A hacksaw can be replaced with a chainsaw if you have one in your arsenal. You can even rent such an instrument. When hemming, the most commonly used lumber is a planed tongue-and-groove board. Its width should be 100 mm, while the thickness can vary from 16 to 22 mm. A wider board is easier to install. Usually the base is coniferous wood. The ceiling is thermally insulated only if the house has an attic without heating. The ceiling should be insulated. If the attic is planned to be insulated, sound insulation is laid on the floor between the room and the attic. To do this, the sheathing is nailed to the laid attic floor beams.
If you plan to install a ceiling made of boards, then you need to take care of preserving the cladding after installation. To do this, paint or colorless varnish is applied to the material. When arranging a rough ceiling, the first step is to attach a vapor barrier to the floor beams. An unedged board is attached on top, maintaining a certain distance between layers. Thermal insulation should be laid on top of the boards. Afterwards you can start processing the overlap on both sides.
Pros and cons of covering the ceiling with boards
Advantages of finishing the ceiling surface with boards:
- The material is highly durable. To do this, it needs to be treated qualitatively with special compounds.
- When using wood finishing, the thermal insulation characteristics of the room are improved.
- Lumber on the ceiling soundproofs the room.
- Simple installation that any home craftsman can easily handle.
- Wooden plank ceilings have an attractive appearance.
This finishing method also has disadvantages:
- Instability to humidity and water. Their constant exposure leads to the fact that lumber begins to rot.
- Intolerance to sudden temperature changes.
- Special products will be required for care.
- When purchasing materials from expensive wood species, the cost of the ceiling is significant.
- Over time, the ceiling surface may lose its original appearance.
Taking into account all the listed pros and cons, it is necessary to decide which wood material is best to use for the design of the ceiling.
There are several types of boards for the ceiling of a house:
- floor board;
- lining;
- Planken.
Flaws
Even the best method of repairing floors has its drawbacks.
A rather specific drawback that antique-style wooden ceilings have is their susceptibility to pests. Partially, this problem is solved by treating all parts with a special impregnation, but in country houses it is rarely possible to completely get rid of pests. The second significant disadvantage will be the high cost of such repairs. Some breeds are very expensive and of course, these will be the varieties with the most beautiful texture. However, modern industry has launched the production of fairly accurate imitations of expensive species, even from chipboard.
Variety of wooden ceiling designs
A ceiling made of lumber and lining can be made in one of three ways, each of which has distinctive features:
- Option one - creating false ceilings
. This method is the most reliable, but not the cheapest. To lay finishing materials, floor beams should be installed using thick bars or hewn logs. It is these elements of the ceiling structure that are expensive. They are installed on the crown, and taking into account the type of roof, they are attached to the walls. Then boards are nailed to the beams. It looks durable and massive. Lumber can also be stuffed on top, making it completely safe to move around the ceiling or roof area. When hemming ceilings with sheathing boards, steam, heat and waterproofing are laid between the lower and upper rows. - Option two - arrangement of panel ceilings
. According to this technology, first of all, special shields are assembled, consisting of two bars installed in parallel. The boards are stuffed transversely. The already prepared panels are lifted to the ceiling and fixed. If desired, heat and vapor barrier is installed on the outside. It will be good if beams are used to create the base, since they have the required strength. Panel ceilings have a serious drawback - the structure made from lumber is heavy. To raise the shield, the participation of assistants will be required. In addition, it will need to be held for some time while the structure is attached. - Option three - construction of a flat ceiling
. This simplest method of laying ceiling boards can be implemented when the span does not exceed 2.5 meters. In this case, lumber must be fastened simultaneously at both ends of the ceiling. You cannot walk on flooring created in this way.
According to the recommendations of experts, when repairing the ceiling of a room, it is better to choose the third option, since it is less labor-intensive and requires minor financial costs. If the house is just being built, it is better not to save money and stick to the first method. The installed floor beams will simultaneously become the base of the roof being constructed.
Algorithm for filing the floor
The instructions for arranging a plank ceiling are quite simple, although they involve various options for action.
Below we present the simplest diagram, following which you can arrange an insulated floor finished with lining or tongue-and-groove boards:
- To begin with, we lay waterproofing on top of the ceiling beams and form the top flooring (it will also be the floor of the attic, attic or second floor).
Note! All parts of the ceiling must be treated with a fire-retardant compound. If this has not been done before, now is the time to impregnate, especially since such products dry in less than a day.
- We lay panels of thermal insulation material between the ceiling beams. It is advisable to use vapor-permeable insulation, since they do not interfere with the natural ventilation of the structure.
- The insulation layer is covered with a vapor barrier membrane. For this purpose, a foil film on a foamed polymer base is best suited. We fasten the vapor barrier to the beams using a stapler.
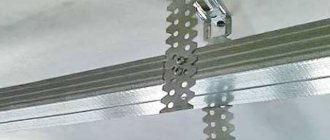
- On top of the vapor barrier we stuff sheathing beams with a cross-section of about 30x30 mm.
- Using nails or self-tapping screws, we attach cladding boards to the sheathing - planks, clapboards, false beams, etc.
Photos during installation
- We do not bring the edges of the boards to the walls by about 10 mm, forming a deformation gap. We cover this gap with ceiling fillets, which we install on the walls.
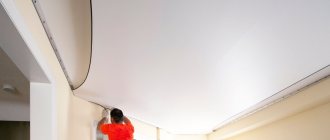
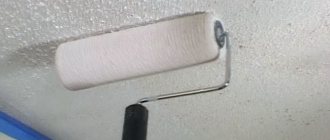
After completing these works, we mask the heads of the fasteners with wood putty, sand the ceiling, and then paint or varnish the wooden paneling.
Using a floor board
An original solution is to use tongue-and-groove boards for the ceiling. This has a great advantage, since the floor boards have a mounting groove, thanks to which, in the event of a change in humidity or temperature, cracks and crevices will not appear at the joints of wooden products.
Creating a ceiling from tongue and groove boards can be called the best choice of material - it allows you to create a perfectly flat surface. If there are differences, they will be almost unnoticeable.
Thus, if a floorboard has been chosen for finishing the ceiling, a number of nuances must be taken into account:
- You should not purchase too thick lumber for the ceiling;
- A 20mm material thickness will be sufficient, and in some cases less.
As an option, you can use a durable parquet board to decorate the ceiling, because such material will give the room a special atmosphere. By the way, many designers, in order to achieve original solutions when decorating walls and ceilings, opt for parquet.
When purchasing a tongue and groove ceiling board, you should pay attention to the quality of processing of this building material. Wood must be protected from all kinds of parasites and mold. When processing by manufacturers of building materials during the manufacture of products is not carried out, the home craftsman must take care of this himself.
Preparatory stage
In most cases, beams are the basis for interfloor ceilings in wooden houses. They are installed with their ends on the load-bearing elements of the structure and are easily subject to additional processing. In addition, such a base can perform not only a supporting, but also a decorative function. In particular, if the ceiling is hemmed along wooden beams from above, the beam becomes part of the interior decor of the premises.
If we talk about the tools that may be required when performing work, they are prepared according to the list:
- jigsaw;
- screwdriver;
- drill with a set of wood drills;
- hammer;
- fastening elements (corners, screws, nails);
- stapler;
- pencil;
- tape measure and building level.
In addition, gloves and safety glasses will be required. If mineral wool is supposed to be used as insulation, it makes sense to take care of a respirator.
Modern lumber for ceilings - planken
One of the latest innovative solutions to emerge in the field of production of materials for flooring design is planken. The products go on sale completely ready for use.
During the production process, planken is subjected to drying, heat treatment and hardening. Thanks to heat treatment, which occurs under the influence of high temperatures, wood has special technological characteristics. Purchasing planken is one of the best choices of lumber for finishing ceilings.
This is evidenced by its undeniable advantages:
- increased strength;
- high degree of resistance to the negative influence of all kinds of microorganisms;
- the material is not dangerous from moisture;
- long service life;
- excellent wear resistance, thanks to which the ceiling will look like new throughout its entire life;
- presentable appearance - planken will decorate any interior;
- resistance to sudden temperature changes.
We can conclude that using boards to decorate the ceiling surface will be an excellent solution for every property owner. Therefore, this type of lumber is often purchased for the purpose of cladding the surfaces of saunas, baths and similar objects.
? Laying over old floors
The first thing you should make sure of before starting work is whether the old floor can continue to withstand heavy loads. If there are no doubts, then you can move on to the repair measures themselves. The sequence is as follows:
- Roughly sand the old flooring and remove any accumulated dust.
- Install waterproofing.
- Lay new floorboards perpendicular or diagonal to the old ones.
Installation of solid boards over existing wood flooring
If you don’t want to experiment with a new laying direction, then use plywood as a base for the new floor. By choosing sheets with a thickness of 12 mm or more and roughly sanding the plywood surface, you can install the floorboard in the usual direction.
Important! If the strength of the old floor is still in doubt, then it is recommended to carry out complete dismantling and start work from the concrete screed. It is not advisable to carry out any construction work yourself
Even the simplest activities require certain knowledge and professional training. The work of the construction team is a guarantee of high quality and excellent results
It is not advisable to carry out any construction work yourself. Even the simplest activities require certain knowledge and professional training. The work of the construction team is a guarantee of high quality and excellent results.
Modern trends, including interior design, force us to look for new solutions. For example, in the arrangement of the ceiling. Suspended and tensioned structures made of plasterboard and PVC are already considered traditional. I want something new, extraordinary. Why not then put a floor covering on the ceiling? For example, a parquet board. After all, who said that this cannot be done?
Unedged board ceilings
The ceiling is made from unedged boards and timber most often when decorating utility rooms. Of course, unedged lumber does not have such an attractive appearance as other wood products intended for decorating the ceiling surface.
But when choosing materials for objects such as a barn, poultry house and similar ones, it is quite possible to get by with unedged boards. When laying them, you need to remember that these products have an irregular shape. Therefore, in order to avoid the appearance of large cracks on the ceiling plane, you should select the next board taking into account the shape of the previous one.
There is a technology according to which unedged material is processed, then coated with varnish and used to finish the floor surface. Despite the fact that such products look unpresentable, you can create an antique-looking unedged board ceiling in a living room.
Some experts advise that you must remove the bark from this type of board. The fact is that various insects and parasites can live under the bark. In addition, the bark contributes to the process of decay.
To make a ceiling from unedged boards, proceed as follows:
- First, a wooden frame or sheathing is assembled.
- Then lay a thick plastic film.
- At the final stage, the boards are secured with screws or nails.
Thermal insulation
An unedged board is quite capable of “fitting” into a stylized interior
Insulation is not a mandatory step in the described chain of manipulations.
But if there is a cold, unheated superstructure overhead, this phase will turn out to be very pressing. A layer of insulation (often in parallel with a soundproofing liner) is applied to the ceiling separating the attic and the living space below. The gasket is nailed, secured with twine or glued to the attic beams.
General device
To understand why this part of the structure is needed and how to properly arrange it, you need to understand the design of the floor itself, to which everything will be attached. The general schematic diagram of this design looks like this:
The wooden deck or floor is located on the second floor or attic, insulating materials and hydro-vapor barrier are laid between the floor joists, and the rough surface is attached to special cranial bars that support it. Some interfloor spans may be arranged differently, but the general principle of assembly is approximately the same.
The skull block may not be used, but then all the load-bearing beams will be hidden behind the surface of the finishing coating. If the height of the room leaves much to be desired, it is better to leave them in sight and raise the surface of the future ceiling, securing it between them. The optimal method of arranging this surface is selected based on the characteristics of a particular building.
Material selection
Blanks for rough flooring
When deciding how cheap it is to sheathe a plank ceiling, you should consider all available materials.
And first of all, slabs and unedged boards will come into our field of vision - these budget materials are widely used for arranging floors, which will then be hidden under the finishing:
Using unedged boards as flooring
- Rough filing of the ceiling with boards is carried out if we need to lay the foundation for installing insulation or a suspended structure.
- For work we use either a slab or an unedged board of a suitable size. The thickness of the parts should be at least 25-30 mm.
- To ensure that the ceiling made from unedged boards is sufficiently reliable, we remove the bark from all pieces, and then saturate the parts with wood antiseptics.
Advice! If possible, thin edges of both unedged panels and slabs should be cut off, forming side edges of at least 10 mm.
Low-grade edged boards can also be used for this purpose, but in this case it is important to carefully sort the workpieces, removing parts with cracks and other large defects
Lining
In the minds of most craftsmen, the ideal board for the ceiling in a wooden house is lining.
And there really is a rational grain in this:
Lining fixed on beams
- The material costs relatively little, and you can find it almost everywhere.
- The technology for installing lining has been proven, so almost anyone can cope with the task.
- The sheathed surface turns out to be quite attractive, especially if you choose modifications with minimal chamfers.
At the same time, it should be noted that standard lining is quite narrow, so it must be installed on the ceiling in such a way that the joint lines are a visual continuation of the wall cladding. Otherwise, your eyes will ripple, because the ceiling, unlike the walls, is usually almost completely open.
tongue and groove floor board
As an alternative to lining, many craftsmen are considering floor boards.
In this case, the casing will not experience any special loads, so you can purchase the thinnest – up to 20 mm – blanks:
Tongue and groove boards are somewhat more reliable than lining
- For work, both a regular edged board and modifications with tongues are used. A tongue-and-groove ceiling board is easier to install; in addition, locks on the side edges allow you to create a more reliable connection.
- To fasten parts, it is better to use nails or screws rather than clamps. Still, long panels are quite heavy, so a margin of safety will not hurt.
- Instead of solid wood blanks, parquet boards, which are veneered multilayer products, can be used. Firstly, it looks more attractive, and secondly, it tolerates changes in temperature and humidity much better.
Parquet boards are also suitable for this purpose.
Planken
However, the board on the ceiling in the house does not have to be a material strictly for interior work.
Facade panels (the so-called planken) are also quite suitable for this purpose:
- Products of this type undergo multi-stage heat treatment, which minimizes the influence of temperature and humidity on the geometry of the cladding.
- The moisture resistance of the panels significantly expands the range of their applications: if you are thinking about how to make a ceiling in a bathhouse from boards so that it does not get wet, feel free to choose façade varieties.
Straight plank is suitable not only for facades
The use of special protective equipment allows us to preserve the natural texture and color of natural wood, so that our ceiling will not look faded even ten years after covering.
Note! Sometimes planken is tinted, which allows not only to preserve, but also to emphasize the characteristic pattern of wood fibers. Finally, it is worth paying attention to the installation
Straight plank attaches to any sheathing very quickly, so filing will not take much time
Finally, it is worth paying attention to the installation. Straight plank attaches to any sheathing very quickly, so filing will not take much time
Briefly about the main thing
Lining as a ceiling decor has many advantages, and, thanks to the variety of types, it allows you to beautifully decorate the interior in many popular styles. For cladding residential premises, choose material from hardwood, class A or “Extra”. In small rooms, preference is given to boards in light shades.
There are many ways to sheathe the ceiling: using a combination of materials, figured layout, false blocks. Calculating the material for the ceiling is not difficult; you can do it yourself or use an online calculator. The cladding is carried out on the frame or with glue, choosing the most suitable option.
Ratings 0
How to choose for different rooms?
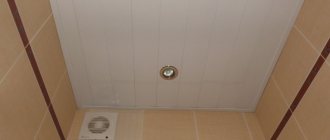
Lining is relevant for the kitchen. It has water-repellent properties, which is indispensable for this room. The tongue-and-groove design of the lining makes it easy to embed a hood into the ceiling or make holes for pipes, and its suspended structure is convenient for carrying wires and communications. The same material is appropriate in the bathroom or toilet. Often, laminated wood parts or coated with several layers of varnish are used on the kitchen ceiling. This is necessary for quick and practical cleaning, and will also prevent the formation of fungus and mold.
The color scheme of the ceiling in the kitchen is light shades, providing visual spaciousness to the room. If desired, you can use bright colors, combining them with pieces of furniture.
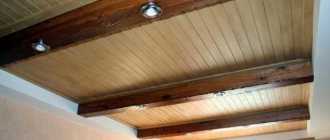
The living room in a private house is the place where the whole family gathers, so finishing the ceiling with wood will create coziness and comfort in this room. For example, wide beams or a panel and slatted design would be appropriate for a living room. And the presence of a fireplace in the room and wooden furniture will perfectly complement such an interior. High ceilings in the living room can be enhanced with dark wood, shading them with light sources. At the same time, several lighting options can be used in one room, for example, spotlights mounted in beams, and main chandeliers and spotlights directed at each other. Such light illumination will help emphasize the texture of the wood on the ceiling and also divide the living room into zones.
In the bedroom, depending on the style of the room, slatted or beamed ceilings can be used. This room is a corner of peace and tranquility, so massive details are not needed here. The main colors for this room are pastel colors - light beige, cream, powder color, light blue, lavender, olive. In this case, it will be necessary to paint the wood, but if you still want to use textured options on the ceiling, then you should choose species of light shades. The best option for a bedroom would be to make the ceiling and floor from wood. This combination will add softness and warmth to the room. The same ceiling can be chosen for the hallway.
Styles
The high-tech style is characterized by a clear geometry of lines, assembled compositionally into a single whole. The interior looks urban, supported by wooden beams used to decorate the ceiling. The design can be in the form of geometric shapes or imitate logs. The color scheme of the ceiling should match the finish of the floor and walls. When planning a design, it is worth remembering that a feature of high-tech is the absence of unnecessary details in the interior.
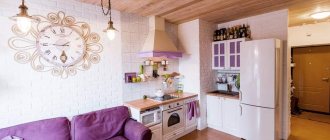
Country style will be complemented by wooden panels or universal lining. Also interesting is the ceiling decoration with wood in combination with stone or other natural elements. The color scheme of the style is natural shades, brown walnut, light pine, white beech, etc. And the interior, topped with a fireplace and wooden furniture, will give the room a homely feel.
The combination of beauty and utilitarian is a sign of the Art Nouveau style. On ceilings, it is acceptable to combine natural wood of rounded shapes with modern objects in the interior. The finishing of the ceiling part with wide glossy lining in combination with textured walls made of timber will be in excellent harmony. The decor will be complemented by floral patterns on the walls and parquet wooden floors.
The chalet style found its roots in Switzerland and reflects the magnificent houses of this country. The monumentality of the ceilings and a certain gloom intertwined with comfort characterize it. The use of massive beams or timber around the perimeter of the ceiling, assembled into various structures, will be very useful. There are no bright colors in the interior of the chalet, these are dark and rich colors - dark burgundy, green, brown, marsh.
The focus in eco finishing suggests that the created ceiling and the entire interior should be made only from safe materials. Wood is used with a pronounced texture in order to demonstrate in every possible way its original appearance. This is expressed by beam structures placed on the ceiling, which complement decorative elements created from natural materials such as plaster or paper. Also, in eco style, wood can be supplemented with a stone fraction from minerals in the form of panels or additional finishing from marble and granite elements.
Exoticism and interesting design characterize the Japanese style. Ceiling structures in the Land of the Rising Sun are most often installed from ceiling fillets or wooden panels in dark shades. The restraint of the Japanese-style interior makes it possible to choose a simple geometry for the ceilings. These are straight lines, complemented by details with a Japanese motif.
Wood-effect ceilings are also welcome in loft or Provence styles. The ceiling covering also looks beautiful in Scandinavian design.