Wood has long and firmly won first place among facing and building materials. Thanks to modern technologies, manufacturers have achieved an increase in the strength qualities of the product; moreover, a rich assortment makes it possible to select materials in different price categories. Among other things, wooden slats are convenient to install on any surface without the use of special tools or skills. We’ll figure out how to attach the lining to the ceiling, technological features of installation options, and consider advice from professionals.
Selecting lining for the ceiling
More recently, when it came to ceiling lining, it was wooden figured strips that were meant. However, currently the construction market offers several types of lining. Based on the intended purpose of the room, material capabilities and buyer preferences, you can choose one or another material.
The material for making lining can be:
- wood;
- polyvinyl chloride;
- MDF boards.
It is worth going into more detail on each of the materials.
Preparing the ceiling for clapboard covering
Attaching the lining to the ceiling requires the preparation of a flat and solid base, so it is necessary to devote enough time to the base ceiling. The process of its preparation can be divided into two stages, each of which we will consider in more detail in the future and see photos that will help to understand their essence.
- Cleaning and insulating the ceiling.
- Frame installation.
Cleaning the ceiling will involve removing old finishes, cleaning dirty areas and eliminating cracks, dips and bulges. After this, the entire surface is treated with an antifungal compound, which kills harmful organisms and protects the future cladding from harmful effects from the inside.
You can insulate the ceiling in a variety of ways that are suitable for your apartment. For example, you can stick foil material for thermal insulation, izolon or penofol, or even leave an empty space for ventilation. You can feel free in this matter!
Now it's time to talk about installing the frames. Why are we doing this? First of all, so that the lining hides the visual imperfections of the ceiling. If you do not make a frame, then all the errors will be clearly emphasized, and the house will only look worse. The installation process differs depending on the type of material chosen. We will consider both cases. Let's start with the metal type of lining.
- First you need to determine the height of the future ceiling. To do this, you need to carefully measure the height of the base ceiling and find its lowest point. Stepping back from it by 5-10 cm, we will get the height at which the starting profile should be located.
- We install a metal profile along the entire perimeter of the walls at a given height, securing it using dowels with a plastic sleeve.
- We attach hangers to the ceiling and bend the plates down on both sides.
- To the last two elements - to the profile and hangers - we attach the sheathing profiles, which are planned as the main ones (read: “How to properly attach a profile to the ceiling”).
- Having completed the construction of the frame, do not secure it tightly until you check the correct location of its elements using a level.
Now that the installation of the metal frame is complete, let's move on to the process of installing the wooden one:
- If you do not plan to lower the ceiling level, then the frame beams can be attached directly to the ceiling. This creates some difficulties regarding the unevenness of the resulting frame, but this can be solved with the help of wedges that you bought in advance.
- We attach brackets to the ceiling, to them - beams for sewing the lining, and to these beams we will later attach the lining itself.
It is convenient to attach the beams to the ceiling using a construction gun. This will significantly speed up the installation of the entire frame and take less effort from you.
Wooden lining
When finishing the ceiling with wooden paneling, the natural rustic style of the room is preserved. Wood lining is used in premises for any purpose and is absolutely safe for human health. The price of this building material varies depending on the type of wood. Most often, lining is made from alder, cedar, fir, oak, aspen, larch and other types of wood.
Pine has antiseptic properties because it is rich in resins. These substances cause mold to form on the surface of the lining. In addition, pine itself is considered a fairly smooth tree, with a small number of knots, which makes it ideal for creating lining.
Lining made from coniferous wood is considered almost universal, unlike hardwood, which is used mainly indoors. However, any wood is susceptible to moisture, so it must be impregnated with special products and provide air access to ventilate it.
Depending on the quality of the wood, there are 4 types of lining:
- Top class (extra). This board looks perfect in appearance, there are no chips, dents or cracks on it. The price of such material is very high, since it is made by splicing. At high humidity, this material begins to crack, so this lining is not used in damp rooms.
- Class A. Small knots are allowed, but there are no other defects on such material. As a rule, it is this category of lining that most consumers choose.
- Class B. There may be small defects on the surface of the board. Although such lining is usually not used in residential premises, it is best suited for cladding balconies and country houses.
- Class C. This is the lowest grade material, which has a large number of knots and defects.
Profile options
Once you have decided on the material for the sheathing, you can move on to choosing what your trim will be made of. There are several options:
- Wooden - classic;
- MDF profile;
- Plastic panels;
- Metal lining.
Any of the presented materials is excellent for finishing the ceiling.
If we are talking about covering a living space, then the least popular material is a metal profile, but even this can perfectly decorate your home. When choosing a specific material, it is necessary to take into account the properties of the surface to be finished and the characteristics of the room where the structure will be installed.
For example, to decorate the ceiling in a bathroom, it will be much more constructive to use plastic lining, while MDF panels will very soon become unusable and, having swollen and twisted, will require new repairs. But the option of a wooden profile in the bathroom is quite acceptable, and according to all its criteria and qualities it is quite suitable for use in this case.
If the lining is attached to the ceiling in a residential area, then the best option is to use wooden lining, namely a profile made of hardwood, since, unlike pine needles, it does not emit resin, which significantly spoils the appearance products. Deciduous trees have a positive effect on the health and aesthetic beauty of the room.
But when finishing a loggia or balcony, panels made from pine raw materials, and indeed from the profile of any coniferous wood, are excellent. It is extremely important to pay attention to the class of the product, as this directly affects the quality and visual appeal of your design, but this will, of course, also affect the price.
Naturally, the choice of material is your decision and it is possible to purchase a low-quality product to finish your ceiling. But in this case, you are guaranteed to encounter a number of other problems and questions, such as what is the best way to paint your low-quality coating to give at least a more or less normal look to your product. There will also be additional surface treatment, such as better grinding and leveling of the structure.
And since you will have to paint over the surface in order to mask defects, you will also hide the unique texture of the wood, thereby nullifying the choice of the wooden product.
Installing eurolining on the ceiling is worth a closer look, with a special, ambiguous place allocated to it. The surface finished with this material is somewhat similar to that of a typical clapboard, but differs significantly in quality, in this situation for the better. An important aspect is that this type of coating is much easier to install, unlike its counterpart.
Characteristics of MDF lining
In appearance, a ceiling made of MDF paneling resembles a wooden laminate, although this material is, in fact, a board made of pressed sawdust. This material is very sensitive to moisture. At the slightest contact with water, it begins to swell, losing its appearance and original quality.
It is worth noting that MDF paneling is used more often for walls than for ceilings. It allows you to organize various decorative elements and diversify the interior. In addition, the material has high thermal and noise insulation qualities.
If desired, you can combine MDF lining with different colors and textures. Installation of such material is not difficult.
Features of installation work
For insulation and sound insulation, it is recommended to lay a layer of mineral wool before installing the lining.
If wooden elements are used in the work, to maintain their attractive appearance and strength, treatment with an antiseptic, as well as with means that increase fire resistance, is required. The finish may be painted, varnished or stained. Plastic panels do not require additional finishing.
Work order:
- Preparing the base. It needs to be cleaned of the old finish. If it remains and begins to fall off, the ceiling may lose its decorativeness and integrity. The cracks are slightly widened and sealed with repair mortar. If necessary, level the base using plaster.
- Ceiling insulation. Mineral wool or foil materials are used for work. They should be secured with construction staples. A vapor barrier film is fixed on top of the heat insulator. The smooth surface is directed indoors.
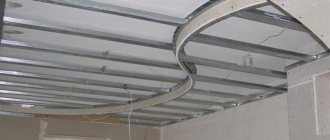
- Frame installation. The lining should be attached to a wooden sheathing or metal frame. To install the second option, measure the lowest point of the ceiling and its height in all corners. 5-10 cm retreat from it downwards. A starting profile should be attached to the walls along the perimeter of the room. For this you need dowels. The hangers are fixed on the floor slab. Lastly, screw the main profiles. The wooden frame beams are screwed onto the rough ceiling.
- Installation of lining. For thin wooden lamellas, clamps are used. Heavy products are nailed using the open method. To ensure that the ceiling remains intact and cracks do not appear on the elements, the fasteners are driven in using a hammer. First, the slats are cut to fit the ceiling. The sheathing elements are directed perpendicular to the lining. The first fragment is preliminarily baited with cloves and its level is checked. The remaining lamellas are inserted with a tenon into the groove and fixed.
- Fastening decorative elements. The joints between the ceiling and walls are covered with skirting boards.
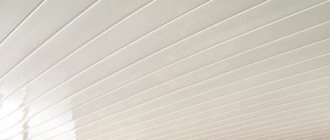
If a decision has been made to lay white lining, all work is carried out as carefully as possible. Any defects on such a surface will be noticeable.
Features of polyvinyl chloride lining
Covering the ceiling with PVC lining is an excellent option, since the material is very easy to handle and easy to install. However, it is worth remembering that PVC planks are fragile and very easy to damage.
There are two types of PVC lining:
- with seams;
- seamless.
Seamless lining allows you to create an almost seamless, smooth surface on which the seams between the individual planks will be almost invisible. If you want to create a surface reminiscent of eurolining, you should use panels with seams.
One of the main advantages of polyvinyl chloride panels is that they are resistant to wet environments. However, you should avoid exposing such a ceiling to direct sunlight, since under ultraviolet radiation the lining will begin to lose its original color.
Thus, the best options for finishing the ceiling with clapboard would be plastic (PVC) panels, as well as wooden planks.
Wooden sheathing
For the installation of eurolining, lathing made of wood is more suitable than metal. The wooden frame is installed as follows:
If the height of the ceiling does not change, then we fix the slats to the main surface. In order for the surface to be perfectly smooth, it is necessary to use wooden wedges;
Brackets are mounted on the ceiling, to which the slats are subsequently attached, on which the profile will be held.
To facilitate the process of installing the frame on the ceiling, you can use a construction gun.
Material calculation
Before covering the ceiling with clapboard in a wooden house, you should take care of purchasing a sufficient amount of material so that during the work you do not need to take breaks for additional purchases. The standard dimensions of one lining board are 15 cm wide, 600 cm long and 1.2-2.5 cm thick. These are the requirements of GOST 8242-88.
For interior decoration, panels with a thickness of less than 1.6 cm are used, and for exterior decoration, panels with a thickness of 1.8 cm or more are used. To determine the number of boards for finishing the ceiling with eurolining, you need to calculate the area of 1 plank and compare it with the total area of the surface to be sheathed. Thus, if we take a panel 9.5 cm wide and 6 m long, its total area will be 0.57 m2.
Let's assume that the total ceiling area in the room is 9 m2. Then for work you will need 9÷0.57=17.3≈18 boards. This is the minimum number of panels, since during the cladding process the width of the canvas will be reduced due to the peculiarities of the installation of the lining. It is fastened with a comb into the groove.
No. 3. Fastening the lining using clamps
Claypers allow you to install the lining while completely maintaining its integrity. They are metal plates with a tongue and holes . The tongue is designed to hold the lining, and thanks to the holes, the clamp is attached to the frame. Such simple, but at the same time ingenious, fasteners allow for hidden fixation of the lining - no fasteners will be visible from the outside. At the same time, the wood is protected from cracks that may appear when nails are driven into it, and the entire installation process is quite simple.
The main difference between all clamps on the market is the height of the tongue . The choice of this parameter depends on what type of lining will be installed: for eurolining, the required brackets are with a tongue 4 mm high, for block-house lining - 6 mm. As for the material, clamps are made mainly from galvanized iron and steel. The consumption of this fastener depends on many factors, but on average, about 20 clamps are needed per 1 m2 of lining.
The sequence of work is as follows:
- a clamp is installed on the lining tenon;
- the board is mounted in its place, fixation occurs due to nails or screws that pass through the holes on the clamp and enter the sheathing. As a rule, there are three such holes on the element, but only two of them are allowed to be used;
- The clamp tongue is thin enough to insert the next lining panel into the groove of the previous one with the clamp already installed. The process is repeated again and again. Let us remind you that it is better to fasten the first and last boards with nails.
The boards must be installed tightly to each other, leaving no visible gaps. The last board will most likely have to be cut to fit the width. In baths and saunas, it is recommended to retreat 2-3 cm from the ceiling and floor so that the wood can easily expand.
The clamps provide detachable fastening, so if something happens, the lining can be easily dismantled and the covering can be assembled in a new place.
Material quality control
After you have decided on the type, color, and quantity of the lining and delivered it to the work site, you need to check its quality. All panels should be laid out on a horizontal, flat surface and checked to see how well they correspond to the stated characteristics. Sometimes unscrupulous sellers place defective samples inside the packaging to avoid losses due to their rejection. Of course, it is advisable to pay attention to this during the shopping process in the store.
The next step if you plan to work with wood paneling is to dry it. PVC and MDF panels do not require this manipulation. To prevent the wooden lining mounted on the ceiling from becoming deformed, it must be thoroughly dried on a horizontal surface. The minimum drying period is 2 weeks, but a longer interval is allowed. If you do not want the wooden ceiling lining to soon lose its presentable appearance, drying cannot be neglected.
How to choose the direction of installation of panels
Before you start constructing the frame, you need to choose in which direction the lining boards will be attached. This is important because the sheathing guide bars must run perpendicular to the direction of the sheathing.
There are several ways:
- vertical is the most common. It allows you to visually increase the height of the room. For such wet rooms as a steam room in a bathhouse, it is also the most optimal, since water easily flows along the grooves between adjacent slats without lingering on the surface;
- horizontal - visually pushes the walls apart. Some types of lining are attached only in the horizontal direction. These include the "American" and the board with the chosen quarter;
The “American” is mounted with the tenon facing up to ensure normal water drainage from the surface Source parki48.ru
See also: Catalog of house projects with imitation timber presented at the “Low-Rise Country” exhibition.
- diagonal - used for decorative purposes on walls and ceilings;
- combined is also a decorative installation method that allows you to create patterns from multidirectional lamellas. It is the most complex of those listed, since the lining is attached to the transverse bars of the sheathing, which in turn must have a corresponding pattern.
The combined method of fastening the lining is difficult to do independently. It is better to entrust this work to specialists Source rus-teplitsa.ru
Preparation of tools and materials
To install the lining on the ceiling as quickly as possible, it is worth preparing in advance all the tools that may be needed during the work process:
- a hammer drill with a drill with a cross-section of 6-7 mm (if you have to work with a concrete ceiling), or an impact drill;
- screwdriver;
- electric jigsaw or hacksaw (tools are suitable for any type of lining);
- level;
- roulette.
In order to cover the ceiling with clapboard, you will need to purchase a number of auxiliary materials.
Since the lining is attached to the frame, that is, the sheathing, you need to choose the type of material for it:
- Wooden slats - they are best suited for fixing any type of lining, since working with them is easier and more convenient, and their cost is much lower than metal profiles.
- Metal lathing made of steel profiles. It is usually used for fastening plasterboard sheets.
It is worth noting that for working in rooms with high humidity, it is recommended to choose a steel version of the lathing and PVC lining, since they do not deform under the influence of moisture, unlike wood.
For a wooden frame you will need:
- strip 4x4 cm based on surface area;
- wooden or plastic wedges for the frame;
- brackets;
- self-tapping screws
For metal sheathing you need to purchase:
- steel profiles;
- fasteners;
- pendant;
- self-tapping screws;
- anchors.
You can begin installing the lining on the ceiling after purchasing materials and thoroughly drying the wood.
Sheathing options
The wooden profile for the ceiling is attached to a high-quality sheathing, which can be made of either metal or wooden beams. When deciding what material your frame will be made of, you need to pay special attention and be very selective about all the details, and even the material of the finishing coating is of considerable importance. Although, both plastic lining and wood profiles can be installed on any type of frame.
Each type of frame (wooden or metal) requires different tools and accessories for installation.
For wood sheathing you need to have:
- Bar for frame;
- Brackets or hangers for mounting to the ceiling;
- Wooden slats with a section of 40x40 mm;
- Plastic or wooden wedges;
- Anchors for attaching suspensions to the ceiling;
- As well as screws and other consumables.
Advice! The material for the future wooden frame must be extremely smooth, dried, without defects or knots.
Before proceeding with installation, you need to make sure that all frame parts are ready for installation and meet all the requirements of a high-quality design.
The metal frame will require from you:
- Galvanized steel profile - a frame made of this material will not rust;
- Profile hangers;
- Self-tapping screws, screws and anchors;
- Connecting elements.
Important! The metal sheathing must be made of a profile with rolled sides. This will give your structure the required rigidity, since the cladding has considerable weight.
Preliminary work with the ceiling
It is very important before making a lining ceiling to prepare it correctly. First, you need to remove a layer of old plaster from the ceiling surface and clean the surface from dirt so that it is as smooth as possible.
Next, we proceed to marking the ceiling for the frame. In this case, it is worth deciding on the direction of the lining strips. In the process of further laying the lining on the ceiling, it is advisable to place it so that there are as few end joints as possible.
Since wooden elements are susceptible not only to moisture, but also to mold, they must be coated with an antiseptic before installation.
In private houses, the ceiling should be pre-insulated. A layer of thermal insulation is laid between the profile posts, mounted with an indentation of 50-60 cm. If we are talking about an apartment, then additional thermal insulation is not needed.
Next, we find a level for attaching the sheathing. Having decided on the direction of the slats, we mark the ceiling. Please note that the lining is fixed perpendicular to the sheathing beams. If desired, it can be placed at right angles to the walls or diagonally.
Retaining brackets are fixed to the ceiling with equal intervals between them. Then wooden slats are laid on the brackets, leveling them using small wedges.
In order for eurolining ceilings to be beautiful, the lathing must be installed very carefully and perfectly level.
The maximum step between fasteners is 50 cm. If eurolining is used, then the step must be halved.
Its final appearance and durability depend on how carefully you pay attention to the preliminary preparation of the ceiling.
Tips from the professionals
It’s not enough to just know how to attach the lining to the ceiling; it’s important to follow some technological nuances:
- Do not neglect the arrangement of the sheathing, even if the ceiling surface is perfectly flat.
- Before work, all wooden elements should be impregnated with protection from fire and biological life forms.
- There is no need to rush into laying out the cladding; it is better to let it sit for 1-2 days in the room where installation will take place.
- If you plan to paint the lining, the wooden material must be primed after the laying is completed.
Having figured out how to attach wooden lining to the ceiling, it will not be difficult to correctly mount the cladding on the walls. The technology of work is exactly the same, but, as you can see, there are no particular difficulties in the process. It is enough to select the desired installation method, correctly calculate the amount of hardware and material, and you can begin the repair.
Advice! When placing lamellas horizontally on the walls, the lining is laid out from top to bottom, because the last element is cut to width and then covered with a plinth. But if you don’t have experience, then it’s much easier to lay it out from the bottom up and decorate the cut board at the top with a plastic element to match the cladding.
Fastening the lining
Installing lining on the ceiling with your own hands is not something too difficult; even inexperienced performers can do it. True, it is advisable to work with the paneling together to make it easier to fasten long panels.
We begin to attach the lining to the ceiling with our own hands, perpendicular to the sheathing from the wall. The first board is tightly fixed to the wall with a tenon. Using a level, adjust the position of the board and then secure it. To lay the lining, you can use both small nails and clamps. In those rooms where the design of the lining ceiling should be ideal, clamps are used, and in other rooms, ordinary nails are also suitable.
Then we take the next board and insert it with a tenon into the groove of the previous one. At the points of contact between the panel and the sheathing, we firmly fix the board. We fix all other lining panels onto the battens in the same way.
On the opposite wall, the last strip of lining may need to be trimmed. In this regard, it is advisable to place it in a place where it will be least noticeable. When working with plastic panels, it is better to use a hand saw, while wooden lining and MDF panels are easier to cut with a jigsaw.
It is better to make any holes for wiring or mounting lighting fixtures immediately at the time of fixing the lining, so as not to damage it.
If you use nails to cover the ceiling with clapboard yourself, then you must first cut off their heads. At the end of the work, the nail holes are opened with wax.
The final stage of arranging a lining ceiling will be attaching the baseboards around the perimeter of the room. These decorative elements will add completeness to the ceiling and hide the gaps along the edges. Typically, wooden lining is opened with varnish, and baseboards with a darker stain and varnish. If desired, this ceiling can be painted.
Metal carcass
At this stage, it doesn’t matter at all how you cover the surface, since upon completion of the work on preparing the ceiling surface, you can begin to create the lathing to which your finishing material will be attached.
The frame is a necessary condition for the construction of your structure, the only exception can be if your walls are perfectly smooth and there is no need to insulate the room; in all other situations, finishing without lathing will look uneven, and the service life of such a coating will not be long.
The phased installation of a metal frame looks like this:
- It is necessary to determine the lower boundary of the surface of your ceiling. The future structure will be at a level of 10 cm from the established mark;
- Installation of a galvanized profile at an established boundary along the perimeter of the entire area of the room. In order to properly fix the product, it is necessary to use dowels, it is better if they have a plastic sleeve;
- We mount hangers whose edges need to be bent down;
- We attach the frame profile to the hangers and to the profile installed around the perimeter;
- First, before final fastening of all parts of the frame, it is necessary to carefully check the level of the entire structure.
- Metal lathing is not subject to deformation from moisture, which determines its choice in bathrooms;
A few recommendations for ceiling cladding
Here are some useful tips that may be useful to you:
- Before covering the ceiling with eurolining, it is advisable to check how good the electrical wiring and other communications running under the ceiling are. If in the future you have to dismantle the lining for repairs, it can be damaged.
- The ceiling lining in places of contact with electrical wires must be insulated to prevent fire.
- When working with wooden panels, it is advisable to use fasteners that will not rust. For PVC panels, the type of fastening is not important.
- Ceiling covering should be done in a dry room at a temperature not lower than 10 ℃.
Briefly about plastic panels
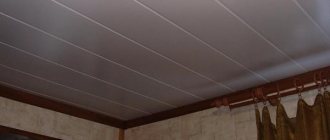
A ceiling covered with plastic lining looks no worse than the same surface trimmed with wood. All work on covering the ceiling with plastic is practically no different from similar work with wood. The only difference is that the material itself is several times lighter, which makes the installation process easier.
In addition, when installing such material, you will have to add a construction stapler to the tools. Otherwise, everything is done almost exactly the same. Apart from the fact that after working with plastic, much less waste remains, and caring for this material is much easier.
The cost of a lining ceiling
The final cost of ceiling repair will largely depend on the price of materials. In turn, the price of lining varies depending on the type and species of wood, the length of the board, as well as production technology.
Depending on these factors, lining is divided into several categories by price:
- The most expensive is considered to be lining made of soft hardwood. Their processing is carried out in accordance with European standards.
- Hardwood lining falls into the middle price category.
- Lining made from softwood is the cheapest.
In addition, if you want to equip a two-level ceiling made of clapboard, you may have to invite a specialist, whose services you also need to pay for.
No. 2. Types of fasteners for lining
traditional ways to fasten the lining :
- using clamps. This is the most gentle method, it allows you to maintain the integrity of the lining;
- using nails that are driven into a groove or tongue. This technology requires greater caution from the performer, as there is a risk of damaging the lining;
- through fastening of self-tapping screws through the lining;
- fastening using a construction stapler.
Regardless of what type of fastening is chosen, it is recommended to install the first and last boards using nails with small heads - they can be easily recessed into the body of the lining. Attach the lining first to the middle beam, then to the two outer ones, carefully controlling verticality or horizontality. Then it is attached to the intermediate bars.
How to care for the ceiling
If we are talking about lining made of wood, it must be treated with antiseptic impregnations and primers that slow down the destruction of wood and prevent the development of fungus and rotting. When choosing a specific product, pay attention to its color, which should match the desired result.
Alternatively, wooden panels can be coated with a special oil, varnish or paint of your choice.
The processing option depends only on the wishes of the owner. In order for the ceiling to retain its presentable appearance longer, it is advisable to periodically wipe off dust from it. If just a damp cloth is not enough for cleaning, you can use special household products that are sold in large quantities in supermarkets.
Self-tapping installation
Through fastening with self-tapping screws through the entire board, and not through a groove, is the simplest, fairly reliable, but not the best solution for wooden lining. With this method, the integrity of the material is compromised, so the holes must be regularly treated with special protective mastics to prevent destruction and rotting of the wood. Despite all efforts, over time, the installation sites of fasteners may become noticeable, which significantly impairs the aesthetics of the decorative finish. Usually the first and last panels are mounted this way for reliability, and for the rest they use fastening with finishing nails or clamps.
Choice of material for the frame
Before we get started, let's decide what materials we will need:
- MDF panels;
- plastic;
- solid wood.
First of all, before installing the lining, it is necessary to form a frame in order to separate the working surface of the ceiling from the base and strengthen the strength of the entire structure. The lining will be mounted on top of such a frame. The frame should be made of metal or plastic ceiling profiles. Wooden beams are also often used. What material to choose is up to you.
But when choosing, consider a few nuances. For example, for moisture-containing rooms, such as a bathroom, wood is not suitable; it is better to use plastic or metal. Accordingly, it would be better to choose the installation of plastic lining. In the bedroom or living room, the use of wooden beams is quite acceptable. Wood is easier and faster to install.
Installation of PVC panels
A plastic profile or, as they also say, PVC panels, are mounted in the same way as a wooden lining, maintaining the same gaps that will compensate for thermal expansion. But there is also a difference. Before you begin finishing around the perimeter of the room, you need a U-shaped groove into which the edge of the panel will be attached. Sometimes the absence of such a groove makes installation impossible.
The level of the ceiling surface is determined by the lathing; during further installation, you must be extremely careful and carefully attach each profile to the frame, this will create a perfectly flat surface.
Installation
Step 1: Frame installation
Fastening the lining to the ceiling surface begins with installing the frame. Without lathing, covering with clapboard will not only not hide flaws in the ceiling surface, but will also emphasize them.
Before installing the sheathing, the first step is to mark it. It is worth paying attention to the direction in which the lining will be laid. The profiles of the metal frame or the slats of the wooden sheathing must lie transversely (i.e., perpendicular to the direction of the lining), and vice versa for the longitudinal direction of the lining.
The sheathing must be installed as evenly as possible, otherwise skewing of the lining may occur. Wooden lathing has less durability than a frame made of metal profiles. But a wooden frame is more suitable for covering the ceiling with wood paneling.
Installation of a wooden frame for lining consists of several stages:
- If there is no need to lower the ceiling level, then wooden beams are attached directly to the ceiling surface.
- To level the frame level, use wedges made of wood or plastic.
- First, brackets are installed on the ceiling and then beams are added to them.
If the ceiling is sheathed with plastic lining panels, then the craftsmen recommend maintaining a distance of 40-60 cm between the wooden beams. For lining panels made of solid wood, the distance between the beams should be from 60 to 100 cm, respectively.
Recommendation: using a construction gun will reduce the time and speed up the process of installing a wooden frame.
Installation of metal sheathing consists of the following steps:
- Take measurements of the height of the room/room in all corners, thereby determining the lowest point.
- From the selected point, measure a line 5-10 cm - level.
- An initial metal profile is attached along the entire perimeter of the walls, taking into account the established level. Dowels can be used as fastening.
- It is necessary to attach profile hangers to the ceiling surface. The suspension plates are bent downwards.
- Metal main profiles are attached to hangers and initial profiles.
- Before final fastening, you should check the level of all frame profiles.
The choice of lathing depends on preferences and financial capabilities. Metal profiles are durable, but also have a higher price compared to a wooden frame.
Step 2: Laying communications (wiring)
Before attaching the lining, you should check the functionality of the electrical wiring being laid, its reliability and insulation strength.
Step 3: Cladding
During the work, the material from which the lining is made is not significant. Because the workflow for each type of lining is similar. Strips (panels) of the lining are cut to a length equal to the length of the ceiling (minus 0.5 cm). If the walls are not perfectly smooth, then the panels are placed close to the wall. The strip must be laid perpendicular to the frame guides and with the groove towards the corner.
Then the first strip is attached on both sides along the entire length. It is necessary to retreat a distance of 5 mm from the wall.
The final strips of lining must be tightly inserted at a certain angle into the groove (lock) of the previous panel. To achieve a tighter fit, you can use a small rubber hammer: carefully tap on the end faces of the panels.
The second side of the panel should be screwed/nailed to the sheathing guides at the bottom of the lock.
As you lay the lining, you need to decide on the wiring - make the appropriate outlet holes. Otherwise, after completing the work, it will be problematic to remove the electrical wiring and the material may be deformed.
The process of attaching the panels to the ceiling continues to the opposite side of the room. The very last panel should be driven into the groove, additionally using small wedges. These wedges are driven between the lining panel and the wall.
Most likely, the last strip will need to be adjusted in length. If wooden lining is used, the strip is cut with a hacksaw. If the panel is made of plastic, you need to make one even cut on both sides of the panel and carefully break it.
Recommendation: there is no point in additionally gluing the sheathing with clapboard for reliability, since over time the glued strips will begin to creak and crack.
Of the common methods of fixing lining strips to the ceiling, experts distinguish 2 main methods:
- fixation with clamps. Using a special construction bracket (kleimer), which is “put on” the groove of the lining panel and attached to the frame. The use of such brackets completely eliminates damage to the lining material. Fastening with clamps is suitable for plastic lining.
- open fixation. This method is used when covering the ceiling with heavy lining panels. The open method requires at least minimal skill and accuracy.
- fixation with self-tapping screws. This method is used, like clamps, when covering lining with plastic panels.
For fastening in this method, self-tapping screws or small nails with small heads (or without heads) are used. Nails should be carefully driven vertically into the grooves of the panels so as not to distort the appearance of the coating. But if, after fastening, the lining strips are treated with a dark-colored varnish, then you can not hide the nail heads, but hammer them in the center of the panel.
Recommendation: if self-tapping screws are used during the installation of the lining, then it is better to make holes in advance with a thin drill on the lining panels to prevent chipping of the material.
When fastening with nails, hammer blows should not be applied directly to the nail head. In this case, you can use a special extension for the nail (doboynik).
In the process of fastening the lining, it is necessary to avoid the formation of gaps and cracks between the panels. Otherwise, the appearance of the ceiling will suffer significantly.
Step 4: Installing skirting boards
At the end of the installation work, a decorative plinth (or corners) is installed around the perimeter of the updated ceiling. The plinth will hide the gaps between the ceiling and the wall, the ends of the cut strips of lining and give a finished look to the ceiling surface.
What you can't do without
To complete the work, you will need the following set of tools, which are essential during installation and installation:
- Hammer, mallet;
- Screwdriver, hammer drill or impact drill;
- Square, building level, water level, as a last resort, the rule;
- Centimeter or tape measure;
- Saw, hacksaw for metal (for metal lining - metal scissors).
For wooden sheathing, a batten with a cross section of 40x20, 40x40 and 50x50 mm, respectively, is more suitable. To assemble the structure and mount it to the ceiling, you will need consumables such as dowels with a plastic clip, screws or anchors, and wood screws with a section (50x4, 75x4 mm)
Metal lathing will require an order of magnitude more costs:
- UD profile for perimeter installation;
- The CD profile creates the sheathing itself;
- U-shaped fasteners and crab type fasteners;
- Self-tapping screws “bug-drill”, metal screws.
To install the profile to the sheathing, you can use: construction staples or nails, or self-tapping screws with a washer, or clips, but the latter are usually used for plastic lining.
Calculation of the amount of lining
Plastic panels come in different widths - 10, 12.5, 15, 20, 25 cm, but the standard length is 6 m.
Let's say you need to cover a ceiling measuring 5 x 3 m with clapboard 20 cm wide. To do this, divide 500 cm by 20 cm - you get 25 pieces.
But, since the length of the panels is 6 m and the width of the room is 3 m, they are cut in half. In addition, 20% is added as a reserve in case you need to replace defective material.
Multiply 25 by 1.2. As a result, we get 30 PVC panels 3 m long or, accordingly, 15 pieces of 6 m each.
Cladding board
The advantages of a durable wooden tongue-and-groove joint, practically free of gaps, have proven themselves well in finishing. The planks connected in this way have an attractive texture and, when assembled, form a durable wooden shield. A lining ceiling can be made using material with different types of profiles. These include:
- Eurolining is a decorative board, rounded at one end and having a recessed groove at the other. This type of profile complies with the European standard.
- American - has a special expanding shape, thanks to which, when fastened, it creates an imitation of the overlap of boards, which is widespread in the United States. This type of lining on the ceiling will look very interesting.
- Standard lining - used on the ceiling more often than other types. When sheathing, there are practically no recesses between the planks, which are typical for eurolining.
- The block house is an imitation of a log, since the profile has a rounded front part. Finishing the ceiling in an apartment with this type of clapboard will make the surface look like a log house.
Instructions for covering the ceiling with clapboard with your own hands
The lining is mounted on a wooden frame.
To make a beautiful and durable ceiling from any type of lining, you need to draw up a detailed, competent project and a step-by-step plan for its implementation.
- Prepare your workspace. Remove from the room items that will interfere with installation or be damaged during installation. Just in case, cover the windows with shields or remove the double-glazed windows (frames).
- Treat the floor slab. Unstable fragments are removed from it, cracks are sealed, and joints are sealed. Finally, an antiseptic and impregnation are applied.
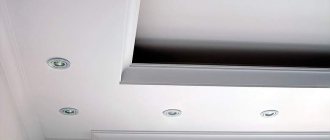
- Assemble the frame. First, a perimeter is made at a level of 2-10 cm from the lowest angle. Then the vertical hangers are screwed on, supporting profiles and cross members are installed. The distance from the slab is selected based on how the space between the panels is planned to be used. You can place insulation, air duct, and install lamps in it.
- Conduct communications, secure insulation. All objects are rigidly fixed to the slab with clamps or brackets.
- Secure the slats to the sheathing. You need to start sheathing the frame from one of the walls in accordance with the chosen direction. The fragments are made in length 10 mm less than the distance between the walls. This is done in order to compensate for the thermal expansion of the shield and the building. Wooden lamellas are driven into the grooves with a mallet, and plastic ones - by hand until they click. Fastening is carried out using self-tapping screws, clamps or staples. The last fragment is cut to width and completes the masonry.
- Install baseboards and appliances, clean the structure from dust and debris.
A separate issue is the impregnation and painting of wood products. Experts recommend doing this before installation to eliminate the possibility of untreated areas on the ceiling.
Frame
At this stage, you should decide on the sheathing. It can be done:
- from a metal profile;
- wooden beam.
The choice of frame material depends on the functional purpose of the room: a metal profile is most suitable for conditions of high humidity, in other cases you can choose the material at your discretion. When using ceiling lining made from wood and its derivatives, the most justified would be to install a wooden frame, which is cheaper than metal and is excellent for attaching cladding.
Solid wood lining installed on the ceiling creates additional load on the frame, which should be strengthened if necessary.
