Starting a renovation always involves a thorough plan and preparation for this important task. You don’t want to go to all the trouble and then have to deal with the consequences of prolonged repairs for more than one year?
A long journey is not our method, so we need to make repairs quickly and efficiently.
Ceiling made of PVC panels
Often, the surfaces of walls and ceilings in rooms with high humidity are exposed to the harmful effects of aggressive environments, temperature fluctuations, and vapor permeability contributes to the development of mold, mildew and other unpleasant consequences.
According to the repair rules, we need to start repairs from the top down, that is, from the ceiling, and eliminate any deficiencies. Which coating should I choose for the operational purpose of a room with high humidity? PVC ceiling! From the article you will learn how to quickly make ceilings from PVC panels and get acquainted with the detailed technology.
Characteristics of PVC panels
This building material is made from polyvinyl chloride, which is a plastic that is characterized by chemical resistance and low combustion. Such panels consist of two thin sheets of plastic, connected to each other using stiffening ribs.
Along the length of the products, there is a large mounting shelf on one side, and a small mounting shelf on the second. The first is used to fix the sheets to the frame, and the second is used to join them to each other.
The popularity of this finishing material is explained by a number of advantages that it has:
- Resistant to damp air. If the plaster begins to peel off in damp conditions, then this will not happen with PVC panels. When living in a multi-storey building, situations where neighbors from above flood the apartment often occur. Even after a severe flood, the sheets can be removed, dried and replaced in their original place.
- Long service life. PVC ceiling panels do not lose their original quality for several decades. It will be easy to replace worn out or damaged ceiling elements.
- Easy care. It will be enough to regularly wipe the panels from dust with a sponge that needs to be moistened in a soap solution. However, you should not use products containing acids, alkalis or abrasive particles.
- The presence of a frame designed to fix the panels. As a result, free space is formed between two ceilings - suspended and rough. It can be used for installation of electrical wiring and heat and sound insulation materials. This feature is important when there is an unheated attic or cold roof above the room.
- Leveling the ceiling using panels. Thanks to their use, there is no need to perform complex and labor-intensive plastering work, which means you can save time, effort and financial resources.
- This modern material is universal; installation of PVC panels on the ceiling is suitable for rooms of different purposes, both residential and utility. Having a large selection of colors and textures allows you to easily choose the finish for the ceiling surface so that it fits perfectly with the interior of the room.
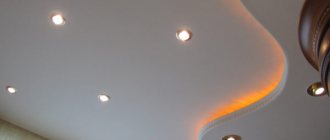
- Creation of functional lighting. Suspended ceiling structures made from such panels allow you to set up systems using a large number of lamps installed around the perimeter of the room and in other places where it is required.
Physical methods.
PVC plastic can be welded using high frequency and ultrasonic technology. In the ultrasonic welding process, the sound applied to the material results in frictional heating between the components being welded, which leads to softening and melting of the material. Subsequent compression and cooling bond the components together. The expanded structure of PVC plastic imposes certain restrictions on this joining method. In addition, this type of welding is more suitable for processing large batches. Ultrasonic generators must be calibrated for each individual welding application. If a high frequency welding process is being considered, then companies specializing in this type of work should be consulted.
Selection of polyvinyl chloride panels
Before installation, you first need to select and purchase finishing materials. First you need to decide on the size of the sheets. Nowadays, specialized stores sell plastic panels in the form of lining or the shape of rectangular slabs.
Regular lining has a length of 3000 and a width of 100 millimeters, and reinforced lining is 3000 and 125 millimeters, respectively. For rectangular panels, the length can be from 2600 to 3000 millimeters with a width from 150 to 500 millimeters. Sheets are produced in lengths from 1500 to 4000 and widths from 800 to 2000 millimeters. All polyvinyl chloride products have a standard thickness of 10 millimeters.
For rooms with a small area, lining panels are best suited. They should also be preferred if you plan to create a ceiling surface stylized as finishing with wooden boards. For large rooms, choose sheets or rectangular products.
To avoid purchasing low-quality material due to inexperience, you need to pay attention to a number of points:
- The stiffening ribs should not be visible on the front side of the products. You also need to count their number - the more there are, the more durable and stronger the PVC panel construction will be.
- The surface of the sheets cannot have chips, cracks or other defects.
- Both shelves - the mounting and the fastening ones - must be so flexible that when you try to bend them they do not break.
- If you put a little pressure on the panel and then a crack appears on its surface, then this product is of poor quality and it is better to refuse to purchase such products.
- To make sure that a good material is chosen, you need to take several sheets and try to fold them together - they should fit together without gaps, end to end.
- If you look at the appearance of the selected products, high-quality specimens taken from different packages cannot differ in shades and texture. True, sometimes panels from different batches have slight differences in color.
In addition to the finishing material, you will need to buy an installation profile for PVC panels on the ceiling. It has two shelves, one of which is attached to the frame, and the second is connected to sheets of plastic. Both the starting and finishing panels are fixed on the installation profile. When choosing it, pay attention to the thickness of the material of manufacture and the absence of any defects.
You also need to purchase a ceiling plinth, which will become a decorative element of the surface and will close the gap between the ceiling made of polyvinyl chloride sheets and the wall. Such fillets are made of plastic and fixed with an adhesive composition.
When choosing PVC panels, they take into account their appearance - they decide on it independently, taking into account personal preferences or based on the design of the room. The range of these products is huge, with many color and texture options available.
Equipment and additional elements
We will discuss how to calculate the number of panels and additional elements below, but now we will tell you what is included in the package for finishing walls with PVC panels. Select the appearance and specific dimensions taking into account the parameters of the panels.
| Name | Brief description and purpose |
Universal corner | It looks like a plate bent at an angle of 90°. Used for finishing internal and external corners of the room. |
Ceiling and floor plinth | Complex profile, part is installed under the panels, the outer side hides uneven cuts or surfaces. |
Outer corner | Consists of a corner, the inner part is wider than the outer. Hides unevenness of the outer corner. |
Inner corner | Differs from the external one in the width of the sides. The wide one is installed under the slats, the outer narrow one hides the unevenness of the inner corner. |
Connecting profile | Allows you to connect lamellas without a lock, used if the length of the lamellas is insufficient for finishing the surface |
Start/finish profile | Installed first and last, sometimes can be used instead of a universal or special corner. |
F-profile | Installed at junctions, can be used as a platband. |
Sheathing mounting strip | The supporting element of the frame can be plastic or made of metal profiles. |
| Klyammer | Made of metal, it presses the panel to the mounting plate. Allows you to dismantle panels without losing factory quality. |
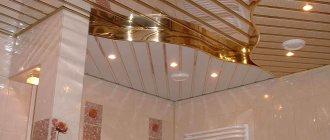
pvc panels for bathroom
The panels are fixed with self-tapping screws with a press washer, staples using a stapler, clamps or liquid nails. The choice of method depends on the materials used to manufacture the supporting frame and the quality of the walls and ceilings.
Methods for installing PVC panels on walls
Tools for assembling the ceiling structure
To install PVC panels on the ceiling, you need to prepare tools in accordance with the list:
- hammer drill - needed for mounting the frame;
- screwdriver - required for attaching sheets to a beam or profile; its presence greatly facilitates and speeds up the work;
- construction stapler - it is used when it is decided to fix the material not with screws, but with staples;
- a level, square and painting thread will ensure control of the accuracy of the markings being made and the location of the ceiling elements;
- a marker or pencil will help you draw lines and indicate the order of laying the sheets;
- tape measure for taking measurements;
- a circular saw or an electric jigsaw - they are used to cut panels and profiles for building a frame;
- ladder;
- rubber mallet - intended for adjusting polyvinyl chloride elements to each other when they are laid.
All of the above tools can be purchased without any problems at any construction supermarket. In addition to them, you will need to buy material to build the frame. You can use a metal profile of UD-27 (main) and CD-60 (guide) grades or a wooden beam for PVC ceiling panels.
You will also need fasteners - staples or screws, glue. You should prepare hangers for the profile, dowels, and attachments for the screwdriver.
Convenient finishing of slopes with a starting profile
- Application of products
- Finishing methods
- Features of application
- Ready solution
- Advantages
- PVC windows and slopes
- What is required for finishing
In most rooms, plastic windows are installed. When it comes to finishing, special nuances appear. For example, you can use P and F profiles for slopes .
Application of products
There are two types of slopes: one of them is located outside the building, the other is located on the inside. Both types require proper finishing. The slope is intended not only to give the windows an aesthetic appearance, it performs important protective functions.
Plastic windows are attached to the opening using mounting foam. It deteriorates under the influence of moisture and is gradually carried away by the wind, which is why it is important to install a slope profile that can protect the structure from adverse weather conditions. Otherwise, the foam may become deformed and damage the window frame.
Application of F-profile for finishing the external slope
How to finish the slopes of plastic windows with your own hands, see the link. We choose the most “correct” slopes for plastic windows. Prices for different types of slopes, consumer reviews
When replacing windows yourself, do not forget about installing sills for plastic windows.
Finishing methods
There are several ways to tidy up your window. These may be the following options:
- Finishing with plaster. This method is quite old. Its main disadvantage is the complexity of the work. Plastering is time-consuming and requires careful cleaning of the area after finishing. When a house shrinks, it may crack.
- Application of drywall. This option is not bad, but it is only suitable for interior work. The room must be dry and warm, otherwise the sheet of drywall will begin to collapse.
- PVC profile for slopes is the best option. It is not afraid of moisture, temperature changes, is easy to install, and can be used both outside and indoors. This is an excellent solution for plastic windows, as it matches them perfectly in terms of material; the PVC F profile for slopes is very easy to install. It is quite possible to do this yourself. With other materials, for example, wood, the profile may not look so harmonious, although you can order wood lamination, and the differences will not be noticeable.
PVC profiles for slopes
Features of application
Finding out the desired profile is quite simple; it looks like the Latin letter “F”. The material is fixed using special plates that are fixed in its grooves. The starting profile for slopes has two important functions:
- Decorates the ends of windows, giving them a decorative look.
- Levels the surface without the use of complex structures and plaster.
Ready solution
The F-shaped profile for slopes is a convenient solution for cladding. It creates a perfectly flat surface, free of imperfections, protects the opening from moisture and sunlight, as well as wind, dust, and other mechanical influences.
The starting profile is attached to a plastic window without the use of glue. The design not only helps to make the slopes visually attractive, but is also perfect for places where different materials meet. The starting profile is most often mounted in this way: one side of it touches the wall, the other touches the plastic structure. If the size of the material does not correspond to the required parameter, it can be cut using a stationery knife; for the same purpose, a grinder or a metal file is sometimes used.
Advantages
The starting profile for PVC windows has several obvious advantages:
- Ability to resist ultraviolet radiation. The profile does not fade even for ten years.
- The material is durable, looks good, and can fit into any interior without standing out.
- Suitable for use both indoors and from the facade.
- Moisture resistant.
- The chalk content in the composition is minimal.
- The semicircular end of the tail allows you to lay the profile on the most uneven wall.
- Hides wall imperfections, levels slopes without the use of other materials.
- The plank can be safely cut, no chips or cracks will appear on it.
- Installation is carried out independently; this does not require special skills.
- No glue is used.
PVC windows and slopes
The starting profile for a PVC window sill is ideal, but it can be used not only with it, but also if the walls are made of sandwich panels. The material will help protect the inside of the panel, easily attach to it and last a long time.
PVC fabric that is too cheap may also be excessively soft. This will make it fragile. The soft fabric does not last long and is not suitable for outdoor use. It easily deforms from any touch.
Preparatory work
Before you go shopping at a hardware store, you will need to complete a number of preparatory activities. First of all, you need to draw up a plan of the room, measuring its width and length. It is imperative to draw a diagram of the frame being constructed.
Then you need to calculate the number of sheets for the suspended ceiling structure, taking into account their sizes. At the planning stage, it is advisable to outline the lines according to which the profile for the frame and panels made of polyvinyl chloride will be cut.
You can mark them with a pencil to explain the order in which the plastic ceiling panels will be installed. It is important to remember that competent and careful planning is the key to quality repairs, so that you don’t have to redo everything all over again.
At the second stage of preparation, the remains of old building materials will have to be removed. If the ceiling surface is covered with a thick layer of paint or plaster, they should be removed, otherwise heavy pieces of the previous finish can damage the integrity of the frame and even PVC panels.
At the end of the preparatory stage, you need to mark the lines of the frame being constructed. To do this, measure the height of all corners indoors using a tape measure. In the area where this size is smallest, measure 50 millimeters from the line down and draw a horizontal line, checking the correctness of its application using a level and painting thread.
A similar line is drawn on the opposite wall at the same height. According to this marking, it is necessary to install a frame for the suspended ceiling structure.
Do-it-yourself plastering of slopes: doorway putty technology
This type of work, such as plastering slopes, is one of the important stages of finishing a doorway. Not only the appearance of the door, but also its important operational characteristics depend on the quality of work performed. Let's take a closer look at the technology and features of doorway putty.
Why plaster slopes
Plastering the slopes of a door or window opening is of great importance, so a lot depends on the quality of the work. We can identify the main reasons why such surface treatment is performed:
- Crevices. Using putty, you can eliminate all cracks, gaps and cracks around the perimeter of the opening. This will have a positive effect on sound insulation and heat retention.
- Finished look. The slopes take on a neater appearance, the door is ready for use, and dirt and construction dust are eliminated.
- Decor. Plaster gives the opening an aesthetic appearance and can act as the main design.
- The basis for a different decor. In addition to plaster, you can use paint, wallpaper, tiles, MDF panels and other similar materials. However, in any case, you need to first level the slopes and create a suitable surface for finishing.
- Protection. Thanks to putty, it is possible to hide the mounting foam from ultraviolet radiation, which is a prerequisite for preventing its destruction.
Plastering of door slopes is carried out to protect and decorate the opening
Plastering slopes with your own hands is a very real task. To facilitate the process, you need to prepare all the necessary tools and select suitable materials.
Selection of putty
Which putty to choose for finishing slopes with your own hands? The modern construction market is famous for its huge assortment, so depending on the specific conditions, you can choose exactly the mixture that suits you best. The entire range can be divided into the following categories:
- Cement. Durable and quite moisture resistant, but after drying they shrink.
- Plaster. Homogeneous, easy to apply, provide a smooth surface, but do not like a humid environment.
- Polymer. Waterproof, easy to use, durable, but expensive.
In addition, plastering slopes with your own hands is often done in several stages. For the base coat you will need a starting, stronger but coarser mixture. It must be leveled with a plastic and uniform finishing putty. Some manufacturers offer universal formulations, but their cost is much higher.
Types of putty used for finishing door slopes
If you are planning further surface finishing of the opening after plastering the slopes, you can use a standard cement-sand mortar for basic sealing of cracks and elimination of unevenness.
Required Tools
Do-it-yourself plastering of door slopes is impossible without certain tools. First of all you will need:
- rule;
- set of spatulas;
- container for diluting the mixture;
- construction mixer;
- construction float;
- level;
- corners;
- serpyanka;
- primer;
- stationery knife;
- brush.
List of tools required for plastering door slopes
Since slopes can be plastered using different methods, you may additionally need a metal mesh, as well as drywall and a profile for its fastening. Be sure to stock up on a set of screws for different surfaces. To fix them you will need a drill and a screwdriver.
Since it is recommended to insulate the doorway, select suitable materials in advance. They will need to be placed around the perimeter in such a way as to prevent drafts and gaps in the finish.
In order not to smear the box and adjacent surfaces with plaster, cover them with masking tape before starting rough work. It is recommended to lay a film on the floor. If possible, remove the fabric from its hinges for a while. As for the new door, it is recommended not to remove the protective film from it until the repair is completed.
Preparing the opening
In order to facilitate plastering of door slopes, the work area must be prepared in advance. This includes a whole list of works. Since such design of slopes is almost always associated with updating the door itself, first you need to eliminate all the defects and irregularities that remained after replacing the frame.
First of all, cut off the excess polyurethane foam with a sharp utility knife. If the unevenness is too significant, it is best to use a plasterboard sheet as a base for plaster. Choose moisture-resistant samples to extend their service life. There are two ways to attach this material to the opening:
- On glue . This is the simplest option to save space. To begin with, a layer of plaster is applied to the slopes. You can use leftover tile adhesive or regular homemade mortar. Then drywall is applied to the wet viscous mass and pressed. Thus, you need to drive an even level around the entire perimeter of the opening.
- On the frame . If the curvature is too significant or you simply don’t want to waste putty once again, then use the traditional approach and screw sheets of the desired shape and size to the aluminum frame. These elements are screwed to the slopes using self-tapping screws and dowels. Using this method, you can create an unusual shape for the opening, for example, create a rounding at the corners, like an arched vault.
Drywall is often used to level door slopes.
If there are gaps and cracks in the opening, they need to be closed using insulation. Usually mineral wool is used for this. In order for the plaster on doorways to set better, it is recommended to cover the slopes with a special mesh. Serpyanka is glued to the deepening places of the self-tapping screws on the plasterboard and in the corners. A larger metal mesh can be nailed directly to the wall.
Finally, you need to treat the surfaces with an antiseptic and carefully prime them to improve adhesion. The next stage is directly plastering the slopes with your own hands.
Plaster application technology
Let's look at how to plaster the slopes of a doorway. The whole process can be divided into several stages:
- First you need to repair the largest irregularities. If you are laying the mass directly on concrete with a mesh, you must use a starting putty. First, a small amount of the mixture is thrown onto the slopes in the direction from bottom to top, and then leveled with a large spatula. Excess is transferred to the upper level. For drywall, everything is simpler: you need to seal the deepening holes of the screws with a finishing mixture.
- It is important to get straight corners. To do this, secure an aluminum profile and mesh around the perimeter. Apply the mixture on top of them with a small spatula and check the thickness of the layer with a large tool.
- After initial plastering of the slopes, wait until the surface is completely dry. If there are significant irregularities, it is recommended to remove them using a construction trowel.
- Since the slopes need to be plastered to a perfectly flat surface, the finishing compound must be applied on top. With its help, all irregularities are eliminated.
- After drying, float the surface and remove dust before further finishing.
An important step in applying plaster is creating even corners
Since it is not easy to putty slopes in several layers, you can improve the adhesion of the mixtures by applying shallow notches to the starting layer before it dries.
If you plan to paint or wallpaper, you need to try to create perfectly even slopes. For textured plaster, tiling and panels, starting treatment will be sufficient. However, if you plan to replace the coating in the future, it is better to initially bring the surface to perfection.
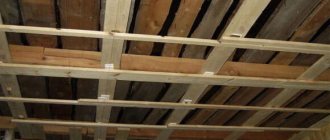
Frame construction
The installation of the panel ceiling begins by marking the locations for the holes, which are drilled using a hammer drill, in accordance with the drawn lines, with an interval of 50–100 millimeters. Then dowels are inserted into them. The main frame, made using a UD-27 profile, is attached to the prepared holes with self-tapping screws, placing its lid against the wall.
At the same time, you should not forget to use a level and ensure that the frame elements are strictly horizontal. Next, guide rails are assembled from the hangers and the CD-60 profile - it is to them that the panels will be attached. The optimal distance between them is 50 centimeters. The CD-60 metal elements are turned with the lid towards the floor surface, while the ends of the slats are placed in the profile of the main frame.
Installation subtleties
Covering bathroom walls with panels can be done in two ways. In the first case, a frame made of wooden slats with a cross-section of 1x3 cm is installed on the wall, on top of which panels are mounted. The frame is attached to the wall using dowels, and the panels themselves are attached to the sheathing using nails or a construction stapler. The correct installation of each lamella is controlled by a level and, if necessary, a gasket is placed.
The gap between the panel and the floor (ceiling) should be 1 cm. Upon completion of the installation of the last element, the corner joints are closed with corners, the gaps near the door slopes - with end moldings, and the cracks near the floor and ceiling - with special skirting boards. When installing the sheathing, you need to remember that when the lamellas are placed horizontally, the sheathing slats are attached vertically and vice versa.
The second method involves installing panels directly on the walls and requires preliminary leveling and priming of the working surfaces. The gluing of elements should begin from the corners, which in the future will eliminate the need for complex adjustment of corner elements. The installation of the first lamella is carried out with a distance of 1 cm from the ceiling, floor and adjacent wall. This panel will serve as a guide for further installation. The glue is applied to the panel in the form of a thin zigzag every 50 mm of the lamella width. Accidentally formed chips and potholes larger than 2 mm are filled with cement mortar, puttied and sanded.
Peculiarities
The plastic starting profile for PVC panels looks like a U shape, one side of which is usually slightly shorter than the other. As a rule, installation of the entire structure begins with its installation, which is why it is also called initial. It “sets” the direction of the entire plastic finishing structure. This molding is used to cover the ends of panels, and, in addition, in cases where the PVC sheet is adjacent to the openings of windows or doors. Its use can significantly save time and materials for finishing and installation work.
Such elements have a number of obvious advantages. They generally exhibit resistance to ultraviolet rays and can avoid yellowing for up to 10 years. The material is elastic, but not brittle, so when cutting you can prevent the appearance of cracks. The composition is good because it contains a minimal amount of chalk and substances harmful to the human body.
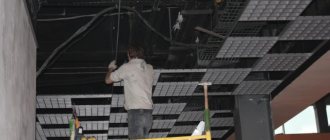
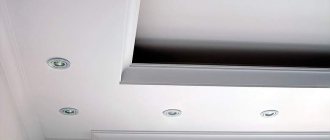
When finishing the ceiling with PVC panels, only a frame fastening method is used, which makes it possible to hide communications, as well as install any recessed lamps in the ceiling.
Suspended ceiling design: plastic panels are attached using fittings to profiles attached to the sub-ceiling. Therefore, you can assemble such a ceiling yourself.
Metal lathing for mounting plastic panels on the ceiling in the bathroom
Since plastic is the lightest material for suspended ceilings, you don’t have to worry about the ceiling collapsing on your head. To install plastic panels, you can use lightweight profiles, for example, aluminum or even plastic. Such profiles can easily withstand plastic sheets and high humidity in the room, so they can be used to install a ceiling in the bathroom. But for rooms with a normal level of humidity, you can use wooden profiles with a thickness of bars of at least 5 cm.
To make a smooth plastic ceiling, before installing the lathing, you must correctly mark the area for the suspended ceiling. To do this, measure the ceiling height in all corners of the room, starting from the window side, where a lot of light can make the ceiling visually uneven. The corner of the room where the ceiling height is the smallest is taken as orientation.
If the room will have recessed lighting, then after forming the lattice frame, immediately lay the necessary communications, and only then install the panels.
Note You can place panels on the ceiling in different ways, but it is best to focus on the shape of the room and lay PVC sheets perpendicular to the length of the room; this arrangement of plastic panels will visually expand the room.
Installation of plastic panels begins from the far corner of the room. The canvases are stacked tightly in the lock to each other.
Preparing the walls
Despite the fact that one of the advantages of finishing walls with PVC panels is the absence of “wet” work, repairs usually cannot be done without them.
Old walls may have cracks, crumbling plaster, areas affected by fungus, etc. Cracks and crumbling areas can “grow”; without strengthening the surface, loose areas serve as a source of dust, and a colony of fungus or mold in many cases causes allergies.
Therefore it is necessary:
- find out the nature of the crack, eliminate the causes, seal it with repair solutions (based on cement, gypsum, epoxy resins, etc.);
- clean crumbling areas, strengthen loose areas with penetrating primer;
- clean the surface of fungus and mold, treat with fungicidal solutions (or primer with an antiseptic).
Before installation, panels of switches and sockets, wall lamps must be removed, and the contacts must be protected with electrical tape from accidental contact.